Get Smart: layers and transparency

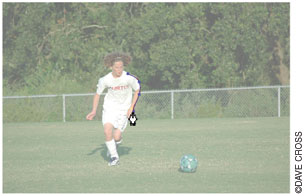
A common approach to creating artwork in Illustrator is to import a photograph or a scanned image (File>Place) and to trace over it. You can make this procedure a little easier by putting the placed image on its own layer and then making it a template. Use the Layers palette’s flyout menu to choose Template. The placed image will automatically be dimmed. To change the setting for the template, double-click on the layer in the Layers palette to open the Layer Options dialog. In the Dim Images To field, enter a percentage. Then click on the Create New Layer icon at the bottom of the Layers palette and use your favorite creation tools to trace over the dimmed image.
When you add a new layer by clicking on the Create New Layer icon in the Layers palette (Window>Layers), the layer is automatically named “Layer x” (with x representing the next number). To create a new layer and name it, Option-click (PC: Alt-click) on the Create New Layer icon to open the Layer Options dialog where you can enter a name for the layer.

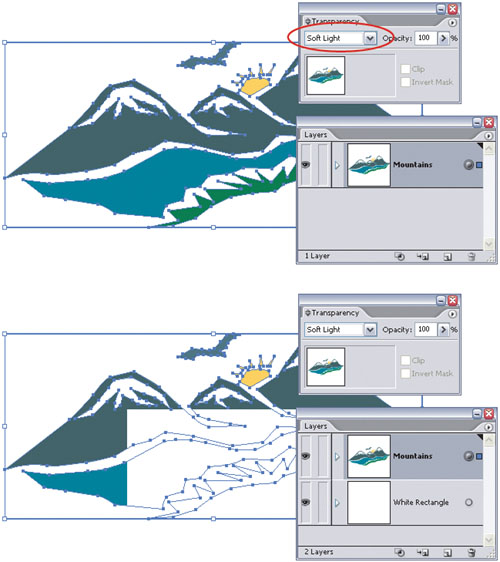
OK, maybe the title is exaggerated a bit. White is still white. But, the artboard in Illustrator isn’t really white and will not reflect any transparency settings that white would normally influence. A little confused on what this means? Try this. Create an illustration or graphic in Illustrator—any small object should do—but just be sure it has no fill and a colored stroke, and you don’t have anything in the layers below it. Select it, then in the Transparency palette (Window>Transparency), change the blend of that object to Soft Light. Nothing should happen. Now, add a rectangle with a white fill and no stroke to a layer below your object and you should see that top object disappear wherever it intersects with the white rectangle below it. This means that even though the artboard is white, it’s not REALLY white.
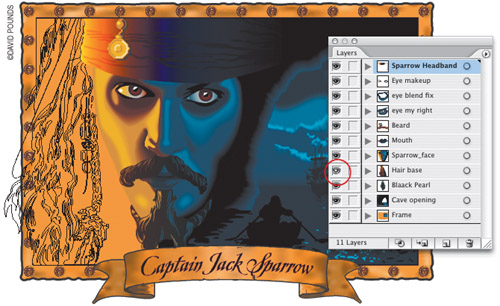
A quick way to view just one layer and hide all the rest of the layers is to press-and-hold the Option key (PC: Alt key) and click on the Eye icon beside the layer you want to view in the Layers palette. All the other layers will be hidden. Repeat to show all the layers again.

Changing to Outline view (Command-Y [PC: Control-Y]) is a great way see all the paths and anchor points. If you want to change only one layer to Outline view (rather than the entire document), press-and-hold the Command key (PC: Control key) and click on its Eye icon.
When your artwork is in Outline view (Command-Y [PC: Control-Y]), things move faster since you’re not waiting for the screen to redraw. Here’s one way to take advantage of almost everything being in Outline view. Press-and-hold Command-Option (PC: Control-Alt) and click on the Eye icon beside the layer you need to change every other layer into Outline view, while your current layer remains in Preview view.

If you find yourself creating Web animations, then Illustrator and its Blend Tool (W) can be your best friend. However, when you expand a Blend in Illustrator (Object>Blend>Expand) it leaves you with a Group. This makes it difficult to export to Photoshop or ImageReady for animation since exporting to PSD will flatten the Group layer. To get around this, immediately after Expanding the Blend, choose Release to Layers (Sequence) from the Layers palette’s flyout menu. This will convert all of the paths in the group to layers, thus preserving each object when you export to a PSD file.

To move a selected object onto a different layer, look for the tiny square to the far right of the current layer’s name in the Layers palette. Drag that square to a different layer and the object will move to that layer. However, if you want to copy the object so that it stays on its current layer and a copy appears on a different layer, hold down the Option key (PC: Alt key) as you drag the small square.
To quickly make an exact duplicate of a layer—and therefore, of all the objects on that layer—click on the layer name, then press-and-hold the Option key (PC: Alt key) as you drag that layer onto the Create New Layer icon at the bottom of the Layers palette.
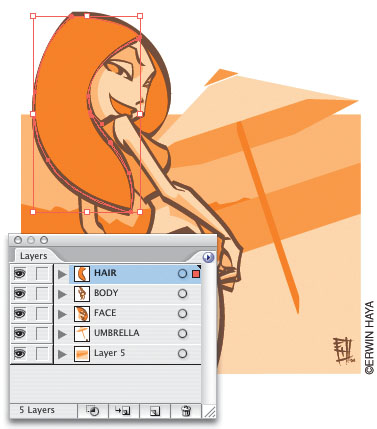
How many times have you wanted to select every single object on a layer? Of course, the Select>All command won’t help since every object on every layer would be selected. Here’s the solution: In the Layers palette, locate the layer whose objects you want to select and either click on the small box (or empty space) to the right of the round button to the far right of the layer name, or Option-click (PC: Alt-click) on the name of the layer. All the objects on that layer will be selected.
To take the previous tip a step further, if you need to select all of the objects on multiple layers, Option-Shift-click (PC: Alt-Shift-click) on the names of the contiguous layers whose objects you need to select, or Command-Option-click (PC: Control-Alt-click) to select non-contiguous layers.

Locking objects is a very effective way to work—you can still see the objects but you cannot select or alter them by mistake. To lock every layer except the one you’re working on, Option-click (PC: Alt-click) on the empty box next to the Eye icon on your current layer. All the layers, except the one you’re working on, will be locked. Repeat the same operation to unlock all the layers.
For many people, the first shortcuts they memorize are used to lock and unlock objects. Unfortunately, Command-2 (PC: Control-2) will lock one object, while Command-Option-2 (PC: Control-Alt-2) will unlock all objects. Sadly, there is no keyboard command to unlock just the last object that you locked a moment ago. The Layers palette offers a great alternative: Expand the layer by clicking on the triangle beside the layer’s name, and then click the Lock icon to the left of the individual sublayer (object) you need to work with. (This only works if sublayers are locked, rather than the entire layer being locked.)

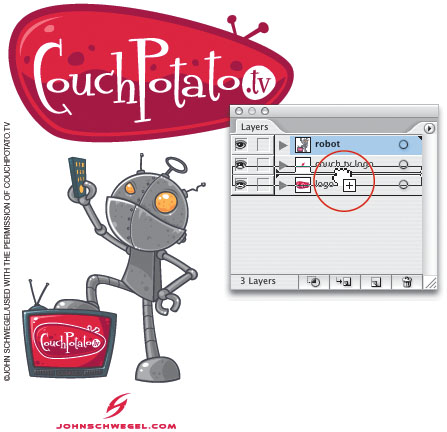
If you need to figure out what layer or sublayer an object is on, try this method. Click on the object to select it and then from the Layers palette’s flyout menu, choose Locate Object. The sublayers will be expanded to reveal the location of the selected object.

Here’s a Windows-only tip that lets you jump to a specific layer in a long list in your Layers palette. Press-and-hold Control-Alt and click in the Layers palette. A solid black line will appear around the interior of the palette. Start typing the layer name to jump to that layer. (If you have a bunch of layers called “Layer 1,” “Layer 2,” and so on, just type the number and you’ll jump to that layer.)

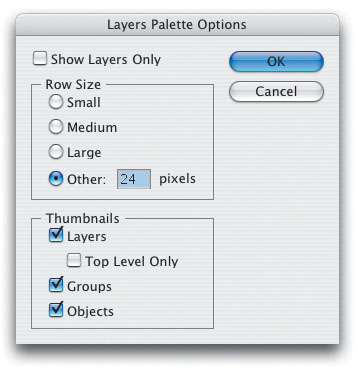
In the Palette Options dialog (found using the Layers palette flyout menu), you can choose between small, medium, and large row sizes. But, in addition to picking between those built-in sizes, you can make your own by choosing Other and entering a specific size. This is another one of these tips that you may not use often, but there are times when it’s a perfect solution for those Goldilocks situations (this one is too small, this one is too big, but this one is just right).
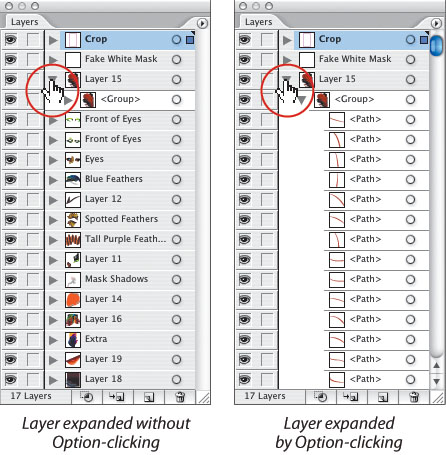
To see all the sublayers in the Layers palette, Option-click (PC: Alt-click) on the expansion triangle beside one of the layers. All the layers will be expanded to display all of their sublayers. (Note: This works differently depending on what sublayers you already have expanded.)
When you click on the Create New Layer icon in the Layers palette, the new layer is created right above the current layer. If you want the new layer to be added at the very top of all the layers, hold down the Command key (PC: Control key) as you click on the Create New Layer icon.

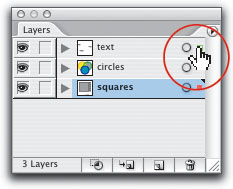
If you want a new layer to be created below the current layer, Command-Option-click (PC: Control-Alt-click) on the Create New Layer icon. The Layer Options dialog will open, but once you click OK, the new layer will be created immediately below the current layer (here we’ve added a new layer named “additional text” below the layer named “balls”).

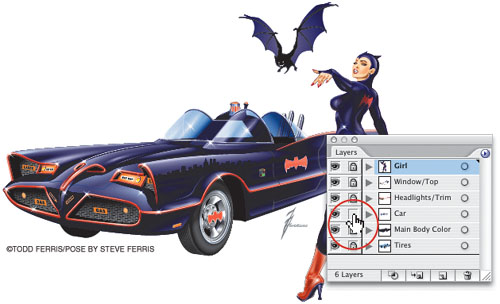
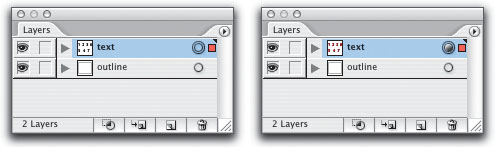
The empty circle to the right of a layer name serves a very important purpose: When you click on the circle, you are targeting the entire layer. Change the layer’s appearance and every object on that layer will have the same appearance. For instance, this applies if you have the layer targeted and then select options in the Appearance and Graphic Styles palettes or use options from the Effect menu, such as Brush Strokes. Once a layer has been targeted and a new appearance applied, the empty circle changes to a shaded circle.
If you have targeted a layer and have changed its appearance, you can easily change your mind and apply the appearance to a different layer. Just click on the shaded circle and drag it onto an empty circle beside a different layer. The look will be moved from the original layer and applied to the other layer.
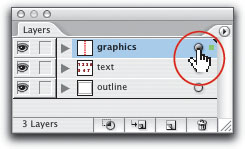
Here’s another possibility: You love the look of one targeted layer so much that you also want to apply that look to another layer. Instead of moving the target, copy it by pressing-and-holding the Option key (PC: Alt key) as you drag the target from the current layer to another layer (note the plus sign beside your pointer).

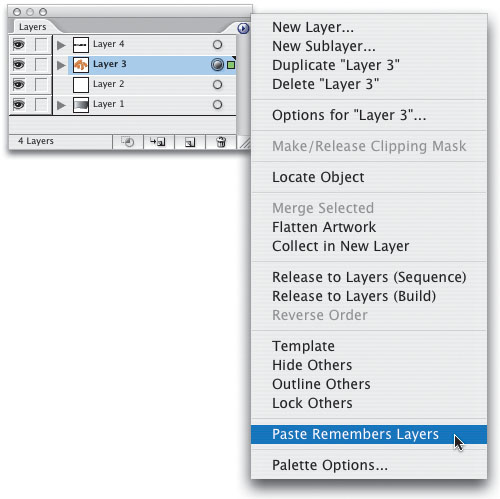
This command is very important when copying-and-pasting objects between documents. It is also an important option when copying-and-pasting in the same document. By default this option is turned off, so when you first start working with layers, you may want to go to the Layers palette’s flyout menu and select Paste Remembers Layers. Then it will stay on, even when you create new documents.
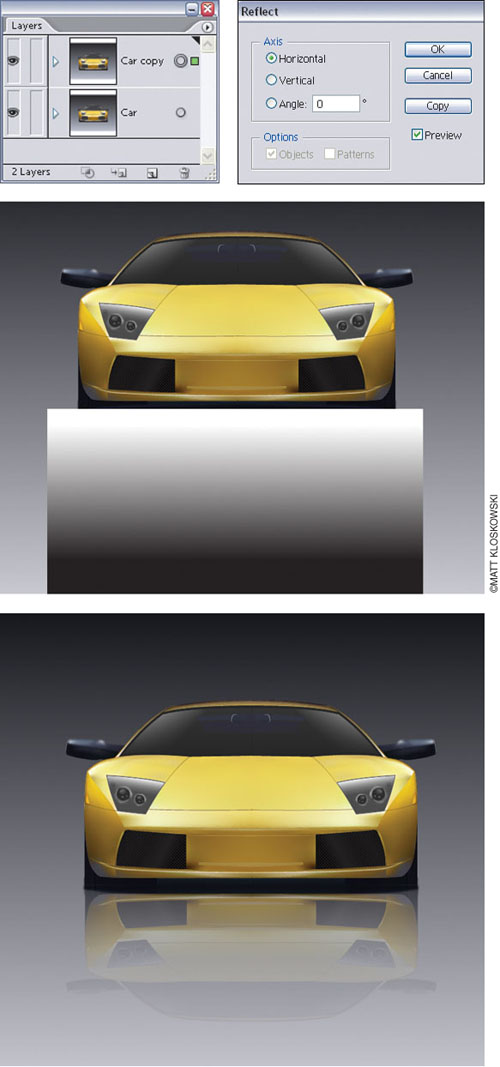
Want to create a mirror reflection right inside Illustrator? It’s easy. First you’ll need to duplicate whatever object you want to create the mirror reflection of so you have two of them. Next, select the object and choose Object>Transform>Reflect. Pick the horizontal option and click OK. Position the duplicate toward the bottom of the original. Next, click the Create New Layer icon at the bottom of the Layers palette to get a blank layer above the layer with your objects. On the new layer, create a rectangle that covers the duplicate object, fill it with a white to black linear gradient, and set the stroke to none. Select both the rectangle and the duplicate object and choose Make Opacity Mask from the Transparency palette’s flyout menu. Instant reflection!
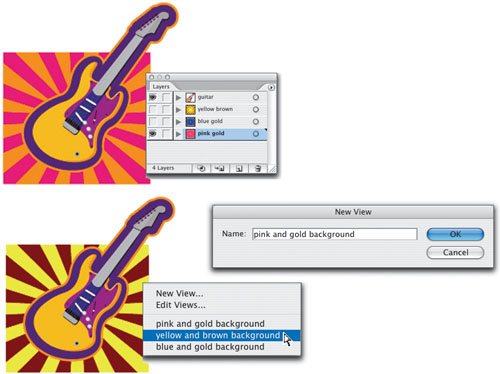
Photoshop CS2 has a great feature called Layer Comps, which helps you save different layer combinations in one document. Although Illustrator CS2 doesn’t have the same feature, you can create a similar effect using custom views. Hide one or more layers by clicking on the Eye icons in the Layers palette, and then from the View menu, create a New View, give it a name in the dialog, and click OK. Repeat this to create as many different combinations of layers as you want and then choose your named views from the View menu to look at the different combinations. (Note: Custom views work best with top-level layers rather than sublayers.) If you want, you can even add a keyboard shortcut to these “layer comps” using Edit>Keyboard Shortcuts to assign a shortcut to Custom View 1, Custom View 2, etc.
Hold down the Shift key to select more than one layer in the Layers palette (how’s that for a staggeringly surprising tip?). Only problem is, you can only select contiguous layers that way (meaning layers that are above or below one another). To select multiple layers anywhere in the list of layers, hold down the Command key (PC: Control key) and click to select non-contiguous layers.

As we saw earlier, you move a selected object to a different layer by clicking on the small square and dragging it to a different layer. However, this won’t work if you need to move a bunch of objects from various layers to one layer. To do this, you’ll have to use the Selection tool (V) and Shift-click to select the objects you need to move and then click on the name of the layer that you want to move them to. Then from the Object menu choose Arrange>Send to Current Layer.

Typically, a placed raster image is used as a template to create an illustration. After placing the image (File>Place), choose Template from the Layers palette’s flyout menu and if you want, use the Layers Options dialog to further dim the template for easier tracing. Just double-click on your layer name and in the dialog, click the Template checkbox. The Dim Images To field will be editable and you can enter a percentage. But, can you use an Illustrator (vector) object as a template? Well, yes and no. While you can turn a vector layer into a template using the same method just described, you cannot dim an Illustrator object. Another option would be to rasterize the object and then turn it into a template. Choose File>Place to get the vector image, and from the Object menu choose Rasterize. Then use the Layers palette’s flyout menu to make the rasterized object into a template. You know the layer is a template when the Template icon appears in the Eye icon box to the left of the layer name. (Note: You may want to duplicate the original object before rasterizing just so you have a backup plan.)

Here’s a simple way to tell at a quick glance if the Print option is turned off in the Layer Options dialog, meaning this layer won’t print: Just look at the name of the layer. If the layer name appears in italics, the option to print has been turned off. Double-click on the layer name to open the Layer Options dialog and turn on printing by clicking the Print checkbox (and the display of the layer name will return to standard type).

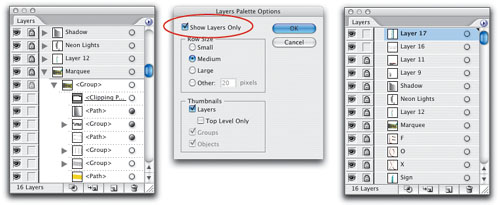
To simplify the display of the Layers palette, use the flyout menu to choose Palette Options. In the dialog, check the Show Layers Only box to hide everything except the top-level layers.
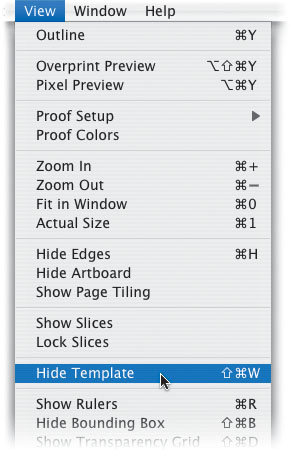
If you’ve used a template in your document, you can quickly toggle the template on and off (showing and hiding the template) by pressing Command-Shift-W (PC: Control-Shift-W). This command can also be found under the View menu, as shown here.
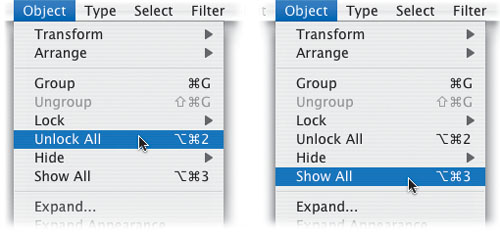
If you use Command-A (PC: Control-A) to Select All, it may not actually select all of your artwork. If you have locked or hidden objects on layers or sublayers, objects on those layers will not be selected. To make sure that Select All will really select everything, use the Unlock All and Show All commands (from the Object menu), then use the Select All command.
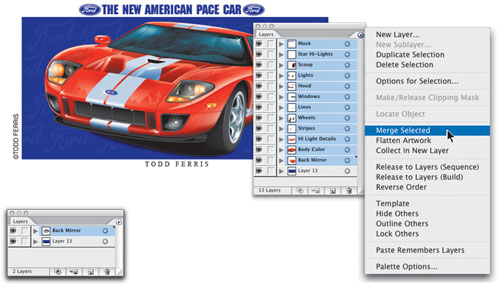
If your Layers palette is getting a little out of hand with way too many layers, there’s a simple solution. After selecting the layers you want (see previous tip), use the Layers palette’s flyout menu to choose Merge Selected and turn those separate layers into one layer with sublayers. For example, if you select three layers, each with two sublayers, and use Merge Selected, you will get one layer made up of six sublayers. The merged layer will use the name of the last layer you select.
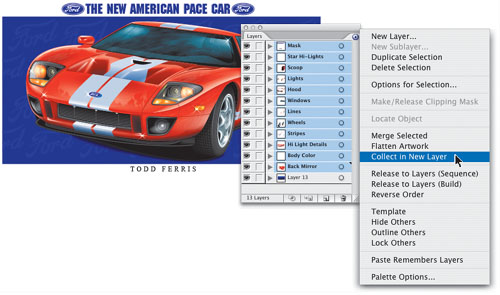
As we saw in the previous tip, the Merge Selected command in the Layers palette turns selected layers and sublayers into a new layer with sublayers. If you want to preserve the structure of layers and sublayers, select the layers and from the Layers palette’s flyout menu, choose Collect in New Layer. A brand new layer will be created that contains the layers and sublayers from the selected layers. (I just said “layer” 14…no, 15 times, but who’s counting?)