

Digital illustration can result in highly detailed, fiercely dynamic artwork. Unlike drawing or painting, digital illustration allows you to make dramatic enhancements with just a few clicks of a button. Before working on the projects in this chapter, note that it’s important to have an understanding of the basic tools and functions of your image-editing software (I prefer Photoshop®). However, if you don’t have a background in digital illustration, you can still use these projects as references for drawing or painting—each piece of art begins with a drawing or painting by hand.

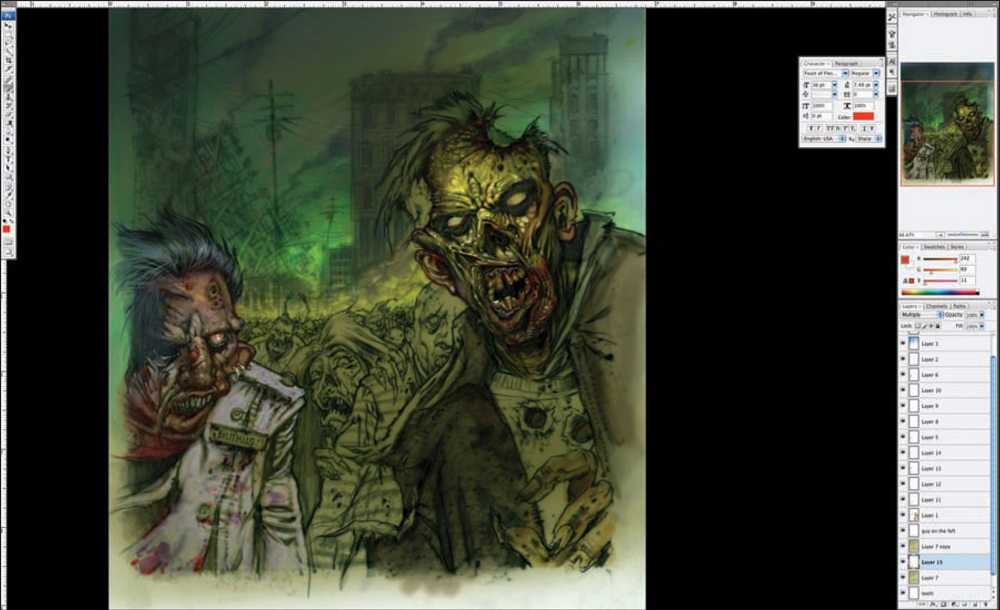
To embark on your journey in digital illustration, you’ll need a computer system, a scanner, and image-editing software. In the setup at left, you’ll see that you can configure multiple monitors for one computer system. This can help you spread out your work; you can bleed the monitors so that your image crosses over onto multiple screens, allowing you to see much more of the image at once. You can also use the multiple monitors to hold various control panels, so you aren’t constantly minimizing windows to create room on the screen. Although it’s ideal to work with several monitors, all you really need is one.

Image-Editing Software
There is a variety of image-editing software available, but many would agree that Adobe® Photoshop® is the most widely used. Below are short summaries of some basic functions used in the projects throughout this book.
Photoshop Basics

Image Resolution: When scanning your drawing or painting into Photoshop, it’s important to scan it at 300 dpi (dots per inch) and 100% the size of the original. A higher dpi carries more pixel information and determines the quality at which your image will print. However, If you intend for the image to be a piece of digital art only, you can set the dpi as low as 72. View the dpi and size under the menu Image > Image Size.

Dodge and Burn Tools: The dodge and burn tools, terms borrowed from the old dark room, are also found on the basic tool bar. Dodge is synonymous with lighten, and burn is synonymous with darken. On the settings bar under “range,” you can select highlights, midtones, or shadows. Select which of the three you’d like to dodge or burn, and the tool will only affect these areas. Adjust the width and exposure (or strength) as desired.

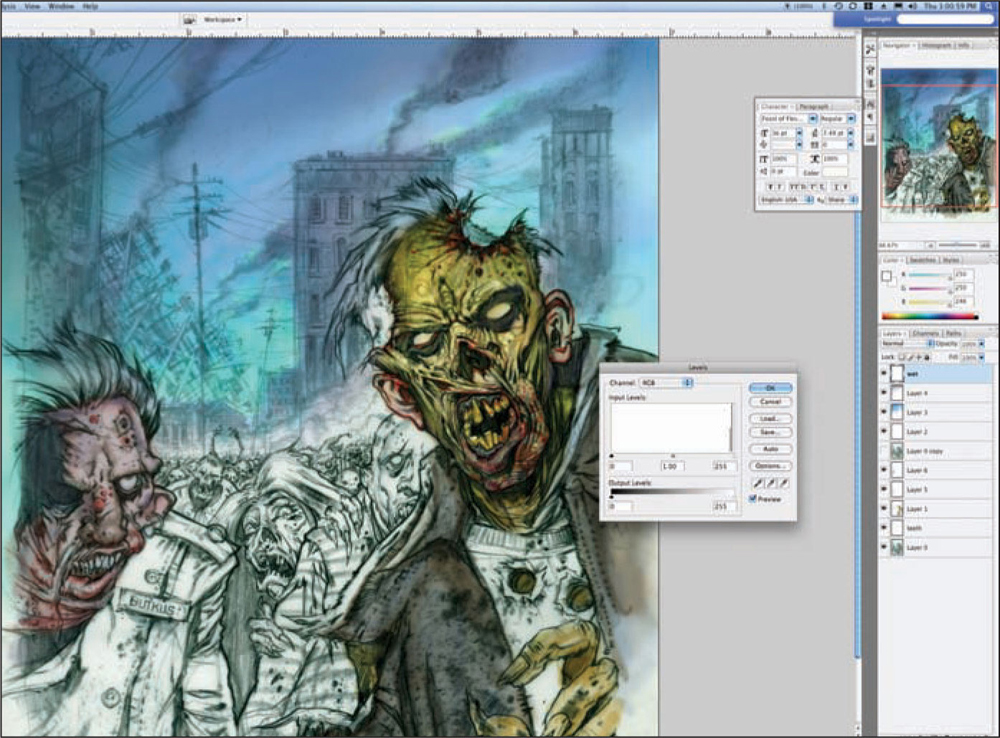
Levels: With this tool (under the menu Image > Adjustments), you can change the brightness, contrast, and range of values within an image. The black, midtone, and white of the image are represented by the three markers along the bottom of the graph. Slide these markers horizontally. Moving the black marker right will darken the overall image, moving the white marker left will lighten the overall image, and sliding the midtone marker left or right will bring the midtones darker or lighter, respectively.

Eraser Tool: The eraser tool is found in the basic tool bar. When working on a background layer, the tool removes pixels to reveal a white background. You can adjust the diameter and opacity of the brush to control the width and strength of the eraser.

Paintbrush Tool: The paintbrush tool, on the basic tool bar in Photoshop, allows you to apply layers of color to your canvas. Like the eraser, dodge, and burn tools, you can adjust the diameter and opacity of the brush to control the width and strength of your strokes.

Color Picker: Choose the color of your “paint” in the color picker window. Select your hue by clicking within the vertical color bar; then move the circular cursor around the box to change the color’s tone.

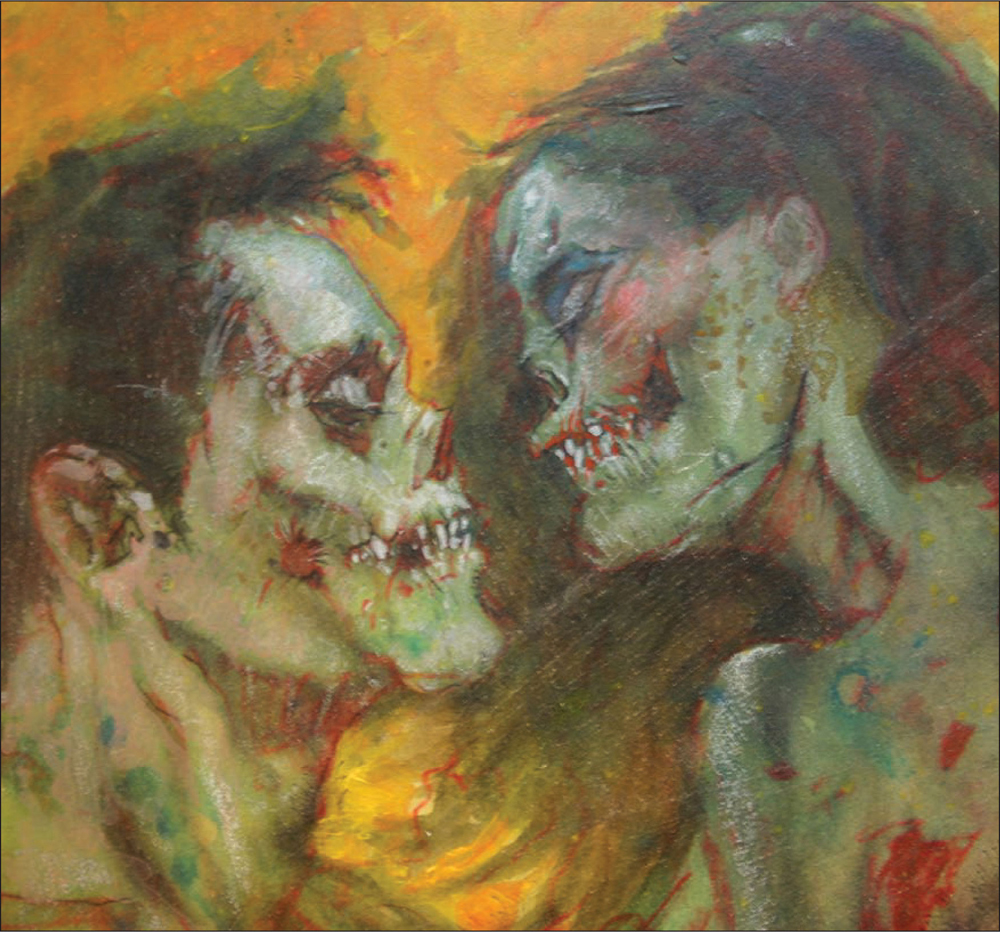
Everybody needs a dose of romantic literature once in a while, even the undead. So, for this illustration we’ll be creating a zombie romance book cover. Who said romance was dead?

Step One Following the thumbnail drawing (above), create a sketch using a red colored pencil on tracing paper. (You can transfer this sketch; see “Transferring a Drawing” on page 25.) After blocking in the drawing, make a photocopy of it. Spray the photocopy with workable spray fixative, then soak it in water for a couple of seconds. Next, mount it onto a masonite board by laying it on the board and brushing it with a mixture of 50% matte medium and 50% water.

Step Two Once that dries, start laying in some colors using a medium-sized acrylic brush. For the flames, use a mixture of cadmium yellow and cadmium red light combined with a good deal of water. For the zombies, use a very watered down combination of viridian hue permanent and cerulean blue hue.

Step Three With the airbrush, quickly lay in the shadows, core shadows, as well as more colors for the skin tone. Then, spray some Turner’s yellow on the male zombie’s chest to reflect the colors of the flames. Soften the hair and feather out the edges, similar to the technique used on the flames—this will create a dramatic effect. If you don’t have an airbrush, build up thin washes of paint, blending the edges for a soft look.
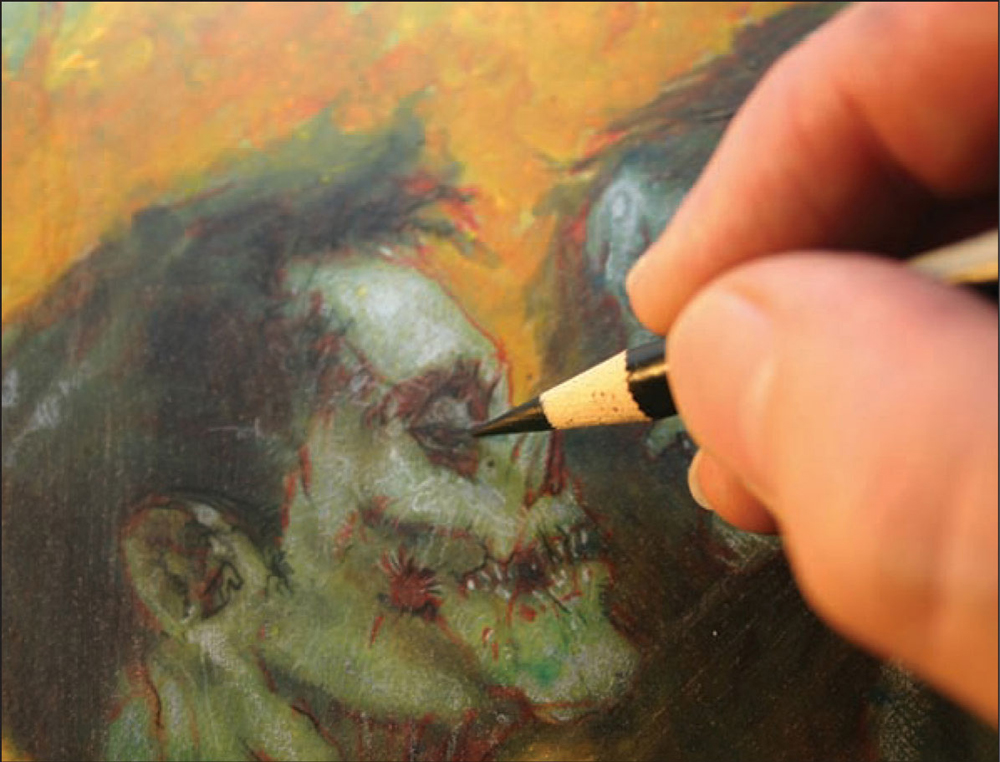
Step Four Next, switch to the colored pencils and start to draw back into the illustration. With a black colored pencil, add dark accents to the eye sockets, nose, and corners of the mouth.
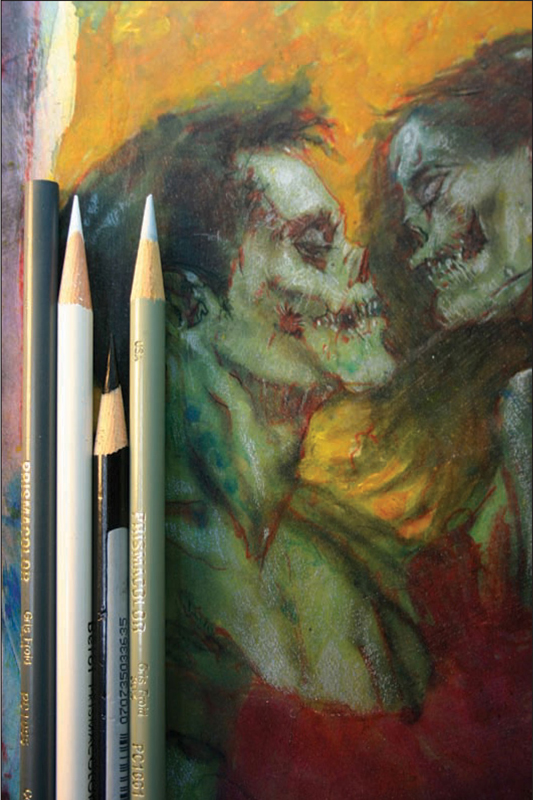
Step Five Now it’s time to add various shades and values of gray to the zombie skin tones using colored pencils. This is an opportunity to go over the smooth layers of paint, adding texture and interesting pencil strokes. Start by bringing out the forms of the bones and the musculature of our lust-struck zombies.
Step Six Still using the colored pencils, add some fun make-up to our femme fatal. Then, bring out more highlights on the male. Make sure to keep his features chiseled and handsome.

Step Seven Add some holes all over the zombies’ forms to emphasize the brittle nature of their skeletal bodies. Do this by painting in some shapes with crisp edges, using watered down Mars black. To add depth to these holes, go back in with the black colored pencil and darken the center of the shapes.

Step Eight To increase the intensity of the image, go back in with a paintbrush and add some cadmium red light and Turner’s yellow to the fire. Keep your brush strokes splotchy, but make sure they blow in one direction. Then, using diluted cadmium red light and Turner’s yellow, spatter some fine drops of paint over the zombies for texture. Now that the illustration is 90% done, scan it into your computer. In Photoshop®, you can quickly and effectively add some eye-popping details and play around with special effects.
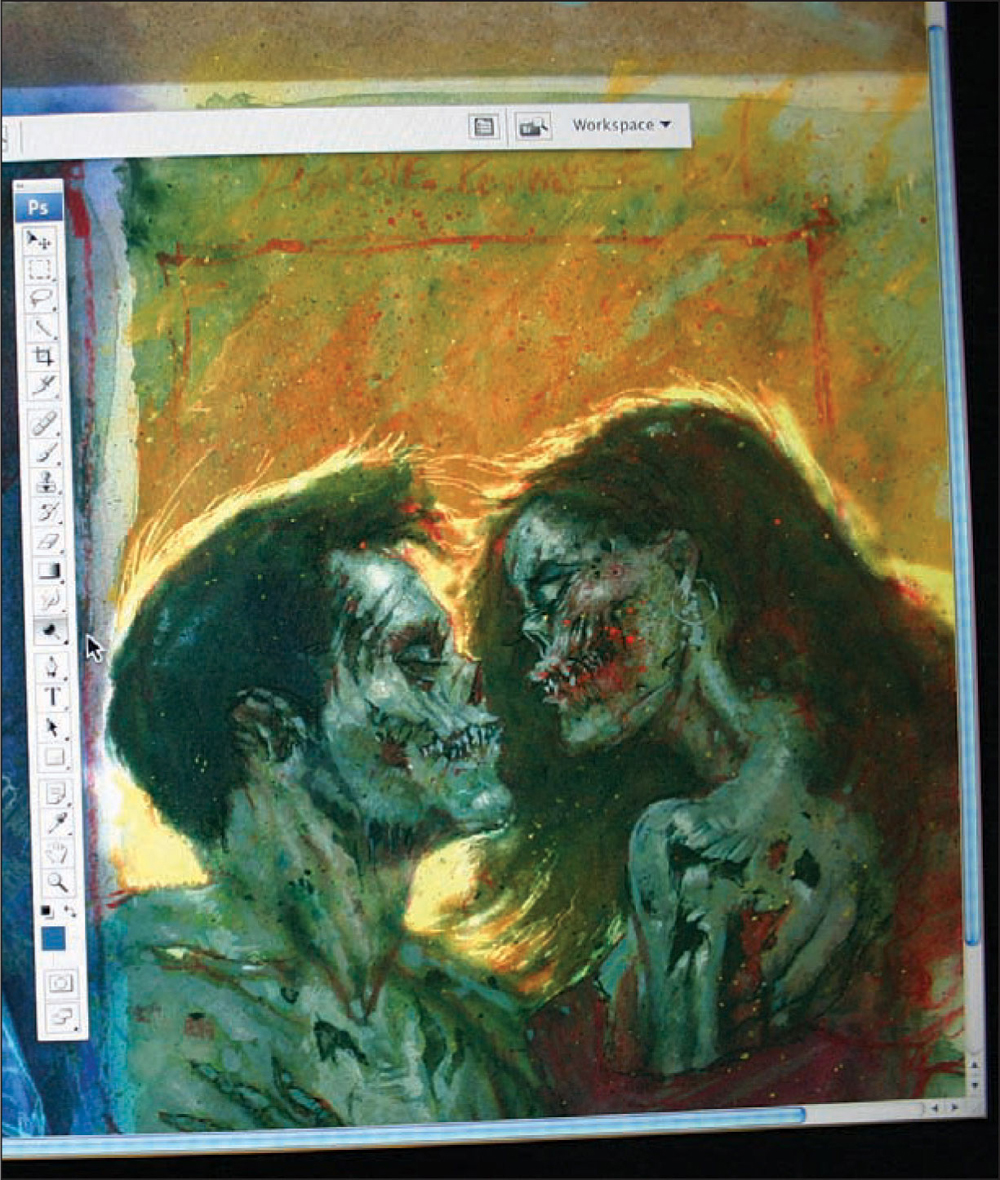
Step Nine First experiment with the flames around the two lovers. Then, select the paintbrush tool and go into its options bar. Decrease the diameter of the brush, bring the hardness level way down, and chose a light yellow from the color palette. By doing this, the lovebirds are brought even closer to the foreground.

Step Ten A bright blazing fire would make an excellent backdrop for our zombie lovers. So, increase your brush size and opacity; then choose a warm, bright yellow from your palette. Keep the outer edges of the flames orange to maintain realism. Note that it’s still important to remain conscious of the design of your shapes and strokes, even when working on the computer. Then outline the zombies with a hot orange-red to make them vibrate.

Step Eleven Add more yellow to their skin and teeth. When you’re a zombie, you don’t worry about little things like bad breath or hygiene.

Face The female’s red lipstick looks like blood, so to make her as gruesome as possible—and to create a fun play on how lipstick smears during a lusty smooch—use your paintbrush tool and select a fiery shade of red. Make sure that the “hardness” of the tool is soft, then start painting around her mouth. After this, increase the hardness of the brush and the opacity as well, then add some gory blood splatter on her cheeks.
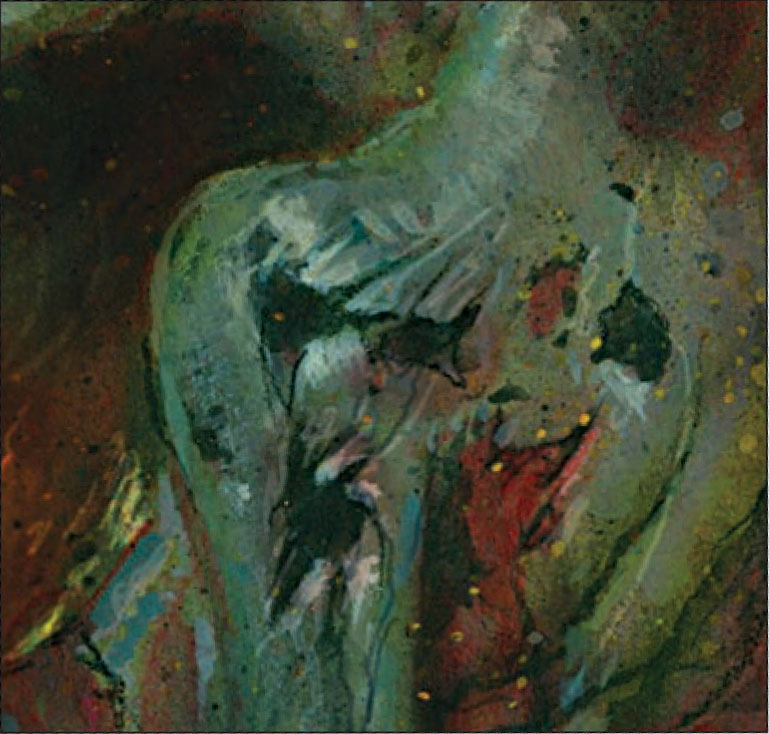
Shoulder Even though our female zombie is showing a lot of skin, she’s made almost entirely out of bones. To play up the reflective nature of the bony surface, add some highlights around the edges of the fractured holes.

Hand Most artists think that drawing a hand is both difficult and time-consuming, but all you need are the correct number of fingers and a little indication form. The viewer’s eye will accept this because most of the time, we see hands in our peripheral vision—not as the main focus. Still using your paintbrush tool, select a darker red and paint around the fingertips. Then, choose a deep cherry red and increase the opacity. Paint deep holes within the lighter red to show the depth of the wounds she is inflicting on her lover.
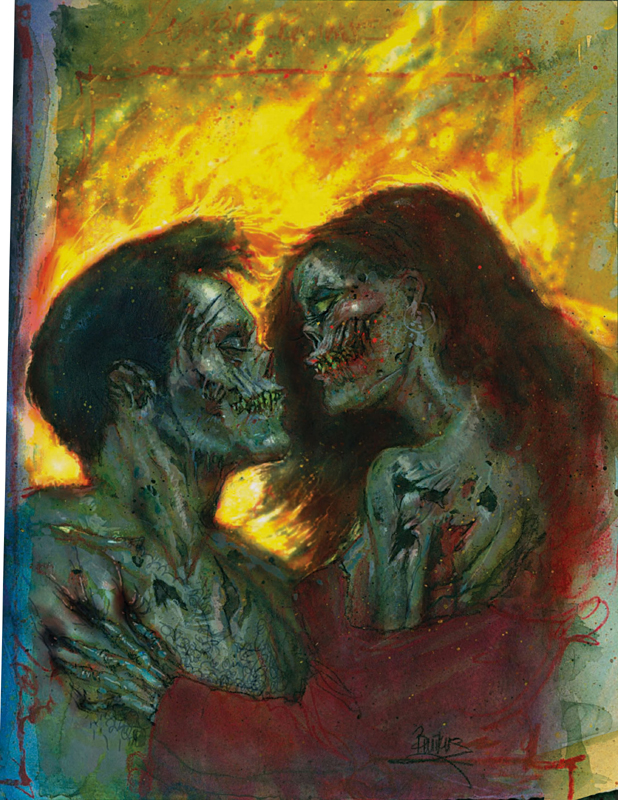
Step Twelve For the final step, select the levels option and darken the two characters. This increases the saturation of color and separates them from the flames. This painting is what would be used as a color production sketch or color comp. It conveys the emotions of the characters and story without having to be taken all the way to a finished illustration.

For this project we will be creating what’s known as a color concept sketch or production sketch, not a finished illustration. This type of comp is used to give a director or producer an idea of character design and environment.

Step One To create a voodoo queen, start off with a sketch using red colored pencil over a piece of 7" × 10" tracing paper.

Step Two Now create a sketch of your thumbnail using red colored pencil over a piece of 7" × 10" tracing paper. (You can transfer this sketch; see “Transferring a Drawing” on page 25.) Once you’re satisfied with the sketch, make a colored copy of it. Then, take the copy outside and spray it with workable spray fixative. When that dries, wet mount it to a masonite board by taking a big house brush and brushing on a mixture of 50% water and 50% matte medium. This step is crucial because it will allow you to work on a flat, undistorted surface. Once the board is dry, start layering in colors: cool purples and blues for the background, and warmer tones for the voodoo queen. Make sure the colors are heavily diluted with water.

Step Three After laying in your washes, bring out an airbrush to create a softer effect and to speed up the process of the initial lay-in stage. Take a little iridescent antique brown mixed with a bit of cadmium red deep hue and airbrush over the face and chest. If you don’t have an airbrush, apply thin washes of paint, softly blending in the shadows to create form.

Step Four Next, airbrush (or paint) the darker values found in the folds of her robe using combinations of Payne’s gray, turquoise deep, cadmium red light, and viridian hue permanent. When you don’t have a reference, the key to making these colors believable comes from using colors found in the background. Then, also, imagine what kind of light source is focused on the subject. In this case, we want her to be in a very warm light.

Step Five For the highlights and crests of the folds on her robe, mix a little bit of titanium white with a good amount of water and lay it in with a small acrylic brush. This will create a nice contrast between the obvious strokes of the brush and the softness of the airbrush.


Step Six Use a variety of colored pencils to draw the queen’s facial features and skin highlights, and to reinforce the design of the turban. Unlike zombies, our voodoo queen’s skin is intact, so make sure to keep her features subtle and the colors pastel.

Step Seven In this image, we want to communicate the power and magic she possesses, so start to give her exotic tattoos, ornate jewelry, and intricate designs on her robe.

Step Eight Finish the tattoos across her face, and then start to deal with the light source. It should originate from a group of candles on the lower left-hand side of the illustration. Taking a small paintbrush, use some Turner’s yellow and create graphic flame shapes. To soften these flames and to make them glow, airbrush over them with Turner’s yellow or build up thin washes of paint.

Step Nine Mix a little Turner’s yellow and cadmium red light, and then use a small paintbrush to add this color to the candle flames. Using the same mixture, fill the airbrush and lightly mist the flames again (or apply thin layers of paint). Then, use these warm colors to brighten the turban and all the areas that would be hit by the candlelight. You can also add some extra mystical jewelry by quickly indicating shapes with a very small brush. Just hit these shapes with warm highlights to finish them off.

Step Ten Darken the robe so it’s closer to the value of the background. Use turquoise deep, cerulean blue hue, and a little Mars black. Lightly spray these colors over the fabric with the airbrush or build up thin washes of paint.
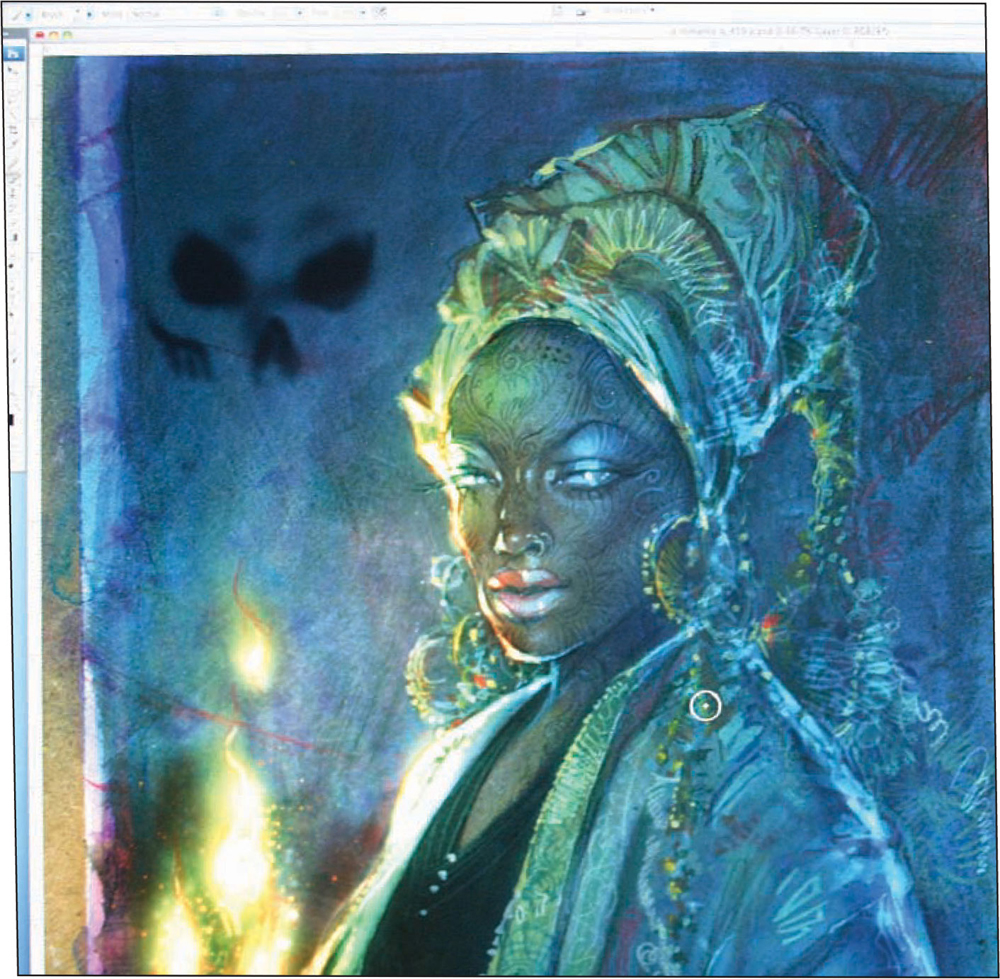
Step Eleven Once you’re finished with hand-painting the illustration, scan it into Photoshop. At this point, we’ll start adding a demonic skull emerging from the wisps of candle smoke. Begin by defining shadow shapes found in a normal human skull. Then, take the brush tool and adjust the diameter to size. Pick a dark indigo color from the palette and start drawing in the shapes. We will not be using layers for this illustration.

Step Twelve Finish the rest of the skull in the same manner. Then, start adding dark shapes around the flames to convey the transparent characteristics of wafting smoke. All this is done using the same tool and color, just adjust the opacity, hardness, and size of the brush as you see fit.

Step Thirteen For a more ominous look, select levels and lower the values of the whole illustration considerably. Then, soften the edges around the voodoo queen by using the dodge tool. Change the range to shadow, keep the exposure low, and just go over her silhouette.

Step Fourteen In this step, the skull really comes alive. Select the dodge tool, adjust its diameter accordingly, then click highlight for the range and lower the exposure. Then, begin adding the highlights on the teeth, nasal cavity, and cheekbones.
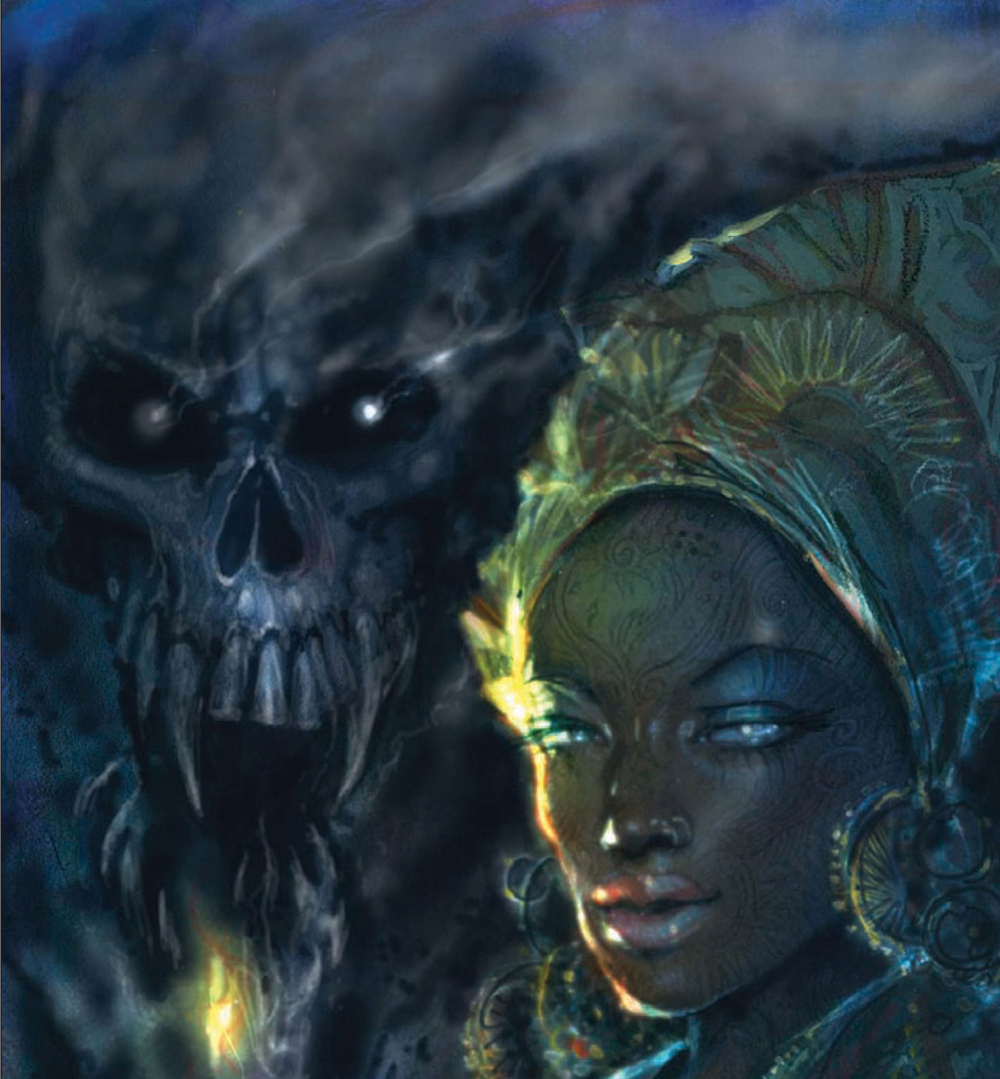
Step Fifteen To create the smoke that emanates from the skull, simply use the eraser tool set at about 7% opacity and 0% hardness for the outer edges.

Step Sixteen Brighten up the highlights in her eyes, her turban, and the edges of her robe by selecting the paintbrush tool and picking a bright lemon yellow from the palette. Keep the brush hardness set at soft to maintain a glowing effect. Again, this illustration is considered a production sketch and is used merely to reflect the flavor of character and story. It does not need to be rendered to a tight finish.

This illustration features a hired zombie killer, ready and willing to do the dirty work—for a price. For this piece, we will use Photoshop® to tint and enhance the illustration. This procedure works especially well when you’re doing a production drawing or character design, and you need to create variations on mood or tone without taking too much time.
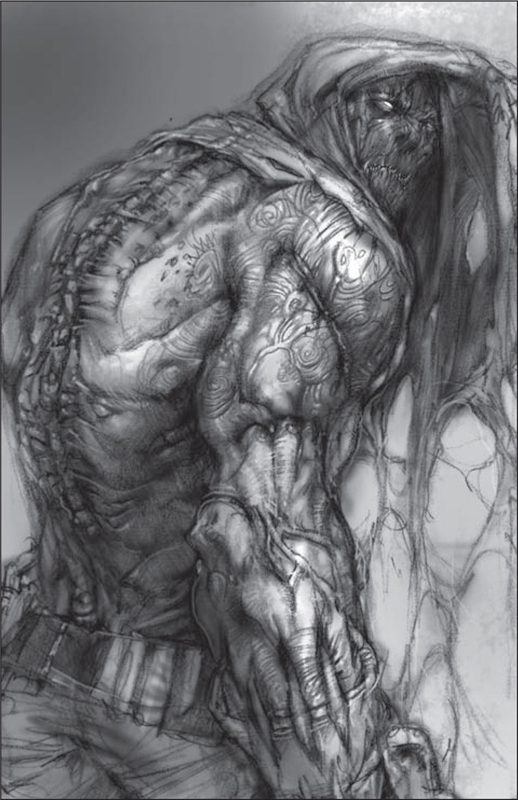
Step One Start your drawing, using a sharp black colored pencil on vellum paper. While this type of paper is a bit expensive, it allows for a beautiful, creamy line quality. Work out all the details of the zombie’s anatomy, designing the veins in a way that almost resembles tattoo art. The majority of the time on this project will be spent on the drawing itself. (You can transfer this sketch; see “Transferring a Drawing” on page 25.) When you’re done with the full value drawing, scan it into Photoshop®.

Step Two Once you’ve scanned in your drawing, begin to experiment with the colors. Using the brush tool, adjust the diameter to size and lower the opacity so that you can layer your colors and value. For this to work, you’ll need to change the mode in the brush options to “multiply.” Begin with a shade of teal, then create a couple of layers so you can continue to experiment with colors if desired.

Step Three To complement the teal, select a warm gray with a tint of yellow and go over the whole image. Increase the brush size and decrease the hardness to about 10%. Also, bring down the opacity so that the color acts like a thin veil over the illustration. Then, warm up parts of his musculature to give the illustration a more organic feel.
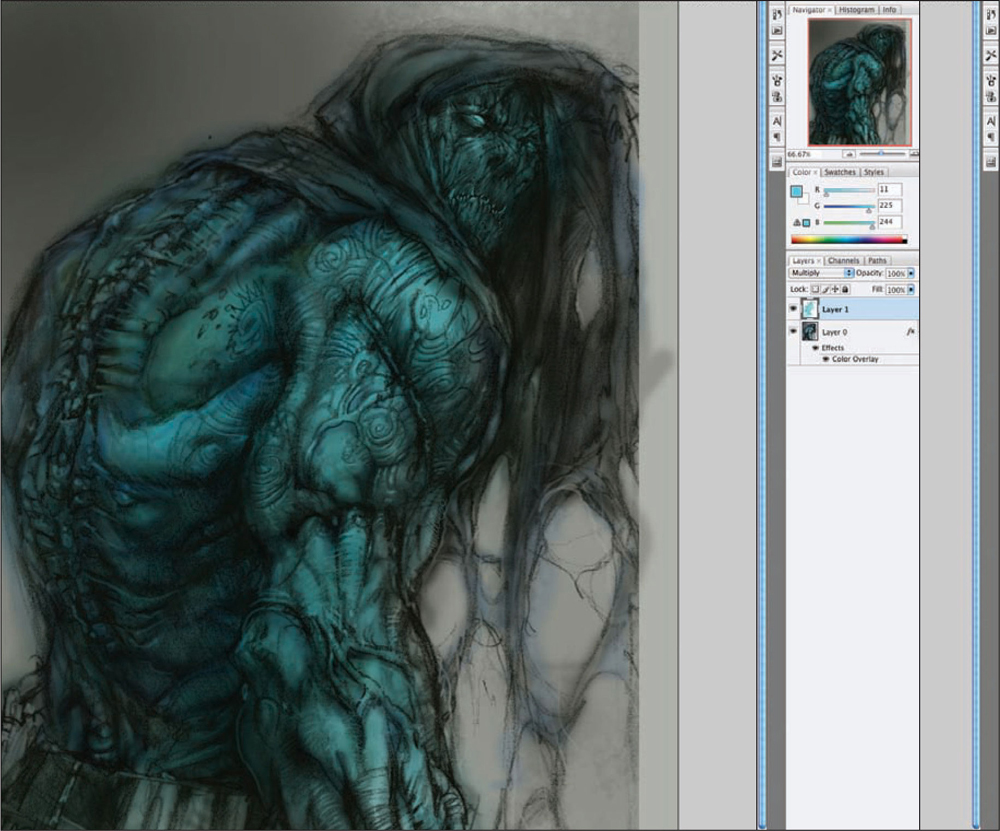
Step Four For more saturation, select your levels and darken the whole image by about 10%. Next, select a magenta color that will harmonize with the teal, and add a bit of it to the zombie’s tattered hood.

Step Five Once satisfied with your values and tone, move on to the highlights. Accent the dimensions of the zombie assassin’s anatomy by selecting the eraser tool. Bring the opacity and hardness down to about 20% and adjust the diameter to size. Then, slowly lighten the centers of the forms.

Step Six Repeat the process used in Step Five for the zombie’s eyes and face.

Step Seven Now, we’ll make the veins more prominent by following them with a darker shadow underneath. Remember to keep the veins wrapped around the forms of his muscles to make them look believable. Soften the zombie ever so slightly by selecting the dodge tool and brightening the shoulder. Next, choose the blur tool and click the “lighten” mode. Keep the strength at about 50% and use it to go over the whole zombie.

Step Eight Next, we’ll add some unique markings to our undead assassin, creating designs that mimic bloody wounds. First, chose a bright red. Then, using the paintbrush, begin to draw some zigzag lines, making sure that they follow the zombie’s anatomy. After this, give the lines a slight shadow by selecting a red that is a few values darker. Make his veins look like they are about to burst out of his skin by coloring them red as well.

Step Nine Then, repeat the process in Step Eight. Add some tribal-esque designs to the zombie assassin’s face and forehead.

For the final touch, add the hint of a futuristic gadget to his belt, revealing that this zombie is both dangerous and technologically savvy. With a bright yellowish green, use the brush tool and keep the opacity and hardness set on high. Then, just stroke in a few quick shapes and add some reflected light to his elbow and forearm, weighting down the zombie and balancing the composition.

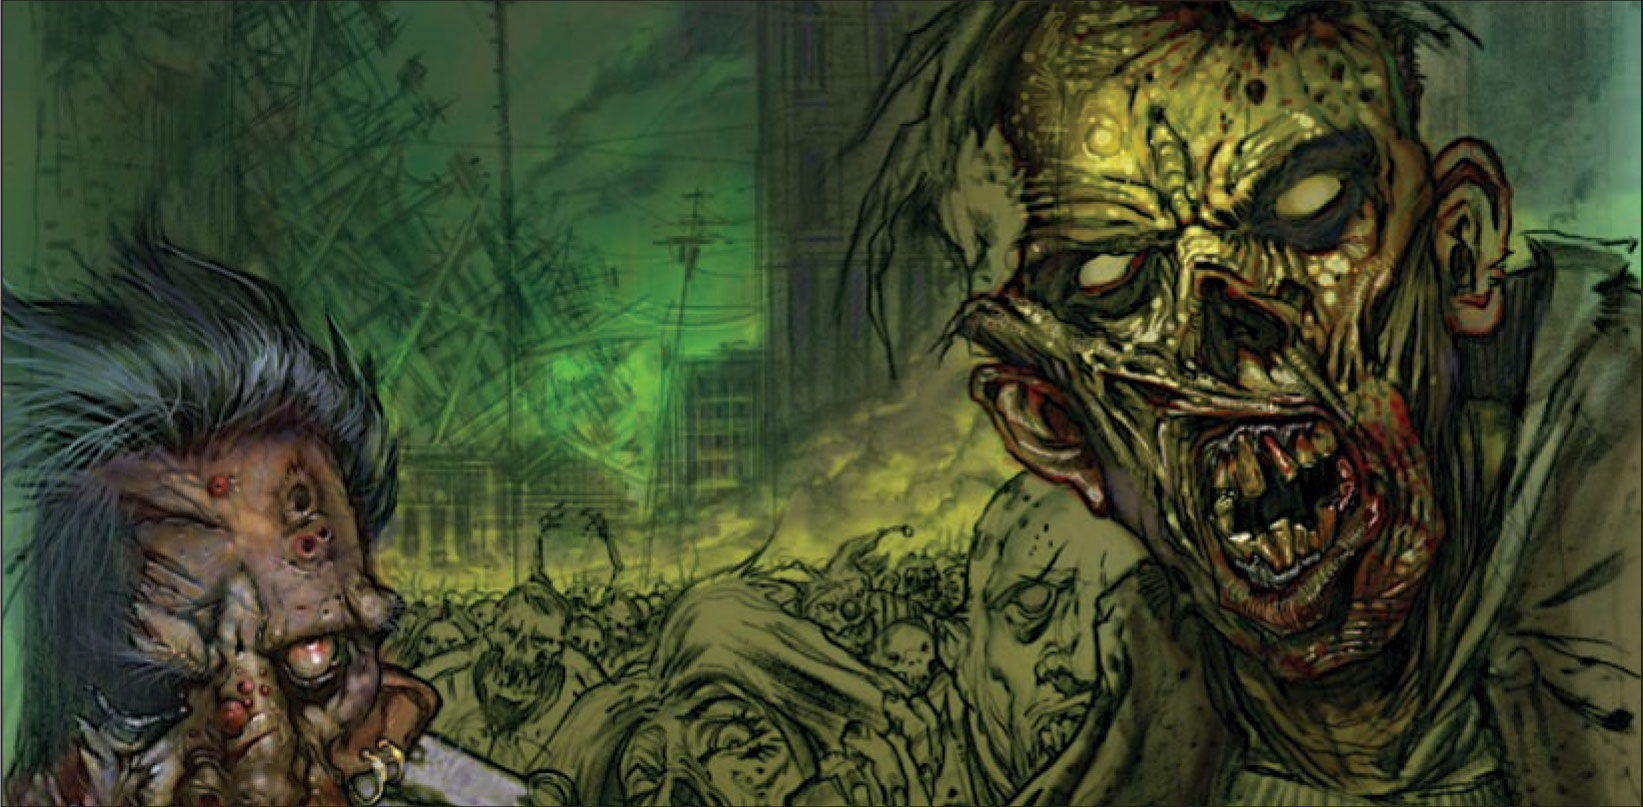
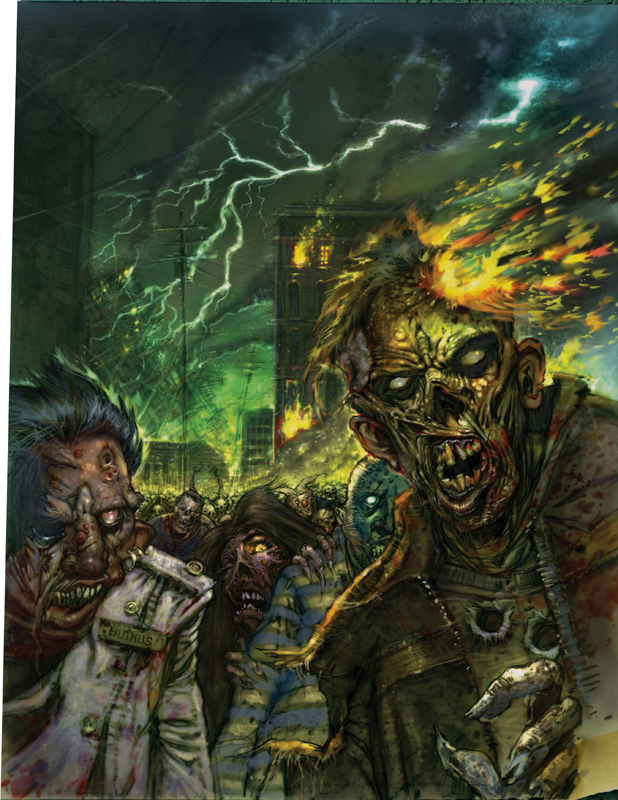
Ever since the book I Am Legend came out in 1954, nearly every zombie movie has included some form of zombie apocalypse. From the 1968 film, Night of the Living Dead, to the 2009 flick, Zombieland, the landscape of the world is seen ravaged by these wandering, insatiable undead monsters—made even scarier by the fact that many of them used to be the protagonist’s best friends.

Step One We’ll begin this illustration by doing a traditional drawing on vellum paper; then we’ll do the color work on the computer. (You can transfer this sketch; see “Transferring a Drawing” on page 25.) For the background scene, use a 30% cool gray colored pencil, and for the foreground (the zombies), use a black colored pencil. This allows you to quickly separate the two without spending too much time on the values. Once you are completely done with your drawing, go ahead and scan it into Photoshop®.

Step Two First, create a layer for the background, and then select a cool color for the evening sky. Using the brush tool, select the multiply mode and adjust the master diameter and opacity accordingly. At this point, we are still experimenting with the color scheme, so keep the opacity light, and slowly build up the values.
Step Three Now that there is some color in the background, you have something to play off and start to work on the front zombie. Create a new layer. With the brush tool, select a cool, sickly beige for the skin tone. For the fingers and ears, choose a warmer color to add a little realism.

Step Four Now for the gory part. From the color palette, select a red for the blood. Then, using the brush tool, outline the zombies’ features and add blood splatter to the teeth, lips, and chin. Separate certain areas of the zombies into different layers so you can easily make changes and additions as the painting progresses.
Step Five Use a different color scheme for the skin on the shorter zombie. Keep the opacity of the brush tool set on low, as if you are laying in a color wash using real paints.

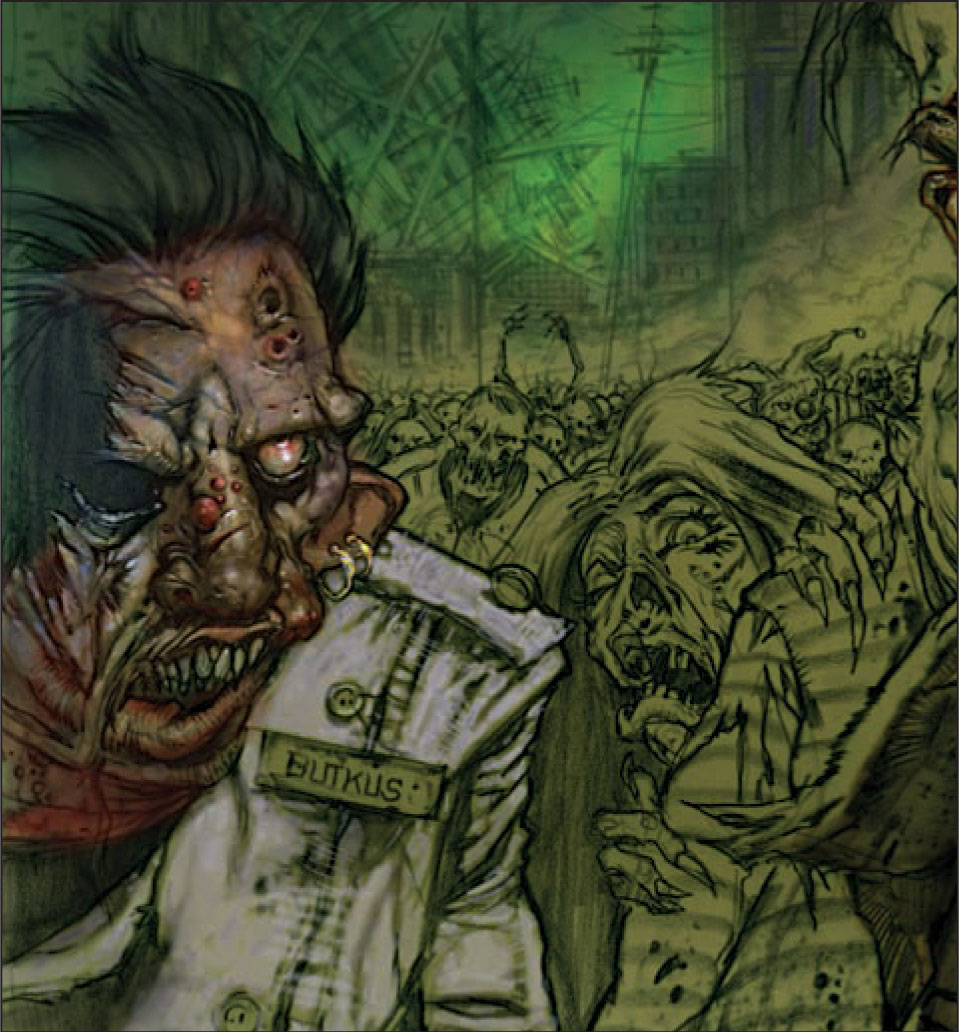
Step Six Now we’re going to darken the whole image. Create a new layer and select an olive green from the color swatches. Again, keep the opacity low and increase the brush size. Keep the mode at multiply so the layers of color beneath will show through. This gives the image a grittier effect.

Step Seven Now that the atmosphere is closer to what we want, we can go back to the leading zombie. Add more details by simply choosing the eraser tool—keep the opacity at about 20%. Pick out some highlights along the side of his mouth, forehead, teeth, and cheeks.
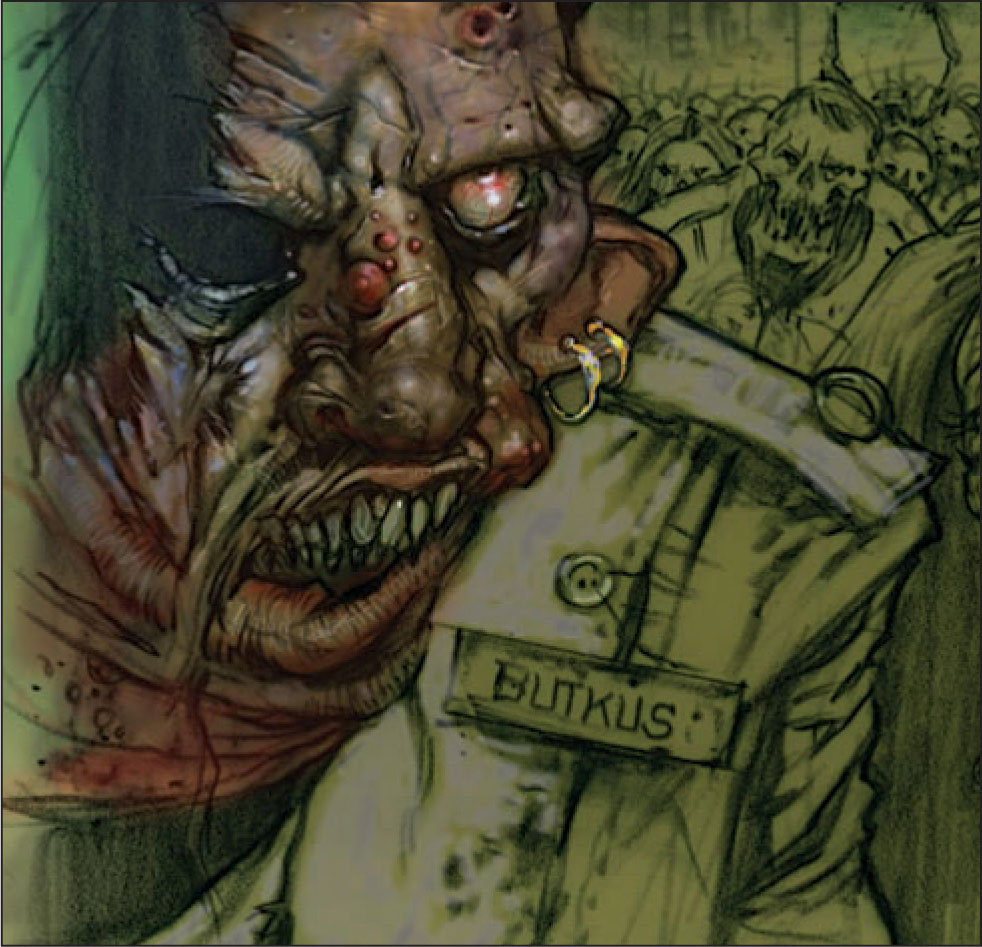
Step Eight Next we’ll work on the smaller zombie. Select the paintbrush tool and add a light layer of blue all over his face. Then, with the eraser tool, pick out some highlights to give more dimension to the forms. Also, use the eraser tool to draw back into his face, adding more texture. As for the hair, lay in a darker value for the big shape and then, using the brush tool, decrease the diameter and add some wispy strands. This zombie might have skin problems, but he takes pride in his full head of hair.
Step Nine For the smaller zombie’s shirt, select grayish white and use the brush tool to paint it in, leaving the folds and creases alone to allow the original drawing to show. Then, for texture, add some cross hatching by using the eraser tool.
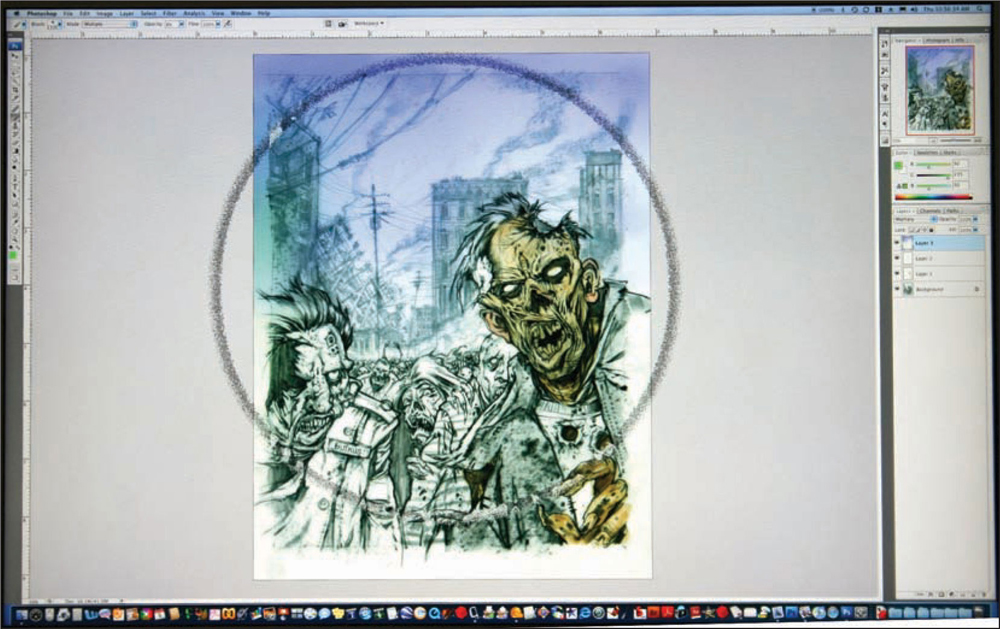
Step Ten Next, we’ll focus on the chaotic background scene. Brighten up certain areas to set the stage for multiple fires. Do this by selecting the dodge tool and choose the highlight mode. For the smoky effect, keep the exposure at about 30%. Once this is done, go back in with the paintbrush tool and add some hot spots by choosing a cool yellow.
Step Eleven Then, add thick dark clouds of smoke by using the paintbrush tool and keeping the hardness really low. Remember, in order to create realistic smoke, you must show that it has dimensions. Add some fire in the windows. Then, highlight the telephone lines and the falling building by using a very fine tip for the brush tool. The key to making the architecture believable is to keep the lines straight and thin and the perspective accurate.
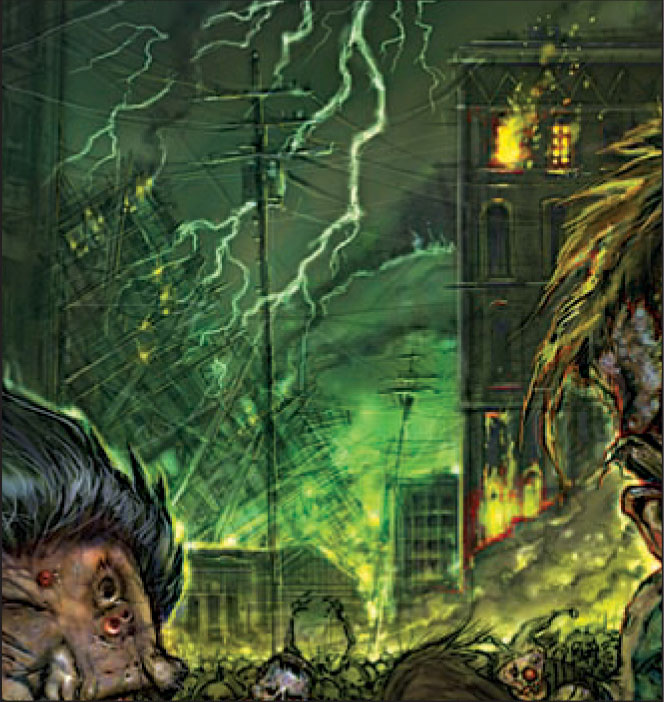
Step Twelve Now we’re going to take it a step further and add lightning into the mix. Using the dodge tool, adjust the diameter and increase the hardness. Then, change the range to “highlights” and bring up the exposure to almost 100%. Draw shapes similar to old, gnarled tree branches. Once finished, select the paintbrush tool and add some highlights on the lightning with a light, turquoise blue.
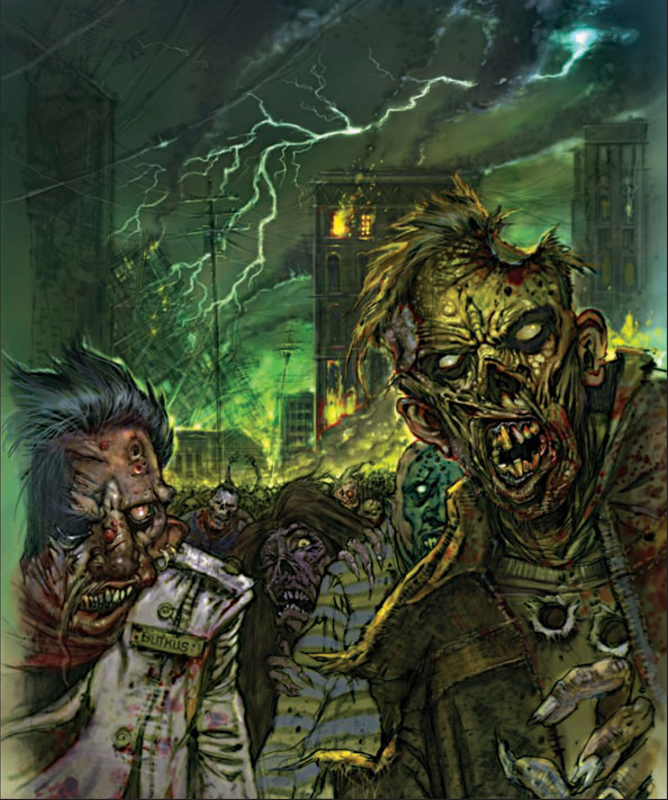
Step Thirteen You won’t need a lot of details for the zombie crowd since the two main zombies in front are so flushed out. Just lay in some color for the background characters using the brush tool.

Step Fourteen With the brush tool, quickly indicate the zombie faces in the background. Then, select the eraser tool, set the opacity at about 15%, and tatter up the jacket of the main zombie. Also, add some threadbare and frayed texture to the profile of the zombie behind him.

Step Fifteen We’re going to return to the main zombie next, adding into him some of the colors found in his friends and the environment. By doing this, we tie everything together and make the painting more cohesive. Also, add some more highlights to his face and hand.
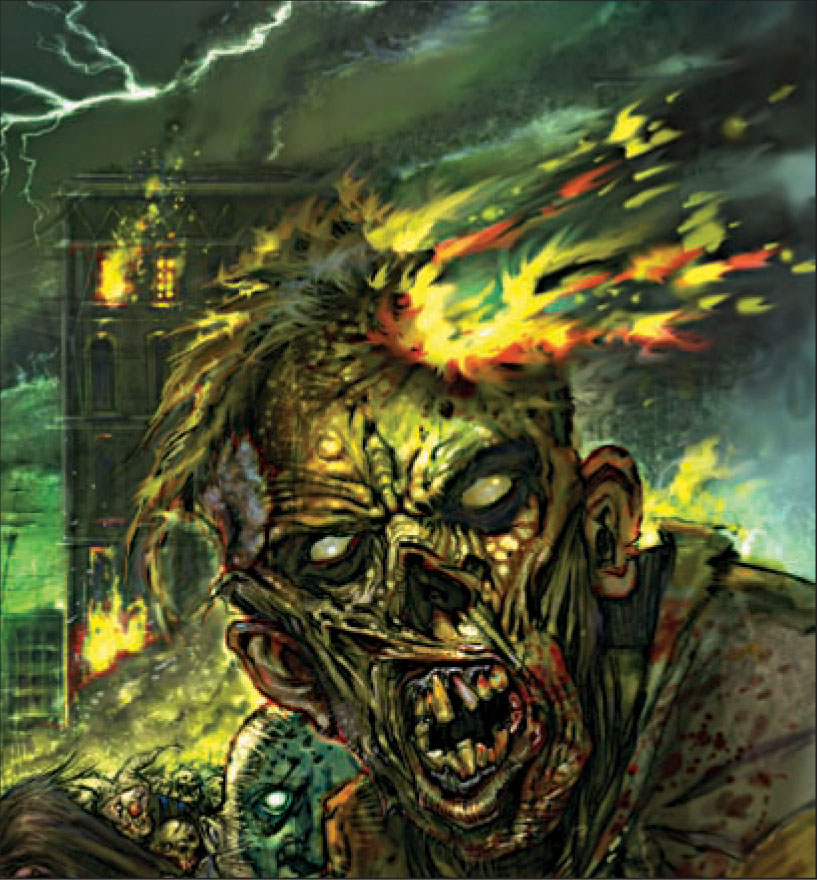
Step Sixteen You never know where or how you’ll find inspiration. My six-year-old daughter gave me a brilliant idea—that the main zombie’s head could catch on fire. To follow her advice, select the brush tool and increase the opacity for the color of the flames. Then, select the burn tool and add a shadow under and behind the flame. To make the flames look like they shoot away from his head, select the smudge tool, decrease the strength to about 20% and go over the area a couple of times.

Congratulations! You survived your first journey into the Fantasy Underground. In this book, you learned how to draw a wide variety of zombies, from a teenage zombie killer to a zombie Goth girl to a zombie assassin. You also experimented with black-and-white illustrations, acrylic paintings, and computer manipulation. The secrets of drawing the undead have been revealed, and as they say in the Underground: If you can capture the beast on paper, then you can control it. So, if you have successfully navigated through these projects you, yourself, are now a Master of the Undead. May you continue to dominate zombies, near and far, until your next journey into the Fantasy Underground.
