

Painting is generally more difficult than drawing because, in addition to strokes and values, you must also consider color and its many aspects—saturation, hue, paint mixing, color schemes, etc. By following the projects in this chapter step by step, hopefully you will get ideas for how to approach color and develop your paintings. The focus of this chapter will be on the painting aspect; however, as in Chapter 2, you will have the option of finishing the paintings with a few digital tweaks.
Acrylic paint is fast-drying paint containing pigment suspended in an acrylic polymer emulsion. Acrylic paints can be diluted with water, but become water-resistant when dry. Depending on how much the paint is diluted (with water) or modified with acrylic gels, media, or pastes, the finished acrylic painting can resemble a watercolor or an oil painting, or have its own unique characteristics not attainable with other media. You can apply acrylic in thin, diluted layers, or apply it in thick, impasto strokes.
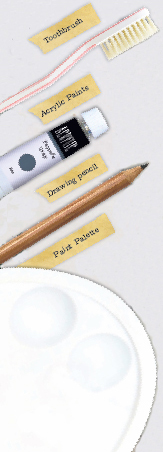
Paintbrushes
When using acrylics, we recommend synthetic hair paintbrushes. For the projects in this book, you’ll want a variety of sizes, from size 00 (very small) to size 6 (medium). Also consider gathering a variety of bristle shapes. Round brushes have bristles that taper to a point, allowing for a range of stroke sizes. Flat brushes have bristles that are pinched into a squared tip. The flat edge produces thick, uniform lines. In addition to these acrylic brushes, you’ll also want a house painting brush—a large paintbrush with coarse bristles. These brushes are perfect for quickly covering the canvas with large washes of color. If you own an airbrush, use this when recommended in the projects, as it produces incredibly soft, realistic gradations that are more difficult to achieve with paintbrushes.
Painting Surfaces
You can use acrylic paint on practically any surface, as long as it’s not greasy or waxy. As a result, you have a lot of flexibility with your painting surfaces. However, it’s best to paint on either canvas or illustration board coated with a white gesso (a coating used to create an ideal painting surface). Remember that the brighter (or whiter) your painting surface, the more luminous your colors will turn out!
Colored Pencils
Colored pencils aren’t just for drawing; they are great tools for adding details to a painting. Working directly over acrylic paint, you can add highlights, intensify shadows, create strands of hair, and more. It’s important to purchase the best colored pencils you can afford; higher quality pencils are softer and have more pigment, giving you smoother, easier coverage.


Typically you’d want to put on your best face for a portrait. Not so for the zombie; instead, a portrait provides the perfect opportunity to show off just how terrifying (and disgusting) he can be. With this project, you’ll discover that the power of gore lies in the details—from veins and cysts to splatters of blood.

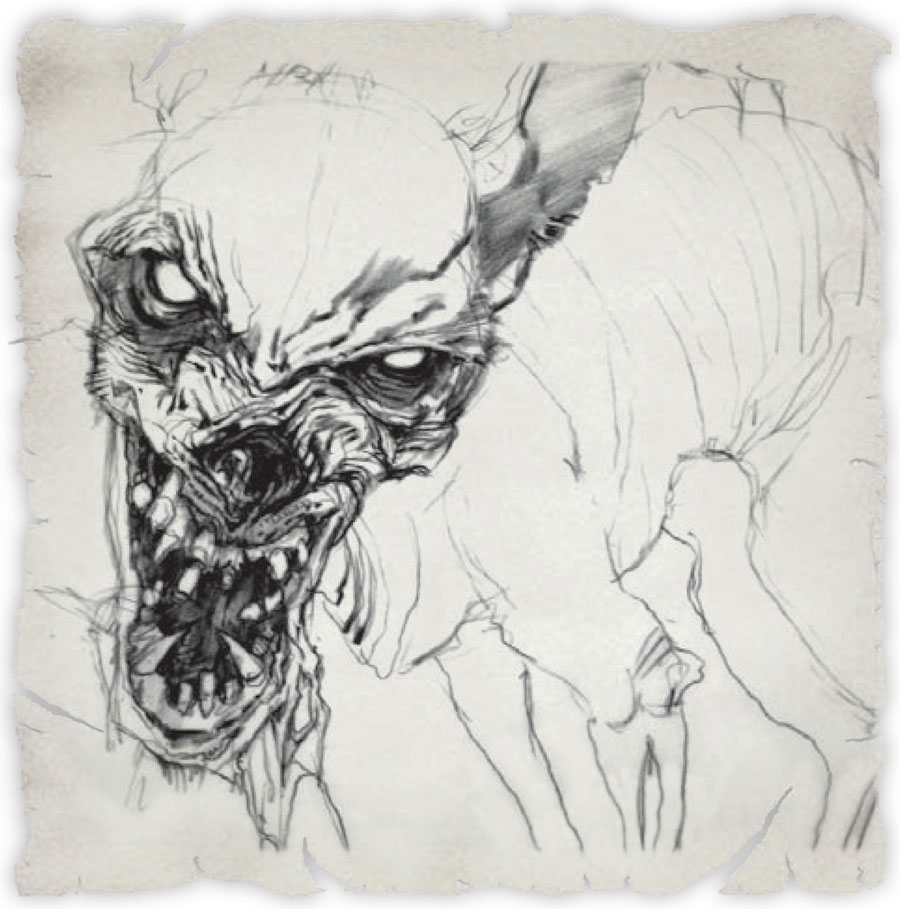
Step One Begin by brainstorming possible zombie head poses and angles. For this painting, I want to juxtapose a traditional portrait stance with over-the-top gore, so I choose the brooding, three-quarter view (far left).

Step Two To make this zombie to look incredibly wicked, concentrate on the texture. Using the thumbnail as reference, begin the drawing with a black colored pencil on vellum paper. For this project, we’ll use a projector to transfer the image to a gessoed illustration board. I recommend that you xerox two copies of your drawing. Place one copy beside your drawing board, and place the other copy above your projection from time to time, making sure that the projected drawing is accurate and not distorted. (You can transfer this sketch; see “Transferring a Drawing” on page 25.)

Step Three Begin the painting by placing the following colors on your palette: burnt umber, acra violet, naphthol red light, Hooker’s green, Prussian blue, Mars black, lamp black, and cadmium yellow medium. Mix a combination of burnt umber, cadmium yellow medium, and naphthol red light, and then dilute it with plenty of water. Using a big, inexpensive house painting brush, quickly coat the surface, leaving the broad strokes and mottling to dry. For a rapid dry, use a blowdryer. After this, add a thin layer of workable fixative. Now the painting is ready for the next layer of cool transparent color.

Step Four Next, create a mixture of Hooker’s green, Prussian blue, and a little lamp black, again diluting it with plenty of water. Using the big brush (rinsed clean), roughly stroke in the cool color around the zombie. The coolness of the background will help the warm head and body of the zombie advance toward the viewer.

Step Five Then load your airbrush with a little Mars black and start adding the shadow areas under the nose, the eyes, and the jaw. Shade within the ear and across the scalp. These soft gradations of shadow give the zombie form; you can almost see him start to pop off the page. If you don’t have an airbrush, add shadows by building up thin washes of paint, softening the edges by blending in water.

Step Six Then take a 50/50 mixture of white gesso and water and use it to paint over the background several times, setting it up for the next layer of texture mottling. To get ready for the cool tones of the zombie, clean out your palette and fill it with Hooker’s green, Prussian blue, Mars black, cobalt blue, and light portrait pink.

Step Seven Next, add cool colors to the zombie and begin building up the dark values. At this point, just experiment with the cools against the warms and have fun with the possibilities. Incorporating a bit of the green mixture from Step Four will help to harmonize the zombie with the background.

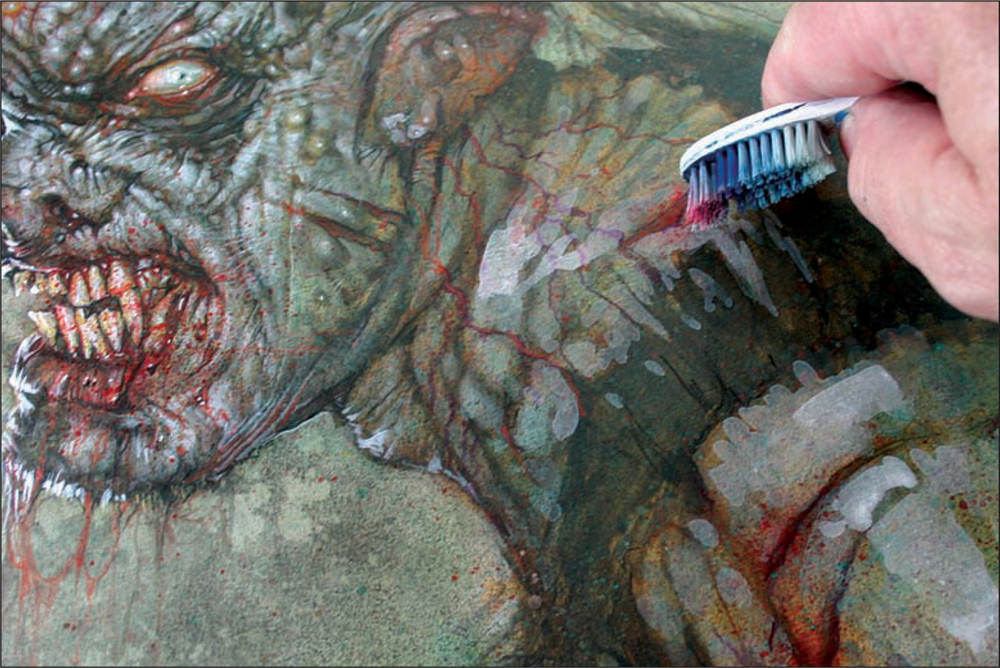
Step Eight In this step, focus on adding textures in the background and within sections of the zombie. Begin by airbrushing or applying thin washes over large areas with a little burnt umber and lamp black until it becomes semi-opaque. Then, use a toothbrush and spatter the painting with a very tiny amount of window cleaner; the ammonia will eat through some of the paint and create a unique mottling. By applying the layer of burnt umber and lamp black over the whole illustration, you’ll find that you’ve tie the zombie in with the background.

Step Nine After giving your airbrush a quick rinse, load it with cobalt blue and Mars black. Then, give the entire illustration a light spray, thus unifying the warms and cools. Take a wet cloth and gently remove some of the overspray. If you don’t have an airbrush, apply thin washes over the painting instead. By doing this, the illustration achieves a depth of wonderful, complex layers that you couldn’t achieve otherwise. Now, because the zombie is blending in with the background, use white to add rim light along the left edge of the face to separate the him from the background and create a sense of drama. In this case, note that you need a strong core shadow for the rim light to be effective.

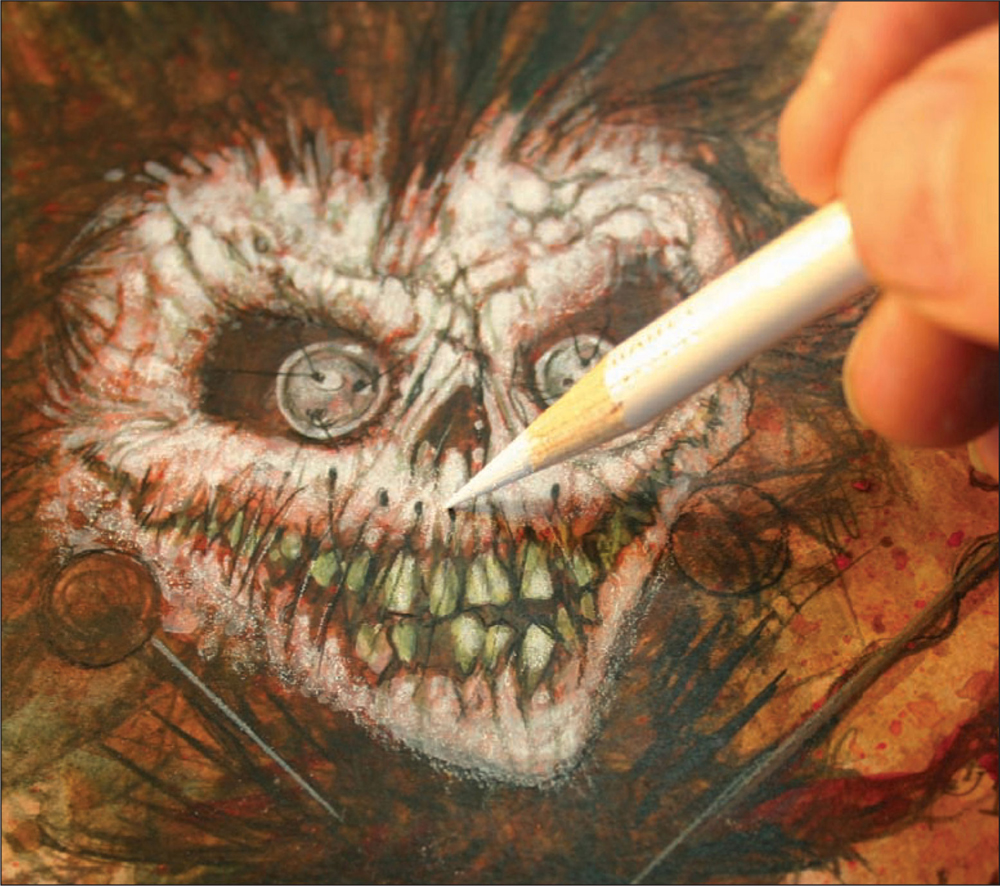
Step Ten Next, we’ll begin the process of working in multiple layers, using cut-gesso (about 80% water and 20% gesso). Using a #00 brush, apply about 6 to 8 layers of the cut-gesso on the zombie, spraying workable fixative after every couple of layers to retain the transparency of the underlying colors while building up the lights at the same time. Once finished with the gesso layers, bring out a variety of colored pencils and start to draw back into the illustration.

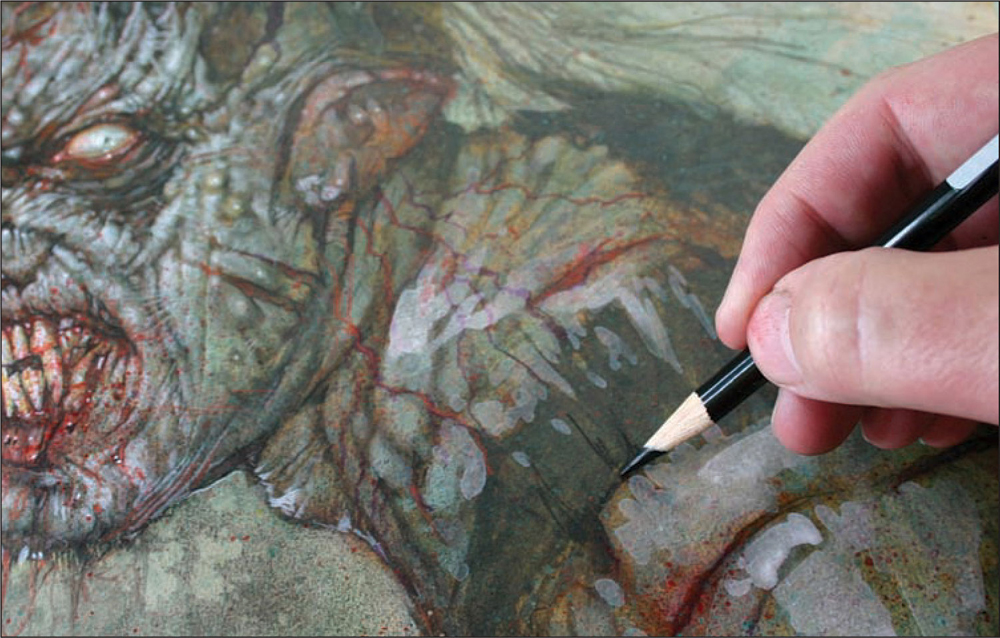
Step Eleven Using a black colored pencil, detail the zombie by strengthening the darks, intensifying the shadows in the creases and around the boils. Constantly keep in mind the design of your shapes and lines; a drawing like this can easily become sloppy.
Step Twelve For the final step, add another layer of wash, using some of the cut-gesso and mixing it with a little Hooker’s green and lamp black to emphasize the look of rotting skin. Then draw back in with the black colored pencil, defining shapes, creating depth, and darkening any areas that get lost in all the washes. To add to the overall goriness of the piece, use a toothbrush to splatter pure naphthol red light over all the zombie’s wounds for the look of fresh blood—the gruesome end to a fine illustration.


Sporting tattoos, piercings, and dramatic skin tones, this zombie Goth girl combines ethereal beauty with deadly intent. While she’s not exactly the sort of girl you’d want to bring home to meet the parents, she’s the perfect subject for another illustration in your growing portfolio of zombie monsters.

Step One Sketch out a dramatic composition, indicating the contrast of values and the flow of lines.

Step Two For this project, we will create a zombie Goth girl. Begin by working with a sharp black colored pencil on a white two-ply, cold-pressed illustration board. Crop tightly into her face and head, framing her deadly yet hauntingly beautiful face with locks of hair and wisps of smoke. (You can transfer this sketch; see “Transferring a Drawing” on page 25.)

Step Three Using a wide brush, quickly lay in broad strokes of diluted Mars black for the hair. For the face, mix a tiny bit of light portrait pink and cadmium red light with a substantial amount of water. Then use a big house painting brush to layer clear gesso over the drawing and underpainting, thus sealing it for the next step.

Step Four Once the gesso is dry, take the sandpaper and lightly stroke over the illustration. This creates a smooth surface for airbrushing and seals the drawing at the same time.
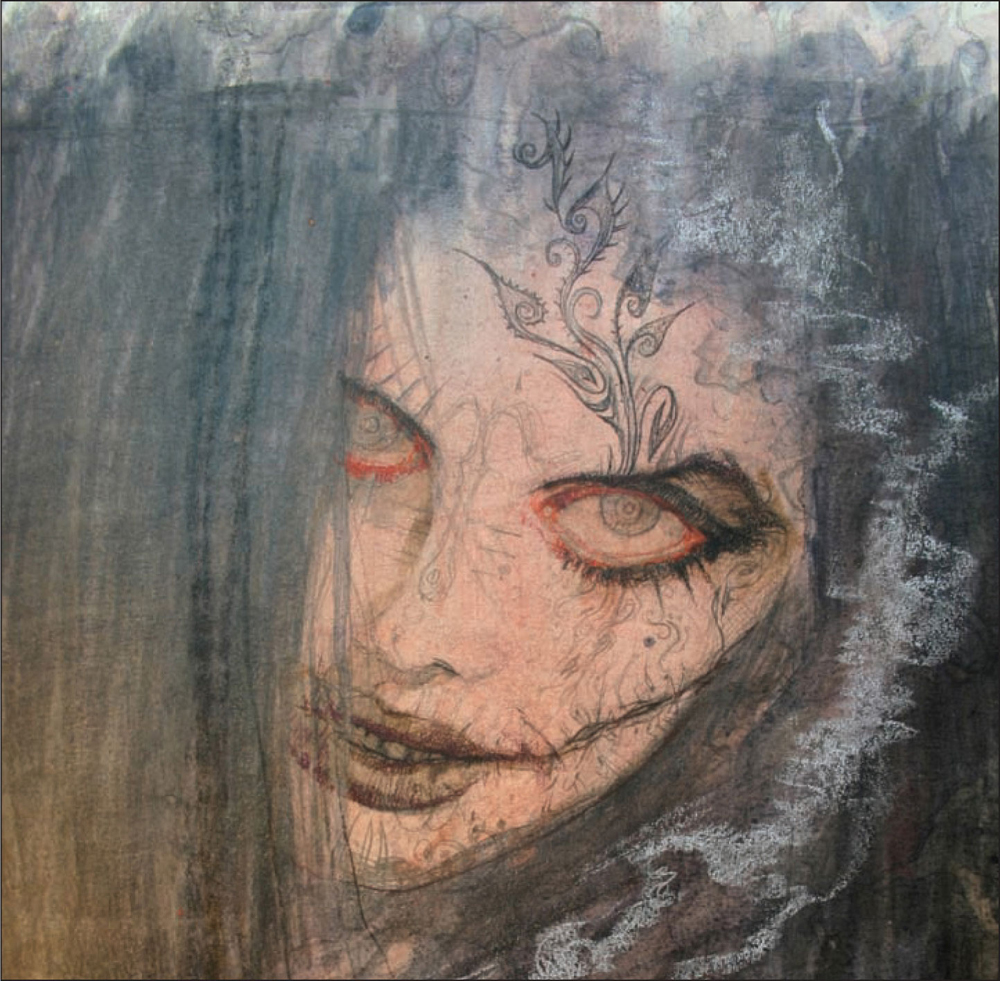
Step Five The eyes play an important part in the Gothic look. Take a little cadmium red deep hue mixed with a hint of light portrait pink, and then thin it out with water to paint the rims of her eyes. Next, outline the eyes with some Mars black and cadmium red deep hue to give them a graphic definition.
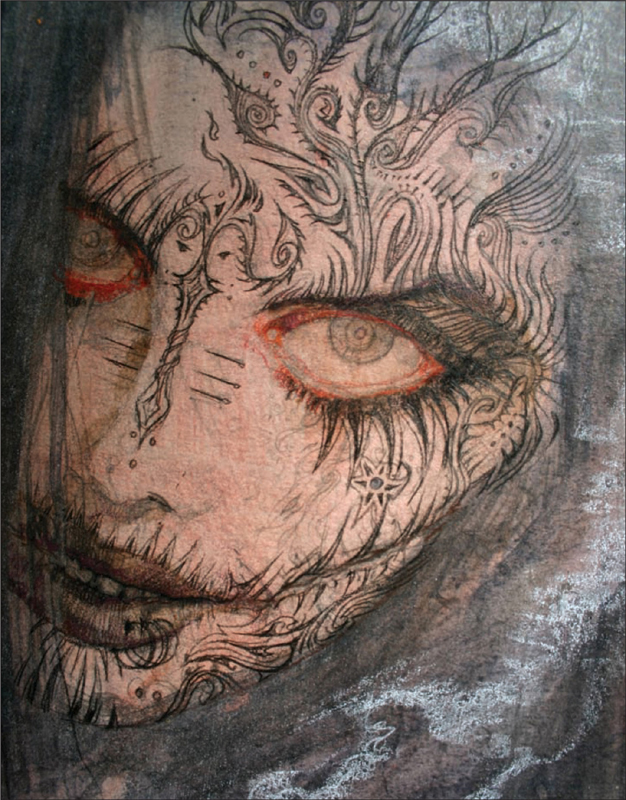
Step Six Taking a sharp black colored pencil, focus on the intricate design of her tattoos. Carefully design attractive shapes and alternate the lines from thick to thin, also paying attention to how they wrap around her bone structure. For the smoke, use a 30% cool gray colored pencil. Notice that the shapes in the smoke are carefully designed as well.

Step Seven Two other striking and recognizable Gothic features are pale skin combined with dark hair. Make a mixture of about 20% white gesso and 80% water. Then, using a medium-sized brush, begin to paint thin layers over the face. This process requires about five or six layers, so you can use a blowdryer after each layer to speed up the process. Next, darken the hair considerably by painting it with a couple of coats of diluted Mars black. For the lips and brow bone, you can use some iridescent antique brown and cadmium red deep hue for a bloody, coppery look.

Step Eight Going back to the eyes, take a pink colored pencil and start softening the red, giving it a more realistic look. Next, use the same pencil to lightly shade in the tip of the nose, portions of the forehead, and beneath the eye to hint at the life that was once there. With a gray pencil, add some nose and lip piercings as her accessories of choice. Then focus on the tattoos, using a white colored pencil to outline them. This creates a slight 3-dimensional quality and also ties the tattoos into the smoke.
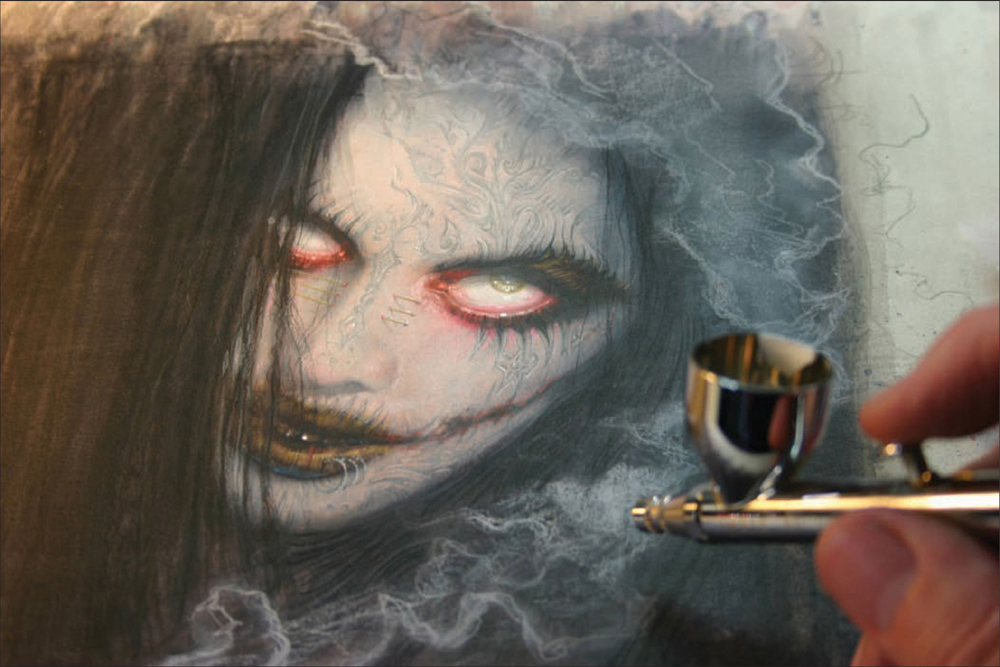
Step Nine Next, use the airbrush to begin softening and darkening some areas. Fill the airbrush with the paint colors of the area that you are working on at that moment. Soften the edges around the face, the eyes, and the smoke. Then, darken the hair a bit. If you don’t have an airbrush, build up thin layers of paint to darken or soften areas.

Step Ten For the final step, add any highlights to areas that need to pop, including the eyes, the piercings, and even the teeth.

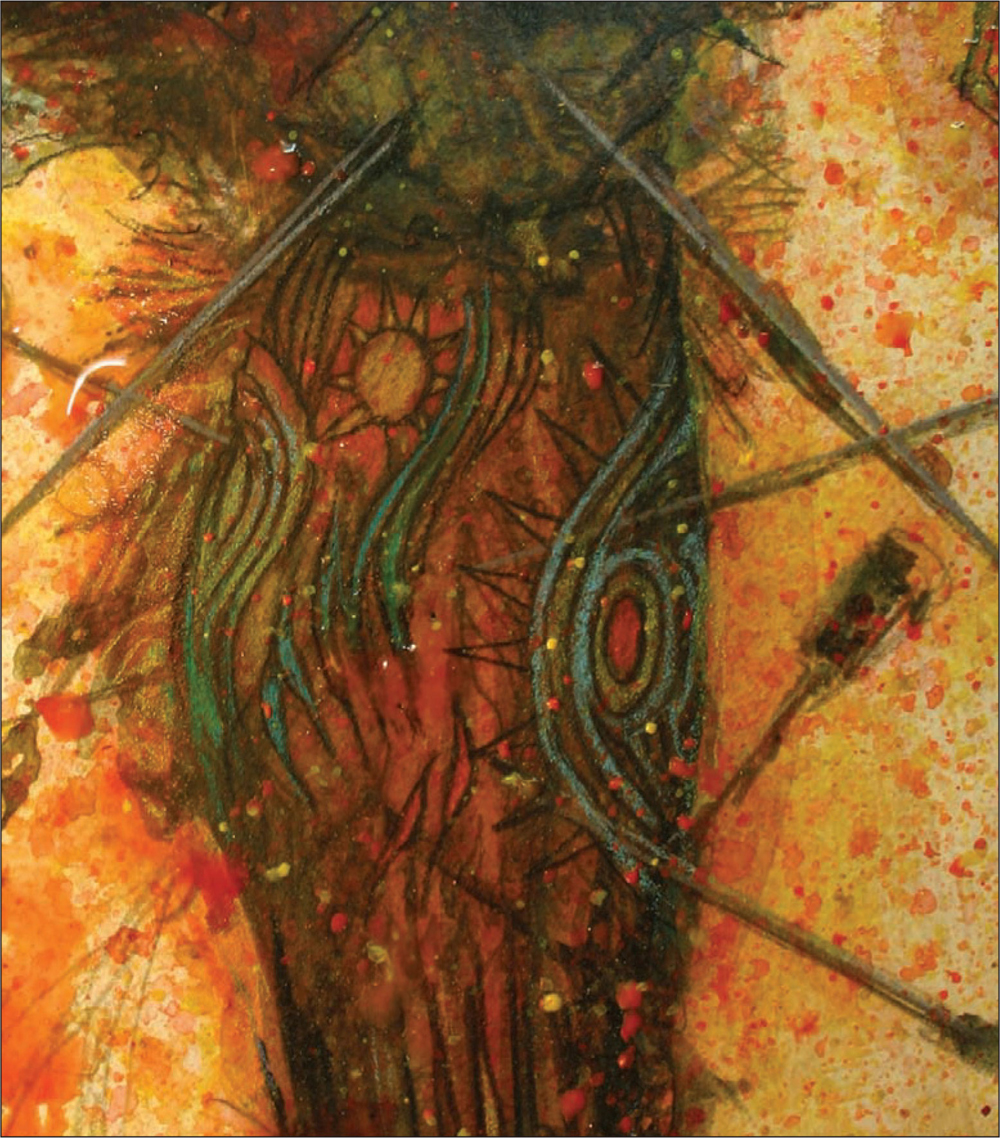
Even tiny things can be deadly in the world of zombies, as seen in this voodoo doll. Boasting life-draining needles and flame-inspired patterns, this illustration focuses on the supernatural elements that have become part of the zombie legend.

Step One Make a quick sketch of the doll, nailing down the shape and expression.
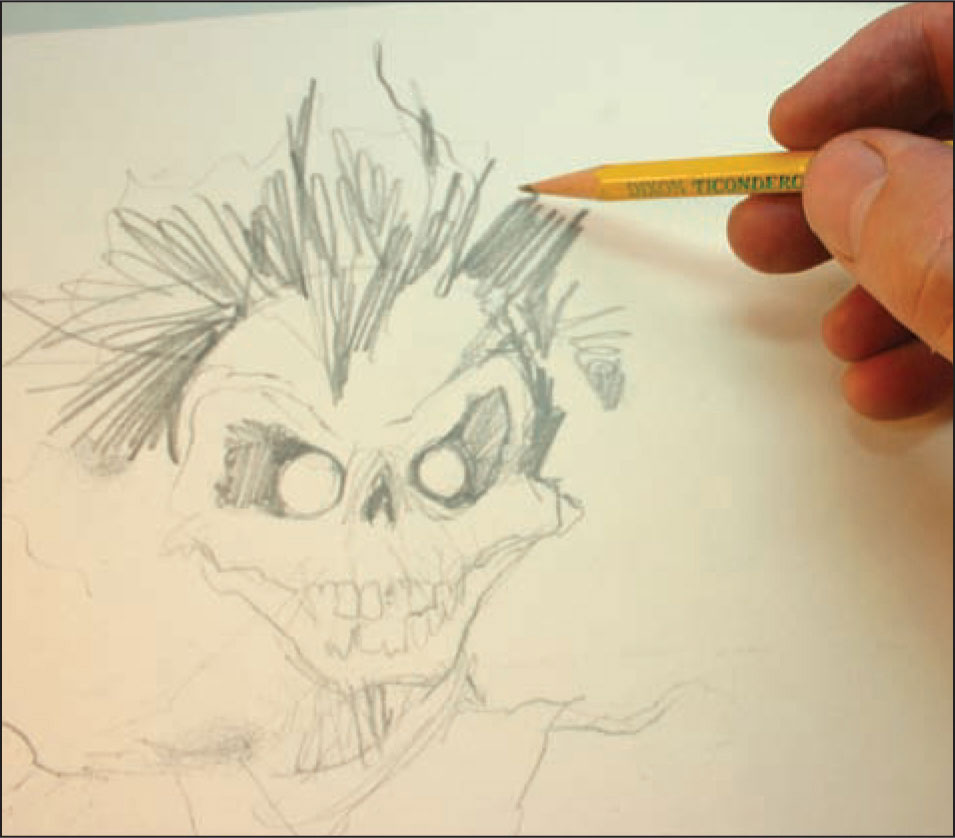
Step Two For the zombie voodoo doll painting, we’ll begin with a white illustration board and a regular #2 pencil. This board will give a “toothy” texture, while the #2 pencil enables us to smudge the lines and achieve a dirty look. In contrast, vellum paper (which we used for many of the other projects in this book) produces a creamy texture and allows the artist to achieve clean and precise lines. This choice is just a matter of preference. (You can transfer this sketch; see “Transferring a Drawing” on page 25.)
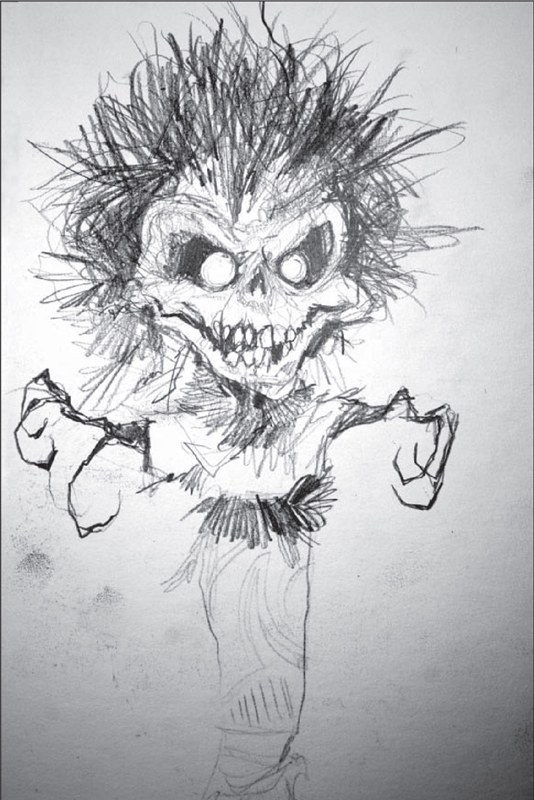
Step Three Block in the doll, then start working on the dress details. The smudging and grittiness of the pencil actually contributes to the look of this subject.
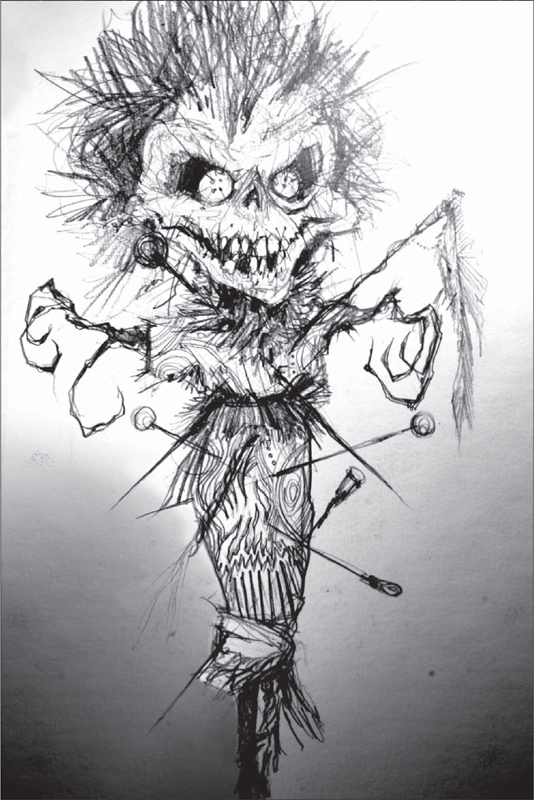
Step Four Then add some flame-inspired patterns and exotic designs on the dress. Once the dark accents and life-draining needles are in place, we are ready for the colors.

Step Five Begin with very diluted washes of acrylic paint, sticking with earth tones such as iridescent antique brown and viridian hue permanent. Painting inside the lines isn’t a big concern on this illustration.
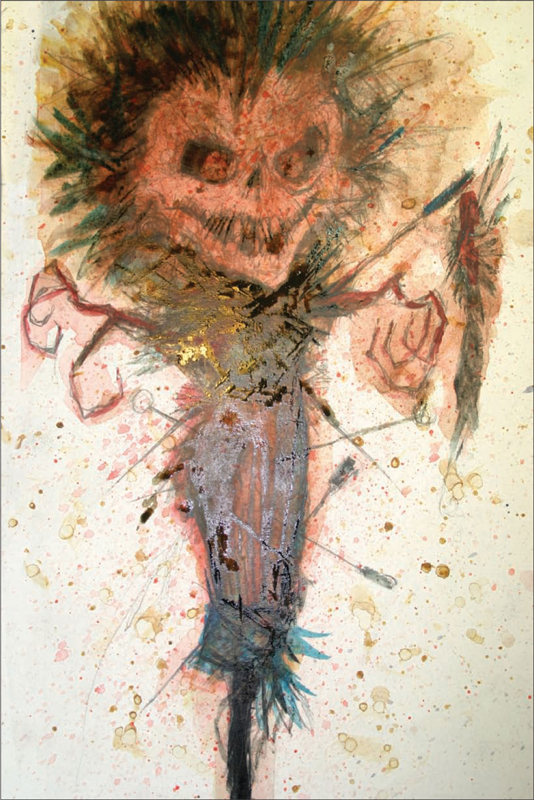
Step Six Using a little bit of cadmium red light and a lot of water, put a warm wash over the face and body. Then, use some cool turquoise deep as accents to give a striking contrast to the red tones. Next, take an old toothbrush, dip it into the already mixed paints on your palette and spatter it all over the illustration.

Step Seven In this step, we’ll concentrate on the zombie voodoo doll’s face. To create a creepy, pasty look, mix a small amount of heavily diluted white gesso (about 60% water and 40% gesso). Then, with a small paintbrush, start laying in all the forms of the face, leaving the underpainting free of paint to suggest the wrinkles and creases.
Step Eight Taking a sharp white colored pencil, define the smaller areas and highlight all the top ridges of the forms of the face. Use a thin mixture of viridian hue and Turner’s yellow to make the teeth look dirty.
Step Nine Next, use the other colored pencils to detail the dress and the needles (see needle head below). Define all the shapes by outlining them with a black colored pencil. Then, take an old toothbrush, dip it into some red paint mix, and flick some of the deadly color all over the illustration.


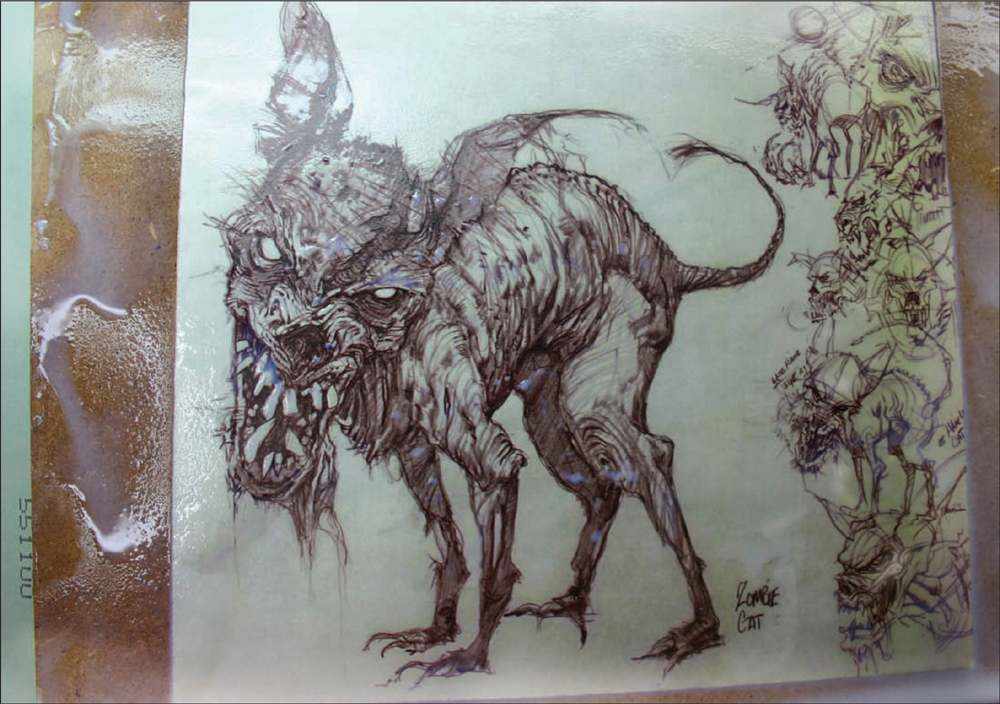
Unlike humans, zombies don’t have to worry about their pets getting sick. Although this zombie cat might not purr or want to cuddle on your lap, it’s built to last forever. This is one stray kitty you probably shouldn’t let in the house on a rainy night.
Step One For this project, we will create our own zombie pet. With a finely sharpened black colored pencil, sketch the animal on vellum paper. Shade the dark values of the head first to quickly establish the maniacal personality of this house pet. (You can transfer this sketch; see “Transferring a Drawing” on page 25.)
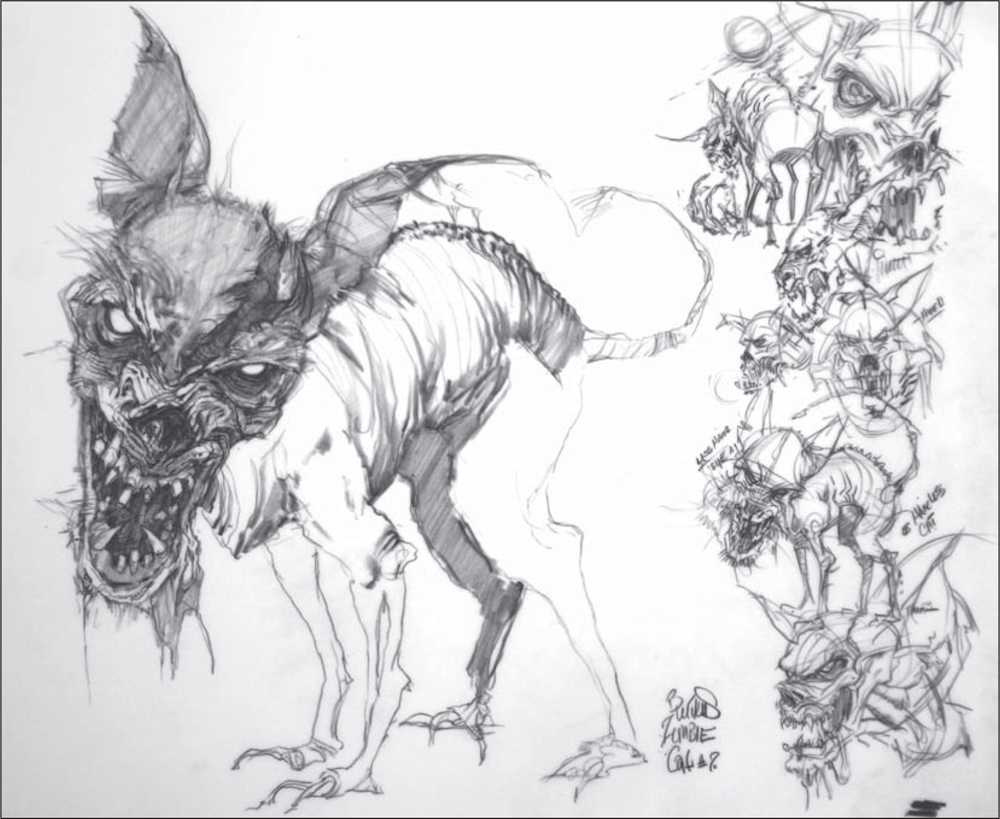
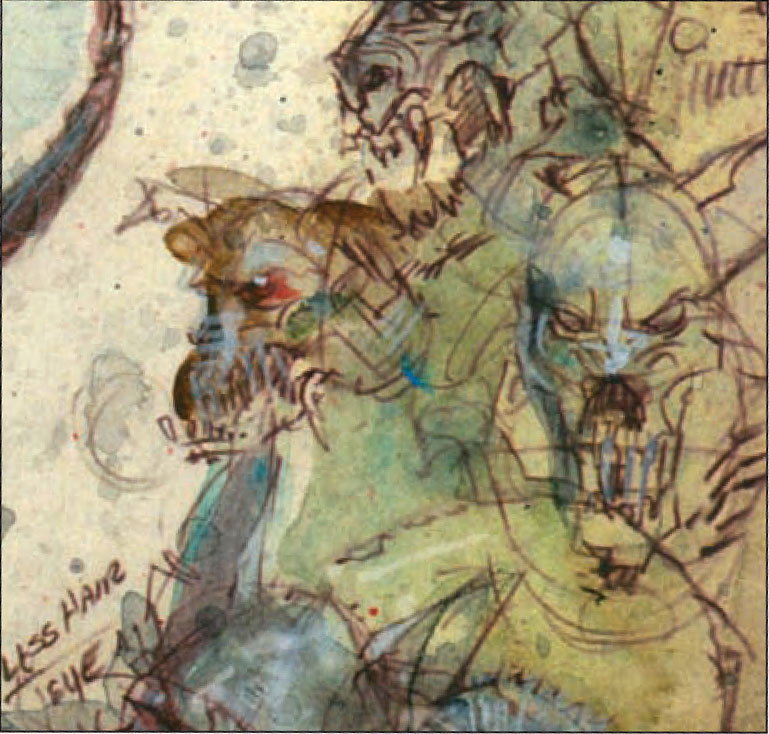
Step Two Lay in the rest of the values on the head, and follow with the body. I added some thumbnails along the edge of the paper. I decided to leave them there to test different color schemes and also because they contributed to the overall charm of the picture.

Step Three Next, we’ll make the zombie pet look extremely emaciated and ratty. To achieve this, first, pull his mouth back to reveal long, grotesque teeth; then draw long swift lines that wrap around his skeletal body; and finally, add some unsightly growths on his head and rib cage. Use broken lines on his ears and legs to show the wear and tear of his skin.
Step Four Once the drawing is done, make a color copy, and select the sepia tone setting. Then take the copy, spray it with workable spray fixative, and soak it in some water. After placing the wet picture on a Masonite board, mix a solution of 50% water and 50% matte medium in a bowl. Then use a big house brush to slather this mixture over the drawing. This mounts the picture on the board and provides a sturdy surface that won’t warp when we start painting with watered-down acrylics.

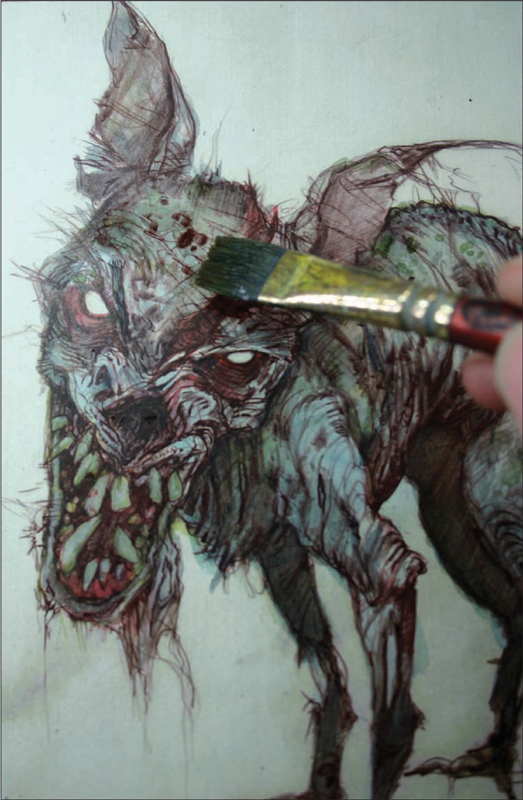
Step Five Once the board is dry, use an extremely watered-down mixture of cerulean blue and Mars black to lay in the skin tone of the zombie cat, giving it a corpse-like feel. Then paint the mouth, the eyes, and the gashes with a thicker mixture of cadmium red light and cadmium red deep hue to create a deadly effect.

Step Six Here you can see how diluted the paints should be while working on this project. In this instance, you’ll be using acrylics like watercolor.
Step Seven Dilute Payne’s gray and then layer the drawing with this wash several times to bring the warm reds and cool blues, together. Then, take a blowdryer and quickly dry the painting. Next, start adding a thin color of Turner’s yellow and viridian hue on certain parts of the creature’s body and teeth to emphasize its jaundice and unhygienic qualities.
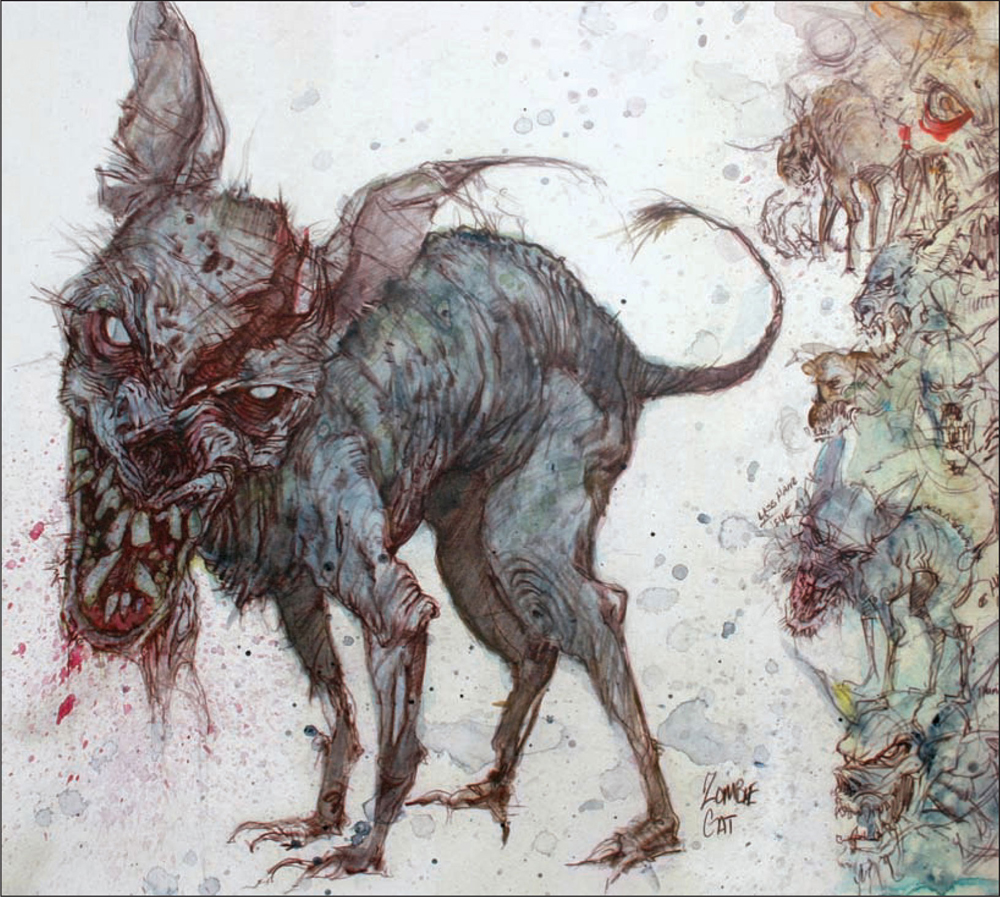
Step Eight Take an old toothbrush and dip it into a mixture of cadmium red deep and cadmium red light. Then flick it to create gruesome blood all around the mouth. After washing the toothbrush, dip it into a diluted mixture of Payne’s gray and phthalocyanine blue, and then splatter it all over the picture, giving it a dirty, vintage look. Note: I experimented with the thumbnails on the side to come up with ideas for the painting.

Step Nine Using your color pencils, begin to delineate the features of the animal’s face. With a warm gray pencil, accentuate the stringy texture of the creature’s skin and also bring out the highlights. Next, using a black colored pencil, darken all the shadows and orifices. Then use a variety of other warm and cool pencils to deepen the colors of the acrylic washes.


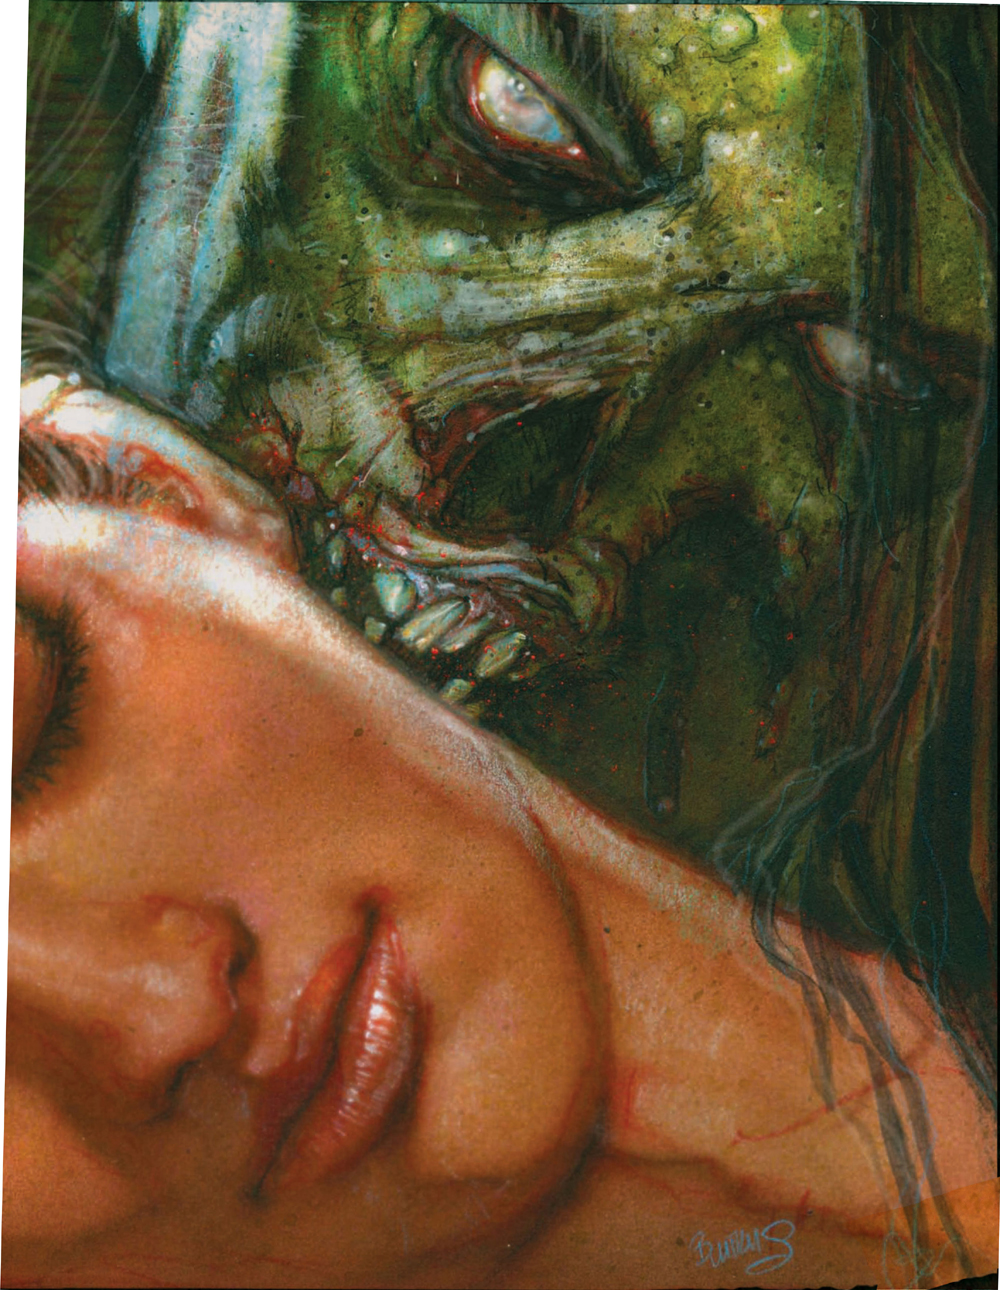
For centuries, vampires have been having all the fun. Who says that zombies can’t be sensuous and romantic too? This illustration boasts a simple diagonal composition and tight cropping. Both elements add to the intimacy of this zombie with a discerning appetite, out for a night on the town.
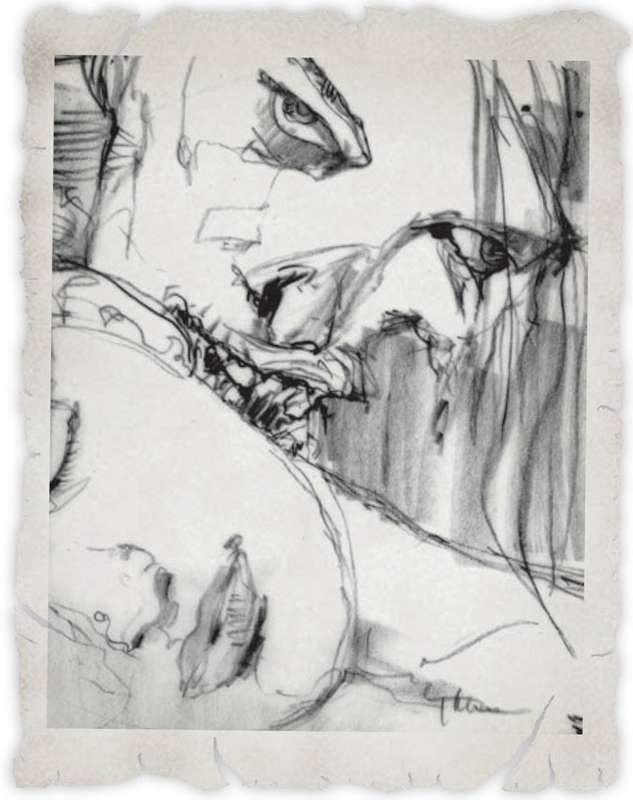
Step One Create a thumbnail drawing of the scene, indicating the main shapes and blocking in the basic values.
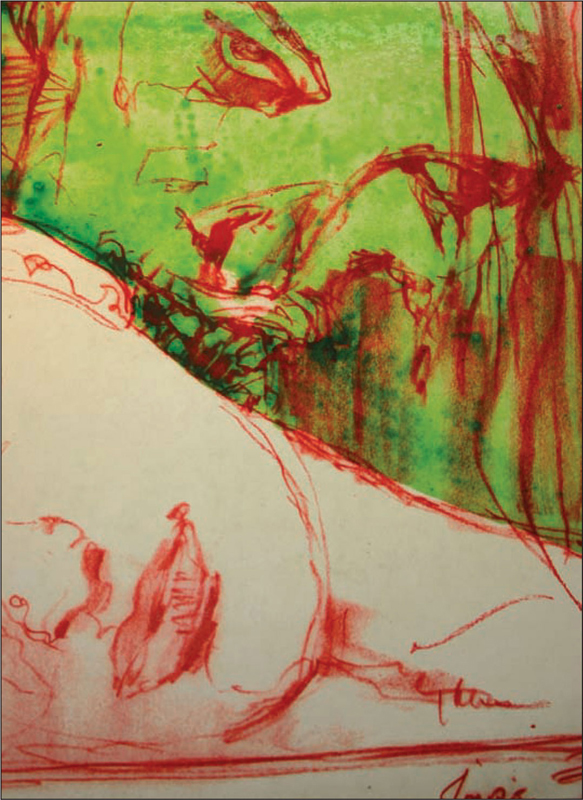
Step Two Using a red colored pencil, block in the drawing on a piece of vellum paper. (You can transfer this sketch; see “Transferring a Drawing” on page 25.) Creating a close-up of the two main characters and exposing the woman’s neck will create a great sense of vulnerability for the viewer and a certain amount of sadistic sensuality. Once the drawing is complete, make a copy of it and spray it with workable spray fixative. First, soak it in water for a couple of seconds; then mount it on a masonite board with a mixture of 50% matte medium and 50% water, using an old house painting brush. These steps offer several benefits: one, you’ll have a flat, undistorted surface; two, you’ll have a great texture to draw on; and three, you won’t have to worry about scanning a warped illustration board in the final stages. Next, mix a little bit of viridian hue permanent with a lot of water and, using a big brush, quickly cover the zombie with this wash.

Step Three Then, use an airbrush to lay in all the shadows and core shadows on the zombie’s face. If you don’t have an airbrush, stroke in the shadows using thin washes of paint instead. For the color, mix a little viridian hue permanent and Mars black. Also, softly and subtly go over the girl’s face with the green mixture to establish a cohesive piece. To create the unsightly boils on his face, add little green circles. Then, take a small paintbrush and highlight the center of each one with a bit of white gesso and water.
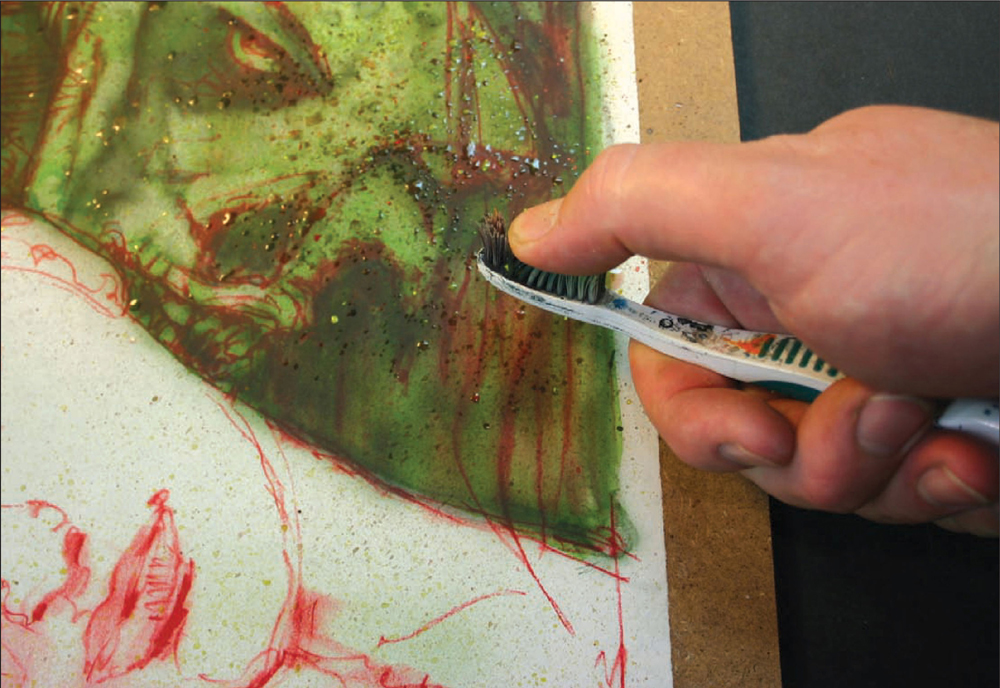
Step Four To add more texture to the zombie’s skin, take an old toothbrush and dip it into the colors on the palette. Then, flick the paint onto the creature. Note: You may have noticed from the other illustrations in the book that the old toothbrush is a reliable tool of mine.

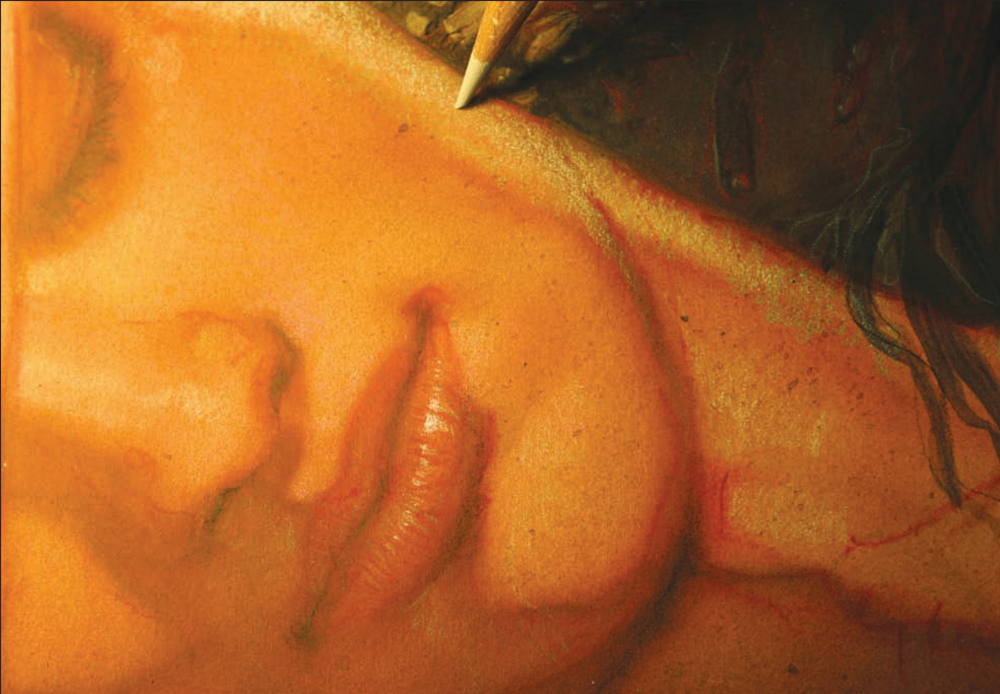
Step Five For the girl’s skin tone, use a mixture of cadmium red deep hue and portrait pink. The colors of the zombie should complement the color of the girl: He should be a ghoulish green and she should be a warm, glowing red.

Step Six Airbrush the rest of the girl’s face and neck with a little Turner’s yellow and iridescent antique brown. For the core shadows, mix in a tiny bit of Hooker’s green. If you don’t have an airbrush, build up thin layers of paint, creating soft blends to suggest the curvature of her forms.

Step Seven Now, begin to bring out some of the hot spots on the zombie’s face to explain the light source. Use a white colored pencil for this, making sure to design your strokes as you shade. To create a milky texture for his eyes, mix a little portrait pink and titanium white.
Step Eight Next, return to the girl. We want to portray the warm, peaceful life that pulsates inside her, thus creating a contrast with our dead zombie. Do this by imagining that her light source comes from a nearby crackling fireplace. To achieve this glow, fill the airbrush with half cadmium yellow and half water. Then, spray a light mist over her face and neck. If you don’t have an airbrush, apply a thin layer of the wash instead. Next, take a warm yellow colored pencil and highlight certain areas of her face and neck, at the same time adding some texture over the smooth layers of paint.

Step Nine We are now done with the painting aspect. To enhance the painting with a few digital adjustments, follow the remaining steps. Begin by scanning it into Photoshop®. For this piece, we will be working directly on a Wacom Tablet (a graphic or digital pen).

Step Ten By using Photoshop® on the very last stage of the illustration, you can achieve a wonderful, eye-popping finish in just a matter of minutes. Select the burnish tool and start picking out hot spots on various areas of the highlights.
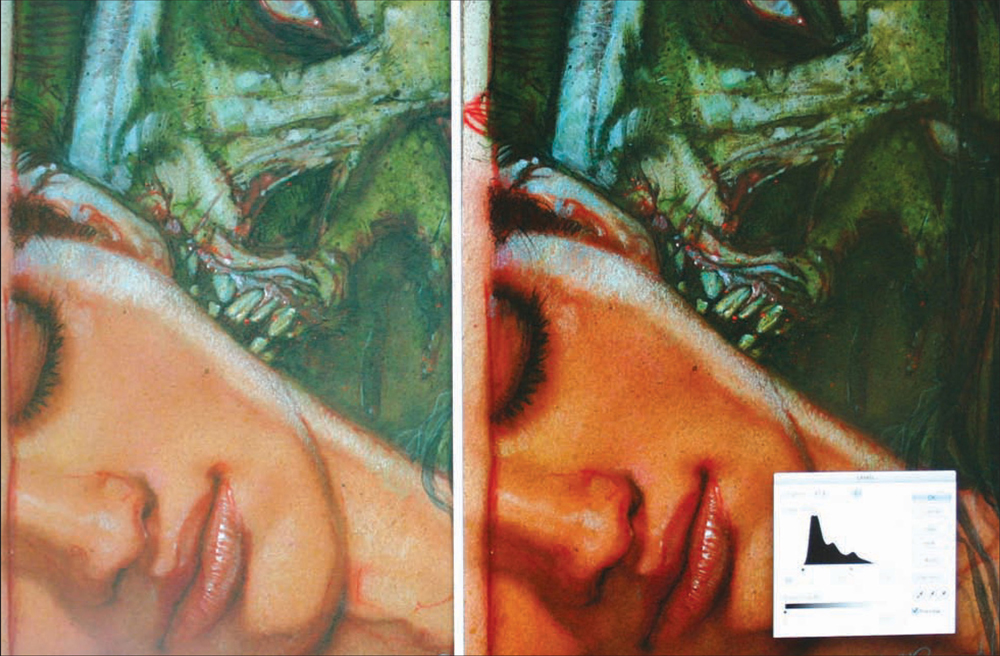
Step Eleven Here we see a split-screen view. The image on the right can be achieved by using the levels tool in Photoshop® to saturate the values. Using levels can make certain areas—or the whole picture—darker or lighter. (See page 101.)

Step Twelve Next, select the paintbrush tool. Set it at a large diameter of about 45 pixels and at a minimum hardness. Bring some warm yellow lighting onto the zombie’s face. Choose a 3% yellow from the color swatch and, using the paintbrush, lightly go over his face until you’re satisfied with the effect. Then, select a turquoise blue. Using the same brush tool (adjusting the diameter of the circle accordingly), go over the side of the zombie’s face and the rim lighting on the girl, with a saturation of about 2 or 3%. Next, select an orange color for the rest of the girl’s skin tone. Then, lightly dust her face and neck with a saturation of about 5%. This will emphasize the complementary colors of the image.

Step Thirteen When using the computer, be conscious of avoiding a slick “computer generated” look. One way to do this is by adding interesting textures. Select the smudge tool and decrease it to the size 3 pixels and keep the hardness at 100%. Then, go over the zombie’s cheekbones, nose, and eyebrows for a more traditional and illustrative effect. Zombie eyes—or the lack of them—are integral to a walking-dead character. In this case, use the blur tool and go over the whites of the zombie’s eyes to create a murky look. Then, select the smudge tool and, with a small diameter, add strange, alien-looking highlights.
Step Fourteen For the final step, we want to tie in the warm colors of the girl’s face with the cool colors of the zombie. Select the paintbrush tool and set it to about 25 pixels. Then, choose the turquoise blue again and lightly brush the light areas of her face and neck. If you want the hungry zombie to be the center of attention—like it is in this illustration—use the levels tool to bring down the value of your sleeping beauty.