
Chapter 17: Scripting the UI, Sounds, and Graphics
In a game, even if the player sees the game through the camera, there is important information that is not visible in plain sight, such as the exact number of remaining bullets, their health, the enemies, whether there's an enemy behind them, and so on. We have already discussed how to tackle those issues with the UI, sounds, and visual effects (VFX), but as we start to move on with scripting in our game, those elements also need to adapt to the game. The idea of this chapter is to make our UI, sounds, and VFX react to the game situation through scripting, reflecting what is happening in the world.
In this chapter, we will examine the following feedback scripting concepts:
- Scripting the UI
- Scripting feedback
By the end of this chapter, you will be able to make the UI react to the game situation, showing relevant information in form of text and bars, and also be able to make the game react to interactions with the UI, such as with buttons. Also, you will be able to make the game inform the user of this information through other mediums, such as sound and particle graphics, which can be as effective as the UI, but more appealing.
Scripting the UI
We previously created a UI layout with elements such as bars, text, and buttons, but so far, they are static. We need to make them adapt to the game's actual state. In this chapter, we are going to discuss the following UI scripting concepts:
- Showing information in the UI
- Programming the Pause menu
We will start by seeing how to display information on our UI using scripts that modify the text and images that are displayed with Canvas elements. After that, we will create the Pause functionality, which will be used throughout the UI.
Showing information in the UI
As discussed earlier, we will use the UI to display information to the user to allow them to make informed decisions, so let's start by seeing how we can make the player's health bar react to the amount of life they have left in the Life script we created earlier:
- Add a new script called Life Bar to the HealthBar Canvas child object, which is the UI Image component we created earlier to represent the life bar:

Figure 17.1 – The Life Bar component in the player's HealthBar Canvas
- In the Life Bar, script adds a Life type field. This way, our script will ask the editor which Life component we will be monitoring. Save the script:
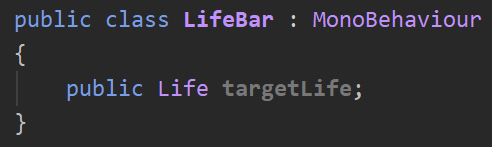
Figure 17.2 – Editor-configurable reference to a Life component
- In the Editor, drag the Player GameObject from the Hierarchy window to the targetlife property to make the life bar reference the player's life, and remember to have the HealthBar object selected before dragging Player.
This way, we are telling our LifeBar script which Life component to check to see how much life the player has remaining. Something interesting here is that the enemies have the same Life component, so we can easily use this component to create life bars for every other object that has lives in our game:

Figure 17.3 – DraggingPlayer to reference its life component
- Add the using UnityEngine.UI; line right after the using statements in the first few lines of the script. This will tell C# that we will be interacting with the UI scripts:
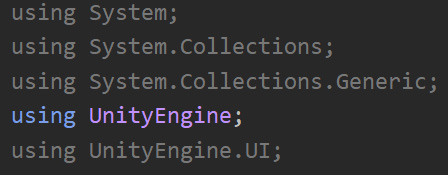
Figure 17.4 – All the using statements in our script. We are not going to use them all but let's keep them for now
- Create a private field (without the public keyword) of the Image type. We will save the reference to the component here in a moment:
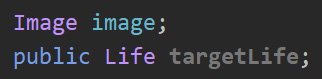
Figure 17.5 – Private reference to an image
- Using GetComponent in Awake, access the reference to the Image component in our GameObject (HealthBar) and save it in the image field. As usual, the idea is to get this reference just once and save it for later use in the Update function. Of course, this will always work when you put this component in an object with an Image component. If not, the other option would be to create a public field of the Image type and drag the image component into it:

Figure 17.6 – Saving the reference to the Image component in this object
- Create an Update event function in the LifeBar script. We will use this to constantly update the life bar according to the player's life.
- In the Update event, divide the amount of life by 100 to have our current life percentage expressed in the 0 to 1 range (assuming our maximum life is 100), and set the result in the fillAmount field of the Image component as in the following screenshot. Remember that fillAmount expects a value between 0 and 1, with 0 signalling that the bar is empty and 1 that the bar is its full capacity:

Figure 17.7 – Updating the fill amount of the LifeBar script's Image component according to the Life component
Important note:
Remember that putting 100 within the code is considered hardcoding (it is also known as a magic number), meaning later changes on that value would require us to look through the code for that value, which is a complicated task in big projects. That's why it is considered bad practice. It would be better to have a Maximum Life field in the Life component or at least have a constant with this value.
- Save the script and in the Editor, select the player and play the game. During Play mode, press Esc to regain access to the mouse and change the player's health in the Inspector window to see how the life bar updates accordingly. You can also test this by making the player receive damage somehow, such as by making enemies spawn bullets (more on enemies later):

Figure 17.8 – Full LifeBar script
Important note:
In the previous chapter, we explored the concept of events to detect changes in the state of other objects. The life bar is another example of using an event as we can change the fill amount of the image when the life actually changes. I challenge you to try to create an event when the life changes and implement this script using the one we looked at in the previous chapter.
You may be thinking that this UI behavior could be directly coded within the Life component, and that's completely possible, but the idea here is to create simple scripts with little pressure to keep our code separated. Each script should have just one reason to be modified, and mixing UI behavior and gameplay behavior in a single script would give the script two responsibilities, which results in two possible reasons to change our script. With this approach, we can also set the player's base life bar at the bottom by just adding the same script to its life bar but dragging the Base Damage object, which we created in the previous chapter, as the target life this time.
Important note:
The single object responsibility principle we just mentioned is one of the five object-oriented programming principles known as SOLID. If you don't know what SOLID is, I strongly recommend you look it up to improve your programming best practices.
Now that we have sorted out the player's life bar, let's make the Bullets label update according to the player's remaining bullets. Something to consider here is that our current Player Shooting script has unlimited bullets, so let's change that by following these steps:
- Add a public int type field to the Player Shooting script called bulletsAmount.
- In the if statement that checks the pressure of the left mouse button, add a condition to check whether the amount of bullets is greater than 0.
- Inside the if statement, reduce the number of bullets by 1:

Figure 17.9 – Limiting the number of bullets to shoot
Now that we have a field indicating the number of remaining bullets, we can create a script to display that number in the UI by doing the following:
- Add a PlayerBulletsUI script to the bullet's Text GameObject. In my case, I called it Bullets Label.
- Add the using UnityEngine.UI statement and add a private field of the Text type, saving it in the reference to our own Text component in Awake:

Figure 17.10 – Caching the reference to our own Text component
- Create a public field of the PlayerShooting type called targetShooting and drag Player to this property in the Editor. As was the case for the life bar component, the idea is that our UI script will access the script that has the remaining bullets to update the text, bridging the two scripts (Text and PlayerShooting) to keep their responsibilities separated.
- Create an Update statement and inside it, set the text field of the text reference (I know, confusing) with a concatenation of "Bullets: " and the bulletsAmount field of the targetShooting reference. This way, we will replace the text of the label according to the current amount of bullets:

Figure 17.11 – Updating the bullet's text label
Important note:
Remember that concatenating strings allocates memory, so again, I urge you to only do this when necessary using events.
If you look at the two scripts, you will find a pattern. You can access the UI and Gameplay components and update the UI component accordingly, and most UI scripts will behave in the same way. Keeping this in mind, I challenge you to create the necessary scripts to make the Score, Enemies, and Waves counters work. Remember to add using UnityEngine.UI to use the Text component. After finishing this, you can compare your solution with the one in the following screenshot, starting with ScoreUI:
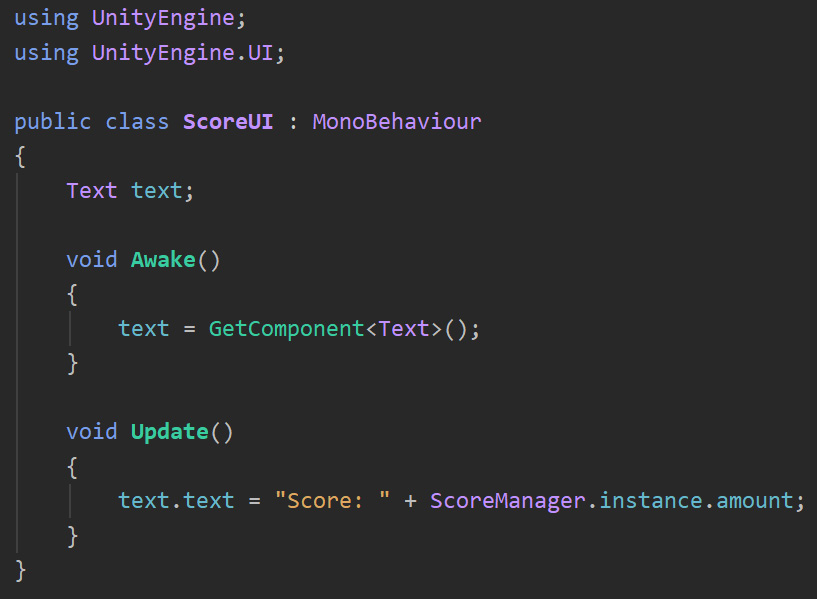
Figure 17.12 – The ScoreUI script
Also, we need the WavesUI component:
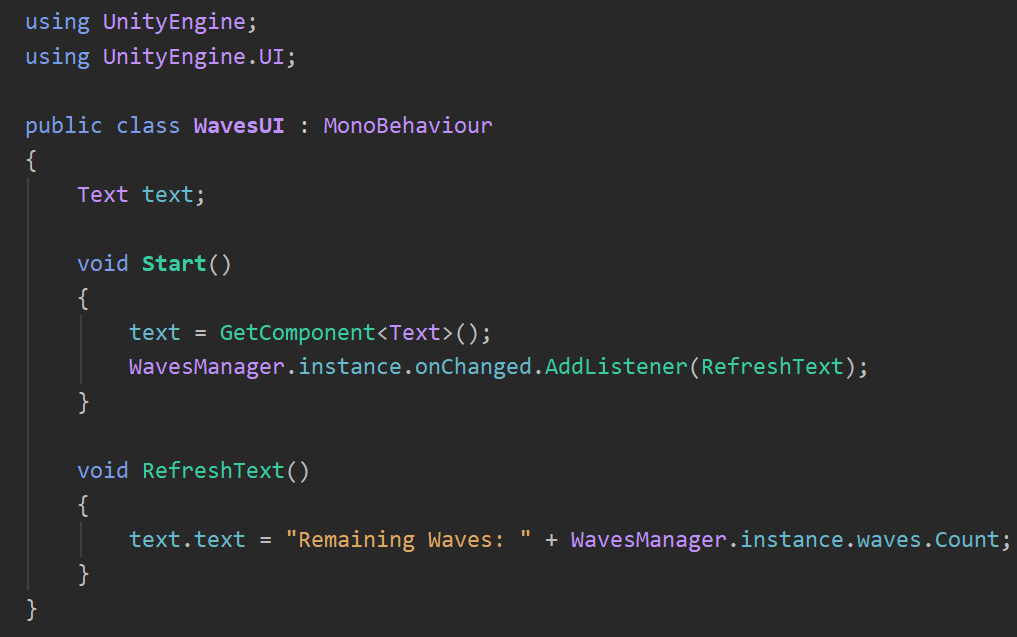
Figure 17.13 – The WavesUI script

Figure 17.14 – The EnemiesUI script
As you can see, we have used the events already coded in the managers to change the UI only when necessary. Now that we have coded the UI labels and bars, let's code the Pause menu.
Programming the Pause menu
Recall how we created a Pause menu in a previous chapter, but it is currently disabled, so let's make it work. First, we need to code Pause, which can be quite complicated. So again, we will use a simple approach for pausing most behaviors, which is stopping the time! Remember that most of our movement scripts use time functionality, such as Delta Time, as a way to calculate the amount of movement to apply, and there's a way to simulate time going slower or faster, which is by setting timeScale.
This field will affect Unity's time system's speed, and we can set it to 0 to simulate that time has stopped, which will pause animations, stop particles, and reduce Delta Time to 0, making our movements stop. So, let's do it:
- Create a script called Pause and add it to a new object in the scene, also called Pause.
- In Update, detect when the Esc key is pressed, and in that scenario, set Time.timeScale to 0:

Figure 17.15 – Stopping time to simulate a pause
- Save and test this.
You will notice that almost everything will stop, but you can see how the shoot functionality still works. That's because the Player Shooting script is not time-dependent. One solution here could be to simply check whether Time.timeScale is greater than 0 to prevent this:

Figure 17.16 – Checking pause in the PSlayer Shooting script
Important note:
As usual, we have pursued the simplest way here, but there is a better approach. I challenge you to try to create PauseManager with a Boolean indicating whether the game is paused or not, changing timeScale in the process.
Now that we have a simple but effective way to pause the game, let's make the Pause menu visible to unpause the game by doing the following:
- Add a field of the GameObject type called pauseMenu in the Pause script. The idea is to drag the Pause menu here so that we have a reference to enable and disable it.
- In Awake, add pauseMenu.SetActive(false); to disable the Pause menu at the beginning of the game. Even if we disabled the Pause menu in the editor, we add this just in case we re-enable it by mistake. It must always start disabled.
- Using the same function but passing true as the first parameter, enable the Pause menu in the Esc key pressure check:

Figure 17.17 – Enabling the Pause menu when pressing the Esc key
Now, we need to make the Pause menu buttons work. If you recall, in the previous chapter, we explored the concept of events, implementing them with UnityEvents and the Button script. Our Pause menu buttons use the same class to implement the OnClick event, which is an event that informs us that a specific button has been pressed. Let's resume the game when pressing those buttons by doing the following:
- Create a field of the Button type in our Pause script called resumeButton, and drag resumeButton to it; this way, our Pause script has a reference to the button.
- In Awake, add a listener function called OnResumePressed to the onClick event of resumeButton.
- Make the OnResumePressed function set timeScale to 1 and disable the Pause menu, as we did in Awake:
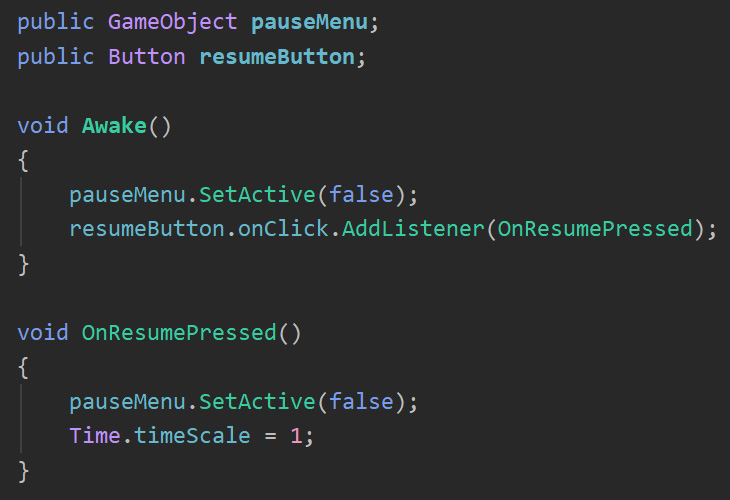
Figure 17.18 – Unpausing the game
If you save and test this, you will notice that you cannot click the Resume button because we disabled the cursor at the beginning of the game, so make sure you re-enable it while in Pause and disable it when you resume:

Figure 17.19 – Showing and hiding the cursor while in Pause
Now that you know how to code buttons, I challenge you to code the Exit button's behavior. Again, remember to add using UnityEngine.UI. Also, you will need to call Application.Quit(); to exit the game, but take into account that this will do nothing in the Editor; we don't want to close the Editor while creating the game. This function only works when you build the game. So for now, just call it and if you want to print a message to be sure that the button is working properly, a solution is provided in the following screenshot:

Figure 17.20 – The Quit button script
This solution proposes that you add this script directly to the Quit button GameObject itself so that the script listens to the onClick event on its Button sibling component, and in that case, executes the Quit function. You could also add this behavior to the Pause script, and while that will work, remember that if a script can be split into two because it does two unrelated tasks, it is always best to split it so that separate behavior is unrelated. Here, the Pause behavior is not related to the Quit behaviour.
Now that we have our Pause system set up using the UI and buttons, let's continue looking at other visual and audible ways to make our player aware of what has happened.
Scripting feedback
We just used the UI to pass on data to the user so that they know what is happening, but sometimes that's not enough. We can reinforce game events using other types of feedback, such as sound and explosions, which we integrated in previous chapters.
In this section, we will explore the following feedback concepts:
- Scripting visual feedback
- Scripting audio feedback
- Scripting animations
We will start seeing how to make our gameplay have more feedback, with different visuals used in the right moments, such as audio and particle systems. Then, we are going to make the animations of our characters match these moments, for example, we will create the illusion that they are actually walking.
Scripting visual feedback
Visual feedback is the concept of using different VFX, such as particles and a VFX Graph, to reinforce what is happening. For example, say right now we are shooting and we know that this is happening because we can see the bullet. It doesn't exactly feel like shooting as a proper shooting simulation needs our gun to show the muzzle flash effect. Another example would be the enemy dying—it just despawns! That doesn't feel as satisfying as it should be. We can instead add a little explosion (considering they are robots).
Let's start making our enemies spawn an explosion when they die by doing the following:
- Create an explosion effect or download one from the Asset Store. It shouldn't loop and it needs to be destroyed automatically when the explosion is over (ensure Looping is unchecked and Stop Action is set to destroy in the main module).
- Some explosions in the Asset Store might use non-URP-compatible shaders. You can fix them by setting the Edit | Render Pipeline | Universal Render Pipeline | Upgrade Selected Materials option to UniversalRP Materials while keeping the materials selected.
- Manually upgrade the materials that didn't upgrade automatically.
- Add a script to the Enemy prefab called ExplosionOnDeath. This will be responsible for spawning the particles Prefab when the enemy dies.
- Add a field of the GameObject type called particlePrefab and drag the explosion Prefab to it.
Important note:
You may be expecting to add the explosion spawning to the Life component. In that case, you are assuming that anything to do with life will spawn a particle when dying, but consider scenarios where characters die with a falling animation instead, or maybe an object that just despawns with no effect whatsoever. If a certain behavior is not used in most scenarios, it is better to code it in a separate optional script to allow us to mix and match different components and get the exact behavior we want.
- Make the script access the Life component and subscribe to its onDeath event.
- In the listener function, spawn the particle system in the same location:

Figure 17.21 – The explosion spawner script
As you can see, we are just using the same concepts we learned about in previous chapters, but combining them in new ways. This is what programming is all about. Let's continue with the muzzle effect, which will also be a particle system, but we will take another approach this time.
- Download a weapon model from the Asset Store and instantiate it so that it is the parent of the hand of the player. Remember that our character is rigged and has a hand bone, so you should put the weapon there:

Figure 17.22 – Parenting a weapon in the hand bone
- Create or get a muzzle particle system. In this case, my muzzle particle system was created as a short particle system that has a burst of particles and then automatically stops. Try to get one with that behavior because there are others out there that will loop instead, and the script to handle that scenario would be different.
- Create an instance of the particle system Prefab in the Editor and parent it inside the weapon, locating it in front of the weapon, aligned with the barrel of the gun. Make sure the Play On Awake property of the main module of the particle system is unchecked; we don't want the muzzle to fire until we press the fire key:

Figure 17.23 – The muzzle parented to the weapon
- Create a field of the ParticleSystem type called muzzleEffect in PlayerShooting and drag the muzzle effect that is parented in the gun to it. Now, we have a reference to the ParticleSystem component of the muzzle to manage it.
- Inside the if statement that checks whether we are shooting, execute muzzleEffect.Play(); to play the particle system. It will automatically stop and is short enough to finish between key pressures:

Figure 17.24 – The muzzle parented to the weapon
Important note:
Here, we again have the same question: Will all the weapons have a muzzle when shooting? In this scenario, I would say yes due to the scope of our project, so I will keep the code as it is. However, in the future, you can create an onShoot event if you need other components to know whether this script is shooting. This way, you can extend the shooting behavior. Consider using events as a way of enabling plugins in your script.
Now that we have some VFX in place, let's add sound effects.
Scripting audio feedback
VFX added a good depth of immersion to what is happening in the game, but we can improve this even further with sound. Let's start adding sound to the explosion effect by doing the following:
- Download an explosion sound effect.
- Select the explosion prefab and add Audio Source to it.
- Set the downloaded explosion's audio clip as the AudioClip property of the audio source.
- Make sure Play On Awake is checked and Loop is unchecked under Audio Source.
- Set the Spatial Blend slider to 3D and test the sound, configuring the 3D Sound settings as needed:

Figure 17.25 – Adding sound to the explosion
As you can see here, we didn't need to use any script. As the sound is added to the Prefab, it will be played automatically in the very moment the prefab is instantiated. Now, let's integrate the shooting sound by doing the following:
- Download a shooting sound and add it through an audio source to the weapon of the player, this time unchecking the Play On Awake checkbox and again setting Spatial Blend to 3D.
- In the PlayerShooting script, create a field of the AudioSource type called shootSound and drag the weapon to this property to connect the script with the AudioSource variable in the weapon.
- In the if statement that checks whether we can shoot, add the shootSound.Play(); line to execute the sound when shooting, using the same logic applied to the particle system:

Figure 17.26 – Adding sound when shooting
Another approach to this would be the same as the one we did with the explosion; just add the shooting sound to the bullet, but if the bullet collides with a wall, soon enough the sound will be cut off. Or, if in the future we want an automatic weapon sound, it will need to be implemented as a single looping sound that starts when we press the relevant key and stops when we release it. This way, we prevent too many sound instances from overlapping when we shoot too many bullets. Take into account those kinds of scenarios when choosing the approach to script your feedback.
Now that we have finished with our audio feedback, let's finish integrating our animation assets, which we prepared in Chapter 12, Creating Animations with Animator, Cinemachine, and Timeline.
Scripting animations
In Chapter 12, Creating Animations with Animator, Cinemachine, and Timeline, we created an animator controller as a way to integrate several animations, and we also added parameters to it to control when the transitions between animations should execute. Now, it is time to do some scripting to make these parameters be affected by the actual behavior of the player and match the player's current state by doing the following:
- In the PlayerShooting script, add a reference to Animator using GetComponent in Awake and cache it in a field:
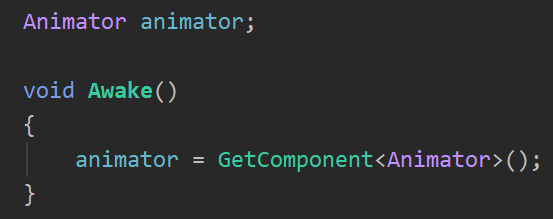
Figure 17.27 – Caching the Animator reference
- Call the animator.SetBool("Shooting", true); function in the if statement that checks whether we are shooting, and add the same function but pass false as a second argument in the else clause of the if statement. This function will modify the "Shooting" parameter of the animator controller:

Figure 17.28 – Setting the Shooting Boolean depending on whether we are shooting
If you test this, you may notice an error—the animation is not playing. If you check the script, you will notice that it will be true just for one frame as we are using GetKeyDown, so the Shooting Boolean will immediately be set to false in the next frame. One solution of the several that we can implement here would be to make our shooting script repeat the shooting action while pressing the key instead of releasing and clicking again to shoot another bullet.
- Check the following screenshot for the solution and try to understand the logic:
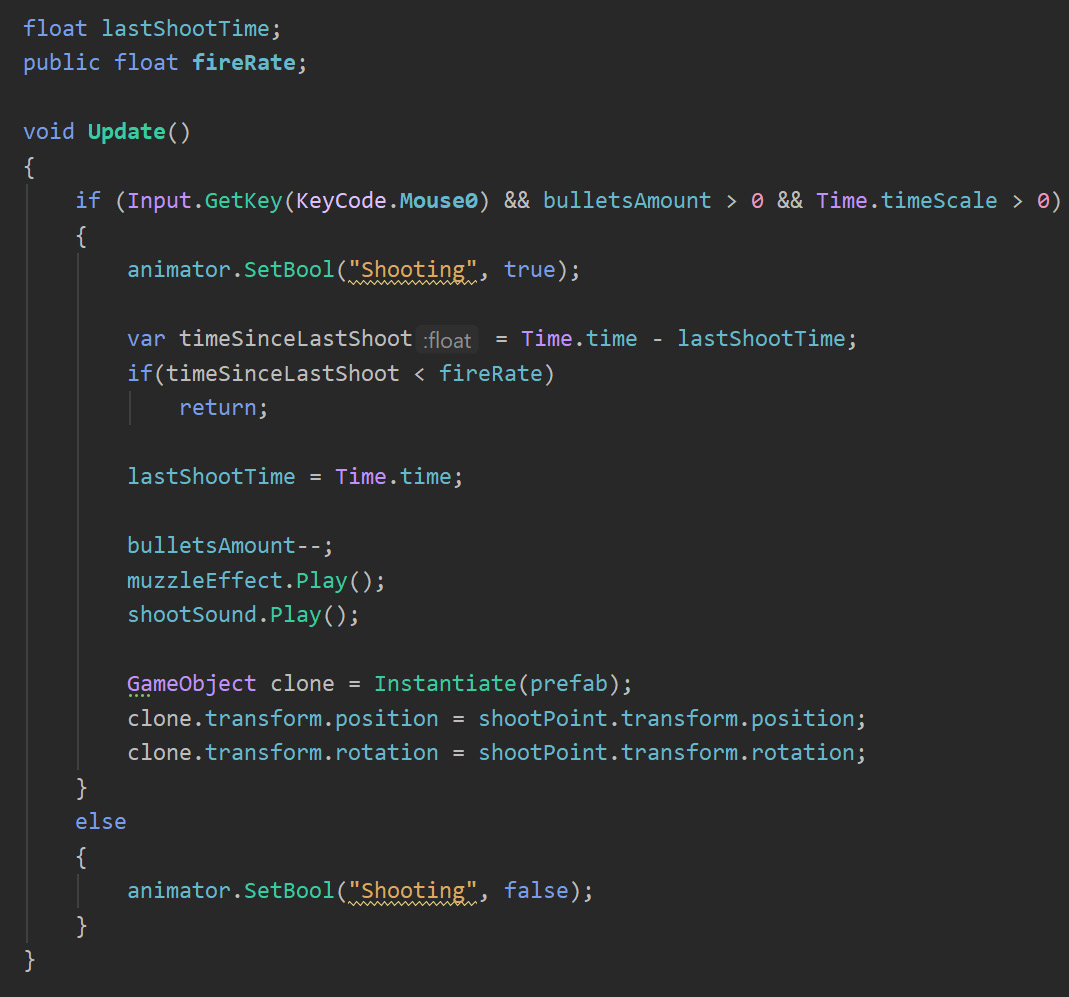
Figure 17.29 – Repetitive shooting script
As you can see, our script now uses GetKey to keep shooting while keeping the shoot button pressed, and to prevent shooting in every frame, we compare the current time against the last shoot time to check how much time has passed since the last shot. We created the fireRate field to control the time between shots.
For the animator controller's Velocity parameter, we can detect the magnitude of the velocity vector of Rigidbody, in meters per second, and set that as the current value. This can be perfectly separated from the PlayerMovement script, so we can reuse this if necessary in other scenarios. So, we need a script such as the following, which just connects the Rigidbody component's velocity with the animator Velocity parameter:

Figure 17.30 – Repetitive shooting script
You may need to increase the 0.01 transitions threshold used so far a bit in the conditions of the transitions of the animator controller because Rigidbody keeps moving after releasing the keys. Using 1 worked perfectly for me. Another option would be to increase the drag and the velocity of the player to make the character stop faster. Pick whatever method works best for you.
As you can see, we can gather data about the actual movement and shooting action of our player to inform the animator controller of its state so that it can react accordingly.
Summary
Feedback is an important topic in video games. It gives valuable information to the player, such as the location of enemies if there is a 3D sound setup, distant shooting depicted by muzzle flashes in the background, life bars indicating that the player is about to die, animations that react according to the player's movements, and so on. In this chapter, we saw different forms of feedback, sounds, VFX, animations, and the UI, which we already created in Part 2 of this book. Here, we learned how to use scripting to connect the UI to the game.
Now, you can script the UI, particle systems, and sounds to react to the game status, including changing the score text or the life bars of the UI or playing particle and sound effects when the character shoots. This improves the player's immersion experience in your game.
In the next chapter, we are going to discuss how to create a challenging AI for our enemies.