
Predix supports a very good library of web components, based on Polymer, to work with the Predix services. This collection is accessible online at https://www.predix-ui.com/.
We are going to use this platform to deliver our first application. From Predix Design, which can be found at https://www.predix-ui.com/, we can get the code of the Predix sample application:

Download the Predix sample application with the following command:
git clone https://github.com/predixdesignsystem/px-sample-app
Open package.json, which is located on the root directory, and ensure that the Node.js version is as follows:
"engines": {
    "node": ">= 7.5.0"
 },
The application is based on Polymer, Node.js, and Bower. First of all, we need to download the Bower and the node packages:
cd px-sample-app
npm install
bower install
Then, we start the server with the following command:
npm start
Now, you can connect to http://localhost:9000 to see the following output:

We are now ready to connect to the Predix time-series that we configured in the Configuring the time-series database section. We need to open the server/localConfig.json file from https://github.com/predixdesignsystem/px-sample-app and fill it with the right information:
{
  "development": {
    "note": "IIOT Book example.",
    "uaaURL": "https://<my UAA UUID>.predix-uaa.run.aws-usw02-pr.ice.predix.io",
    "base64ClientCredential": "<client:password base64>",
    "loginBase64ClientCredential": "<client:password base64>",
    "appURL": "http://localhost:5000",
    "timeseriesURL": "https://time-series-store-predix.run.aws-usw02-pr.ice.predix.io",
    "timeseriesZoneId": "<my TS zoneId UUID>",
    "assetURL": "",
    "assetZoneId": "",
    "windServiceURL": "",
    "websocketServerURL": "/livestream",
    "rmdDatasourceURL": "",
    "rmdDocsURL": "https://raw.githubusercontent.com/PredixDev/predix-rmd-ref-app/master/README.md"
  }
}
As before, we need to provide the UAA's URL and the zone ID of the TSDB. We then have to provide the base64 credential, encoded on both base64ClientCredential and loginBase64ClientCredential. Why do we have to do this twice? Normally, we should define two clients: one for the backend and one for the login, but to simplify our example we used the same user.
We can use an online service to encode the base64 string, or we can use the following command line:
echo -n myclient:mypassword | base64
We can now show the time-series. On src/px-sample-dashboard.es6.js, add the following code:
…,
     tags: {
       type: Array,
        value: function() {
          return [{val: "Compression", key: "IIOT-BOOK:CompressionRatio", unit: "Percentage"}];
        }
     }
Then, copy the component prepared for this book from https://github.com/PacktPublishing/Hands-On-Industrial-Internet-of-Things to the src folder.
On src/px-sample-dashboard.html, add the following lines:
<link rel="import" href="./my-ts-chart-js.html" />
…
<my-timeseries-chart tags="[[tags]]" selected-tag="[[tags[0]]]"></my-timeseries-chart>
Rebuild the application as follows:
gulp
npm start
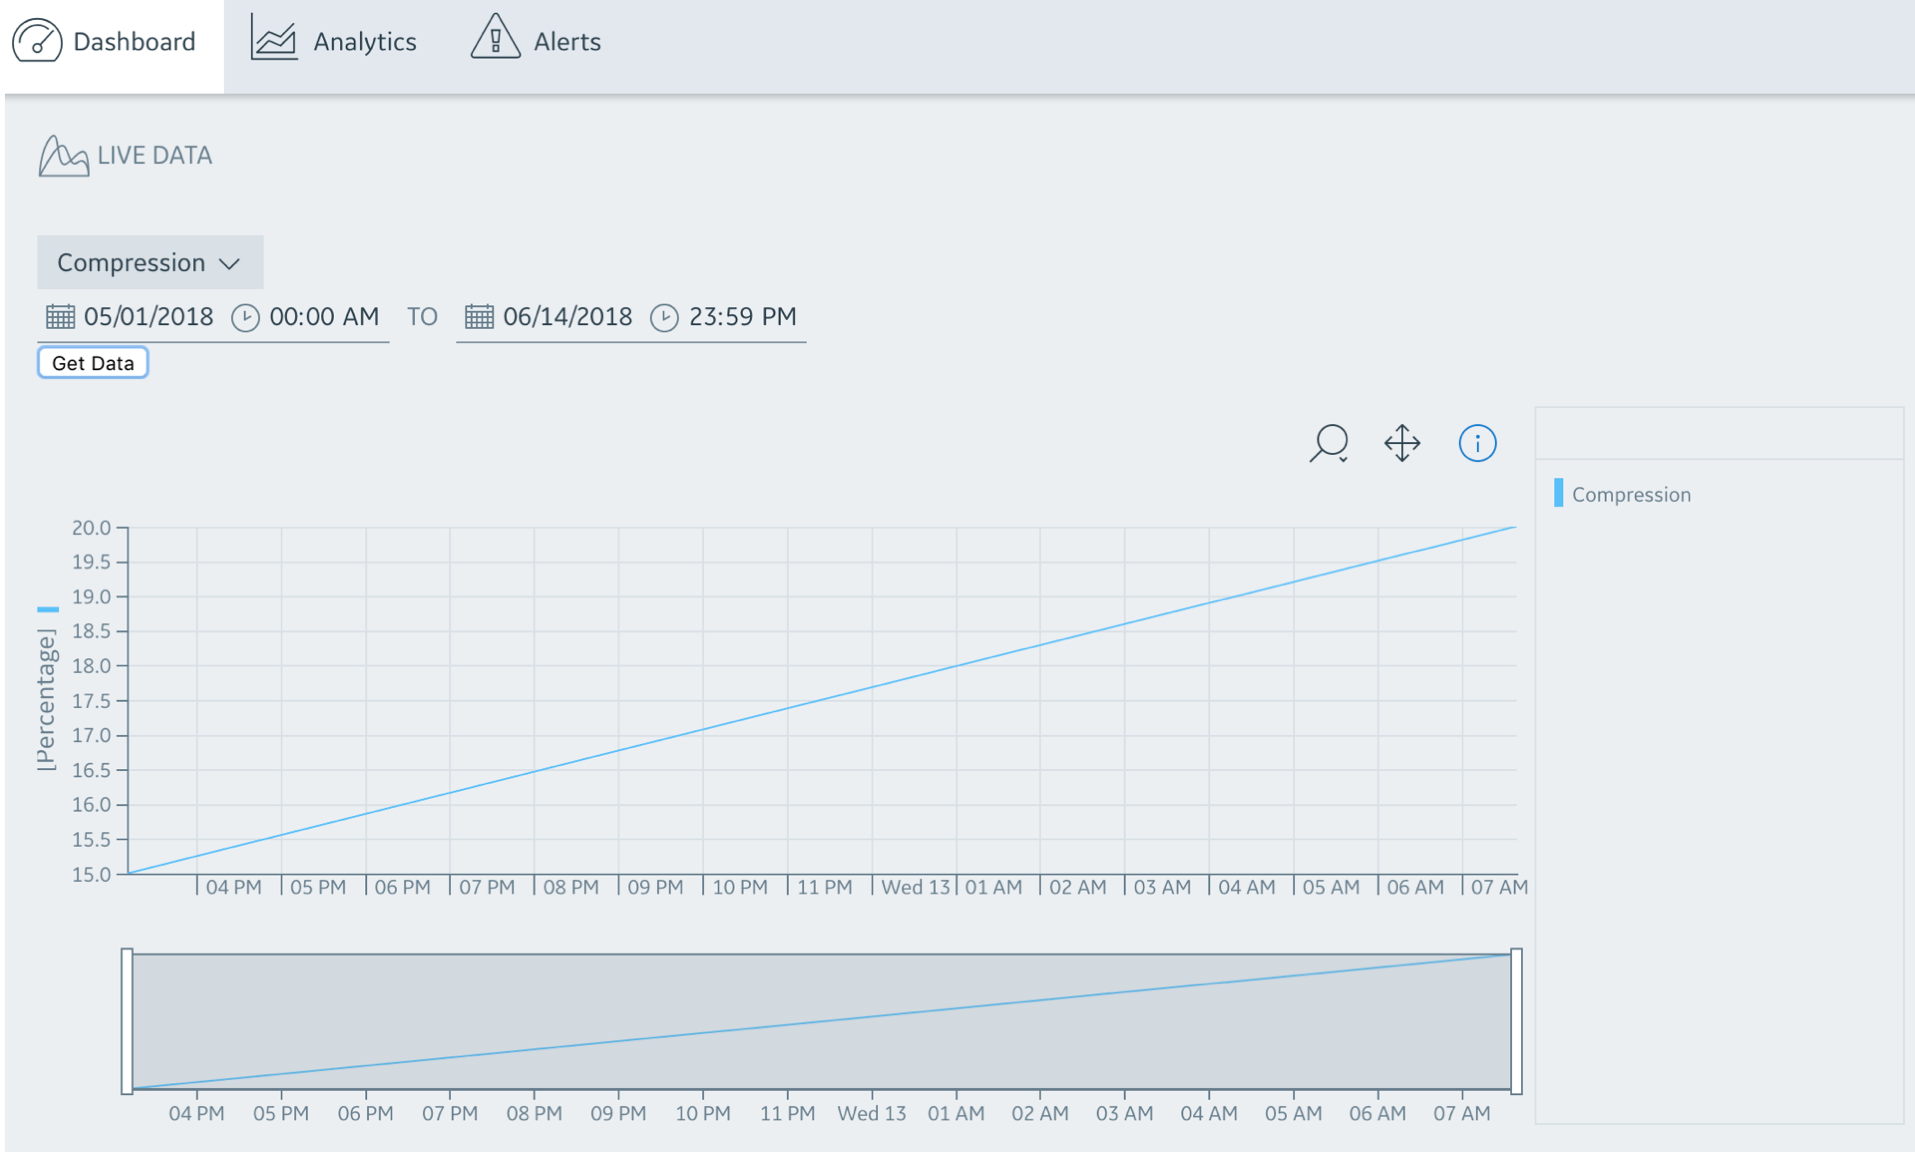
We now have to select the Compression tag from the dashboard and set the last month of the data ingested. Click on Get Data to retrieve the data, as shown in the following screenshot:
We can now deploy the application on the cloud. On the Predix Cloud, the application uses the VCAPS environment.
On the manifest.yml file, configure the following:
---
applications:
  - name: <my name>-px-sample-app
    buildpack: nodejs_buildpack
    command: node --inspect server/app.js
    path: dist
    memory: 128M
services:
 - <my UAA Name>
 - <my TS Name>
 # - your-name-asset
env:
    #node_env: development
    node_env: cloud
    uaa_service_label : predix-uaa
    clientId: gv-client
    base64ClientCredential: <client:password base64>
    loginBase64ClientCredential : <client:password base64>
    websocketServerURL: /livestream
    rmdDocsURL: "https://raw.githubusercontent.com/ "
We can now deploy the following:
gulp dist
px push
We can check the status of the application using:
px log <my name>-px-sample-app –recent
To see the VCAPS, use the following:
px info <my name>-px-sample-app
You can then access the application that has been deployed on the cloud as follows:
https:// <my name>-px-sample-app.run.aws-usw02-pr.ice.predix.io/