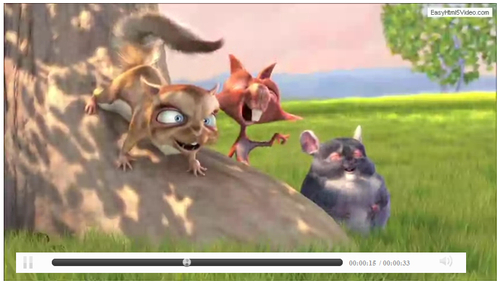
So far, we've focused on providing some basic controls, and have added a set of rudimentary styles—as you've already seen from the screenshot, it doesn't look pretty, but it serves a functional purpose. We will develop this into a basic theme, but before doing this, we need to finish adding the jQuery functionality that will make the player work—this is the subject of this next task.
We need to retrieve a copy of the videoplayer.js file that we created earlier, so go ahead and load this into your normal text editor. Other than this, there isn't anything else required—we will add the necessary code as part of the task. I will assume that you're still using the files from previous demos—if this is not the case then please alter this accordingly.
- The first change you need to make is in the
<header>section ofvideoplayer.html—go ahead and add in this:<script type="text/javascript" src=" http://code.jquery.com/jquery-1.7.2.min.js"></script> <script type="text/javascript" src="https://ajax.googleapis.com/ajax/libs/jqueryui/1.8.18/ jquery-ui.min.js"></script>
- In our plugin file,
videoplayer.js, we need to add in a number of variables that are required for controlling various different elements of the player, so go and add in the following code:(function($) { $.fn.oPlayer = function(options) { return this.each(function() { // variables var $oMain = $(this); var $oVideo = $('video', $oMain); var $oPlay = $('.play', $oMain); var $oPause = $('.pause', $oMain); var $oTimeSlider = $('.time_slider', $oMain); var $oTimer = $('.timer', $oMain); var $oVolSlider = $('.volume_slider', $oMain); var $oMute = $('.mute', $oMain); var $oUnmute = $('.unmute', $oMain); var $oOverlay = $('.video-overlay', $oMain); var bTimeSlide = false; var iVolume = 1; var $oDuration = $('.duration', $oMain); }); }; })(jQuery); - We now need to add in a function that will prepare the volume control, ready to display it on screen, so add in the following code snippet immediately below the last variable from the previous step:
var prepareTimeSlider = function() { if (! $oVideo[0].readyState) { setTimeout(prepareTimeSlider, 1000); } else { $oTimeSlider.slider({ value: 0, step: 0.01, orientation: 'horizontal', range: 'min', max: $oVideo[0].duration, animate: true, slide: function() { bTimeSlide = true; }, stop:function(e, ui) { bTimeSlide = false; $oVideo[0].currentTime = ui.value; } }); }; }; - Now that the basics are in place, let's turn our focus to making the controls work. We'll start with the most important, which are the play and pause buttons, so go ahead and add in this code:
$oPlay.click(function () { $oVideo[0].play(); $oPlay.hide(); $oPause.css('display', 'block'), $oOverlay.fadeOut(); }); $oPause.click(function () { $oVideo[0].pause(); $oPause.hide(); $oPlay.css('display', 'block'), $oOverlay.fadeIn(); }); - The next two options will control the sound—here's the code for muting and un-muting the video:
$oMute.click(function () { $oVideo[0].muted = true; $oVolSlider.slider('value', '0'), $oMute.hide(); $oUnmute.css('display', 'block'), }); $oUnmute.click(function () { $oVideo[0].muted = false; $oVolSlider.slider('value', iVolume); $oUnmute.hide(); $oMute.css('display', 'block'), }); - Your users will expect to be able to click on the video to pause and play it at will—let's fix that by adding in a function to cover this:
$oVideo.click(function () { if($oVideo[0].paused) { $oPlay.click(); } else { $oPause.click(); } return false; }); - The basic player will now work perfectly OK, although there will be elements that won't function at all—one of these will be the right-click context menu. Let's fix that now, starting with the play option:
$oVideo.on("play", function() {
  $oPlay.click();
});
then continuing with the pause option:
$oVideo.on("pause", function() { $oPause.click(); }); - This next function will rectify another element that is not quite right—when the video finishes, we need to reset the controls back to play, so that the next person can start the video:
$oVideo.bind('ended', function() { $oVideo[0].pause(); $oPause.hide(); $oPlay.css('display', 'block'), }); - Our next function takes care of updating the time controls on the player:
$oVideo.bind('timeupdate', function() { var iNow = $oVideo[0].currentTime; $oTimer.text(rectime(iNow)); if (! bTimeSlide) $oTimeSlider.slider('value', iNow); }); - We do need to know how long the video will be, so let's add in the code that will display this on screen:
$oVideo.on("canplay", function() { $oDuration.text(rectime($oVideo[0].duration)); }); - While we now have the ability to turn the volume on or off, it will make for a better experience if we can provide finer control, so let's add that in now:
$oVolSlider.slider({ value: 1, orientation: 'vertical', range: 'min', max: 1, step: 0.02, animate: true, slide: function(e, ui) { $oVideo[0].muted = false; iVolume = ui.value; $oVideo[0].volume = ui.value; } }); - Finally, we need to initialize the Time slider, and remove the default controls that show:
prepareTimeSlider();
$oVideo.removeAttr('controls'),
Putting this all together should result in something similar to the following screenshot:

Throughout this task, we've worked stage by stage on providing the jQuery-based functionality required to operate the controls on the video; this is the functionality that would otherwise be provided by the browser's default video controls, which we will be hiding in the next task.
You will notice that I've used the Google CDN links for jQuery and jQuery UI—while this is perfectly acceptable (and in some cases preferable), you may prefer to use a custom download at least for jQuery UI, which can reduce the size of the file to a more manageable 20KB. If you want to use this alternative, you will need to build a custom download, at http://www.jqueryui.com/download, to include the Core, Widget, Mouse, and Slider elements. The code will need to be altered as well—change the Google CDN link for this (assuming you are following the structure outlined at the start of the task):
<script type="text/javascript" src="js/jquery.ui.min.js">
</script>
