
The content layer is done! Now it’s time to make it pretty. The next four chapters focus on presentation. In this one, we’ll start by covering some basics: we’ll first do a quick overview of CSS selectors, and see what’s been added to our arsenal in CSS3. Then, we’ll take a look at a few new ways of specifying colors. We’ll then dive into rounded corners, drop shadows, and text shadows—tips and tricks enabling us to style pages without having to make dozens of rounded-corner and text images to match our designs.
But first, we need to make sure older browsers recognize the new elements on our page, so that we can style them.
As we mentioned back in Chapter 1, styling the new HTML5 elements in older versions of Internet Explorer requires a snippet of JavaScript called an HTML5 shiv. If you’re using the Modernizr library detailed in Appendix A (which includes a similar piece of code), you’ll be fine.
Even with this JavaScript in place, though, you’re not quite
ready to roll. IE6 through 8 will now be aware of these new elements, but
they’ll still lack any default styles. In fact, this will be the case for
previous versions of other browsers as well; while they may allow
arbitrary elements, they’ve no way of knowing, for example, that article should be block-level and mark should be inline. Because elements render
as inline by default, it makes sense to tell these browsers which elements
should be block-level.
This can be done with the following simple CSS rule:
article, aside, figure, footer, header, hgroup, nav, section {
  display:block;
}
With this CSS and the required JavaScript in place, all browsers will start off on an even footing when it comes to styling HTML5 elements.
Selectors are at the heart of CSS. Without selectors to target
elements on the page, the only way to modify the CSS properties of an
element would be to use the element’s style attribute and declare the styles inline.
This, of course, is ugly, awkward, and unmaintainable. So we use
selectors. Originally, CSS allowed the matching of elements by type,
class, and/or id. This required adding class and id attributes to our markup to create hooks
and differentiate between elements of the same type. CSS2.1 added
pseudo-elements, pseudo-classes, and combinators. With CSS3, we can target
almost any element on the page with a wide range of selectors.
In the descriptions that follow, we’ll be including the selectors provided to us in earlier versions of CSS. They are included because, while we can now start using CSS3 selectors, all the selectors from previous versions of CSS are still supported. Even for those selectors that have been around for quite some time, it’s worth going over them here, as browser support for many of them has only just reached the point of making them usable.
Relational selectors target elements based on their relationship to another element within the markup. All of these are supported in IE7+, Firefox, Opera, and WebKit:
-
Descendant (
E F) -
You should definitely be familiar with this one. The descendant selector targets any element
Fthat is a descendant (child, grandchild, great grandchild, and so on) of an elementE. For example,ol litargetslielements that are inside ordered lists. This would includelielements in aulthat’s nested in anol—which might not be what you want. -
Child (
E > F) -
This selector matches any element
Fthat is a direct child of elementE—any further nested elements will be ignored. Continuing the above example,ol > liwould only targetlielements directly inside theol, and would omit those nested inside aul. -
Adjacent Sibling (
E + F) -
This will match any element
Fthat shares the same parent asE, and comes directly afterEin the markup. For example,li + liwill target alllielements except the firstliin a given container. -
General Sibling (
E ~ F) -
This one’s a little trickier. It will match any element
Fthat shares the same parent as anyEand comes after it in the markup. So,h1~h2will match anyh2that follows anh1, as long as they both share the same direct parent—that is, as long as theh2is not nested in any other element.Let’s look at a quick example:
<article>
  <header>
    <h1>Main title</h1>
    <h2>This subtitle is matched </h2>
  </header>
 <p> blah, blah, blah …</p>
 <h2>This is not matched by h1~h2, but is by header~h2</h2>
  <p> blah, blah, blah …</p>
</article>
The selector string
h1~h2will match the firsth2, because they’re both children, or direct descendants, of theheader. The secondh2doesn’t match, since its parent isarticle, notheader. It would, however, matchheader~h2. Similarly,h2~ponly matches the last paragraph, since the first paragraph precedes theh2with which it shares the parentarticle.
Note: There Are No Backwards Selectors
You’ll notice that there’s no “parent” or “ancestor” selector, and there’s also no “preceding sibling” selector. This can be annoying sometimes, but there’s a reason for it: if the browser had to go backwards up the DOM tree, or recurse into sets of nested elements before deciding whether or not to apply a style, rendering would be exponentially slower and more demanding in terms of processing. See http://snook.ca/archives/html_and_css/css-parent-selectors for a more in-depth explanation of this issue.
Looking through the stylesheet for The HTML5
Herald, you’ll see a number of places where we’ve used these
selectors. For example, when determining the overall layout of the site,
we want the three-column divs to be
floated left. To avoid this style being applied to any other divs nested inside them, we use the child
selector:
As we add new styles to the site over the course of the next few chapters, you’ll be seeing a lot of these selector types.
CSS2 introduced several attribute selectors. These allow for matching elements based on their attributes. CSS3 expands upon those attribute selectors, allowing for some targeting based on pattern matching.
-
E[attr] -
Matches any element
Ethat has the attributeattrwith any value. We made use of this back in Chapter 4 to style required inputs—input:requiredworks in the latest browsers, butinput[required]has the same effect and works in some slightly older ones. -
E[attr=val] -
Matches any element
Ethat has the attributeattrwith the exact, case-insensitive valueval. While not new, it’s helpful in targeting form input types—for instance, target checkboxes withinput[type=checkbox]. -
E[attr|=val] -
Matches any element
Ewhose attributeattreither has the valuevalor begins withval-. This is most commonly used for thelangattribute (as inlang="en-us"). For example,p[lang|="en"]would match any paragraph that has been defined as being in English, whether it be UK or US English. -
E[attr~=val] -
Matches any element
Ewhose attributeattrhas within its value the full wordval, surrounded by whitespace. For example,.info[title~=more]would match any element with theclassinfothat had atitleattribute containing the word “more,” such as “Click here for more information.” -
E[attr^=val](IE8+, WebKit, Opera, Mozilla) -
Matches any element
Ewhose attributeattrstarts with the valueval. In other words, thevalmatches the beginning of the attribute value. -
E[attr$=val](IE8+, WebKit, Opera, Mozilla) -
Matches any element
Ewhose attributeattrends inval. In other words, thevalmatches the end of the attribute value. -
E[attr*=val](IE8+, WebKit, Opera, Mozilla) -
Matches any element
Ewhose attributeattrmatchesvalanywhere within the attribute. In other words, the stringvalis matched anywhere in the attribute value. It is similar toE[attr~=val]above, except thevalcan be part of a word. Using the same example as above,.fakelink[title~=info] {}would match any element with theclassfakelinkthat has atitleattribute containing the stringinfo, such as "Click here for more information."
It’s likely that you’re already familiar with some of the user
interaction pseudo-classes, namely :link,
:visited, :hover,
:active, and :focus.
Important: Key Points to Remember
-
The
:visitedpseudo-class may pose a security risk, and may not be fully supported in the future. In short, malicious sites can apply a style to avisitedlink, then use JavaScript to check the styles of links to popular sites. This allows the attacker to glimpse the user’s browsing history without their permission. As a result, several browsers have begun limiting the styles that can be applied with:visited, and some others (notably Safari 5) have disabled it entirely.The spec explicitly condones these changes, saying: “UAs [User Agents] may therefore treat all links as unvisited links, or implement other measures to preserve the user’s privacy while rendering visited and unvisited links differently.”
-
For better accessibility, add
:focuswherever you include:hover, as not all visitors will use a mouse to navigate your site. -
:hovercan apply to any element on the page—not just links and form controls. -
:focusand:activeare relevant to links, form controls, and any element with atabindexattribute.
While it’s likely you’ve been using these basic pseudo-classes for some time, there are many other pseudo-classes available. Several of these have been in the specification for years, but weren’t supported (or commonly known) until browsers started supporting the new HTML5 form attributes that made them more relevant.
The following pseudo-classes match elements based on attributes, user interaction, and form control state:
-
:enabled -
A user interface element that’s enabled.
-
:disabled -
Conversely, a user interface element that’s disabled.
-
:checked -
Radio buttons or checkboxes that are selected or ticked.
-
:indeterminate -
Form elements that are neither checked nor unchecked. This pseudo-class is still being considered, and may be included in the specification in the future.
-
:target -
This selector singles out the element that is the target of the currently active intrapage anchor. That sounds more complicated than it is: you already know you can have links to anchors within a page by using the
#character with theidof the target. For example, you may have<a href="#content">Skip to content</a>link in your page that, when clicked, will jump to the element with anidofcontent.This changes the URL in the address bar to
thispage.html#content—and the:targetselector now matches the#contentelement, as if you had included, temporarily, the selector#content. We say “temporarily” because as soon as the user clicks on a different anchor,:targetwill match the new target. -
:default -
Applies to one or more UI elements that are the default among a set of similar elements.
-
:valid -
Applies to elements that are valid, based on the
typeorpatternattributes (as we discussed in Chapter 4). -
:invalid -
Applies to empty required elements, and elements failing to match the requirements defined by the
typeorpatternattributes. -
:in-range -
Applies to elements with range limitations, where the value is within those limitations. This applies, for example, to
numberandrangeinput types withminandmaxattributes. -
:out-of-range -
The opposite of
:in-range: elements whose value is outside the limitations of their range. -
:required -
Applies to form controls that have the
requiredattribute set. -
:optional -
Applies to all form controls that do not have the
requiredattribute. -
:read-only -
Applies to elements whose contents are unable to be altered by the user. This is usually most elements other than form fields.
-
:read-write -
Applies to elements whose contents are user-alterable, such as text input fields.
Browser support for these pseudo-classes is uneven, but
improving fairly rapidly. Browsers that support form control attributes
like required and pattern also support the associated
:valid and :invalid
pseudo-classes.
IE6 fails to understand :hover on elements
other than links, and neither IE6 nor IE7 understand
:focus. IE8 and earlier lack support for
:checked, :enabled,
:disabled, and :target. The good
news is that IE9 does support these
selectors.
While support is still lacking, JavaScript libraries such as jQuery can help in targeting these pseudo-classes in nonsupporting browsers.
So far, we’ve seen how we can target elements based on their attributes and states. CSS3 also enables us to target elements based simply on their location in the markup. These selectors are grouped under the heading structural pseudo-classes.
These might seem complicated right now, but they’ll make more sense as we look at ways to apply them later on. These selectors are supported in IE9, as well as current and older versions of all the other browsers—but not in IE8 and below.
-
:root -
The root element, which is always the
htmlelement. -
E F:nth-child(n) -
The element
Fthat is thenth child of its parentE. -
E F:nth-last-child(n) -
The element
Fthat is thenth child of its parentE, counting backwards from the last one.li:nth-last-child(1)would match the last item in any list—this is the same asli:last-child(see below). -
E:nth-of-type(n) -
The element that is the
nth element of its type in a given parent element. -
E:nth-last-of-type(n) -
Like
nth-of-type(n), except counting backwards from the last element in a parent. -
E:first-child -
The element
Ethat is the first childEof its parent. This is the same as:nth-child(1). -
E:last-child -
The element
Ethat is the last childEof its parent, same as:nth-last-child(1). -
E:first-of-type -
Same as
:nth-of-type(1). -
E:last-of-type -
Same as
:nth-last-of-type(1). -
E:only-child -
An element that’s the only child of its parent.
-
E:only-of-type -
An element that’s the only one of its type inside its parent element.
-
E:empty -
An element that has no children; this includes text nodes, so
<p>hello</p>will not be matched. -
E:lang(en) -
An element in the language denoted by the two-letter abbreviation (en).
-
E:not(exception) -
This is a particularly useful one: it will select elements that don’t match the selector in the parentheses.
Selectors with the
:notpseudo-class match everything to the left of the colon, and then exclude from that matched group the elements that also match what’s to the right of the colon. The left-hand side matching goes first. For example,p:not(.copyright)will match all the paragraphs in a document first, and then exclude all the paragraphs from the set that also have theclassofcopyright. You can string several:notpseudo-classes together.h2:not(header > h2):not(.logo)will match allh2s on a page except those that are in aheaderand those that have aclassoflogo.
Note:
What is n?
There are four pseudo-classes that take an
parameter in parentheses:
n
:nth-child(n),
:nth-last-child(n),
:nth-of-type(n), and
:nth-last-of-type(n).
In the simplest case, n can be an
integer. For example, :nth-of-type(1) will target
the first element in a series. You can also pass one of the two
keywords odd or even, targeting
every other element. You can also, more powerfully, pass a number
expression such as :nth-of-type(3n+1).
3n means every third element, defining the
frequency, and +1 is the offset. The default offset
is zero, so where :nth-of-type(3n) would match the
3rd, 6th, and 9th elements in a series,
:nth-of-type(3n+1) would match the 1st, 4th, 7th,
and so on. Negative offsets are also allowed.
With these numeric pseudo-classes, you can pinpoint which
elements you want to target without adding classes to the markup. The
most common example is a table where every other row should be a
slightly darker color to make it easier to read. We used to have to
add odd or even classes to every tr to accomplish this. Now, we can simply
declare tr:nth-of-type(odd) to target every odd
line without touching the markup. You can even take it a step further
with three-colored striped tables: target
:nth-of-type(3n),
:nth-of-type(3n+1), and
:nth-of-type(3n+2) and apply a different color to
each.
In addition to pseudo-classes, CSS gives us access to pseudo-elements. Pseudo-elements allow you to target text that’s part of the document, but not otherwise targetable in the document tree. Pseudo-classes generally reflect some attribute or state of the element that is not otherwise easily or reliably detectable in CSS. Pseudo-elements, on the other hand, represent some structure of the document that’s outside of the DOM.
For example, all text nodes have a first letter and a first line,
but how can you target them without wrapping them in a span? CSS provides the
::first-letter and
::first-line pseudo-elements that match
the first letter and first line of a text node, respectively. These can
alternatively be written with just a single colon:
:first-line and
:first-letter.
Tip: Why bother with the double colon?
The double colon is the correct syntax, but the single colon is
better supported. IE6, IE7, and IE8 only understand the single-colon
notation. All other browsers support both. Even though
:first-letter, :first-line,
:first-child, :before, and
:after have been around since CSS2, these
pseudo-elements in CSS3 have been redefined using double colons to
differentiate them from pseudo-classes.
The
::before and
::after pseudo-elements don’t refer
to content that exists in the markup, but rather to a location where
you can insert additional content, generated right there in your CSS.
While this generated content doesn’t become part of the DOM, it can be
styled.
To generate content for a pseudo-element, use the
content property. For example, let’s say you
wanted all external links on your page to be followed by the URL they
point to in parentheses, to make it clear to your users that they’ll
be leaving your page. Rather than hardcoding the URLs into your
markup, you can use the combination of an attribute selector and the
::after pseudo-element:
a[href^=http]:after {
  content: " (" attr(href) ")";
}
attr() allows you to access any attributes of
the selected element, coming in handy here for displaying the link’s
target. And you’ll remember from the attribute selectors section that
a[href^=http] means “any a element whose href attribute begins with
http”; in other words, external links.
Here’s another example:
a[href$=pdf] {
  background: transparent url(pdficon.gif) 0 50% no-repeat;
  padding-left: 20px;
}
a[href$=pdf]:after {
  content: " (PDF)";
}
Those styles will add a PDF icon and the text “(PDF)” after
links to PDFs. Remember that the [attr$=val]
selector matches the end of an attribute—so
document.pdf will match but
page.html won’t.
The ::selection pseudo-element matches text
that is highlighted.
This is supported in WebKit, and with the
-moz vendor prefix in Firefox. Let’s use it on
The HTML5 Herald, to bring the selection
background and text color in line with the monochrome style of the
rest of the site:
::-moz-selection{
  background: #484848;
  color:#fff;
}
::selection {
  background:#484848;
  color:#fff;
}
We know you’re probably chomping at the bit to put the really cool stuff from CSS3 into practice, but before we do there’s one more detour we need to take. CSS3 brings with it support for some new ways of describing colors on the page. Since we’ll be using these in examples over the next few chapters, it’s important we cover them now.
Prior to CSS3, we almost always declared colors using the
hexadecimal format (#FFF, or #FFFFFF
for white). It was also possible to declare colors using the
rgb() notation, providing either integers (0–255) or
percentages. For example, white is rgb(255,255,255) or
rgb(100%,100%,100%). In addition, we had access to a
few named colors, like purple, lime,
aqua, red, and the like. While the
color keyword list has been extended in the CSS3 color module to
include 147 additional keyword colors (that are generally well supported),
CSS3 also provides us with a number of other options: HSL, HSLA, and RGBA.
The most notable change with these new color types is the ability to
declare semitransparent colors.
RGBA works just like RGB, except that it adds a fourth value: alpha, the opacity level. The first three values still represent red, green, and blue. For the alpha value, 1 means fully opaque, 0 is fully transparent, and 0.5 is 50% opaque. You can use any number between 0 and 1, inclusively.
Unlike RGB, which can also be represented with hexadecimal notation as #RRGGBB, there is no hexadecimal notation for RGBA. There’s been some discussion of including an eight-character hexadecimal value for RGBA as #RRGGBBAA, but this has yet to be added to the draft specification.
For an example, let’s look at our registration form. We want the form to be a darker color, while still preserving the grainy texture of the site’s background. To accomplish this, we’ll use an RGBA color of 0,0,0,0.2—in other words, solid black that’s 80% transparent:
form {
  …
  background: rgba(0,0,0,0.2) url(../images/bg-form.png) no-repeat
↵bottom center;
}
Since Internet Explorer 8 and below lack support for RGBA, if you declare an RGBA color, make sure you precede it with a color IE can understand. IE will render the last color it can make sense of, so it will just skip the RGBA color. Other browsers will understand both colors, but thanks to the CSS cascade, they’ll overwrite the IE color with the RGBA color as it comes later.
In the above example, we’re actually fine with older versions of IE having no background color, because the color we’re using is mostly transparent anyway.
HSL stands for hue, saturation, and lightness. Unlike RGB, where you need to manipulate the saturation or brightness of a color by changing all three color values in concert, with HSL you can tweak either just the saturation, or the lightness, while keeping the same base hue. The syntax for HSL comprises integer for hue, and percentage values for saturation and lightness.[8]
Although monitors display colors as RGB, the browser simply converts the HSL value you give it into one the monitor can display.
The hsl() declaration accepts three
values:
-
The hue, in degrees from 0 to 359. Some examples: 0 = red, 60 = yellow, 120 = green, 180 = cyan, 240 = blue, and 300 = magenta. Of course, feel free to use everything in between.
-
The saturation, as a percentage. 100% is the norm for saturation. Saturation of 100% will be the full hue, and saturation of 0 will give you a shade of gray— essentially causing the hue value to be ignored.
-
A percentage for lightness, with 50% being the norm. Lightness of 100% will be white, 50% will be the actual hue, and 0% will be black.
HSL also allows for an opacity value. For example,
hsla(300, 100%, 50%, 0.5) is magenta with full
saturation and normal lightness, which is 50% opaque.
HSL mimics the way the human eye perceives color, so it can be more intuitive for designers to understand —and, as mentioned above, it can make adjustments a bit quicker and easier. Feel free to use whatever syntax you’re most comfortable with—but remember that if you need to support IE8 or below, you’ll generally want to limit yourself to hexadecimal notation.
Let’s sum up with a review of all the ways to write colors in CSS. A shade of dark red can be written as:
-
#800000 -
maroon -
rgb(128,0,0) -
rgba(128,0,0,1.0) -
hsl(0,100%,13%) -
hsla(0,100%,13%,1.0)
In addition to specifying transparency with HSLA and RGBA colors,
CSS3 also provides us with the opacity property.
opacity sets the opaqueness of the element on which
it’s declared. Similar to alpha transparency, the opacity value is a
floating point number between (and including) 0 and 1. An opacity value
of 0 defines the element as fully transparent, whereas an opacity value
of 1 means the element is fully opaque.
Let’s look at an example:
div.halfopaque {
  background-color: rgb(0, 0, 0);
  opacity: 0.5;
  color: #000000;
}

div.halfalpha{
  background-color: rgba(0, 0, 0, 0.5);
  color: #000000;
}
While the two declaration blocks above may seem to be identical at
first glance, there’s actually a key difference. While
opacity sets the opacity value for an element
and all of its children, a semitransparent RGBA or
HSLA color has no impact on elements other than the one it’s declared
on.
Looking at the example above, any text in the
halfopaque
div
will also be 50% opaque (most likely making it difficult to read!); the
text on the halfalpha
div, though, will still be 100% opaque.
So, while the opacity property is a quick and
easy solution for creating semitransparent elements, you should be aware
of this consequence.
Now that we’ve been through all the available CSS selectors and new color types, we’re ready to really start styling.
For the rest of the chapter, we’ll style a small section of The HTML5 Herald front page; this will demonstrate how to add rounded corners, text shadow, and box shadow.
In the right-hand sidebar of The HTML5
Herald’s front page are a series of whimsical
advertisements—we marked them up as article elements within an aside way back in Chapter 2. The first of these is an old “Wanted”
poster-style ad, advising readers to be on the look out for the armed and
dangerous HTML5 and CSS3. The ad’s final appearance is depicted in Figure 6.1.
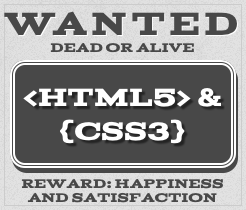
You’ll notice that the dark gray box in the center of the ad has a double border with rounded corners, as well as a three-dimensional “pop” to it. The text that reads “<HTML5> & {CSS3}” also has a shadow that offsets it from the background. Thanks to CSS3, all these effects can be achieved with some simple code, and with no reliance on images or JavaScript. Let’s learn how it’s done.
The markup for the box is simply <a
href="…"><HTML5> & {CSS3}</a>.
Other than the HTML entities, it’s as straightforward as it gets!
Before we can apply any styles to it, we need to select it. Of
course, we could just add a class
attribute to the markup, but where’s the fun in that? We’re here to learn
CSS3, so we should try and use some fancy new selectors instead.
Our box isn’t the only a element
on the page, but it might be the only a
immediately following a paragraph in the sidebar. In this case, that’s
good enough to single out the box. We also know how to add some pre-CSS3
styling for the basics, so let’s do that:
aside p + a {
  display: block;
  text-decoration: none;
  border: 5px double;
  color: #ffffff;
  background-color: #484848;
  text-align: center;
  font-size: 28px;
  margin: 5px 5px 9px 5px;
  padding: 15px 0;
  position: relative;
}
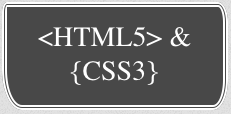
Not bad! As Figure 6.2 shows, we’re well on our way to the desired appearance. This will also be the appearance shown to IE8 and below except for the font styling, which we’ll be adding in Chapter 9.

Remember that IE6 lacks support for the adjacent sibling selector—so
if you need to provide support to that browser, you can use a more common
id or class selector.
This presentation is fine, and should be acceptable—no need for web pages to look identical in all browsers. Users with older versions of Internet Explorer will be unaware that they’re missing anything. But we can still provide treats to better browsers. Let’s go ahead and add a bit of polish.
The border-radius property lets you create
rounded corners without the need for images or additional markup. To add
rounded corners to our box, we simply add:
-moz-border-radius: 25px;
border-radius: 25px;
Safari, Chrome, Opera, IE9, and Firefox 4 support rounded
corners without a vendor prefix (just border-radius).
We still need to include the vendor-prefixed
-moz-border-radius for Firefox 3.6 and earlier, though
by the time you read this those versions may have dwindled enough for it
to be no longer necessary.
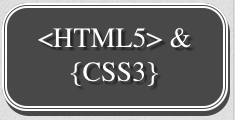
Figure 6.3 shows what our link looks like with the addition of these properties.

The border-radius property is actually a
shorthand. For our a element, the
corners are all the same size and symmetrical. If we had wanted
different-sized corners, we could declare up to four unique
values—border-radius: 5px 10px 15px 20px;, for example.
Just like padding, margin, and
border, you can adjust each value
individually:
border-top-left-radius: 5px;
border-top-right-radius: 10px;
border-bottom-right-radius: 15px;
border-bottom-left-radius: 40px;
The -moz- prefixed form for older versions of
Firefox uses a slightly different syntax:
-moz-border-radius-topleft: 5px;
-moz-border-radius-topright: 10px;
-moz-border-radius-bottomright: 15px;
-moz-border-radius-bottomleft: 40px;
The resulting off-kilter box is shown in Figure 6.4.

When using the shorthand border-radius, the
order of the corners is top-left, top-right, bottom-right, and
bottom-left. You can also declare only two values, in which case the first
is for top-left and bottom-right, and the second is for top-right and
bottom-left. If you declare three values, the first refers to top-left,
the second sets both the top-right and bottom-left, and the third is
bottom-right.
We recommend using the shorthand—because it’s much shorter, and because until old versions of Firefox no longer require support, it avoids the need to use two different syntaxes.
You can also create asymmetrical corners with a different radius on each side.
Rather than being circular, these will appear elliptical. If two values
are supplied to any of the four longhand values, you’ll be defining the
horizontal and vertical radii of a quarter ellipse respectively. For
example, border-bottom-left-radius: 20px 10px; will
create an elliptical bottom-left corner.
When using the shorthand for elliptical corners, separate the value
of the horizontal and vertical radii with a slash. border-radius:
20px / 10px; will create four equal, elliptical corners, and
border-radius: 5px 10px 15px 20px / 10px 20px 30px
    40px;
will create four unequal, elliptical corners. That last
example will create corners seen in Figure 6.5.
Interesting? Yes. Aesthetically pleasing? Not so much.
Tip: With an Eye to the Future
When including prefixed properties, always follow with the correctly written, nonprefixed, standards-compliant syntax. This will ensure that your site is forward compatible!
There’s only one other element on The HTML5 Herald that uses rounded corners: the registration form’s submit button. Let’s round those corners now:
You’ll note two things about the above CSS: we’ve used an attribute
selector to target the submit input type, and we’ve
used percentages instead of pixel values for the rounded corners. This
will come in handy if we need to add more forms to the site later; other
submit buttons might be smaller than the one on the registration page, and
by using percentages, rounded corners will scale in proportion to the size
of the button.
The border-radius property can be applied to
all elements, except the table element
when the border-collapse property is set to
collapse.
Note: What about older browsers?
Generally speaking, there’s no need to provide an
identical look in older browsers, but sometimes a client may insist on
it. In the case of rounded corners, one common method is to dynamically
generate four additional elements—one for each corner. You’d then use
JavaScript to add four spans to all
the elements you want rounded and, in your CSS, provide background
images to each span corresponding to the relevant corner.
While methods like this one provide the desired look, they require JavaScript, additional markup, CSS, and/or images. Additionally, if there’s a design change —for example, the color, radius, or border—the background images will need to be recreated. Fortunately, there are some JavaScript solutions that provide CSS3 decorations to older versions of IE without requiring additional images or markup; CSS3 PIE is one that’s worth looking into.
CSS3 provides the ability to add drop shadows to elements using the
box-shadow property. This property lets you specify
the color, height, width, blur, and offset of one or multiple inner and/or
outer drop shadows on your elements.
We usually think of drop shadows as an effect that makes an element
look like it’s “hovering” over the page and leaving a shadow; however,
with such fine-grained control over all those variables, you can be quite
creative. For our advertisement link, we can use a
box-shadow with no blur to create the appearance of a
3D box.
The box-shadow property takes a comma-separated
list of shadows as its value. Each shadow is defined by two to four size
values, a color, and the key term inset for inset—or
internal—shadows. If you fail to specify inset, the
default is for the shadow to be drawn outside of the element:
Let’s look at the shadow we’re using on our element, so that we can break down what each value is doing:
-webkit-box-shadow: 2px 5px 0 0 rgba(72,72,72,1);
-moz-box-shadow: 2px 5px 0 0 rgba(72,72,72,1);
box-shadow: 2px 5px 0 0 rgba(72,72,72,1);
The first value is the horizontal offset. A positive value will
create a shadow to the right of the element, a negative value to the left.
In our case, our shadow is two pixels to the right of the a.
The second value is the vertical offset. A positive value pushes the
shadow down, creating a shadow on the bottom of the element. A negative
value pushes the shadow up. In our case, the shadow is five pixels below
the a.
The third value, if included, is the blur distance of the shadow. The greater the value, the more the shadow is blurred. Only positive values are allowed. Our shadow is not blurred, so we can either include a value of zero (0), or omit the value altogether.
The fourth value determines the spread distance of the shadow. A positive value will cause the shadow shape to expand in all directions. A negative value contracts the shadow. Our shadow has no spread, so again we can either include a value of zero (0), or omit the value altogether.
The fifth value above is the color. You will generally want to declare the color of the
shadow. If it’s omitted, the spec states that it should default to the
same as the color property of the element. Opera and
Firefox support this default behavior, but WebKit doesn’t, so be sure to
include the color. In the example above, we used an RGBA color. In this
particular design, the shadow is a solid color, so we could just have used
the hex value. Most of the time, though, shadows will be partially
transparent, so you’ll be using RGBA or HSLA, usually.
The drop shadow created by these declarations is shown in Figure 6.6.

By default, the shadow is a drop shadow—occurring on the outside of
the box. You can create an inset shadow by adding the word
inset to the start of your shadow declaration.
Opera, Firefox 4, and IE9 support the nonprefixed syntax.
We’re still including the -moz- prefix for Firefox 3.6
and earlier, and the -webkit- prefix for Safari and
Chrome. However, current development versions of WebKit support the
unprefixed version, and Firefox 4 will soon supplant the older versions,
so the need for prefixing should wane.
Tip: Drop Shadows on IE6+
To include box shadows in IE6 through IE8, you have to use a proprietary filter like the one shown below. Be warned, though, that it’s almost impossible to make it look the same as a CSS3 shadow. You should also be aware that filters have a significant impact on performance, so you should only use them if it’s absolutely necessary for those older browsers to see your shadows. Moreover, these styles should be in a separate stylesheet targeted to earlier versions of IE with the help of conditional comments—otherwise they’ll mess with your standard CSS3 shadows on IE9:
filter: shadow(color=#484848, direction=220, Strength=8);
filter:progid:DXImageTransform.Microsoft.dropshadow(OffX=2,
↵OffY=5, Color='#484848', Positive='true'),
Warning: Nonrectangular shadows?
Drop shadows look good on rectangular elements, including those
with rounded corners like ours. We’re using the
border-radius property on our element, so the
shadow will follow the curve of the corners, which looks good.
Keep in mind, though, that the shadow follows the edges of your element, rather than the pixels of your content. So, if you try to use drop shadows on semitransparent images, you’ll receive an ugly surprise: the shadow follows the rectangular borders of the image instead of the contour of the image’s content.
To include more than one box shadow on an element, define a comma-separated list of shadows. When more than one shadow is specified, the shadows are layered front to back, as if the browser drew the last shadow first, and the previous shadow on top of that.
Like an element’s outline, box shadows are supposed to be invisible in terms of the box model. In other words, they should have no impact on the layout of a page —they’ll overlap other boxes and their shadows if necessary. We say “supposed to,” because there are bugs in some browsers, though these are few, and will likely be fixed fairly quickly.
The registration form for The HTML5 Herald has what looks like a gradient background around the edges, but it’s actually a few inset box shadows.
To create an inset box shadow, add the inset
key term to your declaration. In our case, we have to include two
shadows so that we cover all four sides: one shadow for the top left,
and one for the bottom right:
form {
 -webkit-box-shadow:
   inset 1px 1px 84px rgba(0,0,0,0.24),
   inset -1px -1px 84px rgba(0,0,0,0.24);
 -moz-box-shadow:
   inset 1px 1px 84px rgba(0,0,0,0.24),
   inset -1px -1px 84px rgba(0,0,0,0.24);
 box-shadow:
   inset 1px 1px 84px rgba(0,0,0,0.24),
   inset -1px -1px 84px rgba(0,0,0,0.24);
}
As you can see, to add multiple shadows to an element, you simply need to repeat the same syntax again, separated with a comma.
Warning: WebKit and Inset Shadows
Current versions of WebKit-based browsers suffer from
very slow performance when rendering inset box
shadows with a large blur value, like the one we’re
using on The HTML5 Herald’s registration
form.
Because WebKit supports both the -webkit-
prefixed and unprefixed forms of the box-shadow
property, we’ve had to omit both of these from the finished CSS. We
could only include the -moz- prefixed property, so,
unfortunately, Firefox is the sole beneficiary of our nice big inset
shadow.
This bug has been fixed in the current development version of the WebKit engine, but it might be some time before the fix makes its way into releases of every WebKit-based browser. Therefore, if you’re using inset shadows, be sure to do plenty of browser testing.
Where box-shadow lets us add shadows to boxes,
text-shadow adds shadows to individual characters in
text nodes. Added in CSS2, text-shadow has been
supported in Safari since version 1, and is now supported in all current
browser releases except IE9.
The syntax of the text-shadow property is very
similar to box-shadow, including prefixes, offsets,
and the ability to add multiple shadows; the exceptions are that there’s
no spread, and inset shadows aren’t permitted:
/* single shadow */
text-shadow: topOffset leftOffset blurRadius color;

/* multiple shadows */
text-shadow: topOffset1 leftOffset1 blurRadius1 color1,
             topOffset2 leftOffset2 blurRadius2 color2,
             topOffset3 leftOffset3 blurRadius3 color3;
Like box-shadow, when multiple shadows are
declared, they’re painted from front to back with the first shadow being
the topmost. Text shadows appear behind the text itself. If a shadow is so
large that it touches another letter, it will continue behind that
character.
Our text has a semi-opaque shadow to the bottom right:
This states that the shadow extends three pixels below the text, three pixels to the right of the text, is slightly blurred (one pixel), and has a base color of black at 50% opacity.
With that style in place, our ad link is nearly complete, as Figure 6.7 shows. The finishing touch—a custom font—will be added in Chapter 9.
We now know how to create drop shadows on both block-level elements and text nodes. But so far, we’ve only styled a fraction of our page: only one link in one advertisement, in fact. Let’s do the rest of the shadows before moving on.
Looking back at the site design, we can see that all the h1 elements on the page are uppercase and have
drop shadows. The text is dark gray with a very subtle, solid-white drop
shadow on the bottom right, providing a bit of depth.[9] The tagline in the site header also has a drop shadow, but
is all lowercase. The taglines for the articles, meanwhile, have no drop
shadow.
We know from the section called “ CSS3 Selectors” that we can target all these elements without using classes. Let’s target these elements without any additional markup:
h1, h2 {
  text-transform: uppercase;
  text-shadow: 1px 1px #FFFFFF;
}
:not(article) > header h2 {
  text-transform: lowercase;
  text-shadow: 1px 1px #FFFFFF;
}
The first declaration targets all the h1 elements and h2 elements on the page. The second targets all
the h2 elements that are in a header, but only if that header is not nested in an article element.
Our text shadows are a solid white, so there’s no need to use alpha transparent colors, or a blur radius.
Now that we have shadows and rounded corners under our belt, it’s time to have some more fun with CSS3. In the next chapter, we’ll be looking at CSS3 gradients and multiple background images.
[8] A full exploration of color theory—along with what is meant by the terms saturation and lightness—is beyond the scope of this book. If you want to read more, Jason Beaird’s The Principles of Beautiful Web Design (SitePoint: Melbourne, 2010) includes a great primer on color.