
3. Viewing Clips
In This Chapter
The more time you spend watching your source video, the better an editor you’ll be. You’d be surprised how many times we see people trying to edit video without really thoroughly watching and taking in the nuances of the footage they’re editing.
Sure, watching the clips takes time, but if you’re asking your potential viewers to sit through whatever it is you’re creating, the least you can do is take the time to watch it yourself, over and over again, to make sure you’re showing them only the best, most necessary, most illustrative, most essential bits.
Final Cut Pro X even provides a shortcut for this tedious task: skimming. Now you can quickly skim through your shots to find those critical bits, but we can’t stress strongly enough that skimming isn’t enough. You must watch your video—all of it. Then, later, you can skim to find the moments that stood out to you.
Anatomy of the Viewer
FCP X contains a single, context-sensitive Viewer where the content of your video is displayed ![]() . When you’re looking at source clips in the Event Browser, the Viewer shows those clips. When you examine the clips in your project, the Viewer shows those clips.
. When you’re looking at source clips in the Event Browser, the Viewer shows those clips. When you examine the clips in your project, the Viewer shows those clips.
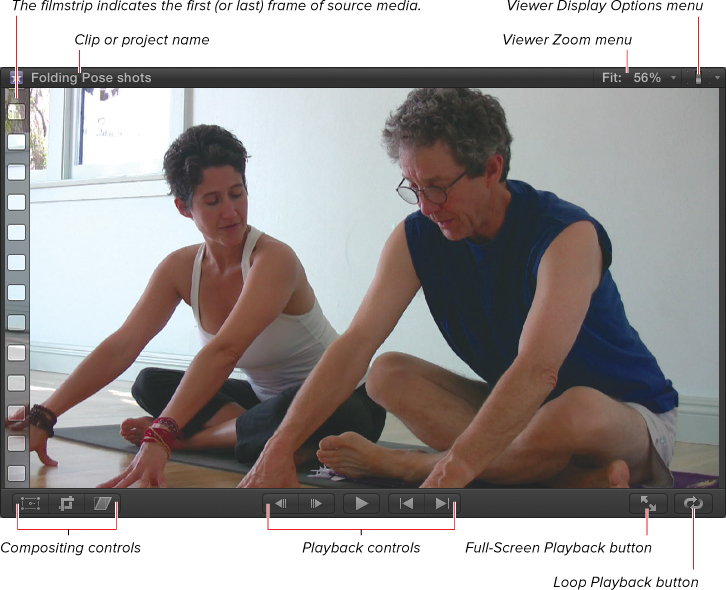
![]() The Viewer window
The Viewer window
The upper-left corner of the Viewer shows the name of the item displayed within. For a clip it displays the clip name, for a project it displays the project name, and so on.
The upper-right corner contains the Zoom and Viewer Display Options menus. These controls allow you to customize the appearance of the Viewer. They are described in the “Zoom and Display Options” section.
The lower-left corner contains three buttons to enable clip effects such as scaling, cropping, or distorting your clips. For more on these controls, see Chapter 13, “Basic Compositing.”
The lower-right corner contains a button to enable full-screen playback and a button to enable looping. Both of these controls are described in more detail in the “Playing Back Video” section.
Playing Back Video
Directly beneath the video, the Viewer contains five playback control buttons. These can be used to navigate the video ![]() .
.
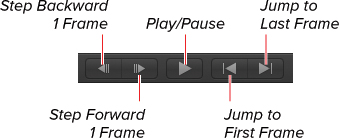
![]() Navigation controls appear under the main Viewer area.
Navigation controls appear under the main Viewer area.
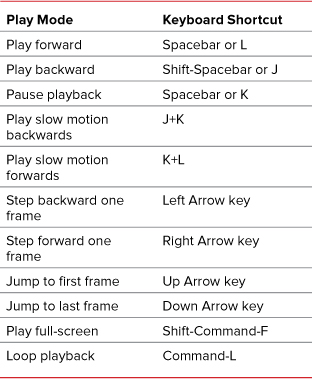
There are also keyboard shortcuts for all the different playback controls and methods, and most users prefer to use the shortcuts than click the buttons on the screen (see the “Playback Shortcuts” table).
Playing from the Keyboard
Far more varied and flexible playback controls are available if you use keyboard shortcuts. Most important is the J-K-L combination ![]() :
:
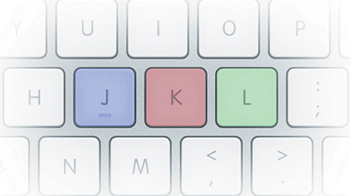
![]() The J, K, and L keys sit comfortably beside each other and enable easy and intuitive playback control.
The J, K, and L keys sit comfortably beside each other and enable easy and intuitive playback control.
• Press J to play backward.
• Press K to stop playback.
• Press L to play forward.
• Press J or L multiple times to play forward or backward at high speed. Pressing twice will play at 2X speed, pressing three times will play at 4X speed, and so on.
• Press J+K together to play backward in slow motion.
• Press K+L together to play forward in slow motion.
These three keys sit side by side on the keyboard so you can rest your fingers on them all at once and easily navigate your clips.
Once you get comfortable using these keys, it will quickly become second nature, and you’ll be able to use them adeptly without thinking.
Playing Full-Screen
Viewing your video without the distraction of the busy FCP interface can be very helpful, especially if you want to share your video with friends or clients.
To play video full-screen
• Click the Full-Screen Playback button, or press Shift-Command-F ![]() .
.

![]() Click the Full-Screen Playback button to enter full-screen playback mode.
Click the Full-Screen Playback button to enter full-screen playback mode.
The screen switches into full-screen playback mode, and playback begins immediately.
Keyboard playback commands still operate.
To exit full-screen playback mode
• Press Escape.
Looping Playback
Sometimes you may want to watch a section of video play over and over again in a continuous loop.
To loop playback
• Click the Loop Playback button, or press Command-L ![]() .
.
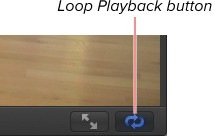
![]() Click the Loop Playback button to enable or disable playback looping.
Click the Loop Playback button to enable or disable playback looping.
The button turns blue to indicate that playback looping is enabled.
Skimming Video
Once you’ve become familiar with your footage, you can use the skimming feature to quickly navigate to a particular frame or section within your clips.
Skimming simply means floating your mouse across a video clip and causing the video frames to display in the Viewer. No clicking is required. As you move your pointer from one clip to another, the new clips automatically load into the Viewer, creating a quick and seamless (if occasionally disorienting) workflow.
When skimming is enabled, you get two separate lines in the clip filmstrip; the white line is the playhead, and the red one is the skimmer ![]() .
.
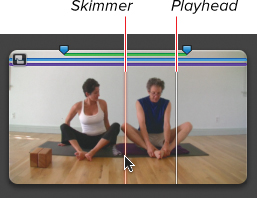
![]() When enabled, the skimmer appears as a red vertical line in the clip filmstrip.
When enabled, the skimmer appears as a red vertical line in the clip filmstrip.
Skimming can be done with or without audio skimming enabled. Skimming with audio can be very helpful for finding a particular section, but hearing audio skimming when you don’t want to can be very annoying, so it’s important to know how to turn it off quickly.
Skimming’s main disadvantage is that it is imprecise. As you skim across a clip, you may find the frame you’re looking for but accidentally skim right past it, which means you waste a lot of time going back and forth.
As you get more adept with skimming, you’ll get comfortable toggling it on and off frequently, which can enable you to skim to find a frame and then turn off the skimmer and click in order to move the playhead to the desired frame.
To enable skimming
• Click the Enable/Disable Skimming button, or press S ![]() .
.
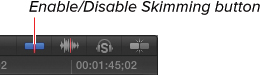
![]() Turn skimming on and off by clicking the Enable/Disable Skimming button or by pressing S.
Turn skimming on and off by clicking the Enable/Disable Skimming button or by pressing S.
Skimming is enabled.
Note that although skimming can be done without a project being open, the Enable/Disable Skimming button is visible only when a project is open in the Timeline. The S key works at anytime.
To disable audio skimming
• Click the Enable/Disable Audio Skimming button, or press Shift-S ![]() .
.

![]() Turn audio skimming on and off by clicking the Enable/Disable Audio Skimming button or by pressing Shift-S.
Turn audio skimming on and off by clicking the Enable/Disable Audio Skimming button or by pressing Shift-S.
Audio skimming is disabled.
To find a frame using the skimmer
1. Press S to enable skimming.
2. Skim across a clip filmstrip to find the frame you’re looking for ![]() .
.
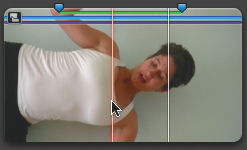
![]() Use the skimmer to quickly locate the frame you’re seeking.
Use the skimmer to quickly locate the frame you’re seeking.
3. As soon as you find the desired frame, move your hand off the mouse so you don’t accidentally move it.
4. Press S to disable skimming.
5. Click the mouse to move the playhead to the frame under the pointer ![]() .
.
![]() With skimming disabled, click the mouse to move the playhead to the selected frame.
With skimming disabled, click the mouse to move the playhead to the selected frame.
The playhead moves to the selected frame.
Zoom and Display Options
The upper-right corner of the Viewer contains the Zoom and Viewer Display Options menus. These controls allow you to customize the appearance of the Viewer.
Zoom Controls
In general, you’ll want to see the whole video image in the Viewer, but sometimes—especially when designing multilayer compositions, applying filters, or performing other precision tasks—you may want to zoom in on the Viewer.
FCP provides a variety of ways to zoom in and out, including a special command called Fit that guarantees that the image is as large as possible based on the current Viewer size.
To change the Viewer zoom level
• Do one of the following:
• Click the Viewer Zoom menu, and select a zoom level from the pop-up menu that appears ![]() .
.
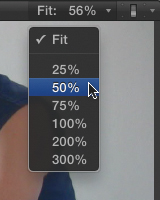
![]() The Viewer Zoom pop-up menu
The Viewer Zoom pop-up menu
Choose Fit to set the zoom level to fill the Viewer as much as possible. When set to Fit, the control displays the actual zoom level. In this example, it’s set to 56 percent.
• Press Command-+ (plus) to zoom in, or press Command-– (minus) to zoom out ![]() .
.
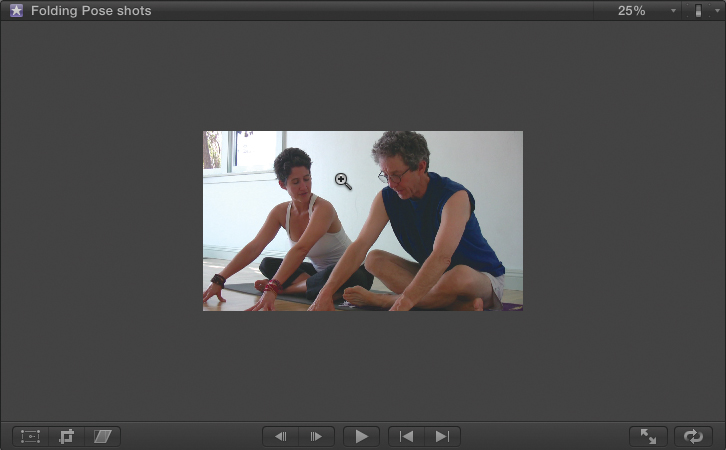
![]() When zoomed out, a gray border appears around the visible area.
When zoomed out, a gray border appears around the visible area.
• Press Shift-Z to set the window to Fit.
• Select the Zoom tool from the Tools pop-up menu in the toolbar, and click in the Viewer to zoom in. Option-click to zoom out ![]() .
.
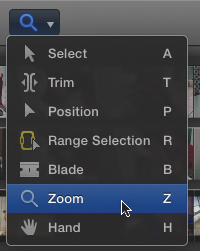
![]() Choose the Zoom tool from the Tools pop-up in the toolbar, and click the Viewer to zoom. Option-click to zoom out.
Choose the Zoom tool from the Tools pop-up in the toolbar, and click the Viewer to zoom. Option-click to zoom out.
To scroll a zoomed image
When zoomed in to a level where the entire image is not visible in the Viewer, you may want to control which part of the zoomed-in image is showing.
Whenever you’re zoomed in, a Zoom Scroll handle appears on the right side of the Viewer ![]() . The white outer box represents the entire image, and the red inner box represents the viewable area. The more zoomed in you are, the smaller the red box will be relative to the white box.
. The white outer box represents the entire image, and the red inner box represents the viewable area. The more zoomed in you are, the smaller the red box will be relative to the white box.
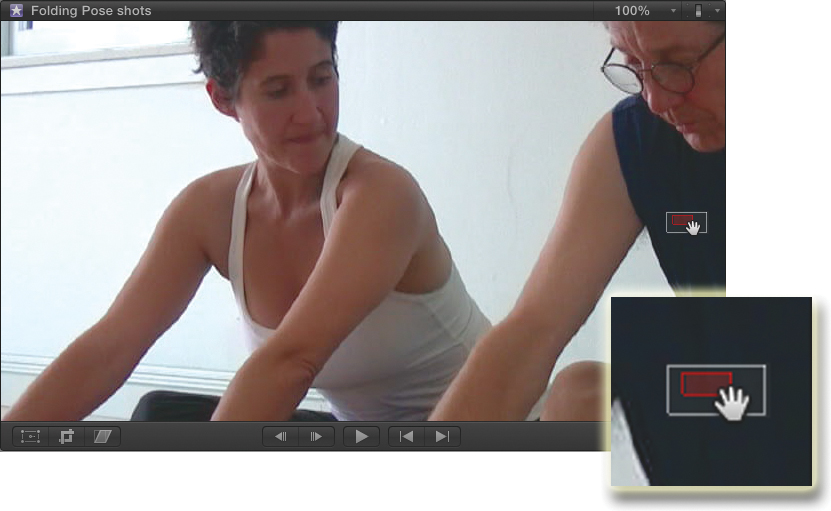
![]() Drag the red box to change the view of a zoomed-in image. The inset image here shows a zoomed-in view of the Zoom Scroll handle.
Drag the red box to change the view of a zoomed-in image. The inset image here shows a zoomed-in view of the Zoom Scroll handle.
To scroll around a zoomed-in Viewer
• Do one of the following:
• Drag the red box in the Zoom Scroll handle to choose a different portion of the zoomed-in image to display in the Viewer.
• Select the Hand tool (H) from the Tools pop-up in the toolbar, and drag around the Viewer ![]() .
.
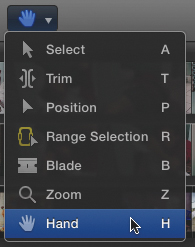
![]() Select the Hand tool from the Tools pop-up menu in the toolbar, and drag around the zoomed-in Viewer.
Select the Hand tool from the Tools pop-up menu in the toolbar, and drag around the zoomed-in Viewer.
Display Options
The Viewer Display Options menu contains a variety of mostly unrelated controls to change how the Viewer displays the video image ![]() .
.
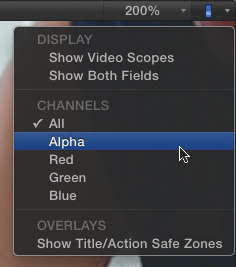
![]() You will rarely need to click the Viewer Display Options menu to modify the appearance of the Viewer.
You will rarely need to click the Viewer Display Options menu to modify the appearance of the Viewer.
Least useful of all are the controls for limiting the Viewer’s display to one of the four video channels (alpha, red, green, or blue). Ordinarily, the Viewer displays all four channels simultaneously, showing you a full-color image along with any transparency (if it exists).
Selecting one of the individual channels will display a monochromatic version of your image containing just the values in one of those four channels ![]() .
.
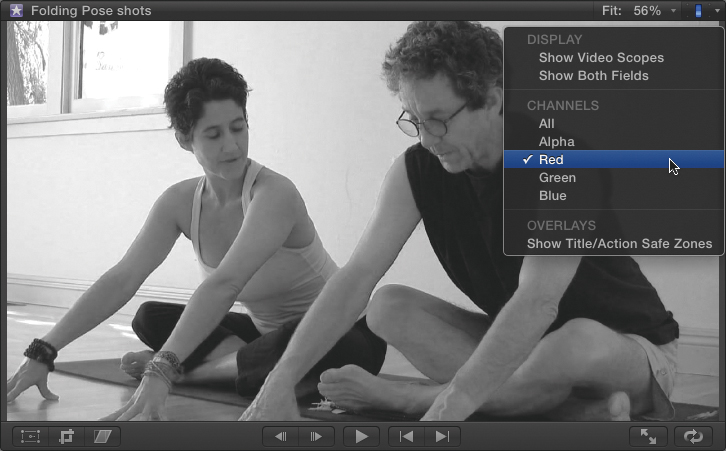
![]() Although it may look cool, there is very little practical use for limiting your display to only one channel.
Although it may look cool, there is very little practical use for limiting your display to only one channel.
If you have no idea when or why you would want to enable this option, you’re not alone. The vast majority of editors will never have any need to perform this task. Primarily, it is useful for highly specific color correction tasks or occasionally for verifying the transparency boundaries of imported graphics.
You can also use this menu to display video scopes (used primarily when doing color correction), both video fields (used to detect interlacing issues on nonprogressive video), and title/action-safe zones (used to help position the placement of titles and otherwise account for the convex, underscanned displays found on televisions manufactured before 1990). For more on video scopes, see the “Video Scopes” section in Chapter 15, “Color Correction.”
To display title/action-safe zones
• Click the Viewer Display Options menu, and choose Show Title/Action Safe Zones.
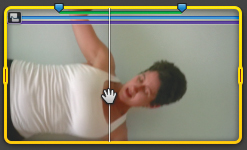
Yellow lines are overlaid near the edges of the Viewer to indicate where some televisions will crop or distort the image ![]() .
.
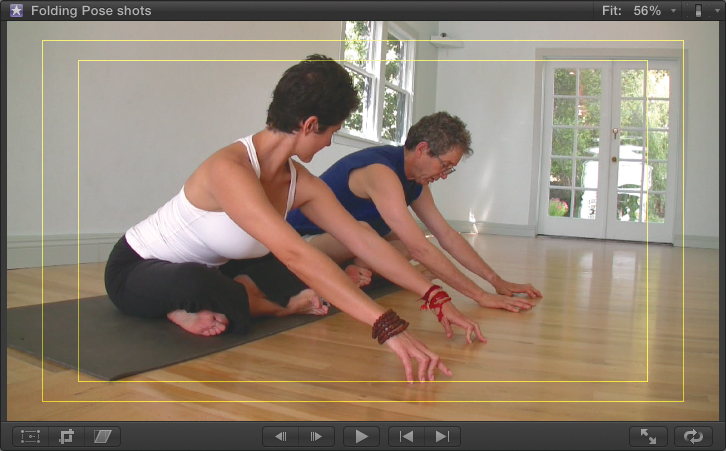
![]() Yellow lines appear on top of the video. The inner line is intended to indicate the boundary where titles should be kept, and the outer line indicates where some TVs may crop the image.
Yellow lines appear on top of the video. The inner line is intended to indicate the boundary where titles should be kept, and the outer line indicates where some TVs may crop the image.
To display both video fields
• Click the Viewer Display Options menu, and choose Show Both Fields.
Both video fields (present only on interlaced source footage) are displayed simultaneously. Fast horizontal movement of objects in the frame may result in a comblike effect ![]() .
.
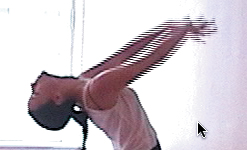
![]() Interlacing is normal and desirable when the final video is going to be displayed on an interlaced (that is, traditional television) monitor. Showing both fields allows you to see two fields overlaid on top of one another, which sometimes appears as a comblike artifact.
Interlacing is normal and desirable when the final video is going to be displayed on an interlaced (that is, traditional television) monitor. Showing both fields allows you to see two fields overlaid on top of one another, which sometimes appears as a comblike artifact.
This is normal and desirable, because it indicates smooth motion that will appear correctly on a traditional television.