
One advantage of a controller is storing properties. Controllers have properties that are stored in the application, which is unlike the model where properties are saved to the server. In this recipe, we'll take a look at a few different types of properties and how they can be displayed in a template.
- In a new application, run the following command:
$ ember g controller applicationIn this application, we'll be using the
application controllerto store all our properties. - Update the application controller to add a new action and a few properties:
// app/controllers/application.js
import Ember from 'ember';

export default Ember.Controller.extend({
    prop2: 'test',
    prop3: true,
    actions: {
      enter(val){
        alert(this.get('prop1'));
        alert(this.getProperties('prop1','prop2').prop1);
        alert(val);
        this.toggleProperty('prop3');
      }
    }
});
This controller has two properties. The first property contains a string. The second has a Boolean value of
trueattached to it. Theenteraction displays a few alert boxes. Let's take a closer look at theenteraction:alert(this.get('prop1')); alert(this.getProperties('prop1','prop2').prop1); alert(val); this.toggleProperty('prop3');When accessing properties in Ember, always use
this.getandthis.set. This guarantees that the property will be read or set correctly in Ember. In addition, we can usethis.getProperties. This allows us to get multiple properties at once. It returns an object of those properties and their values.Another useful method is
toggleProperty. This will take a Boolean value and toggle it. In other words, a value offalsewill becometrueand vice versa.Be aware that you don't have to declare each property in the controller definition. Properties can be retrieved directly from the template and be manipulated. In the preceding example, the
prop1property is retrieved from the template. It was never defined in the controller. If needed, you can set default property values. - Update the template for the application. Display the properties:
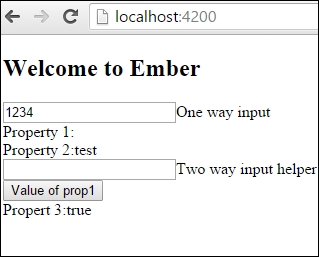
// app/templates/application.hbs
<h2 id="title">Welcome to Ember</h2>

{{outlet}}

<input type='text' value={{prop1}}>One way input<br>
Property 1:{{prop1}}<br>
Property 2:{{prop2}}<br>
{{input type='text'  value=prop1}}Two way input helper<br>
<button {{action 'enter' prop1}}>Value of prop1</button><br>

Propert 3:{{prop3}}
The
prop1property is bound to the bracket input andinputhelper. By default, bracket input tags are one-way. What this means is that theprop1property is retrieved from the controller when the template is rendered. It's copied over, and changes to the property are not reflected back in the controller. On the other hand,inputhelpers are bound two-way. Any changes to the value in theinputhelper will be reflected in the controller. - Start the Ember server and update the values in the one-way input:
Even though the bracket input tag value is set to
prop1, it's not changing the{{prop1}}property elsewhere in the template. This is because the value is set to work only one way. The only way to change the value ofprop1in the controller is to send it as an action back to the controller from the template.This is the basis behind data down, actions up. Data is copied down to the template from the controller or component. Any changes to it are then sent back in an action to the parent component or controller. Keep this concept in mind as it is becoming more and more popular in Ember.
- Update the values in the two-way input helper box:
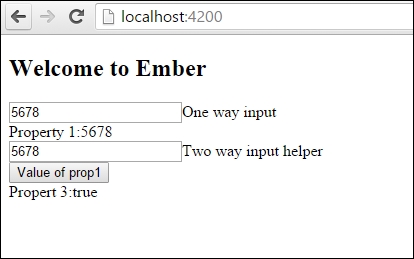
The two-way
inputhelper updates all the values in the template because it's linked back to the controller. Any changes to the property in the template are reflected back in the controller because it's two-way bound. - Press the Value of prop1 button:
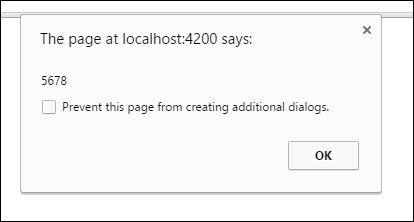
When the button is clicked, an action is triggered. It displays three alert boxes. Each alert box will display the
prop1property. It will then toggle the third Boolean property fromtruetofalse.
Computed properties, or observers, can be added to controllers as well. To learn more about these, check out Chapter 2, The Ember.Object Model.