
17
Going Live
In the previous chapter, you built a real-time chat server for students using Django Channels. Now that you have created a fully functional e-learning platform, you need to set up a production environment so that it can be accessed over the internet. Until now, you have been working in a development environment, using the Django development server to run your site. In this chapter, you will learn how to set up a production environment that is able to serve your Django project in a secure and efficient manner.
This chapter will cover the following topics:
- Configuring Django settings for multiple environments
- Using Docker Compose to run multiple services
- Setting up a web server with uWSGI and Django
- Serving PostgreSQL and Redis with Docker Compose
- Using the Django system check framework
- Serving NGINX with Docker
- Serving static assets through NGINX
- Securing connections through TLS/SSL
- Using the Daphne ASGI server for Django Channels
- Creating a custom Django middleware
- Implementing custom Django management commands
The source code for this chapter can be found at https://github.com/PacktPublishing/Django-4-by-example/tree/main/Chapter17.
All Python modules used in this chapter are included in the requirements.txt file in the source code that comes along with this chapter. You can follow the instructions to install each Python module below or you can install all requirements at once with the command pip install -r requirements.txt.
Creating a production environment
It’s time to deploy your Django project in a production environment. You will start by configuring Django settings for multiple environments, and then you will set up a production environment.
Managing settings for multiple environments
In real-world projects, you will have to deal with multiple environments. You will usually have at least a local environment for development and a production environment for serving your application. You could have other environments as well, such as testing or staging environments.
Some project settings will be common to all environments, but others will be specific to each environment. Usually, you will use a base file that defines common settings, and a settings file per environment that overrides any necessary settings and defines additional ones.
We will manage the following environments:
local: The local environment to run the project on your machine.prod: The environment for deploying your project on a production server.
Create a settings/ directory next to the settings.py file of the educa project. Rename the settings.py file to base.py and move it into the new settings/ directory.
Create the following additional files inside the settings/ folder so that the new directory looks as follows:
settings/
    __init__.py
    base.py
    local.py
    prod.py
These files are as follows:
base.py: The base settings file that contains common settings (previouslysettings.py)local.py: Custom settings for your local environmentprod.py: Custom settings for the production environment
You have moved the settings files to a directory one level below, so you need to update the BASE_DIR setting in the settings/base.py file to point to the main project directory.
When handling multiple environments, create a base settings file and a settings file for each environment. Environment settings files should inherit the common settings and override environment-specific settings.
Edit the settings/base.py file and replace the following line:
BASE_DIR = Path(__file__).resolve().parent.parent
with the following one:
BASE_DIR = Path(__file__).resolve().parent.parent.parent
You point to one directory above by adding .parent to the BASE_DIR path. Let’s configure the settings for the local environment.
Local environment settings
Instead of using a default configuration for the DEBUG and DATABASES settings, you will define them for each environment explicitly. These settings will be environment specific. Edit the educa/settings/local.py file and add the following lines:
from .base import *
DEBUG = True
DATABASES = {
    'default': {
        'ENGINE': 'django.db.backends.sqlite3',
        'NAME': BASE_DIR / 'db.sqlite3',
    }
}
This is the settings file for your local environment. In this file, you import all settings defined in the base.py file, and you define the DEBUG and DATABASES settings for this environment. The DEBUG and DATABASES settings remain the same as you have been using for development.
Now remove the DATABASES and DEBUG settings from the base.py settings file.
Django management commands won’t automatically detect the settings file to use because the project settings file is not the default settings.py file. When running management commands, you need to indicate the settings module to use by adding a --settings option, as follows:
python manage.py runserver --settings=educa.settings.local
Next, we are going to validate the project and the local environment configuration.
Running the local environment
Let’s run the local environment using the new settings structure. Make sure Redis is running or start the Redis Docker container in a shell with the following command:
docker run -it --rm --name redis -p 6379:6379 redis
Run the following management command in another shell, from the project directory:
python manage.py runserver --settings=educa.settings.local
Open http://127.0.0.1:8000/ in your browser and check that the site loads correctly. You are now serving your site using the settings for the local environment.
If don’t want to pass the --settings option every time you run a management command, you can define the DJANGO_SETTINGS_MODULE environment variable. Django will use it to identify the settings module to use. If you are using Linux or macOS, you can define the environment variable by executing the following command in the shell:
export DJANGO_SETTINGS_MODULE=educa.settings.local
If you are using Windows, you can execute the following command in the shell:
set DJANGO_SETTINGS_MODULE=educa.settings.local
Any management command you execute after will use the settings defined in the DJANGO_SETTINGS_MODULE environment variable.
Stop the Django development server from the shell by pressing the keys Ctrl + C and stop the Redis Docker container from the shell by also pressing the keys Ctrl + C.
The local environment works well. Let’s prepare the settings for the production environment.
Production environment settings
Let’s start by adding initial settings for the production environment. Edit the educa/settings/prod.py file and make it look as follows:
from .base import *
DEBUG = False
ADMINS = [
    ('Antonio M', '[email protected]'),
]
ALLOWED_HOSTS = ['*']
DATABASES = {
    'default': {
    }
}
These are the settings for the production environment:
DEBUG: SettingDEBUGtoFalseis necessary for any production environment. Failing to do so will result in the traceback information and sensitive configuration data being exposed to everyone.ADMINS: WhenDEBUGisFalseand a view raises an exception, all information will be sent by email to the people listed in theADMINSsetting. Make sure that you replace the name/email tuple with your own information.ALLOWED_HOSTS: For security reasons, Django will only allow the hosts included in this list to serve the project. For now, you allow all hosts by using the asterisk symbol,*. You will limit the hosts that can be used for serving the project later.DATABASES: You keepdefaultdatabase settings empty because you will configure the production database later.
Over the next sections of this chapter, you will complete the settings file for your production environment.
You have successfully organized settings for handling multiple environments. Now you will build a complete production environment by setting up different services with Docker.
Using Docker Compose
Docker allows you to build, deploy, and run application containers. A Docker container combines application source code with operating system libraries and dependencies required to run the application. By using application containers, you can improve your application portability. You are already using a Redis Docker image to serve Redis in your local environment. This Docker image contains everything needed to run Redis and allows you to run it seamlessly on your machine. For the production environment, you will use Docker Compose to build and run different Docker containers.
Docker Compose is a tool for defining and running multi-container applications. You can create a configuration file to define the different services and use a single command to start all services from your configuration. You can find information about Docker Compose at https://docs.docker.com/compose/.
For the production environment, you will create a distributed application that runs across multiple Docker containers. Each Docker container will run a different service. You will initially define the following three services and you will add additional services in the next sections:
- Web service: A web server to serve the Django project
- Database service: A database service to run PostgreSQL
- Cache service: A service to run Redis
Let’s start by installing Docker Compose.
Installing Docker Compose
You can run Docker Compose on macOS, 64-bit Linux, and Windows. The fastest way to install Docker Compose is by installing Docker Desktop. The installation includes Docker Engine, the command-line interface, and the Docker Compose plugin.
Install Docker Desktop by following the instructions at https://docs.docker.com/compose/install/compose-desktop/.
Open the Docker Desktop application and click on Containers. It will look as follows:

Figure 17.1: The Docker Desktop interface
After installing Docker Compose, you will need to create a Docker image for your Django project.
Creating a Dockerfile
You need to create a Docker image to run the Django project. A Dockerfile is a text file that contains the commands for Docker to assemble a Docker image. You will prepare a Dockerfile with the commands to build the Docker image for the Django project.
Next to the educa project directory, create a new file and name it Dockerfile. Add the following code to the new file:
# Pull official base Python Docker image
FROM python:3.10.6
# Set environment variables
ENV PYTHONDONTWRITEBYTECODE=1
ENV PYTHONUNBUFFERED=1
# Set work directory
WORKDIR /code
# Install dependencies
RUN pip install --upgrade pip
COPY requirements.txt /code/
RUN pip install -r requirements.txt
# Copy the Django project
COPY . /code/
This code performs the following tasks:
- The Python 3.10.6 parent Docker image is used. You can find the official Python Docker image at https://hub.docker.com/_/python.
- The following environment variables are set:
- The
WORKDIRcommand is used to define the working directory of the image. - The
pippackage of the image is upgraded. - The
requirements.txtfile is copied to thecodedirectory of the parent Python image. - The Python packages in
requirements.txtare installed in the image usingpip. - The Django project source code is copied from the local directory to the
codedirectory of the image.
With this Dockerfile, you have defined how the Docker image to serve Django will be assembled. You can find the Dockerfile reference at https://docs.docker.com/engine/reference/builder/.
Adding the Python requirements
A requirements.txt file is used in the Dockerfile you created to install all necessary Python packages for the project.
Next to the educa project directory, create a new file and name it requirements.txt. You may have already created this file before and copied the content for the requirements.txt file from https://github.com/PacktPublishing/Django-4-by-example/blob/main/Chapter17/requirements.txt. If you haven’t done so, add the following lines to the newly created requirements.txt file:
asgiref==3.5.2
Django~=4.1
Pillow==9.2.0
sqlparse==0.4.2
django-braces==1.15.0
django-embed-video==1.4.4
pymemcache==3.5.2
django-debug-toolbar==3.6.0
redis==4.3.4
django-redisboard==8.3.0
djangorestframework==3.13.1
requests==2.28.1
channels==3.0.5
channels-redis==3.4.1
psycopg2==2.9.3
uwsgi==2.0.20
daphne==3.0.2
In addition to the Python packages that you have installed in the previous chapters, the requirements.txt includes the following packages:
psycopg2: A PostgreSQL adapter. You will use PostgreSQL for the production environment.uwsgi: A WSGI web server. You will configure this web server later to serve Django in the production environment.daphne: An ASGI web server. You will use this web server later to serve Django Channels.
Let’s start by setting up the Docker application in Docker Compose. We will create a Docker Compose file with the definition for the web server, database, and Redis services.
Creating a Docker Compose file
To define the services that will run in different Docker containers, we will use a Docker Compose file. The Compose file is a text file with YAML format, defining services, networks, and data volumes for a Docker application. YAML is a human-readable data-serialization language. You can see an example of a YAML file at https://yaml.org/.
Next to the educa project directory, create a new file and name it docker-compose.yml. Add the following code to it:
services:
  web:
    build: .
    command: python /code/educa/manage.py runserver 0.0.0.0:8000
    restart: always
    volumes:
      - .:/code
    ports:
      - "8000:8000"
    environment:
      - DJANGO_SETTINGS_MODULE=educa.settings.prod
In this file, you define a web service. The sections to define this service are as follows:
build: Defines the build requirements for a service container image. This can be a single string defining a context path, or a detailed build definition. You provide a relative path with a single dot.to point to the same directory where the Compose file is located. Docker Compose will look for aDockerfileat this location. You can read more about thebuildsection at https://docs.docker.com/compose/compose-file/build/.command: Overrides the default command of the container. You run the Django development server using therunservermanagement command. The project is served on host0.0.0.0, which is the default Docker IP, on port8000.restart: Defines the restart policy for the container. Usingalways, the container is restarted always if it stops. This is useful for a production environment, where you want to minimize downtime. You can read more about the restart policy at https://docs.docker.com/config/containers/start-containers-automatically/.volumes: Data in Docker containers is not permanent. Each Docker container has a virtual filesystem that is populated with the files of the image and that is destroyed when the container is stopped. Volumes are the preferred method to persist data generated and used by Docker containers. In this section, you mount the local directory.to the/codedirectory of the image. You can read more about Docker volumes at https://docs.docker.com/storage/volumes/.ports: Exposes container ports. Host port8000is mapped to container port8000, on which the Django development server is running.environment: Defines environment variables. You set theDJANGO_SETTINGS_MODULEenvironment variable to use the production Django settings fileeduca.settings.prod.
Note that in the Docker Compose file definition, you are using the Django development server to serve the application. The Django development server is not suitable for production use, so you will replace it later with a WSGI Python web server.
You can find information about the Docker Compose specification at https://docs.docker.com/compose/compose-file/.
At this point, assuming your parent directory is named Chapter17, the file structure should look as follows:
Chapter17/
    Dockerfile
    docker-compose.yml
    educa/
        manage.py
        ...
    requirements.txt
Open a shell in the parent directory, where the docker-compose.yml file is located, and run the following command:
docker compose up
This will start the Docker app defined in the Docker Compose file. You will see an output that includes the following lines:
chapter17-web-1  | Performing system checks...
chapter17-web-1  |
chapter17-web-1  | System check identified no issues (0 silenced).
chapter17-web-1  | July 19, 2022 - 15:56:28
chapter17-web-1  | Django version 4.1, using settings 'educa.settings.prod'
chapter17-web-1  | Starting ASGI/Channels version 3.0.5 development server at http://0.0.0.0:8000/
chapter17-web-1  | Quit the server with CONTROL-C.
The Docker container for your Django project is running!
Open http://localhost:8000/admin/ with your browser. You should see the Django administration site login form. It should look like Figure 17.2:
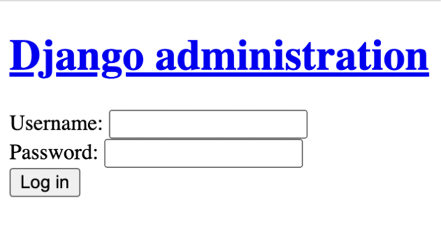
Figure 17.2: The Django administration site login form
CSS styles are not being loaded. You are using DEBUG=False, so URL patterns for serving static files are not being included in the main urls.py file of the project. Remember that the Django development server is not suitable for serving static files. You will configure a server for serving static files later in this chapter.
If you access any other URL of your site, you might get an HTTP 500 error because you haven’t configured a database for the production environment yet.
Take a look at the Docker Desktop app. You will see the following containers:

Figure 17.3: The chapter17 application and the web-1 container in Docker Desktop
The chapter17 Docker application is running and it has a single container named web-1, which is running on port 8000. The name for the Docker application is generated dynamically using the name of the directory where the Docker Compose file is located, in this case, chapter17.
Next, you are going to add a PostgreSQL service and a Redis service to your Docker application.
Configuring the PostgreSQL service
Throughout this book, you have mostly used the SQLite database. SQLite is simple and quick to set up, but for a production environment, you will need a more powerful database, such as PostgreSQL, MySQL, or Oracle. You learned how to install PostgreSQL in Chapter 3, Extending Your Blog Application. For the production environment, we will use a PostgreSQL Docker image instead. You can find information about the official PostgreSQL Docker image at https://hub.docker.com/_/postgres.
Edit the docker-compose.yml file and add the following lines highlighted in bold:
services:
  db:
    image: postgres:14.5
    restart: always
    volumes:
      - ./data/db:/var/lib/postgresql/data
    environment:
      - POSTGRES_DB=postgres
      - POSTGRES_USER=postgres
      - POSTGRES_PASSWORD=postgres
  web:
    build: .
    command: python /code/educa/manage.py runserver 0.0.0.0:8000
    restart: always
    volumes:
      - .:/code
    ports:
      - "8000:8000"
    environment:
      - DJANGO_SETTINGS_MODULE=educa.settings.prod
      - POSTGRES_DB=postgres
      - POSTGRES_USER=postgres
      - POSTGRES_PASSWORD=postgres
    depends_on:
      - db
With these changes, you define a service named db with the following subsections:
image: The service uses the basepostgresDocker image.restart: The restart policy is set toalways.volumes: You mount the./data/dbdirectory to the image directory/var/lib/postgresql/datato persist the database so that data stored in the database is maintained after the Docker application is stopped. This will create the localdata/db/path.environment: You use thePOSTGRES_DB(database name),POSTGRES_USER, andPOSTGRES_PASSWORDvariables with default values.
The definition for the web service now includes the PostgreSQL environment variables for Django. You create a service dependency using depends_on so that the web service is started after the db service. This will guarantee the order of the container initialization, but it won’t guarantee that PostgreSQL is fully initiated before the Django web server is started. To solve this, you need to use a script that will wait on the availability of the database host and its TCP port. Docker recommends using the wait-for-it tool to control container initialization.
Download the wait-for-it.sh Bash script from https://github.com/vishnubob/wait-for-it/blob/master/wait-for-it.sh and save the file next to the docker-compose.yml file. Then edit the docker-compose.yml file and modify the web service definition as follows. New code is highlighted in bold:
web:
  build: .
  command: ["./wait-for-it.sh", "db:5432", "--",
            "python", "/code/educa/manage.py", "runserver",
            "0.0.0.0:8000"]
  restart: always
  volumes:
      - .:/code
    environment:
      - DJANGO_SETTINGS_MODULE=educa.settings.prod
      - POSTGRES_DB=postgres
      - POSTGRES_USER=postgres
      - POSTGRES_PASSWORD=postgres
    depends_on:
      - db
In this service definition, you use the wait-for-it.sh Bash script to wait for the db host to be ready and accepting connections on port 5432, the default port for PostgreSQL, before starting the Django development server. You can read more about the service startup order in Compose at https://docs.docker.com/compose/startup-order/.
Let’s edit Django settings. Edit the educa/settings/prod.py file and add the following code highlighted in bold:
import os
from .base import *
DEBUG = False
ADMINS = [
    ('Antonio M', '[email protected]'),
]
ALLOWED_HOSTS = ['*']
DATABASES = {
    'default': {
        'ENGINE': 'django.db.backends.postgresql',
        'NAME': os.environ.get('POSTGRES_DB'),
        'USER': os.environ.get('POSTGRES_USER'),
        'PASSWORD': os.environ.get('POSTGRES_PASSWORD'),
        'HOST': 'db',
        'PORT': 5432,
    }
}
In the production settings file, you use the following settings:
ENGINE: You use the Django database backend for PostgreSQL.NAME,USER, andPASSWORD: You useos.environ.get()to retrieve the environment variablesPOSTGRES_DB(database name),POSTGRES_USER, andPOSTGRES_PASSWORD. You have set these environment variables in the Docker Compose file.HOST: You usedb, which is the container hostname for the database service defined in the Docker Compose file. A container hostname defaults to the container’s ID in Docker. That’s why you use thedbhostname.PORT: You use the value5432, which is the default port for PostgreSQL.
Stop the Docker application from the shell by pressing the keys Ctrl + C or using the stop button in the Docker Desktop app. Then start Compose again with the command:
docker compose up
The first execution after adding the db service to the Docker Compose file will take longer because PostgreSQL needs to initialize the database. The output will contain the following two lines:
chapter17-db-1   | database system is ready to accept connections
...
chapter17-web-1  | Starting ASGI/Channels version 3.0.5 development server at http://0.0.0.0:8000/
Both the PostgreSQL database and the Django application are ready. The production database is empty, so you need to apply database migrations.
Applying database migrations and creating a superuser
Open a different shell in the parent directory, where the docker-compose.yml file is located, and run the following command:
docker compose exec web python /code/educa/manage.py migrate
The command docker compose exec allows you to execute commands in the container. You use this command to execute the migrate management command in the web Docker container.
Finally, create a superuser with the following command:
docker compose exec web python /code/educa/manage.py createsuperuser
Migrations have been applied to the database and you have created a superuser. You can access http://localhost:8000/admin/ with the superuser credentials. CSS styles still won’t load because you haven’t configured serving static files yet.
You have defined services to serve Django and PostgreSQL using Docker Compose. Next, you will add a service to serve Redis in the production environment.
Configuring the Redis service
Let’s add a Redis service to the Docker Compose file. For this purpose, you will use the official Redis Docker image. You can find information about the official Redis Docker image at https://hub.docker.com/_/redis.
Edit the docker-compose.yml file and add the following lines highlighted in bold:
services:
  db:
    # ...
  cache:
    image: redis:7.0.4
    restart: always
    volumes:
      - ./data/cache:/data
  web:
    # ...
    depends_on:
      - db
      - cache
In the previous code, you define the cache service with the following subsections:
image: The service uses the baseredisDocker image.restart: The restart policy is set toalways.volumes: You mount the./data/cachedirectory to the image directory/datawhere any Redis writes will be persisted. This will create the localdata/cache/path.
In the web service definition, you add the cache service as a dependency, so that the web service is started after the cache service. The Redis server initializes fast, so you don’t need to use the wait-for-it tool in this case.
Edit the educa/settings/prod.py file and add the following lines:
REDIS_URL = 'redis://cache:6379'
CACHES['default']['LOCATION'] = REDIS_URL
CHANNEL_LAYERS['default']['CONFIG']['hosts'] = [REDIS_URL]
In these settings, you use the cache hostname that is automatically generated by Docker Compose using the name of the cache service and port 6379 used by Redis. You modify the Django CACHE setting and the CHANNEL_LAYERS setting used by Channels to use the production Redis URL.
Stop the Docker application from the shell by pressing the keys Ctrl + C or using the stop button in the Docker Desktop app. Then start Compose again with the command:
docker compose up
Open the Docker Desktop application. You should see now the chapter17 Docker application running a container for each service defined in the Docker Compose file: db, cache, and web:

Figure 17.4: The chapter17 application with the db-1, web-1, and cache-1 containers in Docker Desktop
You are still serving Django with the Django development server, which is not suitable for production use. Let’s replace it with the WSGI Python web server.
Serving Django through WSGI and NGINX
Django’s primary deployment platform is WSGI. WSGI stands for Web Server Gateway Interface, and it is the standard for serving Python applications on the web.
When you generate a new project using the startproject command, Django creates a wsgi.py file inside your project directory. This file contains a WSGI application callable, which is an access point to your application.
WSGI is used for both running your project with the Django development server and deploying your application with the server of your choice in a production environment. You can learn more about WSGI at https://wsgi.readthedocs.io/en/latest/.
Using uWSGI
Throughout this book, you have been using the Django development server to run projects in your local environment. However, you need a standard web server for deploying your application in a production environment.
uWSGI is an extremely fast Python application server. It communicates with your Python application using the WSGI specification. uWSGI translates web requests into a format that your Django project can process.
Let’s configure uWSGI to serve the Django project. You already added uwsgi==2.0.20 to the requirements.txt file of the project, so uWSGI is already being installed in the Docker image of the web service.
Edit the docker-compose.yml file and modify the web service definition as follows. New code is highlighted in bold:
web:
    build: .
    command: ["./wait-for-it.sh", "db:5432", "--",
              "uwsgi", "--ini", "/code/config/uwsgi/uwsgi.ini"]
    restart: always
    volumes:
      - .:/code
    environment:
      - DJANGO_SETTINGS_MODULE=educa.settings.prod
      - POSTGRES_DB=postgres
      - POSTGRES_USER=postgres
      - POSTGRES_PASSWORD=postgres
    depends_on:
      - db
      - cache
Make sure to remove the ports section. uWSGI will be reachable with a socket, so you don’t need to expose a port in the container.
The new command for the image runs uwsgi passing the configuration file /code/config/uwsgi/uwsgi.ini to it. Let’s create the configuration file for uWSGI.
Configuring uWSGI
uWSGI allows you to define a custom configuration in a .ini file. Next to the docker-compose.yml file, create the file path config/uwsgi/uwsgi.ini. Assuming your parent directory is named Chapter17, the file structure should look as follows:
Chapter17/
    config/
        uwsgi/
            uwsgi.ini
    Dockerfile
    docker-compose.yml
    educa/
        manage.py
        ...
    requirements.txt
Edit the config/uwsgi/uwsgi.ini file and add the following code to it:
[uwsgi]
socket=/code/educa/uwsgi_app.sock
chdir = /code/educa/
module=educa.wsgi:application
master=true
chmod-socket=666
uid=www-data
gid=www-data
vacuum=true
In the uwsgi.ini file, you define the following options:
socket: The UNIX/TCP socket to bind the server.chdir: The path to your project directory, so that uWSGI changes to that directory before loading the Python application.module: The WSGI module to use. You set this to theapplicationcallable contained in thewsgimodule of your project.master: Enable the master process.chmod-socket: The file permissions to apply to the socket file. In this case, you use666so that NGINX can read/write the socket.uid: The user ID of the process once it’s started.gid: The group ID of the process once it’s started.vacuum: Usingtrueinstructs uWSGI to clean up any temporary files or UNIX sockets it creates.
The socket option is intended for communication with some third-party router, such as NGINX. You are going to run uWSGI using a socket and you are going to configure NGINX as your web server, which will communicate with uWSGI through the socket.
You can find the list of available uWSGI options at https://uwsgi-docs.readthedocs.io/en/latest/Options.html.
You will not be able to access your uWSGI instance from your browser now, since it’s running through a socket. Let’s complete the production environment.
Using NGINX
When you are serving a website, you have to serve dynamic content, but you also need to serve static files, such as CSS style sheets, JavaScript files, and images. While uWSGI is capable of serving static files, it adds an unnecessary overhead to HTTP requests and therefore, it is encouraged to set up a web server, such as NGINX, in front of it.
NGINX is a web server focused on high concurrency, performance, and low memory usage. NGINX also acts as a reverse proxy, receiving HTTP and WebSocket requests and routing them to different backends.
Generally, you will use a web server, such as NGINX, in front of uWSGI for serving static files efficiently, and you will forward dynamic requests to uWSGI workers. By using NGINX, you can also apply different rules and benefit from its reverse proxy capabilities.
We will add the NGINX service to the Docker Compose file using the official NGINX Docker image. You can find information about the official NGINX Docker image at https://hub.docker.com/_/nginx.
Edit the docker-compose.yml file and add the following lines highlighted in bold:
services:
  db:
    # ...
  cache:
    # ...
  web:
    # ...
  nginx:
    image: nginx:1.23.1
    restart: always
    volumes:
      - ./config/nginx:/etc/nginx/templates
      - .:/code
    ports:
      - "80:80"
You have added the definition for the nginx service with the following subsections:
image: The service uses the basenginxDocker image.restart: The restart policy is set toalways.volumes: You mount the./config/nginxvolume to the/etc/nginx/templatesdirectory of the Docker image. This is where NGINX will look for a default configuration template. You also mount the local directory.to the/codedirectory of the image, so that NGINX can have access to static files.ports: You expose port80, which is mapped to container port80. This is the default port for HTTP.
Let’s configure the NGINX web server.
Configuring NGINX
Create the following file path highlighted in bold under the config/ directory:
config/
    uwsgi/
      uwsgi.ini
    nginx/
        default.conf.template
Edit the file nginx/default.conf.template and add the following code to it:
# upstream for uWSGI
upstream uwsgi_app {
    server unix:/code/educa/uwsgi_app.sock;
}
server {
    listen       80;
    server_name  www.educaproject.com educaproject.com;
    error_log    stderr warn;
    access_log   /dev/stdout main;
    location / {
        include      /etc/nginx/uwsgi_params;
        uwsgi_pass   uwsgi_app;
    }
}
This is the basic configuration for NGINX. In this configuration, you set up an upstream named uwsgi_app, which points to the socket created by uWSGI. You use the server block with the following configuration:
- You tell NGINX to listen on port
80. - You set the server name to both
www.educaproject.comandeducaproject.com. NGINX will serve incoming requests for both domains. - You use
stderrfor theerror_logdirective to get error logs written to the standard error file. The second parameter determines the logging level. You usewarnto get warnings and errors of higher severity. - You point
access_logto the standard output with/dev/stdout. - You specify that any request under the
/path has to be routed to theuwsgi_appsocket to uWSGI. - You include the default uWSGI configuration parameters that come with NGINX. These are located at
/etc/nginx/uwsgi_params.
NGINX is now configured. You can find the NGINX documentation at https://nginx.org/en/docs/.
Stop the Docker application from the shell by pressing the keys Ctrl + C or using the stop button in the Docker Desktop app. Then start Compose again with the command:
docker compose up
Open the URL http://localhost/ in your browser. It’s not necessary to add a port to the URL because you are accessing the host through the standard HTTP port 80. You should see the course list page with no CSS styles, like Figure 17.5:

Figure 17.5: The course list page served with NGINX and uWSGI
The following diagram shows the request/response cycle of the production environment that you have set up:

Figure 17.6: The production environment request/response cycle
The following happens when the client browser sends an HTTP request:
- NGINX receives the HTTP request.
- NGINX delegates the request to uWSGI through a socket.
- uWSGI passes the request to Django for processing.
- Django returns an HTTP response that is passed back to NGINX, which in turn passes it back to the client browser.
If you check the Docker Desktop application, you should see that there are 4 containers running:
dbservice running PostgreSQLcacheservice running Rediswebservice running uWSGI + Djangonginxservice running NGINX
Let’s continue with the production environment setup. Instead of accessing our project using localhost, we will configure the project to use the educaproject.com hostname.
Using a hostname
You will use the educaproject.com hostname for your site. Since you are using a sample domain name, you need to redirect it to your local host.
If you are using Linux or macOS, edit the /etc/hosts file and add the following line to it:
127.0.0.1 educaproject.com www.educaproject.com
If you are using Windows, edit the file C:WindowsSystem32driversetc and add the same line.
By doing so, you are routing the hostnames educaproject.com and www.educaproject.com to your local server. In a production server, you won’t need to do this, since you will have a fixed IP address and you will point your hostname to your server in your domain’s DNS configuration.
Open http://educaproject.com/ in your browser. You should be able to see your site, still without any static assets loaded. Your production environment is almost ready.
Now you can restrict the hosts that can serve your Django project. Edit the production settings file educa/settings/prod.py of your project and change the ALLOWED_HOSTS setting, as follows:
ALLOWED_HOSTS = ['educaproject.com', 'www.educaproject.com']
Django will only serve your application if it’s running under any of these hostnames. You can read more about the ALLOWED_HOSTS setting at https://docs.djangoproject.com/en/4.1/ref/settings/#allowed-hosts.
The production environment is almost ready. Let’s continue by configuring NGINX to serve static files.
Serving static and media assets
uWSGI is capable of serving static files flawlessly, but it is not as fast and effective as NGINX. For the best performance, you will use NGINX to serve static files in your production environment. You will set up NGINX to serve both the static files of your application (CSS style sheets, JavaScript files, and images) and media files uploaded by instructors for the course contents.
Edit the settings/base.py file and add the following line just below the STATIC_URL setting:
STATIC_ROOT = BASE_DIR / 'static'
This is the root directory for all static files of the project. Next, you are going to collect the static files from the different Django applications into the common directory.
Collecting static files
Each application in your Django project may contain static files in a static/ directory. Django provides a command to collect static files from all applications into a single location. This simplifies the setup for serving static files in production. The collectstatic command collects the static files from all applications of the project into the path defined with the STATIC_ROOT setting.
Stop the Docker application from the shell by pressing the keys Ctrl + C or using the stop button in the Docker Desktop app. Then start Compose again with the command:
docker compose up
Open another shell in the parent directory, where the docker-compose.yml file is located, and run the following command:
docker compose exec web python /code/educa/manage.py collectstatic
Note that you can alternatively run the following command in the shell, from the educa/ project directory:
python manage.py collectstatic --settings=educa.settings.local
Both commands will have the same effect since the base local directory is mounted to the Docker image. Django will ask if you want to override any existing files in the root directory. Type yes and press Enter. You will see the following output:
171 static files copied to '/code/educa/static'.
Files located under the static/ directory of each application present in the INSTALLED_APPS setting have been copied to the global /educa/static/ project directory.
Serving static files with NGINX
Edit the config/nginx/default.conf.template file and add the following lines highlighted in bold to the server block:
server {
    # ...
    location / {
        include      /etc/nginx/uwsgi_params;
        uwsgi_pass   uwsgi_app;
    }
    location /static/ {
        alias /code/educa/static/;
    }
    location /media/ {
        alias /code/educa/media/;
    }
}
These directives tell NGINX to serve static files located under the /static/ and /media/ paths directly. These paths are as follows:
/static/: Corresponds to the path of theSTATIC_URLsetting. The target path corresponds to the value of theSTATIC_ROOTsetting. You use it to serve the static files of your application from the directory mounted to the NGINX Docker image./media/: Corresponds to the path of theMEDIA_URLsetting, and its target path corresponds to the value of theMEDIA_ROOTsetting. You use it to serve the media files uploaded to the course contents from the directory mounted to the NGINX Docker image.
The schema of the production environment now looks like this:

Figure 17.7: The production environment request/response cycle, including static files
Files under the /static/ and /media/ paths are now served by NGINX directly, instead of being forwarded to uWSGI. Requests to any other path are still passed by NGINX to uWSGI through the UNIX socket.
Stop the Docker application from the shell by pressing the keys Ctrl + C or using the stop button in the Docker Desktop app. Then start Compose again with the command:
docker compose up
Open http://educaproject.com/ in your browser. You should see the following screen:
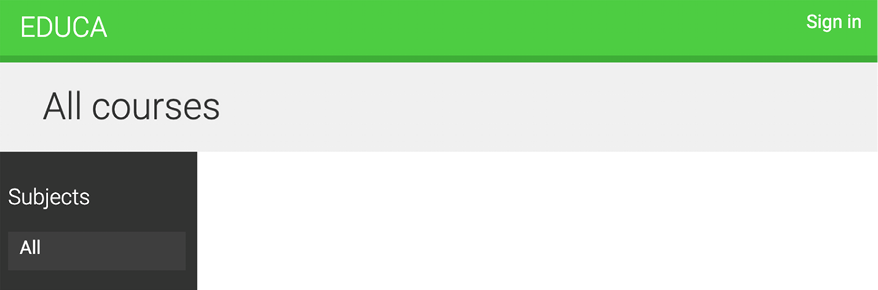
Figure 17.8: The course list page served with NGINX and uWSGI
Static resources, such as CSS style sheets and images, are now loaded correctly. HTTP requests for static files are now being served by NGINX directly, instead of being forwarded to uWSGI.
You have successfully configured NGINX for serving static files. Next, you are going to check your Django project to deploy it in a production environment and you are going to serve your site under HTTPS.
Securing your site with SSL/TLS
The Transport Layer Security (TLS) protocol is the standard for serving websites through a secure connection. The TLS predecessor is Secure Sockets Layer (SSL). Although SSL is now deprecated, in multiple libraries and online documentation, you will find references to both the terms TLS and SSL. It’s strongly encouraged that you serve your websites over HTTPS.
In this section, you are going to check your Django project for a production deployment and prepare the project to be served over HTTPS. Then, you are going to configure an SSL/TLS certificate in NGINX to serve your site securely.
Checking your project for production
Django includes a system check framework for validating your project at any time. The check framework inspects the applications installed in your Django project and detects common problems. Checks are triggered implicitly when you run management commands like runserver and migrate. However, you can trigger checks explicitly with the check management command.
You can read more about Django’s system check framework at https://docs.djangoproject.com/en/4.1/topics/checks/.
Let’s confirm that the check framework does not raise any issues for your project. Open the shell in the educa project directory and run the following command to check your project:
python manage.py check --settings=educa.settings.prod
You will see the following output:
System check identified no issues (0 silenced).
The system check framework didn’t identify any issues. If you use the --deploy option, the system check framework will perform additional checks that are relevant for a production deployment.
Run the following command from the educa project directory:
python manage.py check --deploy --settings=educa.settings.prod
You will see output like the following:
System check identified some issues:
WARNINGS:
(security.W004) You have not set a value for the SECURE_HSTS_SECONDS setting. ...
(security.W008) Your SECURE_SSL_REDIRECT setting is not set to True...
(security.W009) Your SECRET_KEY has less than 50 characters, less than 5 unique characters, or it's prefixed with 'django-insecure-'...
(security.W012) SESSION_COOKIE_SECURE is not set to True. ...
(security.W016) You have 'django.middleware.csrf.CsrfViewMiddleware' in your MIDDLEWARE, but you have not set CSRF_COOKIE_SECURE ...
System check identified 5 issues (0 silenced).
The check framework has identified five issues (0 errors, 5 warnings). All warnings are related to security-related settings.
Let’s address issue security.W009. Edit the educa/settings/base.py file and modify the SECRET_KEY setting by removing the django-insecure- prefix and adding additional random characters to generate a string with at least 50 characters.
Run the check command again and verify that issue security.W009 is not raised anymore. The rest of the warnings are related to SSL/TLS configuration. We will address them next.
Configuring your Django project for SSL/TLS
Django comes with specific settings for SSL/TLS support. You are going to edit the production settings to serve your site over HTTPS.
Edit the educa/settings/prod.py settings file and add the following settings to it:
# Security
CSRF_COOKIE_SECURE = True
SESSION_COOKIE_SECURE = True
SECURE_SSL_REDIRECT = True
These settings are as follows:
CSRF_COOKIE_SECURE: Use a secure cookie for cross-site request forgery (CSRF) protection. WithTrue, browsers will only transfer the cookie over HTTPS.SESSION_COOKIE_SECURE: Use a secure session cookie. WithTrue, browsers will only transfer the cookie over HTTPS.SECURE_SSL_REDIRECT: Whether HTTP requests have to be redirected to HTTPS.
Django will now redirect HTTP requests to HTTPS; session and CSRF cookies will be sent only over HTTPS.
Run the following command from the main directory of your project:
python manage.py check --deploy --settings=educa.settings.prod
Only one warning remains, security.W004:
(security.W004) You have not set a value for the SECURE_HSTS_SECONDS setting. ...
This warning is related to the HTTP Strict Transport Security (HSTS) policy. The HSTS policy prevents users from bypassing warnings and connecting to a site with an expired, self-signed, or otherwise invalid SSL certificate. In the next section, we will use a self-signed certificate for our site, so we will ignore this warning. When you own a real domain, you can apply for a trusted Certificate Authority (CA) to issue an SSL/TLS certificate for it, so that browsers can verify its identity. In that case, you can give a value to SECURE_HSTS_SECONDS higher than 0, which is the default value. You can learn more about the HSTS policy at https://docs.djangoproject.com/en/4.1/ref/middleware/#http-strict-transport-security.
You have successfully fixed the rest of the issues raised by the check framework. You can read more about the Django deployment checklist at https://docs.djangoproject.com/en/4.1/howto/deployment/checklist/.
Creating an SSL/TLS certificate
Create a new directory inside the educa project directory and name it ssl. Then, generate an SSL/TLS certificate from the command line with the following command:
openssl req -x509 -newkey rsa:2048 -sha256 -days 3650 -nodes
  -keyout ssl/educa.key -out ssl/educa.crt
  -subj '/CN=*.educaproject.com'
  -addext 'subjectAltName=DNS:*.educaproject.com'
This will generate a private key and a 2048-bit SSL/TLS certificate that is valid for 10 years. This certificate is issued for the hostname *.educaproject.com. This is a wildcard certificate; by using the wildcard character * in the domain name, the certificate can be used for any subdomain of educaproject.com, such as www.educaproject.com or django.educaproject.com. After generating the certificate, the educa/ssl/ directory will contain two files: educa.key (the private key) and educa.crt (the certificate).
You will need at least OpenSSL 1.1.1 or LibreSSL 3.1.0 to use the -addext option. You can check the OpenSSL location in your machine with the command which openssl and you can check the version with the command openssl version.
Alternatively, you can use the SSL/TLS certificate provided in the source code for this chapter. You will find the certificate at https://github.com/PacktPublishing/Django-4-by-example/blob/main/Chapter17/educa/ssl/. Note that you should generate a private key and not use this certificate in production.
Configuring NGINX to use SSL/TLS
Edit the docker-compose.yml file and add the following line highlighted in bold:
services:
  # ...
  nginx:
    #...
    ports:
      - "80:80"
      - "443:443"
The NGINX container host will be accessible through port 80 (HTTP) and port 443 (HTTPS). The host port 443 is mapped to the container port 443.
Edit the config/nginx/default.conf.template file of the educa project and edit the server block to include SSL/TLS, as follows:
server {
   listen               80;
   listen               443 ssl;
   ssl_certificate      /code/educa/ssl/educa.crt;
   ssl_certificate_key  /code/educa/ssl/educa.key;
   server_name          www.educaproject.com educaproject.com;
   # ...
}
With the preceding code, NGINX now listens both to HTTP over port 80 and HTTPS over port 443. You indicate the path to the SSL/TLS certificate with ssl_certificate and the certificate key with ssl_certificate_key.
Stop the Docker application from the shell by pressing the keys Ctrl + C or using the stop button in the Docker Desktop app. Then start Compose again with the command:
docker compose up
Open https://educaproject.com/ with your browser. You should see a warning message similar to the following one:

Figure 17.9: An invalid certificate warning
This screen might vary depending on your browser. It alerts you that your site is not using a trusted or valid certificate; the browser can’t verify the identity of your site. This is because you signed your own certificate instead of obtaining one from a trusted CA. When you own a real domain, you can apply for a trusted CA to issue an SSL/TLS certificate for it, so that browsers can verify its identity. If you want to obtain a trusted certificate for a real domain, you can refer to the Let’s Encrypt project created by the Linux Foundation. It is a nonprofit CA that simplifies obtaining and renewing trusted SSL/TLS certificates for free. You can find more information at https://letsencrypt.org.
Click on the link or button that provides additional information and choose to visit the website, ignoring warnings. The browser might ask you to add an exception for this certificate or verify that you trust it. If you are using Chrome, you might not see any option to proceed to the website. If this is the case, type thisisunsafe and press Enter directly in Chrome on the warning page. Chrome will then load the website. Note that you do this with your own issued certificate; don’t trust any unknown certificate or bypass the browser SSL/TLS certificate checks for other domains.
When you access the site, the browser will display a lock icon next to the URL like Figure 17.10:

Figure 17.10: The browser address bar, including a secure connection padlock icon
Other browsers might display a warning indicating that the certificate is not trusted, like Figure 17.11:

Figure 17.11: The browser address bar, including a warning message
If you click the lock icon or the warning icon, the SSL/TLS certificate details will be displayed as follows:

Figure 17.12: TLS/SSL certificate details
In the certificate details, you will see it is a self-signed certificate and you will see its expiration date. Your browser might mark the certificate as unsafe, but you are using it for testing purposes only. You are now serving your site securely over HTTPS.
Redirecting HTTP traffic over to HTTPS
You are redirecting HTTP requests to HTTPS with Django using the SECURE_SSL_REDIRECT setting. Any request using http:// is redirected to the same URL using https://. However, this can be handled in a more efficient manner using NGINX.
Edit the config/nginx/default.conf.template file and add the following lines highlighted in bold:
# upstream for uWSGI
upstream uwsgi_app {
    server unix:/code/educa/uwsgi_app.sock;
}
server {
    listen      80;
    server_name www.educaproject.com educaproject.com;
    return 301 https://$host$request_uri;
}
server {
    listen               443 ssl;
    ssl_certificate      /code/educa/ssl/educa.crt;
    ssl_certificate_key  /code/educa/ssl/educa.key;
    server_name   www.educaproject.com educaproject.com;
    # ...
}
In this code, you remove the directive listen 80; from the original server block, so that the platform is only available over HTTPS (port 443). On top of the original server block, you add an additional server block that only listens on port 80 and redirects all HTTP requests to HTTPS. To achieve this, you return an HTTP response code 301 (permanent redirect) that redirects to the https:// version of the requested URL using the $host and $request_uri variables.
Open a shell in the parent directory, where the docker-compose.yml file is located, and run the following command to reload NGINX:
docker compose exec nginx nginx -s reload
This runs the nginx -s reload command in the nginx container. You are now redirecting all HTTP traffic to HTTPS using NGINX.
Your environment is now secured with TLS/SSL. To complete the production environment, you need to set up an asynchronous web server for Django Channels.
Using Daphne for Django Channels
In Chapter 16, Building a Chat Server, you used Django Channels to build a chat server using WebSockets. uWSGI is suitable for running Django or any other WSGI application, but it doesn’t support asynchronous communication using Asynchronous Server Gateway Interface (ASGI) or WebSockets. In order to run Channels in production, you need an ASGI web server that is capable of managing WebSockets.
Daphne is an HTTP, HTTP2, and WebSocket server for ASGI developed to serve Channels. You can run Daphne alongside uWSGI to serve both ASGI and WSGI applications efficiently. You can find more information about Daphne at https://github.com/django/daphne.
You already added daphne==3.0.2 to the requirements.txt file of the project. Let’s create a new service in the Docker Compose file to run the Daphne web server.
Edit the docker-compose.yml file and add the following lines:
daphne:
    build: .
    working_dir: /code/educa/
    command: ["../wait-for-it.sh", "db:5432", "--",
              "daphne", "-u", "/code/educa/daphne.sock",
              "educa.asgi:application"]
    restart: always
    volumes:
      - .:/code
    environment:
      - DJANGO_SETTINGS_MODULE=educa.settings.prod
      - POSTGRES_DB=postgres
      - POSTGRES_USER=postgres
      - POSTGRES_PASSWORD=postgres
    depends_on:
      - db
      - cache
The daphne service definition is very similar to the web service. The image for the daphne service is also built with the Dockerfile you previously created for the web service. The main differences are:
working_dirchanges the working directory of the image to/code/educa/.commandruns theeduca.asgi:applicationapplication defined in theeduca/asgi.pyfile withdaphneusing a UNIX socket. It also uses thewait-for-itBash script to wait for the PostgreSQL database to be ready before initializing the web server.
Since you are running Django on production, Django checks the ALLOWED_HOSTS when receiving HTTP requests. We will implement the same validation for WebSocket connections.
Edit the educa/asgi.py file of your project and add the following lines highlighted in bold:
import os
from django.core.asgi import get_asgi_application
from channels.routing import ProtocolTypeRouter, URLRouter
from channels.security.websocket import AllowedHostsOriginValidator
from channels.auth import AuthMiddlewareStack
import chat.routing
os.environ.setdefault('DJANGO_SETTINGS_MODULE', 'educa.settings')
django_asgi_app = get_asgi_application()
application = ProtocolTypeRouter({
    'http': django_asgi_app,
    'websocket': AllowedHostsOriginValidator(
        AuthMiddlewareStack(
            URLRouter(chat.routing.websocket_urlpatterns)
        )
    ),
})
The Channels configuration is now ready for production.
Using secure connections for WebSockets
You have configured NGINX to use secure connections with SSL/TLS. You need to change ws (WebSocket) connections to use the wss (WebSocket Secure) protocol now, in the same way that HTTP connections are now being served over HTTPS.
Edit the chat/room.html template of the chat application and find the following line in the domready block:
const url = 'ws://' + window.location.host +
Replace that line with the following one:
const url = 'wss://' + window.location.host +
By using wss:// instead of ws://, you are explicitly connecting to a secure WebSocket.
Including Daphne in the NGINX configuration
In your production setup, you will run Daphne on a UNIX socket and use NGINX in front of it. NGINX will pass requests to Daphne based on the requested path. You will expose Daphne to NGINX through a UNIX socket interface, just like the uWSGI setup.
Edit the config/nginx/default.conf.template file and make it look as follows:
# upstream for uWSGI
upstream uwsgi_app {
    server unix:/code/educa/uwsgi_app.sock;
}
# upstream for Daphne
upstream daphne {
    server unix:/code/educa/daphne.sock;
}
server {
    listen       80;
    server_name www.educaproject.com educaproject.com;
    return 301 https://$host$request_uri;
}
server {
    listen               443 ssl;
    ssl_certificate      /code/educa/ssl/educa.crt;
    ssl_certificate_key  /code/educa/ssl/educa.key;
    server_name  www.educaproject.com educaproject.com;
    error_log    stderr warn;
    access_log   /dev/stdout main;
    location / {
        include      /etc/nginx/uwsgi_params;
        uwsgi_pass   uwsgi_app;
    }
    location /ws/ {
        proxy_http_version  1.1;
        proxy_set_header    Upgrade $http_upgrade;
        proxy_set_header    Connection "upgrade";
        proxy_redirect      off;
        proxy_pass          http://daphne;
    }
    location /static/ {
        alias /code/educa/static/;
    }
    location /media/ {
        alias /code/educa/media/;
    }
}
In this configuration, you set up a new upstream named daphne, which points to a UNIX socket created by Daphne. In the server block, you configure the /ws/ location to forward requests to Daphne. You use the proxy_pass directive to pass requests to Daphne and you include some additional proxy directives.
With this configuration, NGINX will pass any URL request that starts with the /ws/ prefix to Daphne and the rest to uWSGI, except for files under the /static/ or /media/ paths, which will be served directly by NGINX.
The production setup including Daphne now looks like this:

Figure 17.13: The production environment request/response cycle, including Daphne
NGINX runs in front of uWSGI and Daphne as a reverse proxy server. NGINX faces the web and passes requests to the application server (uWSGI or Daphne) based on their path prefix. Besides this, NGINX also serves static files and redirects non-secure requests to secure ones. This setup reduces downtime, consumes less server resources, and provides greater performance and security.
Stop the Docker application from the shell by pressing the keys Ctrl + C or using the stop button in the Docker Desktop app. Then start Compose again with the command:
docker compose up
Use your browser to create a sample course with an instructor user, log in with a user who is enrolled on the course, and open https://educaproject.com/chat/room/1/ with your browser. You should be able to send and receive messages like the following example:

Figure 17.14: Course chat room messages served with NGINX and Daphne
Daphne is working correctly, and NGINX is passing WebSocket requests to it. All connections are secured with SSL/TLS.
Congratulations! You have built a custom production-ready stack using NGINX, uWSGI, and Daphne. You could do further optimization for additional performance and enhanced security through configuration settings in NGINX, uWSGI, and Daphne. However, this production setup is a great start!
You have used Docker Compose to define and run services in multiple containers. Note that you can use Docker Compose both for local development environments as well as production environments. You can find additional information on using Docker Compose in production at https://docs.docker.com/compose/production/.
For more advanced production environments, you will need to dynamically distribute containers across a varying number of machines. For that, instead of Docker Compose, you will need an orchestrator like Docker Swarm mode or Kubernetes. You can find information about Docker Swarm mode at https://docs.docker.com/engine/swarm/, and about Kubernetes at https://kubernetes.io/docs/home/.
Creating a custom middleware
You already know the MIDDLEWARE setting, which contains the middleware for your project. You can think of it as a low-level plugin system, allowing you to implement hooks that get executed in the request/response process. Each middleware is responsible for some specific action that will be executed for all HTTP requests or responses.
Avoid adding expensive processing to middleware, since they are executed in every single request.
When an HTTP request is received, middleware is executed in order of appearance in the MIDDLEWARE setting. When an HTTP response has been generated by Django, the response passes through all middleware back in reverse order.
A middleware can be written as a function, as follows:
def my_middleware(get_response):
    def middleware(request):
        # Code executed for each request before
        # the view (and later middleware) are called.
        response = get_response(request)
        # Code executed for each request/response after
        # the view is called.
        return response
    return middleware
A middleware factory is a callable that takes a get_response callable and returns a middleware. A middleware is a callable that takes a request and returns a response, just like a view. The get_response callable might be the next middleware in the chain or the actual view in the case of the last listed middleware.
If any middleware returns a response without calling its get_response callable, it short-circuits the process; no further middleware gets executed (also not the view), and the response returns through the same layers that the request passed in through.
The order of middleware in the MIDDLEWARE setting is very important because middleware can depend on data set in the request by other middleware that has been executed previously.
When adding a new middleware to the MIDDLEWARE setting, make sure to place it in the right position. Middleware is executed in order of appearance in the setting during the request phase, and in reverse order for responses.
You can find more information about middleware at https://docs.djangoproject.com/en/4.1/topics/http/middleware/.
Creating a subdomain middleware
You are going to create a custom middleware to allow courses to be accessible through a custom subdomain. Each course detail URL, which looks like https://educaproject.com/course/django/, will also be accessible through the subdomain that makes use of the course slug, such as https://django.educaproject.com/. Users will be able to use the subdomain as a shortcut to access the course details. Any requests to subdomains will be redirected to each corresponding course detail URL.
Middleware can reside anywhere within your project. However, it’s recommended to create a middleware.py file in your application directory.
Create a new file inside the courses application directory and name it middleware.py. Add the following code to it:
from django.urls import reverse
from django.shortcuts import get_object_or_404, redirect
from .models import Course
def subdomain_course_middleware(get_response):
    """
    Subdomains for courses
    """
    def middleware(request):
        host_parts = request.get_host().split('.')
        if len(host_parts) > 2 and host_parts[0] != 'www':
            # get course for the given subdomain
            course = get_object_or_404(Course, slug=host_parts[0])
            course_url = reverse('course_detail',
                                 args=[course.slug])
            # redirect current request to the course_detail view
            url = '{}://{}{}'.format(request.scheme,
                                     '.'.join(host_parts[1:]),
                                     course_url)
            return redirect(url)
        response = get_response(request)
        return response
    return middleware
When an HTTP request is received, you perform the following tasks:
- You get the hostname that is being used in the request and divide it into parts. For example, if the user is accessing
mycourse.educaproject.com, you generate the list['mycourse', 'educaproject', 'com']. - You check whether the hostname includes a subdomain by checking whether the split generated more than two elements. If the hostname includes a subdomain, and this is not
www, you try to get the course with the slug provided in the subdomain. - If a course is not found, you raise an HTTP
404exception. Otherwise, you redirect the browser to the course detail URL.
Edit the settings/base.py file of the project and add 'courses.middleware.SubdomainCourseMiddleware' at the bottom of the MIDDLEWARE list, as follows:
MIDDLEWARE = [
    # ...
    'courses.middleware.subdomain_course_middleware',
]
The middleware will now be executed in every request.
Remember that the hostnames allowed to serve your Django project are specified in the ALLOWED_HOSTS setting. Let’s change this setting so that any possible subdomain of educaproject.com is allowed to serve your application.
Edit the educa/settings/prod.py file and modify the ALLOWED_HOSTS setting, as follows:
ALLOWED_HOSTS = ['.educaproject.com']
A value that begins with a period is used as a subdomain wildcard; '.educaproject.com' will match educaproject.com and any subdomain for this domain, for example, course.educaproject.com and django.educaproject.com.
Serving multiple subdomains with NGINX
You need NGINX to be able to serve your site with any possible subdomain. Edit the config/nginx/default.conf.template file and replace the two occurrences of the following line:
server_name www.educaproject.com educaproject.com;
with the following one:
server_name *.educaproject.com educaproject.com;
By using the asterisk, this rule applies to all subdomains of educaproject.com. In order to test your middleware locally, you need to add any subdomains you want to test to /etc/hosts. For testing the middleware with a Course object with the slug django, add the following line to your /etc/hosts file:
127.0.0.1 django.educaproject.com
Stop the Docker application from the shell by pressing the keys Ctrl + C or using the stop button in the Docker Desktop app. Then start Compose again with the command:
docker compose up
Then, open https://django.educaproject.com/ in your browser. The middleware will find the course by the subdomain and redirect your browser to https://educaproject.com/course/django/.
Implementing custom management commands
Django allows your applications to register custom management commands for the manage.py utility. For example, you used the management commands makemessages and compilemessages in Chapter 11, Adding Internationalization to Your Shop, to create and compile translation files.
A management command consists of a Python module containing a Command class that inherits from django.core.management.base.BaseCommand or one of its subclasses. You can create simple commands or make them take positional and optional arguments as input.
Django looks for management commands in the management/commands/ directory for each active application in the INSTALLED_APPS setting. Each module found is registered as a management command named after it.
You can learn more about custom management commands at https://docs.djangoproject.com/en/4.1/howto/custom-management-commands/.
You are going to create a custom management command to remind students to enroll on at least one course. The command will send an email reminder to users who have been registered for longer than a specified period and who aren’t enrolled on any course yet.
Create the following file structure inside the students application directory:
management/
    __init__.py
    commands/
        __init__.py
        enroll_reminder.py
Edit the enroll_reminder.py file and add the following code to it:
import datetime
from django.conf import settings
from django.core.management.base import BaseCommand
from django.core.mail import send_mass_mail
from django.contrib.auth.models import User
from django.db.models import Count
from django.utils import timezone
class Command(BaseCommand):
    help = 'Sends an e-mail reminder to users registered more
           than N days that are not enrolled into any courses yet'
    def add_arguments(self, parser):
        parser.add_argument('--days', dest='days', type=int)
    def handle(self, *args, **options):
        emails = []
        subject = 'Enroll in a course'
        date_joined = timezone.now().today() -
                      datetime.timedelta(days=options['days'] or 0)
        users = User.objects.annotate(course_count=Count('courses_joined'))
                            .filter(course_count=0,
                                    date_joined__date__lte=date_joined)
        for user in users:
            message = """Dear {},
            We noticed that you didn't enroll in any courses yet.
            What are you waiting for?""".format(user.first_name)
            emails.append((subject,
                           message,
                           settings.DEFAULT_FROM_EMAIL,
                           [user.email]))
        send_mass_mail(emails)
        self.stdout.write('Sent {} reminders'.format(len(emails)))
This is your enroll_reminder command. The preceding code is as follows:
- The
Commandclass inherits fromBaseCommand. - You include a
helpattribute. This attribute provides a short description of the command that is printed if you run the commandpython manage.py help enroll_reminder. - You use the
add_arguments()method to add the--daysnamed argument. This argument is used to specify the minimum number of days a user has to be registered, without having enrolled on any course, in order to receive the reminder. - The
handle()command contains the actual command. You get thedaysattribute parsed from the command line. If this is not set, you use0, so that a reminder is sent to all users that haven’t enrolled on a course, regardless of when they registered. You use thetimezoneutility provided by Django to retrieve the current timezone-aware date withtimezone.now().date(). (You can set the timezone for your project with theTIME_ZONEsetting.) You retrieve the users who have been registered for more than the specified days and are not enrolled on any courses yet. You achieve this by annotating the QuerySet with the total number of courses each user is enrolled on. You generate the reminder email for each user and append it to theemailslist. Finally, you send the emails using thesend_mass_mail()function, which is optimized to open a single SMTP connection for sending all emails, instead of opening one connection per email sent.
You have created your first management command. Open the shell and run your command:
docker compose exec web python /code/educa/manage.py
  enroll_reminder --days=20 --settings=educa.settings.prod
If you don’t have a local SMTP server running, you can look at Chapter 2, Enhancing Your Blog with Advanced Features, where you configured SMTP settings for your first Django project. Alternatively, you can add the following setting to the settings.py file to make Django output emails to the standard output during development:
EMAIL_BACKEND = 'django.core.mail.backends.console.EmailBackend'
Django also includes a utility to call management commands using Python. You can run management commands from your code as follows:
from django.core import management
management.call_command('enroll_reminder', days=20)
Congratulations! You can now create custom management commands for your applications.
Additional resources
The following resources provide additional information related to the topics covered in this chapter:
- Source code for this chapter – https://github.com/PacktPublishing/Django-4-by-example/tree/main/Chapter17
- Docker Compose overview – https://docs.docker.com/compose/
- Installing Docker Desktop – https://docs.docker.com/compose/install/compose-desktop/
- Official Python Docker image – https://hub.docker.com/_/python
- Dockerfile reference – https://docs.docker.com/engine/reference/builder/
requirements.txtfile for this chapter – https://github.com/PacktPublishing/Django-4-by-example/blob/main/Chapter17/requirements.txt- YAML file example – https://yaml.org/
Dockerfile buildsection – https://docs.docker.com/compose/compose-file/build/- Docker restart policy – https://docs.docker.com/config/containers/start-containers-automatically/
- Docker volumes – https://docs.docker.com/storage/volumes/
- Docker Compose specification – https://docs.docker.com/compose/compose-file/
- Official PostgreSQL Docker image – https://hub.docker.com/_/postgres
wait-for-it.shBash script for Docker – https://github.com/vishnubob/wait-for-it/blob/master/wait-for-it.sh- Service startup order in Compose –https://docs.docker.com/compose/startup-order/
- Official Redis Docker image – https://hub.docker.com/_/redis
- WSGI documentation – https://wsgi.readthedocs.io/en/latest/
- List of uWSGI options – https://uwsgi-docs.readthedocs.io/en/latest/Options.html
- Official NGINX Docker image – https://hub.docker.com/_/nginx
- NGINX documentation – https://nginx.org/en/docs/
ALLOWED_HOSTSsetting – https://docs.djangoproject.com/en/4.1/ref/settings/#allowed-hosts- Django’s system check framework – https://docs.djangoproject.com/en/4.1/topics/checks/
- HTTP Strict Transport Security policy with Django – https://docs.djangoproject.com/en/4.1/ref/middleware/#http-strict-transport-security
- Django deployment checklist – https://docs.djangoproject.com/en/4.1/howto/deployment/checklist/
- Self-generated SSL/TLS certificate directory – https://github.com/PacktPublishing/Django-4-by-example/blob/main/Chapter17/educa/ssl/
- Let’s Encrypt Certificate Authority – https://letsencrypt.org/
- Daphne source code – https://github.com/django/daphne
- Using Docker Compose in production – https://docs.docker.com/compose/production/
- Docker Swarm mode – https://docs.docker.com/engine/swarm/
- Kubernetes – https://kubernetes.io/docs/home/
- Django middleware – https://docs.djangoproject.com/en/4.1/topics/http/middleware/
- Creating custom management commands – https://docs.djangoproject.com/en/4.1/howto/custom-management-commands/
Summary
In this chapter, you created a production environment using Docker Compose. You configured NGINX, uWSGI, and Daphne to serve your application in production. You secured your environment using SSL/TLS. You also implemented a custom middleware and you learned how to create custom management commands.
You have reached the end of this book. Congratulations! You have learned the skills required to build successful web applications with Django. This book has guided you through the process of developing real-life projects and integrating Django with other technologies. Now you are ready to create your own Django project, whether it is a simple prototype or a large-scale web application.
Good luck with your next Django adventure!