The Raspberry Pi Soft ware Configuration Tool is designed to be an easy and intuitive way to set up your Raspberry Pi. It is automatically launched when your Raspberry Pi is powered on for the first time.

The Raspberry Pi Software Configuration Tool
The Raspberry Pi Software Configuration Tool is extremely easy to use. To move between menus, use the arrow keys and the Tab button. To select a menu, simply press the Enter key.
You can run the Raspberry Pi Software Configuration Tool whenever you want by running the following command:
raspi-config
Now that your Raspberry Pi has launched the Raspberry Pi Software Configuration Tool, it is time to use it to get your Raspberry Pi up and running.
The first thing that you need to do is expand the filesystem of your Raspberry Pi to the full size of your SD card. If you don't do this, you won't be able to use the rest of the storage on your SD card.
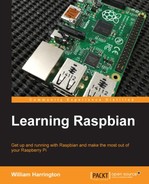
To do this, make sure that the Expand Filesystem option is selected. Now, simply press the Enter key. Your root partition that stores the Raspbian operating system will now be enlarged to the size of the SD card. You will then see the following menu:
This message indicates that you have successfully resized your root partition
The default user password for Raspbian is pi. This is not very secure and you might want to change this to something else. The Raspberry Pi Software Configuration Tool makes it extremely easy to do this.
- Select the Change User Password option and then press Enter.
- Now, you will see the first step to changing your password. When you are ready, press <ok>:

The first step to changing your password
- You will then be prompted to enter your password. You won't see anything appearing as you type.
- When you have finished entering your password, press Enter; type it again and press Enter. Make sure that you don't forget your password, as you will need it to install any new software onto your Raspberry Pi.
Changing the password
Raspbian has several different interfaces that you can make use of in your Raspberry Pi, such as a graphical desktop environment, Command Prompt, and the programming language called Scratch.
We recommend that you select the Desktop Login option so that you can make use of the graphical interface that is included in Raspbian. You can use Command Prompt and the Scratch language from the graphical interface. The default option is to use Command Prompt when your Raspberry Pi boots up.

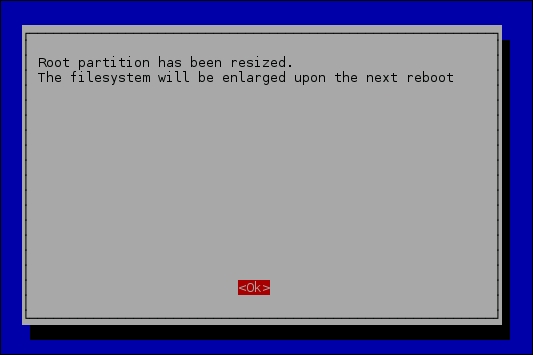
By default, Raspbian is configured for use in the United Kingdom. For those who aren't in the United Kingdom, you need to configure Raspbian to use the correct time zone, keyboard layout, and regional settings.

Internationalisation options in the Raspberry Pi Software Configuration Tool
A locale is used to define which language Raspbian will use to display dates, numbers, currencies and so on. By default, the locale setting for your Raspberry Pi is the United Kingdom.
It is really easy to change the locale to your own country. To do this, select the Change Locale option.

Selecting your locale
You can select multiple locales for your Raspberry Pi. In Australia, we would select the en_AU locale. If you were in the United States, you would select en_US.
The Raspberry Pi Software Configuration Tool also makes it easy to select your time zone. By default, this is set to UTC. If you want the correct time to be displayed on your Raspberry Pi, you need to change your time zone.
Selecting the time zone
To choose your time zone, select the region of the world you are in and press Enter. You can then select the city nearest to you and press Enter.
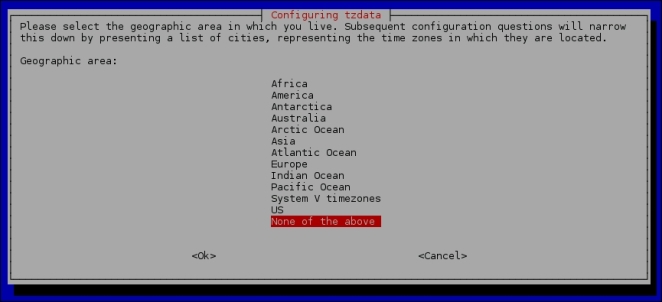
By default, Raspbian expects you to use a keyboard designed for use in the United Kingdom. If you don't use a United Kingdom keyboard, many of the keys on your keyboard won't work as expected.
In order to tell Raspbian to use the correct keyboard, select Change Keyboard Layout.
Selecting the keyboard
If your keyboard isn't listed, go to the Generic 101-key PC keyboard option and press Enter. Depending on your location, you should be able to find a generic keyboard that will work for your country. For example, in the Unites States or Australia we would select an English (US) keyboard.

Selecting the default keyboard layout
After you've selected the keyboard, you will be asked which key you want to use as an AltGr key. An AltGr key is used in some languages to provide additional characters that aren't on the keyboard.
It is generally safe to select The default for the keyboard layout option.

Selecting the AltGr key
The final step to configuring your keyboard is to select which key you would like to use as the Compose key.
A Compose key lets your Raspberry Pi interpret a combination of keys as a single key press. This isn't normally needed, and it is safe to select the default option of No compose key.
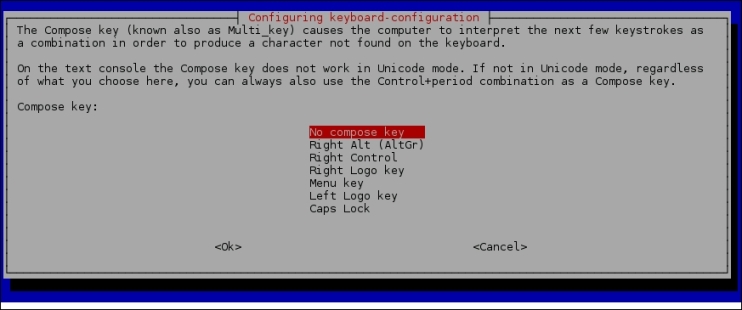
Selecting the default compose key
Raspberry Pi can be equipped with a camera. By default, it is disabled unless you have connected a camera and want to use it. To enable your Raspberry Pi camera, select the <Enable> option in the Raspberry Pi software configuration

Enabling your Raspberry Pi camera
Rastrack is a not-for-profit website that maps many of the Raspberry Pis around the world. If you want to include your Raspberry Pi on the map, select Add to Rastrack and enter your e-mail address.
Note
You can see where some of the other Raspberry Pi boards are in the world by going to http://rastrack.co.uk/.
One other useful customization that you can do in the Raspberry Pi Software Configuration Tool is to enable the SSH server. SSH is a secure protocol that, among other things, allows you to access Command Prompt of your Raspberry Pi remotely.
You can enable SSH by selecting Advanced Options in the Raspberry Pi Software Configuration Tool. Once there, select A4 (SSH) and press Enter. Select Enable SSH and you are done. This enables you to remotely access your Raspberry Pi using an SSH client, such as PuTTY and to copy files to your Raspberry Pi.