Now that you have everything ready, it is time to turn on your Raspberry Pi. The first thing that you need to do is make sure that your monitor is set to the correct input. This is important if you want to use HDMI, because if your Raspberry Pi doesn't detect an HDMI monitor during the boot process, it will automatically use the default AV out.
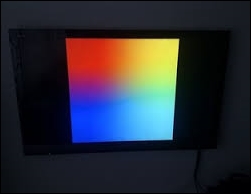
When you power on your Raspberry Pi, you will see the Raspberry Pi boot screen.

The Raspberry Pi bootloader
If you see this, it means that all the bootloader files on your SD card have been found and the appropriate monitor has successfully been detected. If you don't see this, then make sure that all the cables are plugged in, your monitor or TV is on the correct input, and you have imaged the SD card correctly.
The next step in the boot process is the initialization of the Linux kernel. The Linux kernel is contained inside the kernel.img file on your SD card.

Booting Raspbian
You will see a screen similar to the preceding screenshot as your Raspberry Pi boots up. The first boot process will take a bit longer than subsequent boots. As this is the first time that your Raspberry Pi has booted up, it will automatically load the Raspberry Pi Software Configuration Tool.
You can use this tool to configure different parts of your Raspberry Pi.
