
Chapter 2. Getting started
This chapter covers
- Accessing your cluster and logging in
- Creating projects and deploying applications
- Accessing your application by creating routes
- Investigating application components
- Comparing command-line and web workflows
There are three ways to interact with OpenShift: the command line, the web interface, and the RESTful API. This chapter focuses on deploying applications using the command line, because the command line exposes more of the process that’s used to create containerized applications in OpenShift. In other chapters, the examples may use the web interface or even the API. Our intention is to give you the most real-world examples of using OpenShift. We want to show you the best tools to get the various jobs done.
We’ll also try our best not to make you repeat yourself. Almost every action in OpenShift can be performed using all three access methods. If something is limited, we’ll do our best to let you know. But we want you to get the best experience possible from using OpenShift. With that said, in this chapter we’re going to repeat ourselves. But we have a good reason!
The most common task in OpenShift is deploying an application. Because this is the most common task, we want to introduce you to it as early as practical, using both the command line and the web interface. So please bear with us. This chapter may seem a little repetitive, but we think the repetition will be helpful as you continue to learn how to use OpenShift.
2.1. Cluster options
Before you can start using OpenShift, you have to deploy it. Appendix A guides you through a full deployment of OpenShift on multiple servers. Several of the chapter’s examples require multiple nodes to function properly or to have enough resources to function properly. But there’s a different installer for OpenShift that we’d like to mention here: Minishift.
Minishift (https://github.com/minishift/minishift) is a single-node installation of OpenShift that you can stand up in a few minutes on just about any operating system as a virtual machine. As a development platform, it’s a very useful tool.
We strongly recommend going through the process of installing a full OpenShift cluster. You can run most of the examples in this book on Minishift, through chapter 6. But you’ll run into trouble when you start working with persistent storage, metrics, complex application deployments, and networking. If you’re ready to get your full OpenShift cluster up and running, head to appendix A and deploy your cluster before you move on to the examples in this chapter. If you want to dive in to the examples a little faster, Minishift is your path forward. Take a look at its documentation to get it up and running.
It’s almost inevitable. When you’re first learning how to use a new tool like OpenShift, you do something, and it doesn’t come out quite like you expected. So you start troubleshooting, and that makes things worse. Eventually, you end up with a platform that’s full of random weirdness or doesn’t work at all.
IT professionals learn by doing. We encourage you to experiment with OpenShift as you go through this book. Give yourself problems to solve, and use OpenShift to solve them. And when one of them doesn’t work as expected, use this book as a reference to dig in and figure out what’s going on.
We also know that starting from scratch is hard and time-consuming. Toward that end, we’ve created a GitHub organization: https://github.com/OpenShiftInAction. In this organization, you’ll find repositories dedicated to the work and examples for each chapter.
You’ll also notice a project called autoinstaller. The autoinstaller project uses Ansible (www.ansible.com) to deploy OpenShift with the same configuration you’d deploy by following appendix A. There are also shorter playbooks that do all the work for each chapter in the book. If you break your cluster and need to start over, feel free to use autoinstaller as a quicker path back to where you were before your issues.
Also, please use the issue tracker and other tools in the GitHub organization to communicate with us. Our plan is to continue to work with and update these projects even after the book is published. So file issues, submit pull requests, and contribute to the OpenShift in Action community.
Like most applications, OpenShift requires a little configuration to get going. That’s what the next sections discuss.
2.2. Logging in
In OpenShift, every action requires authentication. This allows every action to be governed by the security and access rules set up for all users in an OpenShift cluster. We’ll discuss the various methods of managing authentication in chapter 9, but by default your OpenShift cluster’s initial configuration is set to allow any user and password combination to log in. This is called the Allow All identity provider.
The Allow All identity provider creates a user account the first time a user logs in. Each username is unique, and the password can be anything except an empty field. This configuration is safe and recommended only for lab and development OpenShift instances like the one you just set up.
The first user you’ll create will be called dev. This user will represent any normal developer or end user in OpenShift. You’ll use the dev user for most of the examples in this book.
Note
This authentication method is case-sensitive. Although the passwords can be anything, dev and Dev are different users and won’t be able to see the same projects and applications. Be careful when you log in.
2.2.1. Using the oc command-line application
In appendix A, you install oc on your laptop or workstation. This is the tool you’ll use to manage OpenShift on the command line. If you’re using an OSX or Linux system, you can open your favorite terminal application. On Windows, open your command prompt. From your command line, run the oc login command, using dev for the username and password and the URL for your master server’s API server:
$ oc login -u dev -p dev https://ocp-1.192.168.122.100.nip.io:8443       1
Login successful.

You don't have any projects. You can try to create a new project, by running

    oc new-project <projectname>
- 1 The syntax for logging in to an OpenShift cluster, including the username, password, and URL for your OpenShift master’s API server
The parameters used here for oc login are as follows:
- -u, the username to log in with.
- -p, the user’s password.
- URL for your OpenShift master’s API server. By default, it’s served over HTTPS on TCP port 8443.
In the example, OpenShift is prompting you to accomplish your next step: creating a project.
2.3. Creating projects
In OpenShift, projects are the fundamental way applications are organized. Projects let users collect their applications into logical groups. They also serve other useful roles around security that we’ll discuss in chapters 9 and 10. For now, though, think of a project as a collection of related applications. You’ll create your first project and then use it to house a handful of applications that you’ll deploy, modify, redeploy, and do all sorts of things to over the course of the next few chapters.
The oc tool’s default action is to execute the command you run using the current working project. If you create a new project, it automatically becomes your working project. The oc project command changes among projects that already exist.
To specify a command to be executed against a specific project, regardless of your current working project, use the -n parameter with the project name you want the command to run against.
This is a helpful option when you’re writing scripts that use oc and act on multiple projects. It’s also a good habit in general.
To create a project, you need to run the oc new-project command and provide a project name. For your first project, use image-uploader as the project name:
$ oc new-project image-uploader --display-name='Image Uploader Project' Now using project "image-uploader" on server"https://ocp-1.192.168.122.100.nip.io:8443". You can add applications to this project with the 'new-app' command.
The output prompts you to deploy your first application.
Note
You can find documentation for all of the oc command’s features in the OpenShift CLI Reference documentation at http://mng.bz/dCTv.
In addition to the name for your project, you can optionally provide a display name. The display name is a more human-friendly name for your project. The project name has a restricted syntax because it becomes part of the URL for all of the applications deployed in OpenShift. We’ll discuss how that works later in this chapter.
Now that you’ve created your first project, section 2.5 will walk you through deploying your first application, called Image Uploader, into your new project. Image Uploader is a web-based PHP application that’s used to upload and display graphic files from your computer. But first, let’s talk about application components, so you understand how all the parts fit and work together.
2.4. Application components
Applications in OpenShift aren’t monolithic structures; they consist of a number of different components in a project that all work together to deploy, update, and maintain your application through its lifecycle. These components are as follows:
- Custom container images
- Image streams
- Application pods
- Build configs
- Deployment configs
- Deployments
- Services
These components all work together to serve your applications to your end users, as shown in figure 2.1. The interactions between the application components can seem a little complex, so next let’s walk through what these components do in more detail. We’ll start with how OpenShift creates and uses custom container images for each application.
Figure 2.1. How application components work together: Each deployed application creates these components in your OpenShift cluster. This workflow is fully automated and customizable.

2.4.1. Custom container images
Each application deployment in OpenShift creates a custom container image to serve your application. This image is created using the application’s source code and a custom base image called a builder image. For example, the PHP builder image contains the Apache web server and the core PHP language libraries.
The image build process takes the builder image you choose, integrates your source code, and creates the custom container image that will be used for the application deployment. Once created, all the container images, along with all the builder images, are stored in OpenShift’s integrated container registry, which we discussed in chapter 1 (also noted in figure 2.1). The component that controls the creation of your application containers is the build config.
2.4.2. Build configs
A build config contains all the information needed to build an application using its source code. This includes all the information required to build the application container image:
- URL for the application source code
- Name of the builder image to use
- Name of the application container image that’s created
- Events that can trigger a new build to occur
Figure 2.1 illustrates these relationships. The build config is used to track what’s required to build your application and to trigger the creation of the application’s container image.
After the build config does its job, it triggers the deployment config that’s created for your newly created application.
2.4.3. Deployment configs
If an application is never deployed, it can never do its job. The job of deploying and upgrading the application is handled by the deployment config component. In figure 2.1, you see that deployment configs are created as part of the initial application deployment command that you’ll run later in this chapter.
Deployment configs track several pieces of information about an application:
- Currently deployed version of the application.
- Number of replicas to maintain for the application.
- Trigger events that can trigger a redeployment. By default, configuration changes to the deployment or changes to the container image trigger an automatic application redeployment
- Upgrade strategy. app-cli uses the default rolling-upgrade strategy.
- Application deployments.
A key feature of applications running in OpenShift is that they’re horizontally scalable. This concept is represented in the deployment config by the number of replicas.
Maintaining application replicas
The number of replicas specified in a deployment config is passed into a Kubernetes object called a replication controller. This is a special type of Kubernetes pod that allows for multiple replicas—copies of the application pod—to be kept running at all times. All pods in OpenShift are deployed by replication controllers by default.
Another feature that’s managed by a deployment config is how application upgrades can be fully automated.
Each deployment for an application is monitored and available to the deployment config component using deployments.
In OpenShift, a pod can exist in one of five phases at any given time in its lifecycle. These phases are described in detail in the Kubernetes documentation at http://mng.bz/NIG1. The following is a brief summary of the five pod phases:
- Pending— The pod has been accepted by OpenShift, but it’s not yet scheduled on one of the applications nodes.
- Running— The pod is scheduled on a node and is confirmed to be up and running.
- Succeeded— All containers in a pod have terminated successfully and won’t be restarted.
- Failed— One or more containers in a pod have failed to start.
- Unknown— Something has gone wrong, and OpenShift can’t obtain a more accurate status for the pod.
Failed and Succeeded are considered terminal states for a pod in its lifecycle. Once a pod reaches one of these states, it won’t be restarted.
You can see the current phase for each pod in a project by running the oc get pods command. Pod lifecycles will become important when you begin creating project quotas in chapter 6.
Deployments
Each time a new version of an application is created by its build config, a new deployment is created and tracked by the deployment config. A deployment represents a unique version of an application. Each deployment references a version of the application image that was created, and creates the replication controller to create and maintain the pods to serve the application. In figure 2.1, the deployment is directly linked to the pod that serves an application.
New deployments can be created automatically in OpenShift by managing how applications are upgraded, which is also tracked by the deployment config.
Managing upgrade methods
The default application-upgrade method in OpenShift is to perform a rolling upgrade. Rolling upgrades create new versions of an application, allowing new connections to the application to access only the new version. As traffic increases to the new deployment, the pods for the old deployment are removed from the system.
New application deployments can be automatically triggered by events such as configuration changes to your application, or a new version of a container image being available. These sorts of trigger events are monitored by image streams in OpenShift.
2.4.4. Image streams
Image streams are used to automate actions in OpenShift. They consist of links to one or more container images. Using image streams, you can monitor applications and trigger new deployments when their components are updated.
In figure 2.1, you can see how image streams are linked to the container image for an application, as well as its deployment. We’ll discuss image streams in more depth in chapter 6.
Now that we’ve gone through how applications are built and deployed, it’s time for you to deploy your first application.
2.5. Deploying an application
Applications are deployed using the oc new-app command. When you run this command to deploy the Image Uploader application into the image-uploader project, you need to provide three pieces of information:
- The type of image stream you want to use— OpenShift ships with multiple container images called builder images that you can use as a starting point for applications. In this example, you’ll be using the PHP builder image to create your application.
- A name for your application— In this example, use app-cli, because this version of your application will be deployed from the command line.
- The location of your application’s source code— OpenShift will take this source code and combine it with the PHP builder image to create a custom container image for your application deployment.
Here’s the new application deployment (we’ve trimmed the output for clarity):
$ oc new-app
> --image-stream=php                                                  1
> --code=https://github.com/OpenShiftInAction/image-uploader.git      2
> --name=app-cli                                                       3
...
--> Success
    Build scheduled, use 'oc logs -f bc/cli-app' to track its progress.
    Run 'oc status' to view your app.
- 1 Image stream to use
- 2 Source code for the application
- 3 Application name
After you run the oc new-app command, you’ll see a long list of output. This is OpenShift building out all the components needed to make your application work properly, as we discussed at the beginning of this section.
Now that you’ve deployed your first application, you need to be able to access the newly deployed pod. Figure 2.2 shows that the pod is associated with a component called a service, which then links up to provide application access for users. Let’s look at services next.
Figure 2.2. Components that deploy an application in an OpenShift project

2.5.1. Providing consistent application access with services
Chapters 3 and 4 will explore multiple ways to force OpenShift to redeploy application pods. In the course of a normal day, this happens all the time, for any number of reasons:
- You’re scaling applications up and down.
- Application pods stop responding correctly.
- Nodes are rebooted or have issues.
- Human error (the most common cause, of course).
- The phase of the moon is out of alignment, one of the many other things that cause computers to not do what you want.
Although pods may come and go, there needs to be a consistent presence for your applications in OpenShift. That’s what a service does. A service uses the labels applied to pods when they’re created to keep track of all pods associated with a given application. This allows a service to act as an internal proxy for your application. You can see information about the service for app-cli by running the oc describe svc/app-cli command:
$ oc describe svc/app-cli
Name:            app-cli
Namespace:        image-uploader
Labels:            app=app-cli
Selector:        app=app-cli,deploymentconfig=app-cli
Type:            ClusterIP
IP:            172.30.90.167                 1
Port:            8080-tcp    8080/TCP        2
Endpoints:
Session Affinity:    None
No events.
Each service gets an IP address that’s only routable from within the OpenShift cluster. Other information that’s maintained includes the IP address of the service and the TCP ports to connect to in the pod.
Tip
Most components in OpenShift have a shorthand that can be used on the command line to save time and avoid misspelled component names. The previous command uses svc/app-cli to get information about the service for the app-cli application. Build configs can be accessed with bc/<app-name>, and deployment configs with dc/<app-name>. You can find the rest of the shorthand in the documentation for oc at https://docs.openshift.org/latest/cli_reference/get_started_cli.html.
Services provide a consistent gateway into your application deployment. But the IP address of a service is available only in your OpenShift cluster. To connect users to your applications and make DNS work properly, you need one more application component. Next, you’ll create a route to expose app-cli externally from your OpenShift cluster.
2.5.2. Exposing services to the outside world with routes
When you install your OpenShift cluster, one of the services that’s created is an HAProxy service running in a container on OpenShift. HAProxy is an open source, software load-balancer application. We’ll look at this service in depth in chapter 10.
To create a route for the app-cli application, run the following command:
oc expose svc/app-cli
As we discussed earlier, OpenShift uses projects to organize applications. An application’s project is included in the URL that’s generated when you create an application route. Each application’s URL takes the following format:
<application-name>-<project-name>.<cluster-app-domain>
When you deploy OpenShift in appendix A, you specify the application domain apps.192,168.122.101.nip.io. By default, all applications in OpenShift are served using the HTTP protocol. When you put all this together, the URL for app-cli should be as follows:
http://app-cli-image-uploader.apps.192.168.122.101.nip.io
You can get information about the route you just created by running the oc describe route/app-cli command:
$ oc describe route/app-cli
Name:            app-cli
Namespace:        image-uploader
Created:        About an hour ago
Labels:            app=app-cli
Annotations:        openshift.io/host.generated=true
Requested Host:        app-cli-image-uploader.apps.192.168.122.101.nip.io  1
              exposed on router router about an hour ago
Path:            <none>
TLS Termination:    <none>
Insecure Policy:    <none>
Endpoint Port:        8080-tcp

Service:    app-cli                                                        2
Weight:        100 (100%)
Endpoints:    10.129.1.112:8080                                            3
- 1 URL created in HAProxy
- 2 Associated service
- 3 Endpoints for the service
The output tells you the host configurations added to HAProxy, the service associated with the route, and the endpoints for the service to connect to when handling requests for the route.
Now that you’ve created the route to your application, go ahead and verify that it’s functional in a web browser. You should be able to browse to your app-cli application using the URL for the route that was created (see figure 2.3).
Figure 2.3. The app-cli application web interface should be up and running and available.

Note
You should be able to access your app-cli deployment from anywhere that your test cluster is accessible. If you created the cluster on virtual machines on your laptop, it’s most likely accessible only from your laptop. OpenShift is pretty awesome, but it can’t overcome the rules of TCP/IP networking.
Focusing on the components that deploy and deliver the app-cli application, you can see the relationship between the service, the newly created route, and the end users. We’ll cover this in more depth in chapter 10; but in summary, the route is tied to the app-cli service, and users access the application pod through the route (see figure 2.4).
Figure 2.4. Overview of application request routing

This chapter is about relationships. In OpenShift, multiple components work in concert to build, deploy, and manage applications. We’ll spend the rest of this book discussing the different aspects of these relationships in depth. That fundamental knowledge of how container platforms operate is incredibly valuable.
2.6. Deploying applications using the web interface
We began this chapter by claiming that we didn’t want to repeat ourselves and then warning you that the chapter would be a little repetitive. Well, we’ve reached the repetitive part. Deploying applications in OpenShift is so fundamental to its purpose that we want to quickly walk you through the same process using the web interface. We’ll keep this section as short as possible—the web interface’s workflow will help with that.
2.6.1. Logging in to the OpenShift web interface
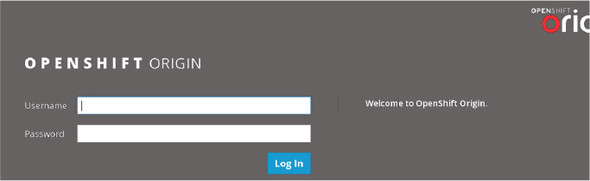
The OpenShift web interface is served from your master server, using the same URL that you use to log in with the command line. In the example, the web interface is accessible at https://ocp-1.192.168.122.100.nip.io:8443 (see figure 2.5). Go ahead and log in, if you haven’t already. Use the same dev user and non-empty password that you used to log in earlier.
Figure 2.5. Web interface login page
After logging in, you’ll arrive at a project overview page. This page lists all active projects for your user. You should see the image-uploader project that you created earlier in this chapter. Click the Image Uploader name to go to the project details page.
2.7. Deploying applications with the web interface
The web interface creates the same components that we talked about in the previous section (see figure 2.6). From the project details, you can see the details for the app-cli deployment, including the following:
- Deployment information, including a link to the deployconfig details
- Replica count
- Route information and a link to the application
Figure 2.6. App-cli information in the web interface, and the Add to Project button

Also on the project details page, on the top bar, is an Add to Project button. Click Add to Project > Browse Catalog to deploy a new application.
When you deployed app-cli, you selected the PHP image stream that included the PHP 7.0 builder image. In the web interface, you can follow the same process. The builder image image streams are available in a handy catalog. For your second application, you’ll deploy the same Image Uploader application again. Click the PHP option from the catalog to proceed (see figure 2.7).
Figure 2.7. Builder images for multiple languages in the image catalog

The next screen takes you to all the available builder images for the PHP programming language. You should see at least three options at this stage, similar to the information about the app-cli service you saw in section 2.4.2. Because you’re deploying the same application, you can select the same default PHP builder image (see figure 2.8).
Figure 2.8. PHP-specific builder images

After selecting the default PHP builder image, you’re prompted to provide the same information that was required to deploy app-cli (see figure 2.9):
Figure 2.9. Create a new PHP application using the web interface.

- Name— For your second deployment of the Image Uploader code, call the application app-gui.
- Git Repository URL— This is the same repository that you supplied to deploy app-cli, https://github.com/OpenShiftInAction/image-uploader.git.
When you’ve filled in the fields, click Create. This will launch the build and deployment process for your new app-gui application.
Once the process has started, you’re taken to a deployment summary page (see figure 2.10). This page provides you with information about how to log in to the command line, as well as more advanced features like setting application probes, which we’ll discuss in chapter 4, and setting resource limits, which we’ll discuss in chapter 9.
Figure 2.10. After deploying your app-gui application, you should see the deployment summary page, which offers you a link to the application overview.

Click the Continue to Overview link to return to the project details page.
At this point, OpenShift is going through the exact same process we discussed earlier in this chapter. It’s taking the source code, creating a custom container image, and building out all the other components that will be used to manage the application’s lifecycle. Even though both app-cli and app-gui use the same application source code, OpenShift will create a custom container image for each deployment, along with a unique version of each other component. Doing so allows for fully independent application lifecycles, even if they share the same source code.
Depending on your internet connection speed, the build and deployment process for app-gui may take a couple of minutes. When it completes, you should see both your app-cli and app-gui application deployments up and active (see figure 2.11).
Figure 2.11. Project details page with app-cli and app-gui deployed

When you deployed app-cli, you had to create a route to access the application. Notice in figure 2.11 that when you deployed app-gui with the web interface, the route was created for you automatically. This is designed to save time for the average user who’s using the web interface. Creating routes with the command line isn’t automated to allow that workflow to be customized and automated more easily.
And that is, we hope, the last time we’ll ask you to do the same thing twice in this book!
This chapter has been all about defining what an application deployment looks like in OpenShift, and how the components that make up an application maintain their relationships with one another. In the next chapter, we’ll discuss how you add persistent storage to applications to make them more flexible and easier to scale.
2.8. Summary
- Application deployments create multiple, tightly orchestrated application components to manage build, deploy, and manage applications.
- All transactions in OpenShift require an authenticated session.
- Projects in OpenShift are used to organize similar applications.
- OpenShift has robust command-line and web-based workflows.
- OpenShift can automatically configure DNS records that route requests to your application when it’s deployed.