
Chapter 17
Configuring a Web Server
Web servers are responsible for serving up the content you view on the Internet every day. By far, the most popular web server is the Apache (HTTPD) web server that is sponsored by the Apache Software Foundation (http://apache.org). Because Apache is an open source project, it is available with every major Linux distribution, including Fedora, RHEL, and Ubuntu.
You can configure a basic web server to run in Linux in just a few minutes. However, there are a tremendous number of ways you can configure your Apache web server. You can configure an Apache web server to serve content for multiple domains (virtual hosting), provide encrypted communications (HTTPS), and secure some or all of a website using different kinds of authentication.
This chapter takes you through the steps to install and configure an Apache web server. These steps include procedures for securing your server, as well as using a variety of modules so you can use different authentication methods and scripting languages on your web server. Then, I describe how to generate certificates to create an HTTPS Secure Sockets Layer (SSL) website.
Understanding the Apache Web Server
Apache HTTPD (also known as the Apache HTTPD Server) provides the service with which the client web browsers communicate. The daemon process (httpd) runs in the background on your server and waits for requests from web clients. Web browsers provide those connections to the HTTP daemon and send requests, which the daemon interprets, sending back the appropriate data (such as a web page or other content).
Apache HTTPD includes an interface that allows modules to tie into the process to handle specific portions of a request. Among other things, modules are available to handle the processing of scripting languages, such as Perl or PHP, within web documents and to add encryption to connections between clients and the server.
Apache began as a collection of patches and improvements from the National Center for Supercomputing Applications (NCSA), University of Illinois, Urbana-Champaign, to the HTTP daemon. The NCSA HTTP daemon was the most popular HTTP server at the time, but had started to show its age after its author, Rob McCool, left NCSA in mid-1994.
In early 1995, a group of developers formed the Apache Group and began making extensive modifications to the NCSA HTTPD code base. Apache soon replaced NCSA HTTPD as the most popular web server, a title it still holds today.
The Apache Group later formed the Apache Software Foundation (ASF) to promote the development of Apache and other free software. With the start of new projects at ASF, the Apache server became known as Apache HTTPD, although the two terms are still used interchangeably. Currently, ASF has more than 100 top-level projects, including TomCat (which includes open source Java Servlet and JavaServer Pages technologies), Hadoop (a project providing highly available, distributed computing), and SpamAssassin (an e-mail filtering program).
Getting and Installing Your Web Server
Although Apache is available with every major Linux distribution, it is often packaged in different ways. In most cases, all you need to start a simple Apache web server is the package containing the Apache daemon itself (/usr/sbin/httpd) and its related files. In Fedora, RHEL, and others, the Apache web server comes in the httpd package.
Understanding the httpd package
To examine the httpd package in Fedora or RHEL before you install it, download the package using the yumdownloader command and run a few rpm commands on it to view its contents:
# yumdownloader httpd
# rpm -qpi httpd-*rpm
Name        : httpd                        Relocations: (not relocatable)
Version     : 2.2.22                            Vendor: Fedora Project
Release     : 2.fc16                 Build Date: Mon 05 Mar 2012 05:54:02 AM EST
Install Date: (not installed)        Build Host: x86-09.phx2.fedoraproject.org
Group       : System Environment/Daemons Source RPM: httpd-2.2.22-2.fc16.src.rpm
Size        : 2921066                          License: ASL 2.0
Signature   : RSA/8, Tue 06 Mar 2012 12:41:45 AM EST, Key ID 067f00b6a82ba4b7
Packager    : Fedora Project
URL         : http://httpd.apache.org/
Summary     : Apache HTTP Server
Description :
The Apache HTTP Server is a powerful, efficient, and extensible
web server.
The yumdownloader command downloads the latest version of the httpd package to the current directory. The rpm -qpi command queries the httpd RPM package you just downloaded for information. You can see that the package was created by the Fedora project, that it is signed, and that it is indeed the Apache HTTP Server package. Next, look inside to the package to see the configuration files:
# rpm -qpc httpd-*rpm
/etc/httpd/conf/httpd.conf
/etc/httpd/conf.d/welcome.conf
/etc/httpd/conf/magic
/etc/sysconfig/httpd
/etc/logrotate.d/httpd
/etc/tmpfiles.d/httpd.conf
/var/www/error/HTTP_BAD_GATEWAY.html.var
/var/www/error/HTTP_BAD_REQUEST.html.var
/var/www/error/HTTP_FORBIDDEN.html.var
...
The main configuration file is /etc/httpd/conf/httpd.conf for Apache. The welcome.conf file defines the default homepage for your website, until you add some content. The magic file defines rules the server can use to figure out a file's type when the server tries to open it. Command line options that are used with the httpd daemon are defined in the /etc/sysconfig/httpd file.
The /etc/logrotate.d/httpd file defines how log files produced by Apache are rotated. The /etc/tmpfiles.d/httpd.conf file defines a directory that contains temporary run-time files (no need to change that file). The last configuration file entries are in the /var/www/error directory. Files in that directory define the responses that a user sees when an error is encountered, such as a file not found or permission denied message.
One location not shown in the httpd configuration file list is the directory /etc/httpd/conf.d. Any file in that directory that ends in .conf is pulled into the main httpd.conf file and used to configure Apache. Most module packages that come with configuration files put those configuration files in the /etc/httpd/conf.d directory. For example, the mod_ssl (for secure web servers) and mod_python (for interpreting python code) modules have related configuration files in the /etc/httpd/conf.d directory named ssl.conf and python.conf, respectively.
You can just install the httpd package to begin setting up your web server. However, you might prefer to add some other packages that are often associated with the httpd package. One way to do that is to install the entire Web Server group as follows:
# yum groupinstall "Web Server"
Here are the packages, along with the httpd package, in the Web Server group in Fedora that you get by default:
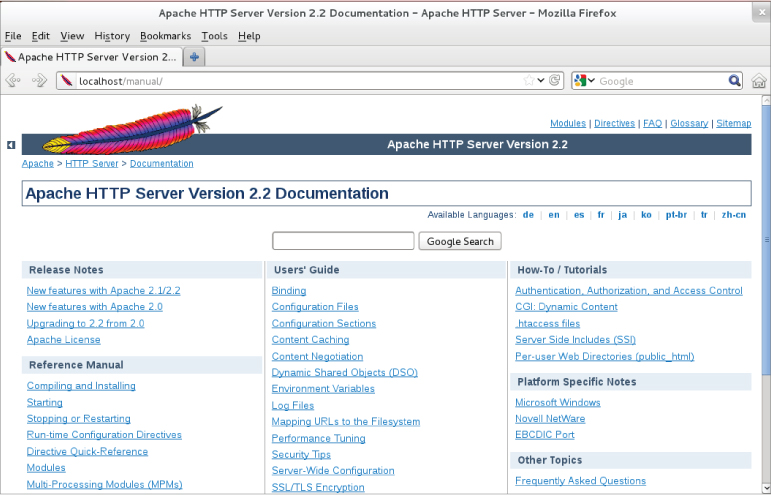
- httpd-manual — Fills the /var/www/manual directory with the Apache documentation manuals. After you start the httpd service, you can access this set of manuals from a web browser on the local machine by typing httpd://localhost/manual into the location box. Externally, instead of localhost, you could use the fully qualified domain name or IP address of the system. The Apache Documentation screen appears as shown in Figure 17.1.
Figure 17.1 Access Apache documentation directly from the local Apache server.
- mod_ssl — Contains the module and configuration file needed for the web server to provide secure connections to clients using Secure Sockets Layer (SSL) and Transport Layer Security (TLS) protocols. These features are necessary if you need encrypted communications for online shopping or other data you want to keep private. The configuration file is located at: /etc/httpd/conf.d/ssl.conf.
- crypto-utils — Contains commands for generating keys and certificates needed to do secure communications with the Apache web server.
- mod_perl — Contains the Perl module (mod_perl), configuration file, and associated files needed to allow the Apache web server to directly execute any Perl code.
- mod_python — Contains the Python module, configuration file, and documentation associated with running Python code directly in Apache.
- php — Contains the PHP module and configuration file needed to run PHP scripts directly in Apache. Related packages include php-ldap (for running PHP code that needs to access LDAP databases) and php-mysql (to add database support to the Apache server).
- squid — As mentioned in Chapter 14 (“Administering Networking”), the Squid proxy server provides proxy services for specific protocols (such as HTTP). While not providing HTTP content itself, a Squid proxy server typically forwards requests from proxy clients to the Internet or other network providing web content. This provides a means of controlling or filtering content clients can reach from a home, school, or place of business.
- distcache — Used with the mod_ssl package to cache SSL/TLS session data.
- webalizer — Contains tools for analyzing web server data.
Optional packages in the Web Server group are displayed from the yum groupinfo command as well. Some of those packages offer special ways of providing content, such as wikis (moin), content management systems (drupal7), and blogs (wordpress). Others include tools for graphing web statistics (awstats) or offer lightweight web server alternatives to Apache (lighttpd and cherokee).
Installing Apache
Although you only need httpd to get started with an Apache web server, if you are just learning about Apache, you should install the manuals (httpd-manual) as well. If you are thinking of creating a secure (SSL) site and possibly generating some statistics about your website, you can just install the entire group:
# yum groupinstall "Web Server"
Assuming you have an Internet connection to the Fedora repository (or RHEL repository, if you are using RHEL), all the mandatory and default packages from that group are installed. You have all the software you need to do the procedures and exercises described in this chapter.
Starting Apache
To get the Apache web server going, you want to enable the service to start on every reboot and you want to start it immediately. In Red Hat Enterprise Linux (up to RHEL 6) and in older Fedora distributions, you could type the following as root:
# chkconfig httpd on
# service httpd start
Starting httpd:                [  OK  ]
In recent Fedora systems, you enable and start httpd using the systemctl command:
# systemctl enable httpd.service
# systemctl start httpd.service
# systemctl status httpd.service
httpd.service - The Apache HTTP Server (prefork MPM)
  Loaded: loaded (/lib/systemd/system/httpd.service; enabled)
  Active: active (running) since Tue, 01 May 2012 20:18:44 -0400; 8s ago
  Process: 26918 ExecStart=/usr/sbin/httpd $OPTIONS -k start
      (code=exited, status=0/SUCCESS)
  Main PID: 26919 (httpd)
    CGroup: name=systemd:/system/httpd.service
      26919 /usr/sbin/httpd -k start
      26921 /usr/sbin/httpd -k start
    ...
26919 /usr/sbin/httpd -k start
26921 /usr/sbin/httpd -k start
...
When the httpd service starts, eight httpd daemon processes are launched by default to respond to requests for the web server. You can configure more or fewer httpd daemons to be started based on settings in the httpd.conf file (described in the “Understanding the Apache configuration files” section). To change the behavior of the httpd daemon, you can add options to the OPTIONS= variable in the /etc/sysconfig/httpd file.
Because there are different versions of httpd around, check the man page (man httpd) to see what options can be passed to the httpd daemon. For example, setting OPTIONS="-e debug" increases the log level so the maximum number of Apache messages are sent to log files. Restart the httpd service for the changes to take effect. Type the ps command to make sure the options took effect:
$ ps -ef | grep httpd
root     27126     1  0 16:56 ?        00:00:00 /usr/sbin/httpd -e debug
apache   27128 27126  0 16:56 ?        00:00:00 /usr/sbin/httpd -e debug
If you added a debug option, remember to remove that option from /etc/sysconfig/httpd when you are done debugging Apache and restart the service. Leaving debugging on will quickly fill up your log files.
Securing Apache
To secure Apache, you need to be aware of standard Linux security features (permissions, ownership, firewalls, and Security Enhanced Linux) as well as security features that are specific to Apache. The following sections describe security features that relate to Apache.
Apache file permissions and ownership
The httpd daemon process runs as the user apache and group apache. By default, HTML content is stored in the /var/www/html directory (as determined by the value of DocumentRoot in the httpd.conf file).
For the httpd daemon to be able to access that content, standard Linux permissions apply: If read permission is not on for “other” users, it must be on for the apache user or group for the files to be read and served to clients. Likewise, any directory the httpd daemon must traverse to get to the content must have execute permission on for the apache user, apache group, or other user.
Although you cannot log in as the apache user (/sbin/nologin is the default shell), you can create content as root and change its ownership (chown command) or permission (chmod command). Often, however, separate user or group accounts are added to create content that is readable by everyone (other) but only writable by that special user or group.
Apache and iptables
If you have locked down your iptables firewall in Linux, you need to open several ports for clients to be able to talk to Apache through the firewall. Standard web service (HTTP) is accessible over TCP port 80; secure web service (HTTPS) is accessible via TCP port 443. To verify which ports are being used by the httpd server, use the netstat command:
# netstat -tupln | grep httpd
tcp   0      0 :::80           :::*                    LISTEN      29169/httpd
tcp   0      0 :::443          :::*                    LISTEN      29169/httpd
The output shows that the httpd daemon (process ID 29169) is listening on all addresses for port 80 (:::80) and port 443 (:::443). Both ports are associated with the TCP protocol (tcp). To open those ports in Fedora or Red Hat Enterprise Linux, you could add rules to the /etc/sysconfig/iptables file (somewhere before a final DROP or REJECT) such as the following:
-A INPUT -m state --state NEW -m tcp -p tcp --dport 80 -j ACCEPT
-A INPUT -m state --state NEW -m tcp -p tcp --dport 443 -j ACCEPT
Restart the iptables service for the new rules to take effect.
Apache and SELinux
If Security Enhanced Linux (SELinux) is set to Enforcing (as it is by default in Fedora and Red Hat Enterprise Linux), SELinux adds another layer of security over your httpd service. In essence, SELinux actually sets out to protect the system from being damaged by the httpd daemon. It does this by creating policies that:
- Deny access to files that are not set to the right file contexts. For httpd in SELinux, there are different file contexts for content, configuration files, log files, scripts, and other httpd-related files. Any file that is not set to the proper context will not be accessible to the httpd daemon.
- Prevent insecure features from being used, such as file uploading and clear-text authentication, by setting Booleans for such features to the off position. You can selectively turn on Booleans as they are needed, if they meet your security requirements.
- Keep the httpd daemon from accessing non-standard features, such as a port outside of the default ports the service would expect to use.
A full description of SELinux is contained in Chapter 24, “Enhancing Linux Security with SELinux.” However, here are a few specifics you should know about using SELinux with the Apache httpd service:
- Turn off SELinux. You don't have to use SELinux. You can set SELinux to Permissive mode if you feel it is too difficult and unnecessary to create the SELinux policies needed to get your web server to work with SELinux in Enforcing mode. You can change the mode to Permissive by editing the /etc/sysconfig/selinux file so the SELINUX value is set as follows. With this set, the next time you reboot the system, it will be in Permissive mode. This means that if you break SELinux policies, that event is logged, but not prevented (as it would be in Enforcing mode).
SELINUX=permissive
- Read the httpd_selinux man page. Type man httpd_selinux from the shell. This man page will show you the proper file contexts and available Booleans.
- Use standard locations for files. When you create new files, those files inherit the file contexts of the directories they are in. Because /etc/httpd is set to the right file context for configuration files, /var/www/html is right for content files, and so on, simply copying files to or creating new files in those locations causes the file contexts to be set properly.
- Modify SELinux to allow non-standard features. You may want to serve web content from the /mystuff directory or put configuration files in the /etc/whatever directory. Likewise, you may want to allow users of your server to upload files, run scripts, or enable other features that are disabled by SELinux by default. In those cases, you can use SELinux commands to set the file contexts and Booleans you need to get SELinux working the way you want.
Be sure to read Chapter 24 to learn more about SELinux.
Understanding the Apache configuration files
The configuration files for Apache HTTPD are incredibly flexible, meaning that you can configure the server to behave in almost any manner you want. This flexibility comes at the cost of increased complexity in the form of a large number of configuration options (called directives). But in practice, you need to be familiar with only a few directives.
In Fedora and RHEL, the basic Apache server's primary configuration file is in /etc/httpd/conf/httpd.conf. Besides this file, any file ending in .conf in the /etc/httpd/conf.d directory is also used for Apache configuration (based on an Include line in the httpd.conf file). In Ubuntu, the Apache configuration is stored in text files read by the Apache server, beginning with /etc/apache2/apache2.conf. Configuration is read from start to finish, with most directives being processed in the order in which they are read.
Using directives
The scope of many configuration directives can be altered based on context. In other words, some parameters may be set on a global level and then changed for a specific file, directory, or virtual host. Other directives are always global in nature, such as those specifying which IP addresses the server listens on. Still others are valid only when applied to a specific location.
Locations are configured in the form of a start tag containing the location type and a resource location, followed by the configuration options for that location, and finishing with an end tag. This form is often called a configuration block, and looks very similar to HTML code. A special type of configuration block, known as a location block, is used to limit the scope of directives to specific files or directories. These blocks take the following form:
<locationtag specifier>
(options specific to objects matching the specifier go within this block)
</locationtag>
Different types of location tags exist and are selected based on the type of resource location that is being specified. The specifier that is included in the start tag is handled based on the type of location tag. The location tags you generally use and encounter are Directory, Files, and Location, which limit the scope of the directives to specific directories, files, or locations, respectively.
- Directory tags are used to specify a path based on the location on the filesystem. For instance, <Directory /> refers to the root directory on the computer. Directories inherit settings from directories above them, with the most specific Directory block overriding less-specific ones, regardless of the order in which they appear in the configuration files.
- Files tags are used to specify files by name. Files tags can be contained within Directory blocks to limit them to files under that directory. Settings within a Files block will override the ones in Directory blocks.
- Location tags are used to specify the URI used to access a file or directory. This is different from Directory in that it relates to the address contained within the request and not to the real location of the file on the drive. Location tags are processed last and override the settings in Directory and Files blocks.
Match versions of these tags — DirectoryMatch, FilesMatch, and LocationMatch — have the same function but can contain regular expressions in the resource specification. FilesMatch and LocationMatch blocks are processed at the same time as Files and Location, respectively. DirectoryMatch blocks are processed after Directory blocks.
Apache can also be configured to process configuration options contained within files with the name specified in the AccessFileName directive (which is generally set to .htaccess). Directives in access configuration files are applied to all objects under the directory they contain, including subdirectories and their contents. Access configuration files are processed at the same time as Directory blocks, using a similar “most specific match” order.
Three directives commonly found in location blocks and access control files are DirectoryIndex, Options, and ErrorDocument:
- DirectoryIndex tells Apache which file to load when the URI contains a directory but not a filename. This directive doesn't work in Files blocks.
- Options is used to adjust how Apache handles files within a directory. The ExecCGI option tells Apache that files in that directory can be run as CGI scripts, and the Includes option tells Apache that server-side includes (SSI) are permitted. Another common option is the Indexes option, which tells Apache to generate a list of files if one of the filenames found in the DirectoryIndex setting is missing. An absolute list of options can be specified, or the list of options can be modified by adding + or - in front of an option name. See http://httpd.apache.org/docs/mod/core.html#options for more information.
- ErrorDocument directives can be used to specify a file containing messages to send to web clients when a particular error occurs. The location of the file is relative to the /var/www directory. The directive must specify an error code and the full URI for the error document. Possible error codes include 403 (access denied), 404 (file not found), and 500 (server internal error). You can find more information about the ErrorDocument directive at http://httpd.apache.org/docs/mod/core.html#errordocument. As an example, when a client requests a URL from the server that is not found, the following ErrorDocument line causes the 404 error code to send the client an error message that is listed in the /var/www/error/HTTP_NOT_FOUND.html.var file.
ErrorDocument 404 /error/HTTP_NOT_FOUND.html.var
Another common use for location blocks and access control files is to limit access to a resource. The Allow directive can be used to permit access to matching hosts, and the Deny directive can be used to forbid it. Both of these options can occur more than once within a block and are handled based on the Order setting. Setting Order to Deny,Allow permits access to any host that is not listed in a Deny directive. A setting of Allow,Deny denies access to any host not allowed in an Allow directive.
As with most other options, the most specific Allow or Deny option for a host is used, meaning that you can Deny access to a range and Allow access to subsets of that range. By adding the Satisfy option and some additional parameters, you can add password authentication. For more information about access control, see http://httpd.apache.org/docs/mod/mod_access.html.
Understanding default settings
The reason you can start using your Apache web server as soon as you install it is that the httpd.conf file includes default settings that tell the server such things as where to find web content, scripts, log files, and other items the server needs to operate. It also includes settings that tell the server how many server processes to run at a time and how directory contents are displayed.
If you want to host a single website (such as for the example.com domain), you can simply add content to the /var/www/html directory and add the address of your website to a DNS server so others can browse to it. You can then change directives, such as those described in the previous section, as you need to.
To help you understand the settings that come in the default httpd.conf file, I've displayed some of those settings with descriptions below. I have removed comments and rearranged some of the settings for clarity.
The following settings show locations where the httpd server is getting and putting content by default:
ServerRoot "/etc/httpd"
PidFile run/httpd.pid
Include conf.d/*.conf
ErrorLog logs/error_log
CustomLog logs/access_log combined
DocumentRoot "/var/www/html"
ScriptAlias /cgi-bin/ "/var/www/cgi-bin/"
The ServerRoot directive identifies /etc/httpd as the location where configuration files, log files, and PID files are stored. The path defined by the PidFile setting (run/httpd.pid) indicates where the process ID of the httpd process is stored. It is appended to the path defined by the ServerRoot setting, which results in the PID being stored in /etc/httpd/run/httpd.pid.
At the point in the file where the Include line appears, any files ending in .conf from the /etc/httpd/conf.d directory are included in the httpd.conf file. Configuration files are often associated with Apache modules or with virtual host blocks, which you might add yourself to virtual host configurations in separate files (see the “Adding a virtual host to Apache” section).
As errors are encountered and content is served, messages about those activities are placed in files indicated by the ErrorLog and CustomLog entries. From the entries shown here, those logs are stored in the /etc/httpd/logs/error_log and /etc/httpd/logs/access_log directories, respectively. Those logs are also linked to the /var/log/httpd directory, so you can access the same file from there as well.
The DocumentRoot and ScriptAlias directives determine where content that is served by your httpd server is stored. Typically, you place an index.html file in the DocumentRoot directory (/var/www/html, by default) as the homepage, and then add other content as needed. The ScriptAlias directive tells the httpd daemon that any scripts requested from the cgi-bin directory should be found in the /var/www/cgi-bin directory. For example, a client could access a script located in /var/www/cgi-bin/script.cgi by entering a URL such as http://example.com/cgi-bin/script.cgi.
In addition to file locations, you can find other information in the httpd.conf file. Here are some examples:
Listen 80
User apache
Group apache
ServerAdmin root@localhost
DirectoryIndex index.html index.html.var
AccessFileName .htaccess
The Listen 80 directive tells httpd to listen for incoming requests on port 80 (the default port for the HTTP web server protocol). The User and Group directives tell httpd to run as apache for both the user and group. The value of ServerAdmin (root@localhost, by default) is published on some web pages to tell users where to e-mail if they have problems with the server.
The DirectoryIndex lists files that httpd will serve if a directory is requested. For example, if a web browser requested http://host/whatever/, httpd would see whether /var/www/html/whatever/index.html existed and serve it if the file existed. If it didn't exist, httpd would look for index.html.var. If that file couldn't be found, the contents of the directory would be displayed.
The AccessFileName directive tells httpd to use the contents of the .htaccess file if it exists in a directory to read in settings that apply to access to that directory. For example, the file could be used to require password protection for the directory or to indicate that the contents of the directory should be displayed in certain ways. For this file to work, however, a Directory container (described next) would have to have AllowOverride opened.
The following Directory containers define behavior when the root directory (/) and /var/www/html directory are accessed:
<Directory />
    Options FollowSymLinks
    AllowOverride None
</Directory>
<Directory "/var/www/html">
    Options Indexes FollowSymLinks
    AllowOverride None
    Order allow,deny
    Allow from all
</Directory>
The first Directory container (/) indicates that if httpd tries to access any files in the Linux file system, httpd will be allowed to follow files symbolically linked to other files (Options FollowSymLinks). The AllowOverride None directive prevents .htaccess files from overriding settings for that directory. Those settings apply to any subdirectories that are not defined in other Directory containers.
The /var/www/html Directory container also follows symbolic links and does not allow overrides. It has Order and Allow directives (described earlier) that don't prevent any access to the server, but can be modified to indicate that only selected hosts can access the /var/www/html directory and its contents.
If all the settings just described work for you, you can begin adding the content you want to the var/www/html and var/www/cgi-bin directories. One reason you might not be satisfied with the default setting is that you might want to serve content for multiple domains (such as example.com, example.org, and example.net). To do that, you need to configure virtual hosts. Virtual hosts, which are described in greater detail in the next section, are a convenient (and almost essential) tool for altering server behavior based on the server address or name that a request is directed to. Most global configuration options are applied to virtual hosts but can be overridden by directives within the VirtualHost block.
Adding a virtual host to Apache
Apache supports the creation of separate websites within a single server to keep content separate. Individual sites are configured on the same server in what are referred to as virtual hosts.
Virtual hosts are really just a way to have the content for multiple domain names available from the same Apache server. Instead of needing to have one physical system to serve content for each domain, you can serve content for multiple domains from the same operating system.
An Apache server that is doing virtual hosting may have multiple domain names that resolve to the IP address of the server. The content that is served to a web client is based on the name used to access the server.
For example, if a client got to the server by requesting the name www.example.com, the client would be directed to a virtual host container that had its ServerName set to respond to www.example.com. The container would provide the location of the content and possibly different error logs or Directory directives from the global settings. This way, each virtual host could be managed as if it were on a separate machine.
To use name-based virtual hosting, turn on the NameVirtualHost directive. Then add as many VirtualHost containers as you like. Here's how to configure a virtual host:
NameVirtualHost *:80
<VirtualHost *:80>
    ServerAdmin     [email protected]
    ServerName      www.example.org
    ServerAlias     web.example.org
    DocumentRoot    /var/www/html/example.org/
DirectoryIndex  index.php index.html index.htm
</VirtualHost>
- The NameVirtualHost line tells Apache to determine which virtual host to serve documents from based on the hostname provided by the HTTP client. The *:80 means that requests to port 80 on any IP address will be treated in this manner.
- Similarly, the *:80 specification in the VirtualHost block indicates what address and port this virtual host applies to. With multiple IP addresses associated with your Linux system, the * can be replaced by a specific IP address. The port is optional for both NameVirtualHost and VirtualHost specifications but should always be used to prevent interference with SSL virtual hosts.
- The ServerName and ServerAlias lines tell Apache which names this virtual host should be recognized as, so replace them with names appropriate to your site. You can leave out the ServerAlias line if you do not have any alternate names for the server, and you can specify more than one name per ServerAlias line or have multiple ServerAlias lines if you have several alternate names.
- The DocumentRoot specifies where the web documents (content served for this site) are stored. Although shown as a subdirectory that you create under the default DocumentRoot (/var/www/html), often sites are attached to the home directories of specific users (such as /home/chris/public_html) so that each site can be managed by a different user.
 # apachectl configtest
 Syntax OK
 # apachectl graceful
Provided you have registered the system with a DNS server, a web browser should be able to access this website using either www.example.org or web.example.org. If that works, you can start adding other virtual hosts to the system as well.
Another way to extend the use of your website is to allow multiple users to share their own content on your server. You can enable users to add content they want to share via your web server in a subdirectory of their home directories, as described in the next section.
Allowing users to publish their own web content
In situations in which you do not have the ability to set up a virtual host for every user that you want to provide web space for, you can easily make use of the mod_userdir module in Apache. With this module enabled (which it is not by default), the public_html directory under every user's home directory is available to the web at http://servername/∼username/.
For example, a user named wtucker on www.example.org stores web content in /home/wtucker/public_html. That content would be available from http://www.example.org/∼wtucker.
Make these changes to the /etc/httpd/conf/httpd.conf file to allow users to publish web content from their own home directories:
<IfModule mod_userdir.c>
     # UserDir disabled
     UserDir public_html
</IfModule>
<Directory /home/*/public_html>
    AllowOverride FileInfo AuthConfig Limit
    Options MultiViews Indexes SymLinksIfOwnerMatch IncludesNoExec
    <Limit GET POST OPTIONS>
        Order allow,deny
        Allow from all
    </Limit>
    <LimitExcept GET POST OPTIONS>
        Order deny,allow
        Deny from all
    </LimitExcept>
</Directory>
$ mkdir $HOME/public_html
# chmod +x /home /home/*
# chcon -R --reference=/var/www/html/ /home/*/public_html
# setsebool –P httpd_enable_homedirs true
Securing your web traffic with SSL/TLS
Any data that you share from your website using standard HTTP protocol is sent in clear text. That means that anyone that can watch the traffic on a network between your server and your client can view your unprotected data. To secure that information, you can add certificates to your site (so a client can validate who you are) and encrypt your data (so nobody can sniff your network and see your data).
Electronic commerce applications such as online shopping and banking are generally encrypted using either the Secure Sockets Layer (SSL) or Transport Layer Security (TLS) specifications. TLS is based on version 3.0 of the SSL specifications, so they are very similar in nature. Because of this similarity — and because SSL is older — the SSL acronym is often used to refer to either variety. For web connections, the SSL connection is established first, and then normal HTTP communication is “tunneled” through it.
While you are establishing a connection between an SSL client and an SSL server, asymmetric (public key) cryptography is used to verify identities and establish the session parameters and the session key. A symmetric encryption algorithm such as DES or RC4 is then used with the negotiated key to encrypt the data that are transmitted during the session. The use of asymmetric encryption during the handshaking phase allows safe communication without the use of a preshared key, and the symmetric encryption is faster and more practical for use on the session data.
For the client to verify the identity of the server, the server must have a previously generated private key, as well as a certificate containing the public key and information about the server. This certificate must be verifiable using a public key that is known to the client.
Certificates are generally digitally signed by a third-party certificate authority (CA) that has verified the identity of the requester and the validity of the request to have the certificate signed. In most cases, the CA is a company that has made arrangements with the web browser vendor to have its own certificate installed and trusted by default client installations. The CA then charges the server operator for its services.
Commercial certificate authorities vary in price, features, and browser support, but remember that price is not always an indication of quality. Some popular CAs include InstantSSL (http://www.instantssl.com), Thawte (http://www.thawte.com), and VeriSign (http://www.verisign.com).
You also have the option of creating self-signed certificates, although these should be used only for testing or when a very small number of people will be accessing your server and you do not plan to have certificates on multiple machines. Directions for generating a self-signed certificate are included in the “Generating an SSL key and self-signed certificate” section.
The last option is to run your own certificate authority. This is probably practical only if you have a small number of expected users and the means to distribute your CA certificate to them (including assisting them with installing it in their browsers). The process for creating a CA is too elaborate to cover in this book, but it is a worthwhile alternative to generating self-signed certificates.
The following sections describe how HTTPS communications are configured by default in Fedora and RHEL when you install the mod_ssl package. After that, I describe how to better configure SSL communications by generating your own SSL keys and certificates to use with the web server (running on a Fedora or RHEL system) configured in this chapter.
Understanding how SSL is configured
If you have installed the mod_ssl package in Fedora or RHEL (which is done by default if you installed the Web Server group), a self-signed certificate and private key are created when the package is installed. This allows you to immediately use HTTPS protocol to communicate with the web server.
Although the default configuration of mod_ssl allows you to have encrypted communications between your web server and clients, because the certificate is self-signed, a client accessing your site will be warned that the certificate is untrusted. To begin exploring the SSL configuration for your Apache web server, make sure the mod_ssl package is installed on the server running your Apache (httpd) service:
# yum install mod_ssl
The mod_ssl package includes the module needed to implement SSL on your web server (mod_ssl.so) and a configuration file for your SSL hosts: /etc/httpd/conf.d/ssl.conf. There are many comments and settings in this file, including the following:
LoadModule ssl_module modules/mod_ssl.so
Listen 443
<VirtualHost _default_:443>
ErrorLog logs/ssl_error_log
TransferLog logs/ssl_access_log
LogLevel warn
SSLEngine on
SSLCertificateFile /etc/pki/tls/certs/localhost.crt
SSLCertificateKeyFile /etc/pki/tls/private/localhost.key
</VirtualHost>
Of the global settings in the ssl.conf file, the mod_ssl.so module is loaded to provide SSL features. The SSL service is also set to listen on standard SSL port 443.
A VirtualHost block is created that causes error messages and access messages to be logged to log files that are separate from the standard logs used by the server (ssl_error_log and ssl_access_log in the /var/log/httpd/ directory). The level of log messages is set to warn and the SSLEngine is turned on.
In the preceding sample code, the last two lines in the VirtualHost block contain the key and certificate information. As mentioned previously, a key is generated when mod_ssl is installed and placed in the file /etc/pki/tls/certs/localhost.crt. A self-signed certificate, /etc/pki/tls/certs/localhost.crt, is created using that key. When you create your own key and certificate later, you will need to replace the values of SSLCertificateFile and SSLCertificateKeyFile in this file.
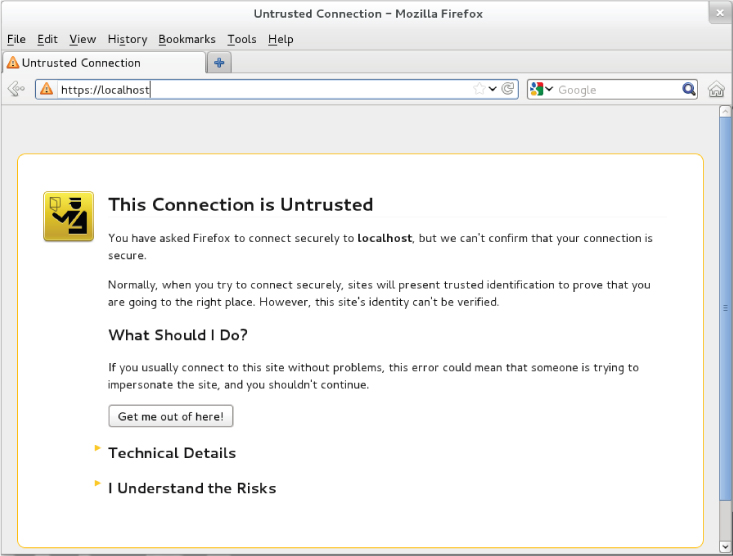
After installing the mod_ssl package and reloading the configuration file, you can test that the default certificate is working by following these steps:
Figure 17.2 Accessing an SSL website with a default certificate
Because you don't want your website to scare off users, the best thing to do is to get a valid certificate to use with your site. The next best thing to do is to create a self-signed certificate that at least includes better information about your site and organization. The following section describes how to do that.
Generating an SSL key and self-signed certificate
To begin setting up SSL, use the openssl command, which is part of the openssl package, to generate your public and private key. After that, you can generate your own self-signed certificate to test the site or to use internally.
# yum install openssl
# cd /etc/pki/tls/private
# openssl genrsa -out server.key 1024
# chmod 600 server.key
# openssl genrsa -des3 -out server.key 1024
# cd /etc/pki/tls/certs
# openssl req -new -x509 -nodes -sha1 -days 365
   -key /etc/pki/tls/private/server.key
   -out server.crt
Country Name (2 letter code) [AU]: US
State or Province Name (full name) [Some-State]: NJ
Locality Name (eg, city) []: Princeton
Organization Name (eg, company) [Internet Widgits Pty
Ltd]:TEST USE ONLY
Organizational Unit Name (eg, section) []:TEST USE ONLY
Common Name (eg, YOUR name) []:secure.example.org
Email Address []:[email protected]
SSLCertificateFile /etc/pki/tls/certs/server.crt
SSLCertificateKeyFile /etc/pki/tls/private/server.key
For internal use or testing, a self-signed certificate might work for you. However, for public websites, you should use a certificate that is validated by a certificate authority (CA). The procedure for doing that is covered next.
Generating a certificate signing request
If you plan to have your certificate signed by a CA (including one that you run yourself), you can use your private key to generate a certificate signing request (CSR):
# mkdir /etc/pki/tls/ssl.csr
# cd /etc/pki/tls/ssl.csr/
# openssl req -new -key ../private/server.key -out server.csr
Country Name (2 letter code) [AU]:US
State or Province Name (full name) [Some-State]:Washington
Locality Name (eg, city) []:Bellingham
Organization Name (eg, company) [Internet Widgits Pty
Ltd]:Example Company, LTD.
Organizational Unit Name (eg, section) []:Network
Operations
Common Name (eg, YOUR name) []:secure.example.org
Email Address []:[email protected]
Please enter the following 'extra' attributes
to be sent with your certificate request
A challenge password []:
An optional company name []:
Listen 192.168.0.56:443
<VirtualHost *:443>
    ServerName      secure.example.org
    ServerAlias     web.example.org
    DocumentRoot    /home/username/public_html/
    DirectoryIndex  index.php index.html index.htm
    SSLEngine       On
    SSLCertificateKeyFile /etc/pki/tls/private/server.key
    SSLCertificateFile /etc/pki/tls/certs/example.org.crt
</VirtualHost>
The IP address shown in the Listen directive should be replaced by the public IP address representing the SSL host you are serving. Remember that each SSL host should have its own IP address.
Troubleshooting Your Web Server
In any complex environment, you occasionally run into problems. This section includes tips for isolating and resolving the most common errors that you may encounter.
Checking for configuration errors
You may occasionally run into configuration errors or script problems that prevent Apache from starting or that prevent specific files from being accessible. Most of these problems can be isolated and resolved using two Apache-provided tools: the apachectl program and the system error log.
When encountering a problem, first use the apachectl program with the configtest parameter to test the configuration. In fact, it's a good idea to develop the habit of running this every time you make a configuration change:
# apachectl configtest
Syntax OK
# apachectl graceful
/usr/sbin/apachectl graceful: httpd gracefully restarted
In the event of a syntax error, apachectl indicates where the error occurs and also does its best to give a hint about the nature of the problem. You can then use the graceful restart option (apachectl graceful) to instruct Apache to reload its configuration without disconnecting any active clients.
Some configuration problems pass the syntax tests performed by apachectl but cause the HTTP daemon to exit immediately after reloading its configuration. If this happens, use the tail command to check Apache's error log for useful information. On Fedora and RHEL systems, the error log is in /var/log/httpd/error.log. On other systems, you can find the location by looking for the ErrorLog directive in your Apache configuration.
You might encounter an error message that looks something like this:
[crit] (98)Address already in use: make_sock: could not bind to port 80
This error often indicates that something else is bound to port 80 (not very common unless you have attempted to install another web server), that another Apache process is already running (apachectl usually catches this), or that you have told Apache to bind the same IP address and port combination in more than one place. My friend Richard said he has seen students who installed Skype on Linux in a way that causes Skype to use TCP port 80 when running in the background.
You can use the netstat command to view the list of programs (including Apache) with TCP ports in the LISTEN state:
# netstat -nltp
Active Internet connections (only servers)
Proto  Local Address  Foreign Address  State   PID/Program name
tcp    0.0.0.0:80     0.0.0.0:*        LISTEN  2105/httpd
The output from netstat (which was shortened to fit here) indicates that an instance of the httpd process with a process ID of 2105 is listening (as indicated by the LISTEN state) for connections to any local IP address (indicated by 0.0.0.0) on port 80 (the standard HTTP port). If a different program is listening to port 80, it is shown there. You can use the kill command to terminate the process, but if it is something other than httpd, you should also find out why it is running.
If you don't see any other processes listening on port 80, it could be that you have accidentally told Apache to listen on the same IP address and port combination in more than one place. Three configuration directives can be used for this: BindAddress, Port, and Listen:
- BindAddress — Enables you to specify a single IP address to listen on, or you can specify all IP addresses using the * wildcard. You should never have more than one BindAddress statement in your configuration file.
- Port — Specifies which TCP port to listen on but does not enable you to specify the IP address. Port is generally not used more than once in the configuration.
- Listen — Enables you to specify both an IP address and a port to bind to. The IP address can be in the form of a wildcard, and you can have multiple Listen statements in your configuration file.
To avoid confusion, it is generally a good idea to use only one of these directive types. Of the three, Listen is the most flexible, so it is probably the one you want to use the most. A common error when using Listen is to specify a port on all IP addresses (*:80) as well as that same port on a specific IP address (1.2.3.4:80), which results in the error from make_sock.
Configuration errors relating to SSL commonly result in Apache starting improperly. Make sure all key and certificate files exist and that they are in the proper format (use openssl to examine them).
For other error messages, try doing a web search to see whether somebody else has encountered the problem. In most cases, you can find a solution within the first few matches.
If you aren't getting enough information in the ErrorLog, you can configure it to log more information using the LogLevel directive. The options available for this directive, in increasing order of verbosity, are emerg, alert, crit, error, warn, notice, info, and debug. Select only one of these. Any message that is at least as important as the LogLevel you select will be stored in the ErrorLog. On a typical server, LogLevel is set to warn. You should not set it to any value lower than crit and should avoid leaving it set to debug because that can slow down the server and result in a very large ErrorLog.
As a last resort, you can also try running httpd -X -e debug manually to check for crashes or other error messages. The -X runs httpd in the foreground while -e debug displays debug and higher messages on the screen.
Accessing forbidden and server internal errors
The two common types of errors that you may encounter when attempting to view specific pages on your server are permission errors and server internal errors. Both types of errors can usually be isolated using the information in the error log. After making any of the changes described in the following list to attempt to solve one of these problems, try the request again and then check the error log to see whether the message has changed (for example, to show that the operation completed successfully).
- File permissions — A “File permissions prevent access” error indicates that the apache process is running as a user that is unable to open the requested file. By default, httpd is run by the apache user and group. Make sure that the account has execute permissions on the directory and every directory above it, as well as read permissions on the files themselves. Read permissions on a directory are also necessary if you want Apache to generate an index of files. See the manual page for chmod for more information about how to view and change permissions.
- Access denied — A “Client denied by server configuration” error indicates that Apache was configured to deny access to the object. Check the configuration files for Location and Directory sections that might affect the file you are trying to access. Remember that settings applied to a path are also applied to any paths below it. You can override these by changing the permissions only for the more specific path to which you want to allow access.
- Index not found — The “Directory index forbidden by rule” error indicates that Apache could not find an index file with a name specified in the DirectoryIndex directive and was configured to not create an index containing a list of files in a directory. Make sure your index page, if you have one, has one of the names specified in the relevant DirectoryIndex directive, or add an Options Indexes line to the appropriate Directory or Location section for that object.
- Script crashed — “Premature end of script headers” errors can indicate that a script is crashing before it finishes. On occasion, the errors that caused this also show up in the error log. When using suexec or suPHP, this error may also be caused by a file ownership or permissions error. These errors appear in log files in the /var/log/httpd directory.
- SELinux errors — If file permissions are open, but messages denying permission appear in log files, SELinux could be causing the problem. Disable SELinux temporarily (setenforce 0) and try to access the file again. If the file is now accessible, turn on SELinux again (setenforce 1) and check file contexts and Booleans. File contexts must be correct for httpd to be able to access a file. A Boolean might prevent a file being served from a remotely mounted directory or prevent a page from sending an e-mail or uploading a file. Type man httpd_selinux for details about SELinux configuration settings associated with the httpd services.
Summary
The open source Apache project is the world's most popular web server. Although Apache offers tremendous flexibility, security, and complexity, a basic Apache web server can be configured in just a few minutes in Fedora, RHEL, and most other Linux distributions.
The chapter described the steps for installing, configuring, securing, and troubleshooting a basic Apache web server. You learned how to configure virtual hosting and secure SSL hosts. You also learned how to configure Apache to allow any user account on the system to publish content from his or her own public_html directory.
Continuing on the topic of server configuration, in Chapter 18, you learn how to set up an FTP server in Linux. The examples illustrate how to configure an FTP server using the vsftpd package.
Exercises
The exercises in this section cover topics related to installing and configuring an Apache web server. As usual, I recommend you use a spare Fedora or Red Hat Enterprise Linux system to do the exercises. Don't do these exercises on a production machine because these exercises modify the Apache configuration files and service and could damage services you have currently configured. Try to find a computer where it will do no harm to interrupt services on the system.
These exercises assume that you are starting with a Fedora or RHEL installation on which the Apache server (httpd package) is not yet installed.
If you are stuck, solutions to the tasks are shown in Appendix B. These show you one approach to each task, although in Linux, there are often multiple ways to complete a task.
- Listens on port 80 on all interfaces
- Has a server administrator of [email protected]
- Has a server name of joe.example.org
- Has a DocumentRoot of /var/www/html/example.org
- Has a DirectoryIndex that includes at least index.html