
When you’re making changes to your template’s code, as we did in the last chapter, it’s always worth asking yourself if you can implement your change as a new widget area, or as a custom widget. For example, in the last chapter, we saw how to add a list of pages to the site’s footer. Why not just add a new widget area to the site’s footer, and create a custom widget for displaying only top-level pages? That way users could display the list of pages there if they wanted to, but could also choose to display nothing, or to display entirely different content.
In this chapter you’ll learn how to customize your theme by adding widget-ready areas, and how to create your own custom widgets to package with your theme.
Brandon told you quite a bit about widgets while you were learning to plan and design your theme, but now’s a good time for a quick review. Widgets allow users to insert all sorts of content into many different site areas with ease. If the user would like to display a list of the site’s categories in the sidebar, then all they need to do is drag the Categories widget onto one of the sidebar widget areas, and voilà! Instant gratification. WordPress includes about a dozen different widgets by default, but plugins and themes can add new ones, so in reality there’s no limit to the number and variety of widgets users of your theme will have access to.
Before your users can take advantage of the functionality that widgets offer, you need to provide them with a place to put those widgets in your theme. Within a standard WordPress theme, you’ll find at least one widget-ready area (alternatively referred to as a sidebar or an aside). Widget-ready areas come in all shapes and sizes depending on the theme, but they all serve the same function: they’re empty containers into which WordPress users can place widgets. In fact, WordPress.org requires that every theme in its directory have at least one widget-ready area.
Many theme developers refer to these widget-ready areas as sidebars. For many designers the idea of a sidebar implies a traditional two-column blog layout, but widgets can really be used anywhere, giving your users access to this powerful functionality anywhere within the theme. Common examples of widgetized areas include leaderboards, inline ad spaces, and additional footer contents.
The Thematic theme framework uses the term asides to describe its widget-ready areas, which is actually very appropriate when you think about it. Thematic boasts 13 of these asides to give you detailed control over the design and layout of your site.
To avoid recreating functionality that already exists, let’s have a look at the default widgets available in WordPress out of the box:
- Archives
-
displays links to monthly archives of all the site’s posts
- Calendar
-
displays a calendar to allow visitors to navigate through previous posts
- Categories
-
a list or drop-down showing the site’s categories; they can be displayed either aligned or as a nested hierarchy, and you can also optionally display post counts in each one
- Custom Menu
-
available only from WordPress 3.0 onwards, this allows users to display one of their custom menus in a widget-ready area
- Links
-
this presents a list of links (for example, a blogroll)
- Meta
-
the login and logout links for the site
- Pages
-
a list of the site’s pages
- Recent Posts
-
lists the most recent posts
- Recent Comments
-
the most recent comments on the site
- RSS
-
this is used to display entries from any RSS or Atom feed; it can be entries from another blog, or updates from any service that provides an RSS feed
- RSS Links
-
links to the site’s primary RSS feed and its comment RSS feed
- Tag Cloud
-
displays the site’s tags, with their font size determined by the number of posts they’re attached to
- Text
-
the most versatile widget, allowing users to insert arbitrary text or HTML (for example, it can be used to display a video from a third-party site that provides embed codes, an advertisement, or a short mission statement)
- Search
-
the site’s search form
Before you go merrily adding widget areas to your child theme, it’s worth having a look at Thematic’s existing asides to see if one of them might serve your purpose.
I’m sure you’ll find they’re fairly self-explanatory:
- Primary Aside
-
one of two main asides, which comes right after the content container in the markup on all pages, and which is commonly displayed as a sidebar
- Secondary Aside
-
the other main aside, which comes after the primary aside and is also usually shown as a sidebar
- Subsidiary Asides (3)
-
three widget-ready areas that appear in the footer
- Index Top
-
an aside that appears at the top of the index page
- Index Insert
-
this area’s inserted after a certain number of posts on the index page; the number can be set in Thematic’s options page in the WordPress admin section
- Index Bottom
-
an area that appears at the bottom of the index page
- Single Top
-
a widget area that appears at the top of a single-post page
- Single Insert
-
a widget area that presents on a single post page, between the post content and the comments
- Single Bottom
-
this area appears at the bottom of single post pages
- Page Top
-
a widget area that is inserted at the top of page templates
- Page Bottom
-
A widget area that’s placed at the bottom of page templates
All of these asides have Thematic’s usual abundance of class attributes, so they’re dead simple to
move around and style with CSS.
Soon we’ll be learning how to add a new widget-ready area to
our theme, but first let’s have a look at the sort of markup that an
active widget will generate. WordPress outputs the widget-ready area as an
unordered list, with a list item for each widget the area contains. In
addition, when using Thematic, each widget area will be wrapped in a
div with a class of aside and an id corresponding to the widget’s ID (we’ll see
how that’s set shortly).
Here’s the markup for Thematic’s Primary Aside:
<div id="primary" class="aside main-aside">
  <ul class="xoxo">
    <li id="linkcat-2" class="widgetcontainer widget_links">
      <h3 class="widgettitle">Blogroll</h3>
      <ul class="xoxo blogroll">
        <li><a href="#">Link #1</a></li>
        <li><a href="#">Link #2</a></li>
        <li><a href="#">Link #3</a></li>
      </ul>
    </li>
  </ul><!-- END #xoxo -->
</div><!-- END #first -->
The highlighted area here represents the actual widget being used—in this example it’s WordPress’s built-in Links widget. Thematic has filters that allow you to modify the markup elements that make up widgets and widget-ready areas:
thematic_before_widget_area-
the opening
<div>tag thematic_after_widget_area-
the closing
</div>tag thematic_before_widget-
the opening
<li>tag before each widget; the default value is:<li id="%1$s" class="widgetcontainer %2$s">
Those odd-looking
%1$sand%2$sbits allow WordPress to generate a numberedidand aclassfor each widget that’s added, likelinkcat-2andwidget_linksin the previous code example. thematic_after_widget-
the closing
</li>tag thematic_before_title-
the opening
h3tag before each widget’s title thematic_after_title-
the closing
h3tag after each widget’s title
Let’s look at a quick example of putting these filters to use. Let’s
say you wanted the widget titles to be wrapped in h4 elements instead of h3s. Easy:
function wicked_before_title($content) {
  $content = '<h4 class="widgettitle">';
  return $content;
}
function wicked_after_title($content) {
  $content = '</h4>';
  return $content;
}
add_filter('thematic_before_title', 'wicked_before_title'),
add_filter('thematic_after_title', 'wicked_after_title'),
This is a little different from the way we used filters in the last
chapter: instead of modifying the $content variable,
we’re flat-out overwriting it. This might seem odd, but it’s perfectly
okay, and it’s nice and simple.
We’ve seen that Thematic includes three widget-ready areas
in the footer, called subsidiary asides. All three are wrapped in a
container div with an id of subsidiary.
For our example, we’ll add another widget area above that container, which can be styled to be full-width, to replace the hardcoded page list we added in Chapter 5.
The first step in adding a new widget-ready area to your theme is to register it with WordPress, so that it will appear in the widget administration interface.
To keep our functions.php file nice and tidy, let’s create a new file in the library directory of our child theme; we’ll call it widget-areas.php and include it as follows in functions.php:
In this file, we’ll put all the code required to register and
display our new widget-ready area. To register it we need to call on
WordPress’s register_sidebar
function. It accepts an array of options that define the new
sidebar:
<?php

// Register the extra Footer Aside
function wicked_footer_aside() {
  register_sidebar(array(
    'name' => 'Main Footer Aside',
    'id' => 'footer-aside',
    'description' => __('A widget area in the footer, above the subsidiary
↵asides.', 'thematic'),
    'before_widget' => thematic_before_widget(),
    'after_widget' => thematic_after_widget(),
    'before_title' => thematic_before_title(),
    'after_title' => thematic_after_title(), )
  );
}
add_action('init', 'wicked_footer_aside'),

?>
The array passed to register_sidebar
needs to have the following values:
name-
The name of the widget that shows up in the back end. The name is also used in the CSS
classthat I mentioned earlier. We’re calling our new widget-ready area “Main Footer Aside.” id-
This is used to set an ID for WordPress’s sake, which you’ll need to use when you’re adding the widget-ready area to your templates. It’s also used on the front end as the
divelement’sid. We’re usingfooter-asidehere. description-
As the name suggests, this should describe the intended use or location of the sidebar. It’s only shown in the back-end interface. Our description is “A widget-ready area in the footer, above the subsidiary asides.” For details on that funky-looking
__()code, seethe note titled Localization below. before_widget,after_widget,before_title, andafter_title-
This is where you’ll specify the markup that will be inserted before and after each widget and widget title. Fortunately, Thematic already has functions to generate this markup for you, which pass the content through the filters we saw earlier. If you need your aside to have different markup from the other widget-ready areas, you can change it here; for now we’ll use Thematic’s functions so that they’ll be consistent with other widget-ready areas in the theme.
Note: Localization
The __() function used in the above example is a translation function.
When writing themes or plugins for distribution, it’s best practice to
run any text through this function, so that it can be easily
translated by your end users. Rather than digging through your PHP
files to translate your theme’s text, they can simply upload a
translation file that includes localized variants of every message
your theme uses. When WordPress encounters the
__() method, it will go looking for a
translation of that message in the user’s chosen language. If it finds
one, it will substitute it. The extra
'thematic' parameter passed to the functions is
what’s called a domain; it’s used in a situation where the same
message might need to be translated differently in alternative
contexts.
There’s no pressure to fully understand WordPress localization; just remember to wrap any text in your theme’s interface in the translation function, and you’ll be doing your job.
For more info about how to use
register_sidebar, you guessed it: check
out the WordPress Codex.
Now that the widget-ready area is registered, it will appear in the back-end interface and you can add widgets to it. However, we’ve yet to call on it in any of our templates, so as they stand, these widgets would never be displayed. Let’s fix that now.
So we’ve registered our new widget-ready area, but
currently it only exists on the back-end interface, and nowhere on the
front end. We now need to insert it in a template for it to appear. When
we added the page list to the footer-homepage.php
template in Chapter 5, we put it right above the
call to thematic_footer. Now that we know about
hooks, we can just add our function to that action hook and we should be
good to go. Add this code to your widget-areas.php
file:
// Add footer Sidebar Area
function add_wicked_footer_aside() {
  if (is_sidebar_active('footer-aside')) {
    echo thematic_before_widget_area('footer-aside'),(1)
    dynamic_sidebar('footer-aside'),(2)
    echo thematic_after_widget_area('footer-aside'),(3)
  }
}

add_action('thematic_footer','add_wicked_footer_aside', 10);
What we’ve done here is created a function called
add_wicked_footer_aside, and used it to grab
our newly registered sidebar, called footer-aside,
and add it to the top of Thematic’s footer. There’s a conditional
statement—if (is_sidebar_active('footer-aside'))—that
checks to see if the sidebar is active; in other words, if it has
widgets added to it. This tells the theme to only show the widget area
if the user has added widgets. After that come the three essential lines
that we use to output the actual markup of our widget-ready area:
|
This adds the opening markup for the widget-ready area; by
default, this is a | |
|
This is the WordPress function that displays all the widgets contained in the sidebar. You just pass in the sidebar’s ID, and WordPress handles the rest. | |
|
This outputs the closing markup for the widget-ready area. As
above, you can filter it with
|
Any time you want to output a widget-ready area with the benefit of Thematic’s extra markup and filters, you’ll need to use those same three lines of code, so remember them well.
At this point, if you add a few widgets to your new Main Footer Aside, you should see them appear on the site above the subsidiary asides. The aside just needs a few quick styles to set it to be the same width as the main content area:
Victory!
When developing your theme, it’s always good to keep in mind how the publisher will use it. The 13 widget-ready areas built into Thematic really allow you to push the envelope when it comes to displaying targeted content. However, depending on your design, you may only need one or two sidebars. Especially when dealing with end-users that are new to WordPress, you want to keep the experience of administering the theme as simple as possible.
If you’re designing a theme built on Thematic and you have no specific use or plans for a given widget area, you should remove it. In doing so, the back-end interface is kept cleaner, making it more organized and potentially less confusing for yourself and anyone who may use your theme. This is very easy to do with a few quick lines of code.
As an example, let’s remove one of Thematic’s built-in widget areas.
In the last chapter, we replaced the standard Loop on the home page with a
custom Loop of our own making. One consequence of this is that the
index-insert widget area is no longer present in the
template. As a result, it should be removed to prevent users being
confused; at present, any widgets added to it will fail to display
anywhere.
To remove the area, we need simply call on WordPress’s
unregister_sidebar method. We’re adding it to the
init hook with a priority of 20, because we want to
make sure that it runs after the register_sidebar
call that adds the sidebar in the first place:
// remove index insert aside
function wicked_remove_index_insert() {
  unregister_sidebar('index-insert'),
}
add_action('init', 'wicked_remove_index_insert', 20);
And that’s it! If you refresh the widget admin page now, the
index-insert box will have vanished.
There are tons of plugins and widgets in the WordPress plugin directory; however, at some point you’ll need to come up with your own custom widget that solves a particular problem. It’s a really great selling point to have themes that come with built-in widgets, especially when they take advantage of a particular feature only available to your theme.
Traditionally, there were two ways to add your own custom widgets. The first was to simply add a function to your functions.php file, which is what we’ve been doing so far for the custom functionality of our theme. This will become quite cumbersome quickly, though with good commenting and file separation it can stay manageable. The second way of going about it is to create a WordPress plugin for each new widget. This tends to be problematic as well, because the plugin will exist separately from your theme, thereby adding a few extra administrative steps to the installation process. You want your theme to be as easy as possible to use, so this is probably best avoided.
Luckily, Thematic comes with a rather innovative built-in widget solution that makes widget creation and management extremely simple. There’s a core Thematic function that looks for a folder called widgets in your child theme folder, and adds any widgets in there without any additional work on your part. This feature also means that your widgets will travel with your child theme, so if you’re creating theme-specific widgets for distribution, you’ll make things simpler for users by removing any extra plugin installation/activation steps. Another great aspect of using the widgets folder is that you can create each widget as a separate PHP file, which can help you stay organized.
In Chapter 5 we wrote a function to add author information to the end of every post. To make this functionality a little more flexible, why not turn it into a widget that will only display on single post pages? That way, your users can choose to display it in the sidebar, or elsewhere, or not at all.
Warning: OOP(s)
The code that follows makes use of PHP’s object oriented programming (OOP) features. If you’re unfamiliar with object oriented programming, don’t worry: I’ll explain everything as simply as possible. This is just a warning that some of this code may seem a little strange to you if you’ve only ever worked with PHP in a procedural (or not object oriented) way.
To create a new widget in WordPress, you extend the
WP_Widget class. If this seems a bit beyond your
grasp, don’t worry: when developing WordPress widgets, it’s unnecessary
to think about objects and classes very much. Every widget class has the
same four functions inside it, so you only need to write those four functions
for every widget—and you can just copy and paste the basic layout of the
class every time you want to make a new widget. The four functions you
need are a constructor function (which always has the same name as the
class itself), widget,
update, and
form.
Let’s first have a look at the empty shell of a new widget:
class My_Widget extends WP_Widget {
  function My_Widget() {
    // this is a constructor, where each new instance of your widget gets built
  }

  function form($instance) {
    // this generates the widget options form which you see
    // in the widgets section in the admin
  }

  function update($new_instance, $old_instance) {
    // this handles the submission of the options form to
    // update the widget options
  }

  function widget($args, $instance) {
    // the most important function: this one handles actually outputting
    // the widget's content to the theme
  }
}
Assuming you’ve filled out each of these functions with your desired functionality, there’s only one step left. Much like widget-ready areas, new widgets need to be registered with WordPress:
register_widget('My_Widget'),
At the most basic level, the form and
update functions only need to give your users
the option to input the title to be displayed with the widget. This
means that unless you require more detailed options here, you can reuse
the same code for those two functions for each widget you
develop.
To create our first custom widget, we’ll first create a
widgets folder inside our child theme folder, and
add a new PHP file to it. We’ll call it
author-data.php. Let’s start by putting in the
declaration of the Author_Data_Widget class,
along with the four required functions and the
register_widget call:
<?php

class Author_Data_Widget extends WP_Widget {
  function Author_Data_Widget() {

  }

  function form($instance) {

  }

  function update($new_instance, $old_instance) {

  }

  function widget($args, $instance) {

  }
}

register_widget('Author_Data_Widget'),

?>
Our first task is to write the constructor function. In its most basic form, it consists of:
function My_Widget() {
  $this->WP_Widget($id, $name, $widget_ops, $control_ops);
}
That one function ($this->WP_Widget) is what
WordPress uses to create each instance of your widget, so that’s all
that’s necessary here. The $id parameter is used
internally to refer to your widget, and $name is the
name that’s shown in the widget admin interface. The
$widget_ops parameter is an array that includes
the widget’s description to be shown in the admin section.
$control_ops is optional and not required for most
widgets, so you can forget about it for now.
Let’s have a go at writing this function for our author data widget:
function Author_Data_Widget() {
  $widget_ops = array(
    'description' => 'A widget that displays author info on single posts.'
  );
  $this->WP_Widget('author_data', 'Author Data', $widget_ops);
}
Even with only this one function in place, we can already see our widget in the back-end interface, as shown in Figure 6.1.

However, if you drag the widget onto one of your widget-ready areas, you’ll see that it lacks any customizable options, as shown in Figure 6.2.
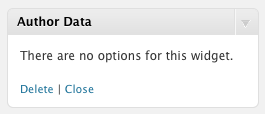
We’d like our users to at least be able to set a custom title for
the widget, so we should fill out the form and
update functions to give us an options form.
Let’s start with the form method.
Fortunately, WordPress handles the creation of the
form element; all you need to do is
write the label and input elements specific to your option. These
must be assigned specific id and
name attributes in order to work
correctly, but again WordPress has your back: your widget has functions
called get_field_id and
get_field_name that serve this purpose. Here’s
what our simple form looks like:
function form($instance) {
  $title = esc_attr($instance['title']);

  ?>
    <p>
      <label for="<?php echo $this->get_field_id('title'), ?>">Title:
      <input class="widefat"
             id="<?php echo $this->get_field_id('title'), ?>"
             name="<?php echo $this->get_field_name('title'), ?>"
             type="text"
             value="<?php echo attribute_escape($title); ?>" />
      </label>
    </p>
  <?php
}
The function receives an $instance variable
that represents the current widget, which will include the options that
are currently set. So, to make sure the form displays the current value
of the title, we first extract the $title variable
from $instance.
Then we construct the form field, using
$this->get_field_id
and
$this->get_field_name
to set the field’s id and name attributes. Other than that, this is
fairly straightforward HTML. If you want your form to have more than one
field, all you have to do is add them here, setting their attributes
appropriately.
When the form is submitted, WordPress will use your
update function to save the options the user has entered. Let’s have a
look at that next:
function update($new_instance, $old_instance) {
  $instance = $old_instance;
  $instance['title'] = strip_tags($new_instance['title']);

  return $instance;
}
The update function works a little
differently: it receives two parameters, which hold a brand new widget
containing the new options submitted in the form, and the old widget
with the previous options, respectively. So we need to grab the title
from $new_instance—being careful to strip out any
HTML and PHP tags—and use that to set the title on our instance. To
avoid confusion, we’ve dumped $old_instance into a
new variable simply called $instance, and that’s
where we set the new title. Then we return $instance,
and WordPress handles the rest, updating the widget with the options
we’ve set.
If your form has more than one field, just repeat this process for
each option that requires setting. You can include as much logic as you
want in update. If ever you’d like to discard
the new options (based on some condition), all you have to do is return
false and the widget won’t be updated.
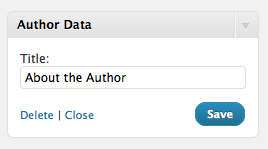
Now that we have our options form, test it out: go back to your widgets admin page, and drag the Author Data widget onto one of the widget areas. You should see your new title form, as shown in Figure 6.3.
That’s three out of four functions defined: we have our
constructor, as well as the form and
update methods for handling our widget options
form. Now all that’s to be done is tell WordPress how to display the
widget!
Here’s what that function will look like:
function widget($args, $instance) {
  extract($args, EXTR_SKIP);(1)

  if (is_single()) {(2)

    echo $before_widget;(3)
    $title = apply_filters('widget_title', $instance['title']);(4)

    if ( !empty( $title ) ) { echo $before_title . $title . $after_title; };(5)
    echo '<div class="author-data">';
    echo get_avatar(get_the_author_meta('user_email'), 150);(6)
    echo '<h4>' . the_author_meta('display_name') . '</h4>';
    // Is there an author description?
    if (get_the_author_meta('description')) {
      echo '<div class="description"><p>'
          . get_the_author_meta('description')
          . '</p></div>';
    }
    echo '</div>';
    echo $after_widget;(7)
  }
}
Your function receives two parameters: the first one is
$args, which is an array of the arguments provided to
all widgets in your theme. They will be familiar to you:
before_title, after_title,
before_widget, and after_widget.
The second parameter is our old friend $instance,
which contains all the options set on your widget. In our case that’s
only the title.
Here’s a breakdown of what’s going on in there:
|
First, we’re using PHP’s handy | |
|
We only want to display our widget on single post pages: that’s really the only place where it makes sense! | |
|
We echo out the standard | |
|
We pass the title provided by the user
( | |
|
As long as the title has content in it, we’ll output it as
well as the | |
|
We use the | |
|
Finally, we output the |
Now that you’ve written all the functions required for your widget, it should correctly display the author info on single-post pages. Give it a try!
Here’s the full author-data.php file:
<?php

class Author_Data_Widget extends WP_Widget {
  function Author_Data_Widget() {
    $widget_ops = array(
      'description' => 'A widget that displays author info on single posts.'
    );
    $this->WP_Widget('author_data', 'Author Data', $widget_ops);
  }

  function form($instance) {
    $title = esc_attr($instance['title']);
    ?>
      <p>
        <label for="<?php echo $this->get_field_id('title'), ?>">Title:
        <input class="widefat"
               id="<?php echo $this->get_field_id('title'), ?>"
               name="<?php echo $this->get_field_name('title'), ?>"
               type="text"
               value="<?php echo attribute_escape($title); ?>" />
        </label>
      </p>
    <?php
  }

  function update($new_instance, $old_instance) {
    $instance = $old_instance;
    $instance['title'] = strip_tags($new_instance['title']);

    return $instance;
  }

  function widget($args, $instance) {
    extract($args, EXTR_SKIP);

    if (is_single()) {

      echo $before_widget;
      $title = apply_filters('widget_title', $instance['title']);

      if (!empty($title)) { echo $before_title . $title . $after_title; };
      echo '<div class="author-data">';
      echo get_avatar(get_the_author_meta('user_email'), 150);
      echo '<h4>' . the_author_meta('display_name') . '</h4>';

      // Is there an author description?
      if (get_the_author_meta('description')) {
        echo '<div class="description"><p>'
            . get_the_author_meta('description')
            . '</p></div>';
      }
      echo '</div>';
      echo $after_widget;
    }
  }
}

register_widget('Author_Data_Widget'),

?>
A theme that is well-prepared with carefully placed widget-ready areas, and which takes advantage of custom widgets where appropriate to highlight its features, will often be able to outshine its competitors. We’ve seen fairly simple examples of the kinds of widgets you can create, but there’s really no limit to what you can do: let your imagination go wild.
Here are a few final tips:
-
Try not limit the functionality of your theme designs by only thinking of widget-ready areas as sidebars. Widgetized areas can be used anywhere in your site design where you think your users might want to display custom bits of content.
-
Take advantage of the helpers that Thematic and WordPress provide. There’s no need to reinvent the wheel when it comes to markup or hooks and filters when building widget-ready areas or custom widgets.
-
Keep the back end simple for yourself, your users, or your clients by removing unnecessary clutter that’s extraneous to your theme: if you haven’t used or adequately styled a certain widgetized area, unregister it.
Stick to the ideas outlined here and you’ll be a widget master before you know it!