
Chapter at a glance
Animate
Adding animation to text and shapes

Edit
Editing video and applying transitions
Save
Saving your presentation as a video
IN THIS CHAPTER, YOU WILL LEARN HOW TO
Add animation to text and shapes.
Edit video and apply transitions.
Insert and play online video.
Save your presentation as a video.
Microsoft PowerPoint 2013 makes it easy to include audio and video in presentations, along with more common animation and transition effects. In fact, you can even perform some basic multimedia editing tasks right inside PowerPoint. Have you ever needed to snip just a couple of seconds off the end of a video in your presentation? Well, now you can.
As we become increasingly more dependent on the cloud, PowerPoint follows suit, offering a number of options for inserting online media content. In addition, PowerPoint 2013 takes it a step farther and gives you the ability to save your own presentations as videos, in either MPEG-4 or Windows Media Video format.
In this chapter, you’ll learn how to apply basic animations to text and shapes, how to add video to your slides, how to edit videos, how to insert an online video, and how to save your presentation as a video.
Practice Files
To complete the exercises in this chapter, you need the practice files contained in the Chapter15 practice file folder. For more information, see Download the practice files in this book’s Introduction.
Animation can add splash to your presentation, but it’s important to use it effectively. Animation should have a purpose—to demonstrate a process, to emphasize a point, to control the flow of text, and so on. It should not be added “just because.” Keeping it simple is a good rule of thumb when working with animation effects in PowerPoint.
In this exercise, you’ll apply entrance and exit animation effects to placeholder text and shapes.
Set Up
You need the SampleContentA_start presentation located in the Chapter15 practice file folder to complete this exercise. Open the SampleContentA_start presentation, and save it as SampleContentA. Then follow the steps. The SampleContentA_end.PPTX file has also been included in the practice file folder to help you monitor your success with this exercise.
Click the edge of the text placeholder on slide 3 to select it.
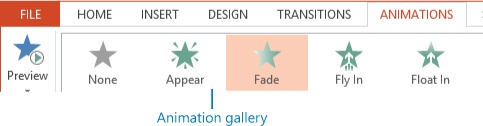
On the Animations tab, click Fade in the Animation gallery. The animation will be displayed on the slide.
Notice the numbers next to the text on the slide. These will be displayed when the Animations tab is active on the ribbon. This shows you the sequential order of the animated objects.
Press Shift+F5 to start a presentation on this slide and review how the animation works in Slide Show view. Click once to reveal the first bullet point, and then click a second time to reveal the second point and its sub-bullets. Click again to reveal the third point and its sub-bullets. Keep clicking or press Esc to end the slide show.
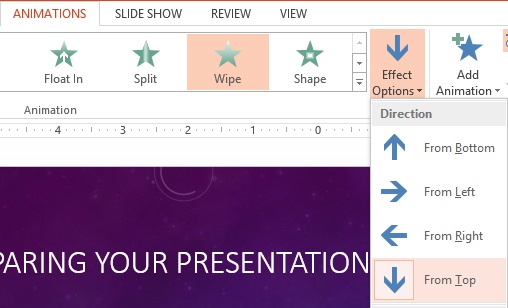
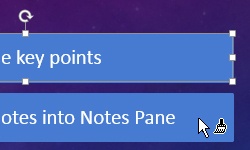
Go to slide 2 and select the top rectangle. In the Animation gallery, click Wipe, which will bring the object onto the slide with a wiping motion from bottom to top.
With the top rectangle still selected, click Effect Options on the Animations tab, then click From Top to change the direction of the wipe animation you just added.
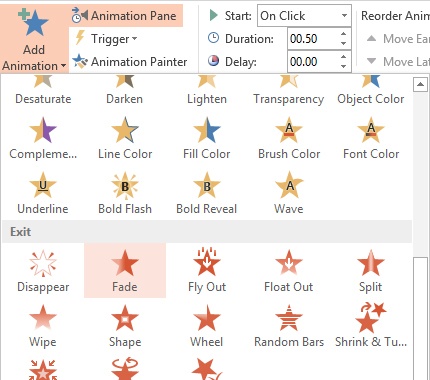
With the top rectangle still selected, click Add Animation. Scroll down to the Exit animations and click Fade. A Fade exit animation will be added to the top rectangle.
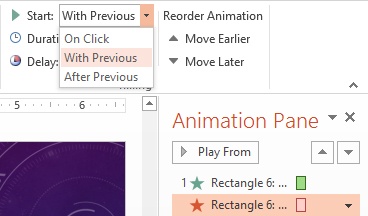
Click the Animation pane button on the ribbon to open the Animation pane.
Select the second animation in the Animation pane. This is the exit animation you applied to the rectangle in step 7. On the ribbon, change Start (On Click) to Start With Previous so that the rectangle disappears at the same time the previous animation occurs.
Tip
If there is a number next to the animation in the Animation pane, then that animation starts when you click the mouse. If there is no number alongside the animation, then it is set to Start With Previous (which means it starts at the same time as the prior animation), or After Previous (which means the animation starts at the completion of the prior animation).
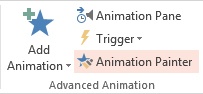
Select the top rectangle on the slide, and then double-click the Animation Painter to activate it.
Click each of the remaining rectangles on the slide to apply the same animation settings as you did with the top rectangle. Press Esc to exit the Animation Painter.
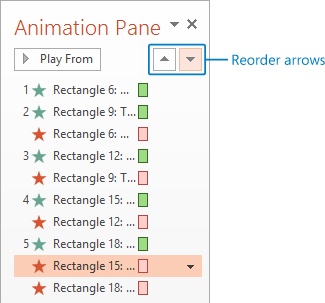
In the Animation pane, select the Rectangle 6 exit animation. Drag it into position after the Rectangle 9 entrance animation. This causes Rectangle 6 to fade away at the same time Rectangle 9 wipes in.
Select the Rectangle 9 exit animation and drag it into place immediately following the Rectangle 12 entrance animation. This causes Rectangle 9 to fade away at the same time Rectangle 12 wipes in. Rearrange the remaining exit animations so that one rectangle exits when the next rectangle enters.
Select the Rectangle 18 exit animation in the Animation pane and press Delete to remove the animation. This guarantees that Rectangle 18 won’t disappear as it appears!
Press F5 to begin the presentation from the first slide and click through it to review the animations. The SampleContentA_end.PPTX file has been included in your practice files to help you monitor your success with this exercise.
Animation lets you add movement to an object on a slide. Transitions let you add movement between one slide and the next slide. And video adds another dimension of movement altogether. You can easily add all these to your presentations.
In this exercise, you’ll add and edit a video and apply transitions to your presentation.
Set Up
You need the SampleContentB_start presentation and the Fabrikam Employee Excursion.wmv video located in the Chapter15 practice file folder to complete this exercise. Open the SampleContentB_start presentation, and save it as SampleContentB. Then follow the steps.
With slide 3 selected, click the bottom of the New Slide button on the Home tab, then click Blank to add a new slide based on the Blank layout.
With the new slide (slide 4) selected, on the Insert tab, click Video, and then click Video on My PC.
Navigate to the Fabrikam Employee Excursion.wmv file, select it, and then click Insert to add the video to slide 4. The video will be inserted in the middle of the slide.
With the video selected, click the Video Tools Playback tab and change the Start On Click setting to Start Automatically so the video begins playing as soon as you transition to slide 4.
Troubleshooting
When an animation is set to Start On Click, the animation begins when you click the mouse. You don’t have to click anything special or have your mouse pointer in a specific location. With video, however, Start On Click indicates that the video will start when you click the multimedia controls, which appear when you move your mouse pointer near the video. This means you must move your pointer to the video in order to play it; a random mouse click won’t do.
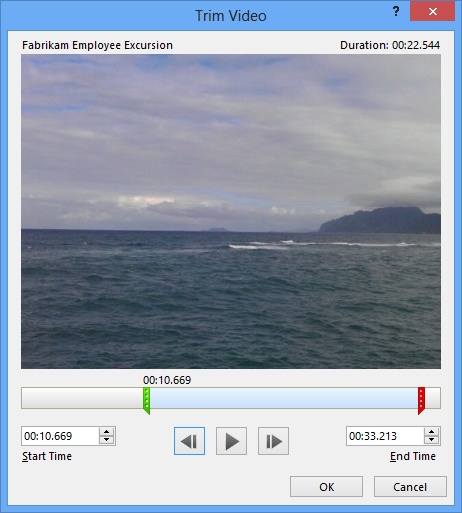
With the video still selected, click the Trim Video button to open the Trim Video dialog box.
Slide the green Start Time indicator to the right until it is at timepoint 00:10.669. Use the arrows in the Start Time field, if necessary, or enter 10.669 directly into the Start Time field and press Tab to set the Start time.
Slide the red End Time indicator to the left until it is at timepoint 00:33.213. As with the Start Time field, you can manually input time into the End Time field as necessary.
Click OK to apply the trims.
On the Transitions tab, scroll through the transitions until you can click Peel Off, which is located in the Exciting group of transitions. Click Apply To All to add a page turn transition to all of your slides.


Playing sound across slides
Inserting an audio file is basically like inserting anything else. Click the Insert tab, click Audio, and then choose whether you want to add a sound file from your computer or insert a sound file that will download from Office.com.
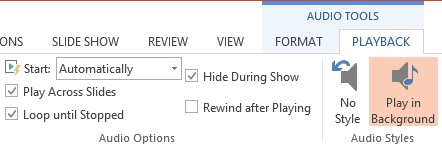
After the audio file has been inserted into your presentation, you can trim it and fade it just as you can with video. In addition, you can insert a sound file on the first slide and then click the Play In Background button on the Audio Tools Playback tab to have PowerPoint treat your sound as a background track. (The buttons to Start Automatically, Play Across Slides, Loop Until Stopped, and Hide During Show are all activated when you click Play In Background.)
It’s not unusual to want to put a short video clip from an online source (such as YouTube) into your presentation. PowerPoint 2013 makes it easy to do that by using the video’s embed code. Be aware that even though you’re using an embed code to control the video, it’s still online, and it’s still linked to your presentation. That means you’ll need a good solid Internet connection in order to play the online video during your presentation.
In this exercise, you’ll insert an online video into your presentation.
Set Up
You need the SampleContentC_start presentation located in the Chapter15 practice file folder to complete this exercise. You will also need an Internet connection in order to insert an online video. Open the SampleContentC_start presentation, and save it as SampleContentC. Then follow the steps.
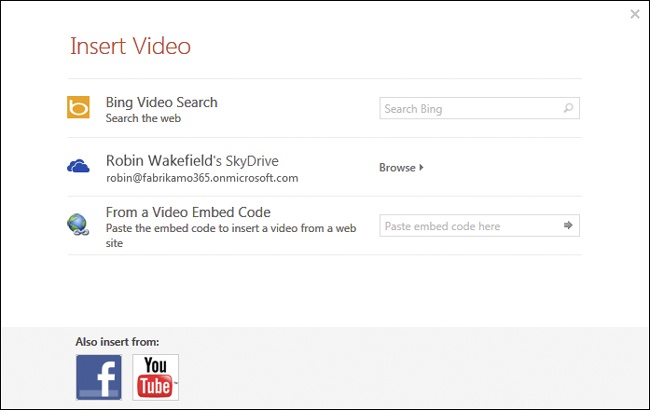
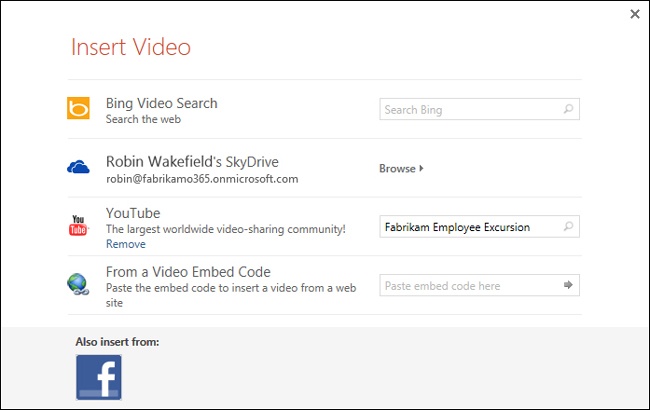
Select slide 5, choose Insert, then Video, and then Online Video.
If necessary, click the Also Insert From YouTube icon to enable adding video from YouTube.
Enter Fabrikam Employee Excursion in the YouTube search box and press Enter.
There will be only one search result. Select the video, and then click Insert.
Press Shift+F5 to play the presentation and test the video. Click the Play button on the YouTube video to start it.
PowerPoint 2013 gives you the option to save your presentation as either a .wmv or an .mp4-formatted video. It does a very good job of keeping animations and transitions intact, but they are all converted to automatic animations. After all, you can’t click to animate an object in a video. PowerPoint also includes most audio and video you’ve added to the presentation, so you can create a video of a video! However, some files, such as online videos, will not be included when you save your presentation as a video.
If you’ve added automatic transition timings (Advance After __ Seconds), then PowerPoint will use those as it creates the video. Otherwise, you will have the option of specifying how long PowerPoint will remain on each slide. You also have options to choose different sizes of video, which comes in handy when you’re creating videos for various purposes.
In this exercise, you’ll save your presentation as a video.
Set Up
You need the SampleContentD_start presentation located in the Chapter15 practice file folder to complete this exercise. Open the SampleContentD_start presentation, and save it as SampleContentD. Because the Fabrikam Employee Excursion video from YouTube has been inserted into this file, you may receive a security warning, “References to external media objects have been blocked.” Click the Enable Content button to allow PowerPoint to reference the YouTube video, and then follow the steps.
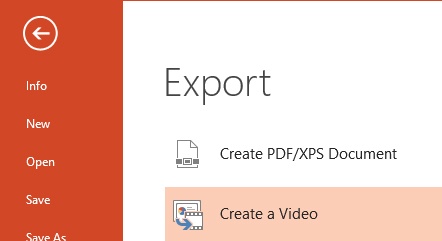
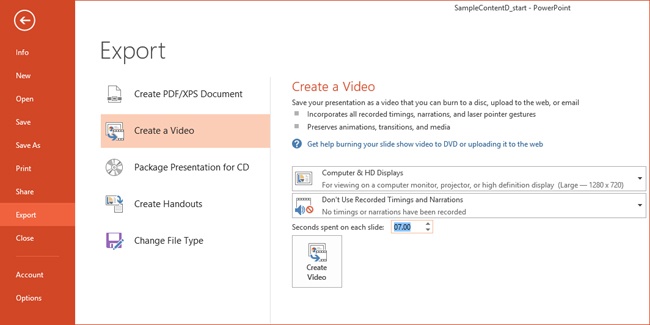
Click File, Export, and then Create a Video.
In the Create a Video settings on the right, change Seconds Spent on Each Slide from 5.00 to 7.00.
Leave the Computer & HD Displays option set at Computer & HD Displays (Large size).
Click the Create Video button, enter a name for the video, and click Save.
A message box appears to explain that some of the media in the presentation can’t be included in the video. Click Continue without media.
Play the video in your favorite video application. You’ll find that the animations and transitions have all become automatic, the YouTube video is missing from the last slide, and just a static picture of the first frame is displayed.

Animations add movement to objects on a slide, whereas transitions move the presentation from one slide to the next.
When it comes to animations and transitions, “less is more” is a good rule of thumb.
Audio and video files are embedded into PowerPoint 2013 by default.
Even if you use an embed code to insert an online video into your presentation, that video is not embedded in your presentation.
You can save your presentation as a video, and PowerPoint will leave animations, transitions, and most multimedia intact.
Online video is not included when you save your presentation as a video.