
IN THIS CHAPTER
Understanding tools
Working with panels and workspaces
Identifying common user-interface features
Using keyboard shortcuts
Working with several programs developed by a single software manufacturer has great advantages: The programs support a common user interface, and access to tools, menus, panels, and preferences is handled similarly among the programs. Even if you've never used a particular program in the Creative Suite, you can explore a program that's new to you with an intuitive sense of knowing how to perform one function or another based on your experiences with other CS5 applications. The common user interface, knowing where to look for tools and commands to execute actions, and familiarity with the methods help shorten your learning curve.
Each of the Creative Suite programs obviously has unique features, but many aspects are exactly the same from one program to the next. In some cases, you can customize a program to suit your individual needs or a standard implemented for your workgroup. In this chapter, we cover tools, menus, commands, and customizing options to bring the programs close together.
Certainly, anyone who opens one of the Creative Suite 5 applications is aware of how to use tools nested in the Tools panels. Illustrator, Photoshop, InDesign, Fireworks, and Flash have many tools in common. Dreamweaver and Acrobat have fewer tools in common with these three programs, and Adobe Bridge has its own set of unique tools.
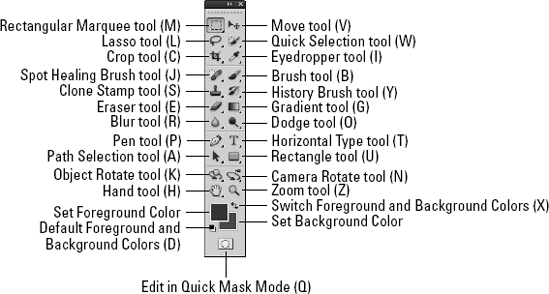
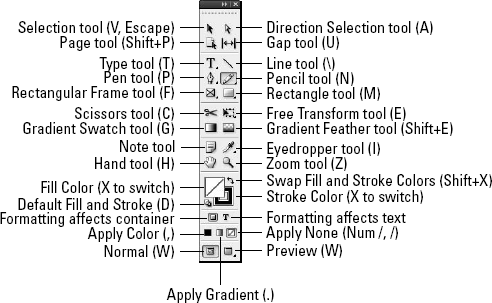
Figures 3.1, 3.2, 3.3, 3.4, and 3.5 show the Toolboxes from Illustrator, Photoshop, InDesign, Flash, and Fireworks, respectively. Notice that the keyboard shortcuts used to access the tools are common in most cases among the programs (for example, the shortcut you use to select the Pen tool in Photoshop is the same shortcut you use to select the Pen tool in InDesign). The character in parentheses is used to select a tool in the Toolbox.
Tip
The small set of arrows at the top-left corner of the Toolbox is used to toggle the Toolbox between single-width and double-width size.


Note
Although the interface for Dreamweaver matches most of the style of the other Adobe applications, it doesn't have a Toolbox.
The tools common to Illustrator, Photoshop, InDesign, Flash, and Fireworks include the following:
Selection tool (V): Notice that the Move tool in Photoshop behaves like the Selection tool used in the other programs. The Move tool in Photoshop uses the same keyboard shortcut (V). Additionally, Photoshop has a Path Selection tool used for selecting vector objects. The Path Selection tool in Photoshop works similarly to the Selection tools in Illustrator and InDesign. In InDesign, you use the Selection tool to move objects and to crop object and type frames.
Direct Selection tool (A): The Direct Selection tool is used to reshape objects. In Photoshop, you access the Direct Selection tool by clicking the Path Selection tool and holding down the mouse button. A pop-up toolbar opens from which you can select the Direct Selection tool. In Flash, this is called the Subselection tool.
When you click an object with the Direct Selection tool, the anchor points are shown deselected. Clicking a single anchor point or a path segment moves just that point or segment, thereby reshaping the object. In all programs, you reshape paths using the Direct Selection tool. In InDesign, you also use the Direct Selection tool to move objects around a placeholder frame, select the content to clear it from the frame, or manipulate elements of a group without ungrouping.
Pen tool (P): The familiar Pen tool that originated in Adobe Illustrator is found in Photoshop and InDesign alike. The Pen tool is used to draw freeform paths in all the programs.
Note
Because Flash and Fireworks have existing users, it has a couple of tools that didn't initially correspond to the keyboard shortcuts in the other Adobe product, so some tools, such as the Pen tool, have several shortcuts that do the same thing.
Type tool (T): As the name implies, the Type tool is used for typing text. In each program, you find additional options for the Type tool (except in Flash) by holding down the mouse button on the Type tool and selecting other type tools from the pop-up toolbars.
Line/Line Segment tool ( in Illustrator and InDesign; U in Photoshop; N in Flash and Fireworks): Drawing straight lines is handled with the Line tool (Photoshop, InDesign, Flash, and Fireworks) or Line Segment tool (Illustrator). In Photoshop, you access the Line tool by clicking the Rectangle tool and opening the pop-up toolbar, or by pressing Shift+U several times until the Line tool appears in the Toolbox.
Rectangle tool (M in Illustrator and InDesign; U in Photoshop and Fireworks; R or O in Flash): The Rectangle tool appears at the top level in the Toolbox. In each program, click and hold down the mouse button to open a pop-up toolbar where you can select other tools like the Ellipse tool, Polygon tools, and other special vector-shape tools. In Photoshop, the objects you draw with these tools remain vector shapes until they are rasterized (the process of converting vector objects to raster images). In InDesign, the tools are used for artwork where you apply fills and strokes; however, the shapes can take the same form as the Frame tools and act as containers for text and placed graphics.
Note
For more information on rasterizing objects, see Part 3.
Pencil tool (N in Illustrator and InDesign; B in Photoshop and Fireworks; Y in Flash): Use the Pencil tool for freeform drawing, much like you would use a pencil for an analog drawing.
Eyedropper tool (I): The Eyedropper tool is used most often for color sampling in all three programs. In Adobe Bridge, you use this tool to work in the Camera Raw settings dialog box. In InDesign, the use broadens to sample certain styles such as type formatting.
Gradient tool (G): Use the Gradient tool for drawing linear and radial gradients applied to shapes and selections.
Hand tool (H): The Hand tool is used to move a document page around the monitor window.
Zoom tool (Z): Click with the Zoom tool to zoom in on a document page. Press the Option/Alt key with the Zoom tool selected, and click to zoom out of the document page.
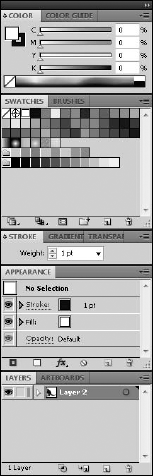
Fill/Stroke or Foreground/Background Color (D, X): Press D to return colors to default values. Press X to switch between Foreground/Background and Stroke/Fill. In Illustrator, InDesign, Flash, and Fireworks, the tools are used for assigning strokes and fills to objects. In Photoshop, the colors are used for foreground and background colors. A change of color from the Colors panel, the color wheel, or the Swatches panel is reflected in the tools in the Toolbox.
Note
The D and X shortcuts don't work this way in Flash.
Tools that are common to InDesign and Illustrator but that don't appear in the Photoshop Toolbox include the following:
Rotate tool (R): Rotate objects by selecting and dragging or by supplying numeric values in a dialog box.
Scale tool (S): Scale objects by selecting and dragging or by supplying numeric values in a dialog box.
Shear tool (O in InDesign; no equivalent in Illustrator): Shear objects by dragging with the tool or entering numeric values in a dialog box. In Illustrator, the tool is accessed by holding down the mouse on the Scale tool and selecting the Shear tool from the pop-up toolbar.
Free Transform tool (E): Transform objects (scaling, rotating, distorting) by clicking and dragging a selected object. Flash also has a Free Transform tool (Q).
Scissors tool (C): Use the Scissors tool to cut a path drawn with the geometric tools or the Pen tool.
Tools common to Illustrator and Photoshop but not found in InDesign include the following:
Lasso tool (L in Photoshop and Flash; Q in Illustrator): Use the Lasso tool to select pixels in Photoshop and objects in Illustrator. The Lasso tool also is found in Flash.
Magic Wand tool (W): In Photoshop, use this tool to select colors of common color values within a user-specified tolerance range. In Illustrator, use it to select objects of common color values.
In addition to tools common to the programs, each application has a few unique tools. Photoshop has various tools for changing brightness values along with a Note tool (also found in Acrobat), cloning tools, and the History Brush tool. The Blend tool, Mesh tool, Graph tools, Warp tools, and Symbol Sprayer tools are unique to Illustrator. In InDesign, you find a Button tool similar to the Button Form Field tool in Acrobat. Flash has an Ink Bottle tool and InDesign has a Notes tool.
Adobe Bridge has a few tools located in the Bridge window. Most actions you perform in Bridge are handled with menu commands. As an application, you don't edit documents using tools. The edits made from within Bridge are generally applied to an entire document or to initiating an edit that ultimately takes place in one of the other CS programs.
Note
For a detailed description of Bridge tools, see Chapter 6.
Because the tools in Acrobat are so different from the tools in Illustrator, InDesign, and Photoshop, it makes more sense to list them apart from the other programs. Acrobat is a program that serves many different business professionals, and some of the tools you find in Acrobat may not be used in your work as a creative professional. The more common tools used in Acrobat by creative professionals include:
Comment & Markup tools: Shown in Figure 3.6, the Comment & Markup tools are used for adding comments to PDF files and participating in review sessions.
Print Production tools: Commercial printers use the Print Production tools, shown in Figure 3.7, to preview, prepare, and print PDF documents that are intended to print on commercial printing devices.
Note
For information on using the Commenting & Drawing Markups tools, see Chapter 33. For information on using the Print Production tools, see Chapter 36.
Tools in Acrobat appear in separate toolbars. Unlike the other CS programs, the default position for the toolbars is horizontal across the top of the Acrobat window. Individual toolbars are docked in the Toolbar Well. You can open toolbars and dock them in the Toolbar Well, or remove them from the Toolbar Well and place them anywhere in the Acrobat window as floating toolbars. Access toolbars by choosing View
Dreamweaver CS5 doesn't have a standard Toolbox. Instead, positioned along the top edge of the window is a set of tabs. These tabs run horizontally along the top of the toolbar, and the available tools change depending on which tab is selected. What looks like a Toolbox in Dreamweaver CS5 is actually called the Insert panel, shown in Figure 3.8. Because much of the page building in Dreamweaver is done via drag and drop, you don't use all the tools in the same manner as tools you find in the other CS5 programs.
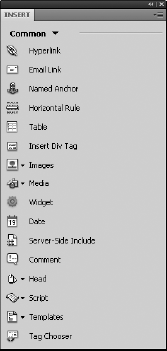
Figure 3.8. Click the Common tools group in the top-left corner of the Toolbox, and the tools change in the lower half of the Toolbox to tools used in laying out a Web page.
Note
For information on using tools in Dreamweaver, see Chapter 24.
In Illustrator and InDesign, you have some option choices for certain tools that are controlled in accompanying dialog boxes. Not all tools have associated dialog boxes, so you need to either poke around or become familiar with tools offering these extended option choices. In Illustrator or InDesign, double-click the mouse button on tools in the Toolbox, and you'll see a dialog box similar to the one shown in Figure 3.9 for tools supporting further options in dialog boxes.
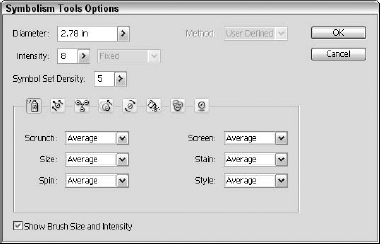
Figure 3.9. Double-clicking one of the Symbol tools in the Illustrator Toolbox opens the Symbolism Tools Options dialog box.
Most often, double-clicking a tool opens an options dialog box typically not accessible other than by double-clicking a given tool. In some cases, double-clicking a tool opens a panel, a dialog box accessible through other commands, or a preference setting. Here's what happens when you double-click tools in Illustrator:
Selection tools: You need to have an object selected in the document window in order to open a dialog box when clicking either the Selection tool or the Direct Selection tool. When an object is selected and you double-click either tool, the Move dialog box shown in Figure 3.10 appears. You have options for moving objects and patterns at fixed distances. Like all dialog boxes that have a Preview check box, check the box and the view is rendered dynamically as you work in the dialog box.
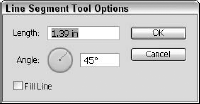
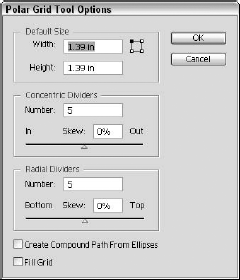
Segment tools: A dialog box respective to the selected tool opens where you can make choices about options. You also can access the same dialog box by selecting a tool and clicking the document page. The Segment tools include the Line Segment tool, the Arc Segment tool, the Spiral tool, the Rectangular Grid tool, and the Polar Grid tool. As shown in Figures 3.11 and 3.12, double-clicking different tools opens dialog boxes respective to the tool options.
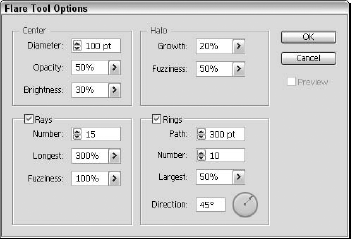
Shape tools: The only tool in this group that opens a dialog box when you double-click the tool is the Flare tool. The Flare Tool Options dialog box is shown in Figure 3.13.
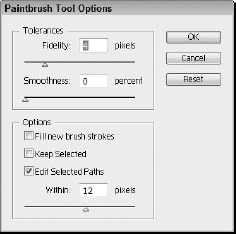
Paintbrush tool: Doubling-click the tool opens the Paintbrush Tool Preferences dialog box, shown in Figure 3.14.
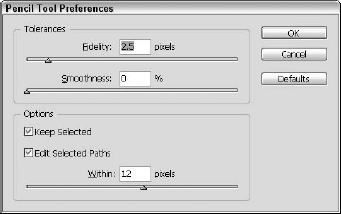
Pencil tool/Smooth tool: Although the toolbar for the Pencil tool contains three tools (Pencil, Smooth, and Erase), only the Pencil tool and the Smooth tool use a dialog box where you can make options choices. Double-click either tool, and a dialog box opens specific to the options for the selected tool. Figure 3.15 shows options choices for the Pencil tool.
Blob Brush tool: The Blob Brush Tool Options dialog box, shown in Figure 3.16,includes settings for controlling the Fidelity and the Smoothness of the paths drawn with this tool. It also includes settings for controlling the size, angle, and roundness of the brush.


Eraser/Scissors/Knife tools: The Eraser tool lets you remove portions of an object just as you would erase the pixels in Photoshop. Using the Eraser Tool Options dialog box, shown in Figure 3.17, you can set the Angle, Roundness, and Diameter of the eraser tool. The Scissors tool is used to cut a path at a specified point, and the Knife tool can cut through an entire object dividing it in two.

Rotate/Reflect tools: Double-clicking either tool opens a dialog box with options specific to the selected tool. In Figure 3.18, the Rotate dialog box appears when you click the Rotate tool.
Scale/Shear/Reshape tools: The Scale and Shear tools use dialog boxes for options settings. Note that double-clicking the Reshape tool does not open a dialog box; no options are available for this tool. Double-click either of the two other tools, and the options respective to that tool appear in a dialog box. Figure 3.19 shows the result of double-clicking the Scale tool.
Warp tools: The Warp tools include the Warp tool, the Twirl tool, the Pucker tool, the Bloat tool, the Scallop tool, the Crystallize tool, and the Wrinkle tool. Selecting a different tool and double-clicking the selected tool opens a dialog box with options associated with that tool. In Figure 3.20, the Wrinkle tool options are shown.
Symbolism tools: The Symbolism tools—Symbol Sprayer, Symbol Shifter, Symbol Scruncher, Symbol Sizer, Symbol Spinner, Symbol Stainer, Symbol Screener, and Symbol Styler—have one advantage over other tools with respect to selecting tools and adjusting attributes: As shown earlier in Figure 3.8, you can select any of the eight Symbolism tools directly in the Symbolism Tool Options dialog box. Therefore, you don't need to leave the dialog box, select another tool, and then reopen the dialog box to make adjustments respective to the selected tool. Double-clicking any of the Symbolism tools offers you options for selecting different tools and making options choices for a selected tool.
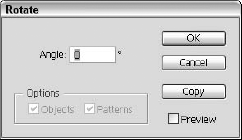
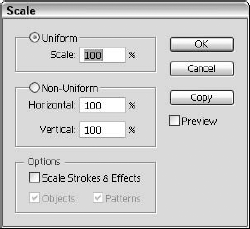
Figure 3.19. Double-click either the Scale or Shear tool to open a dialog box where you can make options choices.

Graph tools: The Graph tools include the Column Graph tool, the Stacked Column Graph tool, the Bar Graph tool, the Stacked Bar Graph tool, the Line Graph tool, the Area Graph tool, the Scatter Graph tool, the Pie Graph tool, and the Radar Graph tool. Double-clicking any tool in this group opens the Graph Type dialog box, shown in Figure 3.21. Like the Symbol tools, among the Graph tools options is the ability to select the tools in the Graph Type dialog box and make attribute changes for any one of the tools in the same dialog box. Double-click any tool, and you can make settings choices for the respective tool.

Figure 3.21. Double-click any one of the Graph tools, and you can change the options settings for that tool.
Mesh tool: The Mesh tool lets you create a gradient mesh that conforms to the shape of the selected object.
Gradient tool: The Gradient tool is used to create gradients using different stops, colors, and shapes.
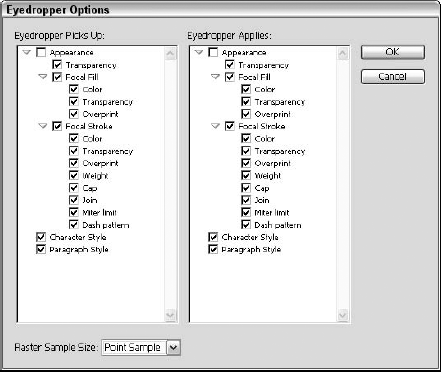
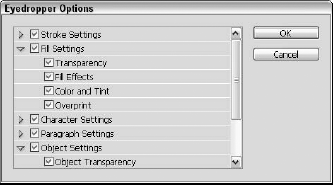
Eyedropper/Measure tools: The Eyedropper tool is used to assess color values. When you double-click the tool, the Eyedropper Options dialog box opens, as shown in Figure 3.22. The second tool in the toolbar is the Measure tool used for measuring distances. If you double-click the Measure tool, the Preferences dialog box opens, which allows you to change Guide and Grid colors.
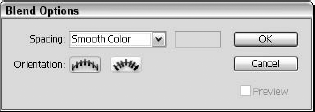
Blend tool: Double-click the Blend tool to open the Blend Options dialog box, shown in Figure 3.23. Notice that you also can open the same dialog box by clicking the Blend tool on one option and then pressing the Option/Alt key when clicking the second object to be included in the blend.
Shape Builder/Live Paint Bucket/Live Paint Selection tools: The Shape Builder tool lets you identify and select an interior shape created by overlapping paths. The selected shape then becomes merged into a new shape object. The Paint Bucket tool has been replaced with the Live Paint Bucket tool. Additionally, you find the Live Paint Selection tool. You use the Live Paint Bucket tool to apply a color, pattern, or gradient to a live paint group. You select multiple objects and click with the Live Paint Bucket tool to create a Live Paint Group. The Live Paint Selection tool can select edges of a Live Paint Group that can be painted with the Live Paint Bucket tool. It allows you to select zones to copy and paste as independent vector elements. Double-click either tool, and the same set of options appears for changing paint fills, paint strokes, and highlight colors, as shown in Figure 3.24.
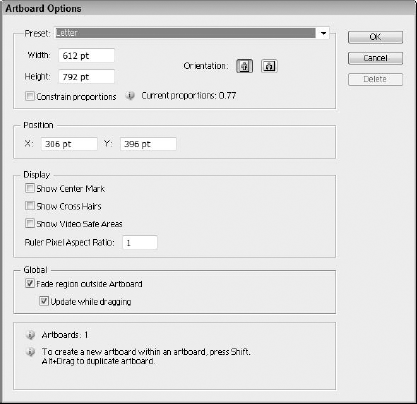
Artboard/Slice/Slice Selection tools: The Artboard tool lets you set all the details for the artboard including its size and position. It is also used to create crop marks by accurately defining a crop area by dragging in the document. Double-clicking the Artboard tool opens the Artboard Options dialog box, shown in Figure 3.25. The Slice tool divides an image into several separate pieces that can be used on a Web page, and the Slice Selection tool lets you select the individual slices.
Hand tool: Double-clicking the Hand tool sets the page view to a fit-in-window view. This view also is acquired in all CS applications by pressing

Zoom tool: Double-click the Zoom tool to show the document window in an actual-size view (100 percent view).
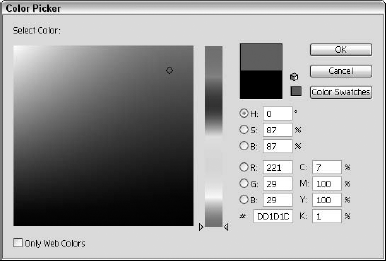
Fill/Stroke tools: Clicking the Fill or Stroke tool opens the system Color Picker, shown in Figure 3.26.

In Photoshop, double-clicking tools produces an effect with the Hand tool and the Zoom tool only. Double-click the Hand tool, and you see the active document window zoomed to a Fit on Screen view. This view is similar to Fit Window view in other CS applications. Double-click the Zoom tool, and the window zooms to Actual Size view.
Remaining options for tools are addressed in Photoshop's Options bar. Click a tool, and the Options bar changes to reflect choices pertaining to the selected tool. In Figure 3.27, the Rectangular Marquee tool was selected.

InDesign is like a mixture of the UI (user interface) between Illustrator and Photoshop. In Illustrator, most tools have associated options dialog boxes accessed by double-clicking a tool in the Toolbox. Likewise, some of InDesign's tools also have similar options dialog boxes accessed the same way as in Illustrator. In Photoshop, tools don't have pop-up dialog boxes opened by double-clicking a tool; Photoshop uses an Options bar that changes options settings each time a different tool is accessed. Likewise, in InDesign, you have a Control panel where many options settings are made respective to the currently selected tool. Tools in InDesign that support dialog boxes for options settings include the following:
Note
Accessing some dialog boxes when double-clicking a tool in the InDesign Toolbox requires you first to select an object in the document window.
Selection/Direct Selection tools: The same Move dialog box opens in InDesign as you find in Illustrator when double-clicking one of the Selection tools. Note that to open the Move dialog box, you select an object must be selected in the document window before you double-click either tool. Notice that the options for the Move dialog box are almost always the same in the various programs, but the items that can be moved do vary a little. In Illustrator, either Objects or Patterns are targeted for movement. In InDesign, the only option is to move the content of the selected object, as shown in Figure 3.28. If you use the Selection tool to select the object, the frame moves, and if you use the Direct Selection tool, the content of the frame moves.
Note
Within InDesign, if you use the move command with the frame selected, both the frame and the content move, but if you have only the content selected with the Direct Selection tool, the move command affects only the content.
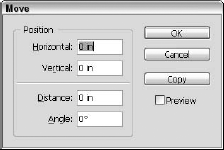
Figure 3.28. InDesign's Move dialog box is almost identical to Adobe Illustrator's Move dialog box with the exception of the Options choices.
Pencil/Smooth tool: The Pencil tool options are identical in Illustrator and InDesign. The Smooth tool options vary slightly between Illustrator and InDesign. InDesign supports an additional option for keeping objects selected, as shown in Figure 3.29.
Polygon tool: Double-click the Polygon tool to open the Polygon Settings dialog box, shown in Figure 3.30. A similar dialog box opens in Illustrator when you select the Polygon tool and click in the document window.
Eyedropper tool: The Eyedropper tool in InDesign, as shown in Figure 3.31, can pick up colors and attributes.
Rotate tool: The Rotate tool offers options settings in a dialog box similar to those found in Illustrator.
Scale tool: The Scale tool options are similar to those found in Illustrator.
Shear tool: Rounding out the last of the transformation tools, the Shear tool also has options choices similar to Illustrator.

Tip
Within InDesign, double-click the Gradient tool to open the Gradient panel, double-click the Gradient Feather tool to open the Effects dialog box with the Gradient Feather settings displayed, and double-click the Measure tool to open the Info panel.
Hand tool: The same effect that you have in Illustrator takes place when you double-click the Hand tool in InDesign. A Fit Page view is the result of double-clicking the tool in the Toolbox.
Zoom tool: Likewise, double-clicking the Zoom tool is the same as in Illustrator, where an Actual Size view is displayed in the document window.
The Flash tools work a little differently than the other CS5 apps. Within the Flash Toolbox, the bottom portion of the Toolbox (beneath the black/white, swap colors, and no color row of icons) is open to be filled with additional icons depending on the tool that is selected.
The Toolbox configuration shown in Figure 3.4 includes tools to Snap to Objects and Smooth and Straighten options. These icons are visible only when the Selection tool is enabled. However, when the Brush tool is selected, several different icons are displayed at the bottom of the Toolbox, as shown in Figure 3.32.

The tool options in Fireworks are displayed within the Properties palette when a tool is selected. For example, Figure 3.33 shows the Properties palette when the Type tool is selected. The options available in the Properties palette let you change the font, type size, color, and formatting options.

A common characteristic among all Adobe products is an extensive set of palettes. Palettes offer you options choices for various tool uses, menu commands, and extended features not available through the selection of a tool or menu command. For the most part, panels are accessed and used in all the CS programs similarly.
To open a panel, click the Window menu and select the panel you want to open. If a panel name appears with a check mark in the Window menu, the panel is already open. In Figure 3.34, you can see the Windows menu for InDesign.
Note
Panels are typically listed alphabetically, but Flash, Fireworks, and Dreamweaver panels are divided into groups.
Acrobat also makes use of panels; however, accessing the panels is handled from a different menu. To open panels in Acrobat, choose View
The extraordinary use of panels in all the CS applications requires you to spend a little time managing panels, showing only the panels you need for any given editing job. Opening all the panels at once in any program uses lots of screen space that you'll need to work on your documents. Fortunately, the programs have methods for docking panels in wells or beside the application window.
When a panel is docked to the edge of the window, a small double arrow appears in the upper-outside corner of the docked panel. Clicking this double arrow collapses the panels to a well located along the right edge of the interface (or to the left edge if that is where it was initially docked), as shown in Figure 3.36. Clicking again on the double arrows expands the panels out away from the edge to their full size.
By dragging the gripper on the inside edge of the icon panel, you can change the width of the icon panels. This gives you control over how much space the docked panels take. In the General panel of the Preferences dialog box, the Auto-Collapse Icon Panels option causes any opened panels to be collapsed automatically as you begin to work.
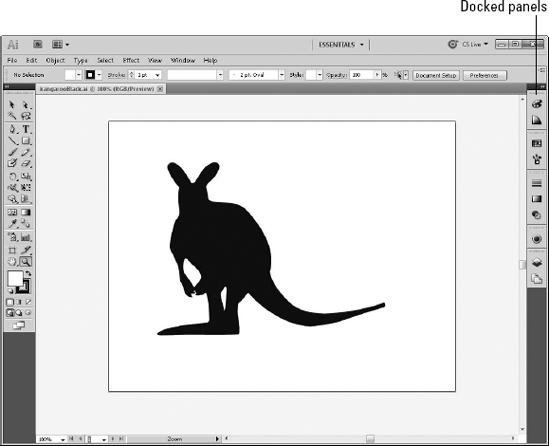
Illustrator, Photoshop, InDesign, Fireworks, Dreamweaver, and Flash panels are all handled using the same methods, and the interface is fairly consistent between these applications. Panels are placed along the right side of the document window by default, as shown for Illustrator in Figure 3.37.
When you open a new panel by selecting the Window menu and then selecting a panel name that appears without a check mark, the panel opens in the application window. When opened, the panel may appear as a floating panel or in icon form. If it is grouped but not active, then the panel is opened. To move a panel in Illustrator, drag the panel by the title bar (the topmost horizontal bar running across the top of a panel) to any side of the application window. When you drag to the edge of the application window in any direction, the panel snaps into position. If you're dragging to the right side of the application window, the panel snaps to the right side but moves freely up and down.
In each of these applications, by default, panels are docked along the right side of the application window, but they can be docked to either side of the screen. In the icon view method for managing panels, you can stack panels into several columns of icons, as shown for Photoshop in Figure 3.38.

Acrobat uses a slightly different metaphor from the other CS applications. If you talk about panels in Acrobat, you also need to consider toolbars. Unlike the other CS programs, not all of Acrobat's tools are visible when you launch the program. Therefore, tools, as well as panels, need to be loaded in Acrobat for various editing tasks.
When you launch Acrobat, the default tool set appears at the top of the application window, as shown in Figure 3.39. These tool sets change as you load and hide individual toolbars. Individual tools are contained within toolbars that are docked in the Toolbar Well.
The default tools can be removed from the Toolbar Well at the top of the screen and hidden from view or used as a floating toolbar, or additional tools can be added to the Toolbar Well. To gain access to additional toolbars, choose View
If you want to return the Toolbar Well view to defaults, open a context menu and select Reset Toolbars. Also, when toolbars appear as floating toolbars in the Document pane, you can easily dock the toolbars by selecting Dock All Toolbars from the same context menu.

Note
Acrobat's toolbars are undocked from the Toolbar Well by dragging the separator bar on the left side of the toolbar. Look for a vertical embossed line appearing to the left of some tools. Clicking and dragging on the separator bar is the only way to move toolbars around the Document pane.
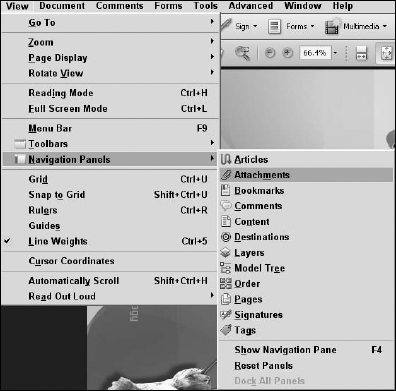
In addition to toolbars, Acrobat also uses panels, as described for all the other CS applications. To open a panel, you need to access the Navigation Panels submenu. When a panel is selected in the Navigation Panels submenu, it opens as a free-floating panel, if it isn't already docked. Panels in Acrobat need to be docked in one specific place called the Navigation pane. Notice that panels in Acrobat are not docked on the left or right side of the application window, but rather within the Navigation pane that appears on the left side of the document window. To dock a panel in the Navigation pane, click any tab in the pane to expand the window. Click the tab in a floating panel, and drag it to the Navigation pane. The Comments & Attachments panels dock at a special place at the bottom of the Navigation pane.
Tip
Panels also can be dropped in the Navigation pane without expanding the pane. Just drag a tab to the left of the vertical bar separating the tabs from the Document pane or on top of any tab in the closed pane.
Panels can be nested in groups in all the CS applications. When using floating panels, you can group panels together; this gives the appearance of a single panel with multiple tabs. Open any panel, and drag the tab from another open panel to the destination panel. When the cursor appears over the tab area in the target panel, release the mouse button and the target panel accepts the new addition. In Figure 3.40, you can see the Layers panel in InDesign being moved to a panel containing several tabs.
To ungroup a tab from a panel, click and drag the tab away from the panel. When you release the mouse button, the tab appears in its own panel.
Grouping panels also occurs at another level using the icon panels. To use the icon panels, drag a panel tab to a collapsed panel at one of the vertical edges of the application window. When the panel tab snaps into position, you can drag another panel tab to the grouped panel. Add as many tabs to a grouped panel as you like, but keep in mind they need to be grouped and ungrouped one panel at a time. In Figure 3.41, you can see several panels docked together in InDesign and another panel to be added to the group by dragging the tab to the grouped panels.
Tip
Groups of panels can be iconized in a single move by holding down the Alt [Option] key when you drag a panel's tab to the side. This same trick works to drag an icon group away from the edge to turn it into a free-floating group of panels.
Panels also can be docked in a hierarchy in all CS programs except Acrobat. If you want panels in view without docking them on the sides of the application window, you can dock several panels together and move them around the application window as a grouped object. In any CS5 program except Acrobat, you can add a panel below another panel. Simply click a panel tab, and drag it to the base of the target panel. When the horizontal blue line appears at the base of the target panel, release the mouse button and drag one panel tab to the bottom of another panel, as shown in Figure 3.42. The left of this figure shows the panel as it is being docked, and the right shows the panels after being docked.

Figure 3.41. To add a panel to a group, click and drag the panel tab to the tab well in the docked panel group.

Be certain to drag a panel by the tab and move the cursor to the base of the target panel. When you see a horizontal blue line at the base of the target panel, release the mouse button and the panels are docked. When you drag the title bar on the top of the panel, both panels move together as a group. If you need to undock a panel, click the panel tab for the panel to be moved and drag it away from the group.
Panels offer you many options for addressing features and techniques available in the CS applications. They're essential program components, and you'll rarely edit without making use of options contained in at least one panel. Those panels you use most frequently are ones you'll want to keep open and have accessible every time you launch your program of choice.
Fortunately, all the CS5 applications remember the organization of your workspace each time you quit a program and relaunch it. If you rearrange panels and then quit the editing program, the next time you open the program, all the panel views are displayed according to the last view from that editing session.
In Acrobat, not only do all the panels in the Navigation pane keep their last position, but also all the toolbars keep their last position, exactly the same as the last Acrobat editing session. The same holds true for Illustrator, Photoshop, InDesign, Flash, Fireworks, and Dreamweaver with respect to panel positions. However, Illustrator, Photoshop, InDesign, Flash, Fireworks, and Dreamweaver have an additional benefit not found in Acrobat: options to save custom workspaces.
In workflow environments where computers may be shared, the ability to save workspaces is a true benefit. You can customize your work environment to suit your own personal choices for panel positions and save the panel views as your personal workspace. Notice that in Figure 3.43 the InDesign workspace includes several panels nested and docked along the right edge of the application window. To capture the position of the panels, choose Window

Figure 3.43. To save a workspace in InDesign, first arrange your panels exactly as you want them to appear when you open the application.
Illustrator's, Photoshop's, Flash's and Dreamweaver's treatment in regard to saving workspaces is the same as you find with InDesign. The menu command is identical, and the same dialog box opens to prompt you for a workspace name.
Workspaces can also be selected from the application bar at the top of the interface. This provides a convenient way to quickly change between different workspaces.
The one thing to remember when adjusting workspaces is that all CS programs remember the last view you had before quitting the program. Therefore, if you save a workspace, then move panels out of their docked positions and rearrange them differently from the saved workspace, after quitting the program and relaunching it, the last view you created becomes the new default. To regain your workspace view, choose Window
Tools, panels, and menus in the CS programs make for a common user interface where you can more easily discover new tools and editing techniques when learning a program. Some of the most advantageous of the common user-interface items in all CS programs include context menus and help documents.
If at any time you have difficulty finding a tool or menu command for a given task, first try to open a context menu. All CS applications use context menus, and the menu choices change according to the tool you select in the Toolbox or toolbar. Context menus are opened by right-clicking (Mac) or right-clicking (Windows). The context menu pops up at the cursor location, as shown in Adobe Bridge in Figure 3.44.

Context menus are not limited to document pages. You also can open context menus in some panels in Adobe Bridge, Photoshop, InDesign, Flash, Dreamweaver, and Acrobat. In Figure 3.45, you see a context menu opened in the Preview panel in Adobe Bridge.

Tip
As you work in the CS applications, try to get in the habit of opening a context menu when you want to edit an object, page, or function. The only way to determine whether a context menu offers a menu option is to poke around and try. As you become familiar with menu options, you'll begin to work much faster.
You might think that with a purchase as substantial (both in terms of program features and the money you spent) as Creative Suite, you would get a hefty library of documentation. When you open the box for the CS installer DVDs, you quickly learn that accompanying documentation is not offered in printed form. Instead of providing printed user manuals, Adobe created several different types of help information files accessible as you work in the CS programs.
In terms of user guides and documentation, Adobe CS5 offers an elaborate form of help files that you access from the Help menu in all CS5 programs. While you're working in a program, and when you need to meet tight deadlines, the online help files should be a welcome addition to the CS5 features. In all programs but Acrobat, the help files are interconnected documents. In Acrobat, the help file is a document with a custom user interface.
From any CS5 program, open the Help menu and select program name Help (where program name is the name of the program you're currently using). For example, in Adobe InDesign, choose Help
After you access the Help command, the Adobe Help Viewer opens. Note that the Help for pull-down menu can take you to Help for a specific CS5 program. When you want help for Adobe Bridge, use the Help menu in the Bridge window.
The Adobe online help offers you helpful tips and techniques posted online at the Adobe Web site. You can find many useful tips and techniques hosted as Web pages, video downloads, and PDF documents. There are descriptions for new program features, plug-ins and add-ons for different CS programs, upgrade information, and links to customer-support pages.
You can access online help and the latest news about the various CS5 applications in Bridge Home.
Because these help files are hosted online, you obviously need an Internet connection to access them. Be sure your Web browser is operational, and click the Online menu command in any CS program to open Web pages on the Adobe Web site.
Tip
For access to tips and techniques using the CS programs, open Adobe Bridge and click Bridge Home in the Favorites pane. Scroll the different panes, and click Adobe Studio and Tutorials. Scroll the list in the next pane to the right, and click an item of interest. Your default Web browser opens and takes you to a related tip or technique hosted on the Adobe Web site. For more information on using the Bridge Center, see Chapter 6.
Keyboard shortcuts are another item that could be listed as a common user-interface feature. We cover them here as a separate topic to elaborate a little bit more about the aspects of using keyboard shortcuts in the CS programs and of customizing shortcuts for your personal workflow.
If you want a comprehensive list of keyboard shortcuts, consult the program help files. Obviously, you don't want to spend lots of time memorizing the shortcuts, but you'll want to take advantage of using shortcuts common among the CS programs to perform identical tasks. One great advantage of using the CS programs is that, because the applications are developed by a single software manufacturer, the keyboard shortcuts from one program to the next are often the same. In some cases, however, you also find inconsistencies among the programs, or perhaps some features that could use keyboard shortcuts where they don't exist. Fortunately, several CS programs offer you an option to edit and redefine keyboard shortcuts.
There are some differences between the CS applications in handling custom keyboard shortcuts and in the features available in one program versus another. The following sections describe working with keyboard shortcuts and customizing them to suit your workflow according to each CS program.
Illustrator was the first of the CS programs developed by Adobe Systems, and it has a long tradition of assigned keyboard shortcuts to access tools and menu commands. As new programs have been developed, Adobe Systems has modified many keyboard shortcuts in Illustrator to match equivalent actions in other programs, such as in Photoshop. If you want to return to a familiar keyboard shortcut in Illustrator, you can customize the keyboard shortcut.
Tip
If you work in a production environment and share your computer with others, it's a good idea to settle on agreed changes if they deviate from defaults used by other users. If you use your computer exclusively, you'll want to give a little thought to customizing keyboard shortcuts that are consistent between the CS programs. The more consistent you make your shortcuts, the less confusion you'll experience. Many workspaces can include both keyboard customization and menu customization. This can help with shared work environments.
To customize a keyboard shortcut, choose Edit
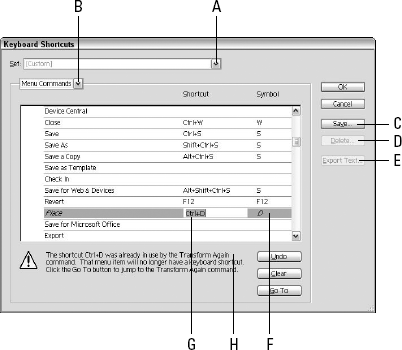
In the Keyboard Shortcuts dialog box, you have several options for creating a new shortcut or modifying an existing one. The options to understand in this dialog box include the following:
Set pull-down menu (A): By default, the menu option is Illustrator Defaults. This menu choice remains listed in the pull-down menu so you can return to the Illustrator defaults at any time. When you assign a new keyboard shortcut or modify an existing one, the menu item changes to Custom. When you save your modified set, you're prompted to name the set. After saving, the name you use to identify your custom set is added to the pull-down menu.
Menu Commands/Tools (B): Select from either Menu Commands or Tools to change shortcuts that invoke menu commands or select tools.
Save (C): After changing the shortcuts to your personal liking, click Save to save your changes. The name you use for your set is added to the Set pull-down menu.
Delete (D): The Delete button enables you to delete custom sets you add to the pull-down menu. To delete a set, first select the set to be deleted in the pull-down menu and then click Delete.
Export Text (E): When you click Export Text, all your keyboard shortcuts are saved in a text file. You can use the text file to share with other workgroup members. For more information on custom keystrokes in workgroup environments, see the "Custom shortcuts for workgroups" sidebar in this chapter.
Shortcut edits (F): To change a shortcut, first click in the Shortcuts column in the row for the item you want to change. For example, if you want to reassign the keystroke for accessing the Type tool, click the cursor in the Shortcut column where the Type row appears.
Symbol (G): The keyboard shortcut to access a tool or invoke an action is defined in the Shortcut column. Adjacent to the Shortcut column is the Symbol column. The characters you add here appear in a menu list and/or tool tip. Notice that when you view the menus in all CS programs, you see the menu name and often the keys used for the shortcut to access the menu item.
Warning (H): If you define a tool or a menu command with a key combination that is already used to select a tool or invoke a command, a warning is displayed at the bottom of the dialog box. If you don't want to interfere with an existing shortcut, click Undo. If you're overriding a preexisting shortcut, you can edit the shortcut used by another tool or menu command. Click Go To and you're taken to the item using the shortcut you overrode. Add a new shortcut if you so desire.
Note
Mac OS X does not permit assigning
Note
For more information on using the PDFMaker and converting Microsoft Word files to PDF, see Part V of this book.
Custom Shortcuts for Workgroups
If you make changes with keyboard shortcuts and want to share your custom set with other users, you can easily copy your custom keyboard set to other computers. When you save a custom set, the new definitions are saved to a file. This file is stored in the user logon Library/Preferences/Adobe Illustrator CS5 Settings folder (Mac) or the Documents and SettingsusernameApplication DataAdobeAdobe Illustrator CS5 Settings folder on Windows. To find the files on Windows, you need to turn on the ability to view hidden files and folders within the Tools
If you make changes to the keyboard shortcuts either in an isolated environment or when working as part of a group, it's handy to have a template or guide that you can refer to in order to refresh your memory on changes made to the shortcut keys. When you create a custom set and click Export Text, all features that can accept keyboard shortcuts are exported along with all those features assigned a keyboard shortcut. The file is a text file with the items and keyboard shortcuts listed with tabs and carriage returns. You can easily convert the text file to a table in InDesign.
Have you ever wondered why
To change keyboard shortcuts, choose Edit
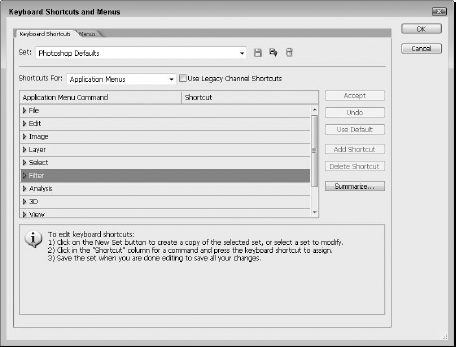
Figure 3.47. The Photoshop Keyboard Shortcuts and Menus dialog box offers very similar options to those found in the Illustrator Keyboard Shortcuts dialog box.
As you can see in Figure 3.49, the dialog box offers options very similar to the ones you find using the Illustrator Keyboard Shortcuts dialog box. The Set pull-down menu provides choices for using the default keyboard shortcuts or custom sets you create and save, much like those options discussed with Illustrator in the preceding section. From the Shortcuts For pull-down menu, you can choose to edit application menu commands, panel menus, or tools. When you select one of the categories from the Shortcuts For pull-down menu, the options change in the list below the pull-down menu. For Application Menus and Panel Menus, each menu is listed with a right-pointing arrow symbol adjacent to the menu name. Click the right-pointing arrow symbol, and the menu expands where each individual command is exposed. In Figure 3.48, you can see the Applications Menus selected from the Shortcuts For pull-down menu and the Layers panel expanded where all panel menu commands are listed. Notice that, by default, only three commands have shortcut-key equivalents.
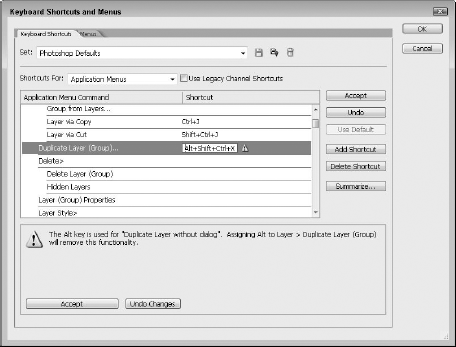
Figure 3.48. Select the category you want from the Shortcuts For pull-down menu, and expand the menu or panel by clicking the symbol adjacent to a panel name.
Most of the same options exist for creating, changing, and deleting keyboard shortcuts in Photoshop as you find in Illustrator. Photoshop enables you to export a list of all the assigned keyboard shortcuts; however, unlike the text-file export in Illustrator, Photoshop's export is in the form of an HTML file. Click Summarize in the Keyboard Shortcuts and Menus dialog box, and the Save dialog box opens, allowing you to navigate your hard drive and locate a folder destination for your file. After saving the file, you can view the list of shortcuts in your Web browser.
Fortunately, the Keyboard Shortcuts dialog box for most of the CS applications that allow you to customize shortcuts is accessed with the same menu command. Select Edit
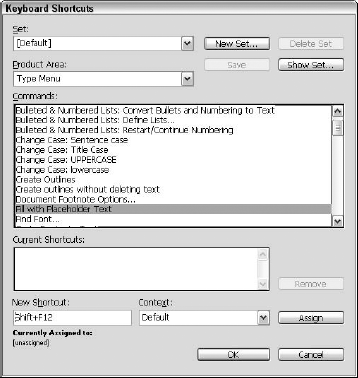
You select an option from the Product Area pull-down menu and click a command in the Commands list box. From this point, you have another option where you can narrow the assignment of the keyboard shortcut to one of five categories listed in the Context pull-down menu. For example, if you want to assign a keyboard shortcut to Fill with Placeholder text, you start by selecting Type Menu in the Product Area. In the Commands list, you select Fill with Placeholder Text. Then click in the New Shortcut field box, and press the keys to create the new shortcut. Then click OK and test the shortcut to see if it behaves as you expect. In Figure 3.50, you can see an example for assigning a keyboard shortcut to Fill with Placeholder Text.
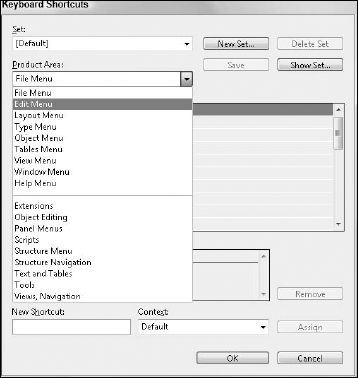
Figure 3.49. The Keyboard Shortcuts dialog box in InDesign contains an extensive set of categories from the Product Area pull-down menu.
You handle the basic options for creating new sets, saving a set, and selecting custom sets from the Set pull-down menu in a similar way to how you handle these operations in Illustrator and Photoshop. As an added benefit for users who are former QuarkXPress users, InDesign provides a QuarkXPress-equivalent set of shortcuts accessible from the Set pull-down menu. A PageMaker set also is available for users familiar with Adobe PageMaker shortcuts.
InDesign is also unique in that you can set keyboard shortcuts for specific situations by using the Context selector. This allows the same shortcut to be used for different commands depending on what you're doing.
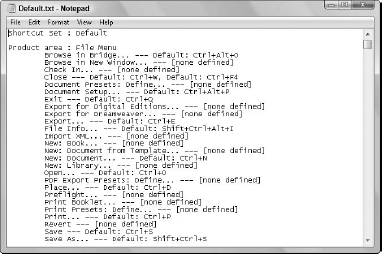
If you want to create a table describing the key shortcuts created for a custom set, click Show Set. Like Adobe Illustrator, the list of assigned keys and those commands where no assignment has been made are all listed in a text file. When you click Show Set, the list appears in your default text editor, as shown in Figure 3.51.
You can save the text file and open it in Microsoft Word or import the text in InDesign, where you can convert the text file to a table like the table conversion described when converting Illustrator text files. The text file for InDesign, unfortunately, is not as well formatted as the text file you have available in Illustrator. The InDesign text file doesn't convert to a table as cleanly as Illustrator's table conversion, so you may have to do a little editing to make a table guide for your workgroup.
Keyboard shortcuts also can be assigned in Flash, Fireworks, and Dreamweaver. Choose Edit (Dreamweaver on Mac)
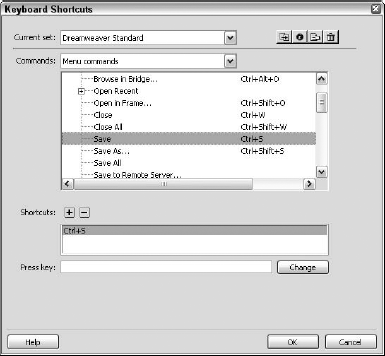
Dreamweaver supports a list of commands in a list box that is expanded by clicking a symbol adjacent to the menu name. On the Mac, a right-pointing arrow appears adjacent to the menu name; on Windows, the symbol is a plus sign. When expanded, the symbols change to a down-pointing arrow and a minus sign, respectively.
As you scroll down the list of commands in the list box, notice that the commands are nested in groups. Click the symbol adjacent to a menu command, and the list expands.
Dreamweaver also supports saving a text file or creating an HTML file for a list of commands you can use as a guide.
Acrobat is the only program in the Creative Suite that doesn't support creation of custom keystrokes for shortcuts. However, while discussing keyboard shortcuts, there is one thing important to point out when working in Acrobat: By default, accessing tools with keystrokes is not enabled. Users of earlier versions of Acrobat soon find that pressing the H key and expecting to select the Hand tool doesn't produce a result when they first launch Acrobat. In order to use key modifiers to access tools, you need to change a preference setting.
Open the Preferences dialog box by choosing Acrobat
Be certain that the Use single-key accelerators to access tools check box is selected. If the check box is unchecked, pressing a key on your keyboard to access a tool won't work. By default, when you first load Acrobat, this check box is unchecked.
Unfortunately, you cannot change any keyboard shortcuts in Acrobat.
Several CS programs have some common tools. The vast majority of common tools exist among Illustrator, Photoshop, and InDesign. The tools work similarly in the programs that use them. Accessing the tools using keystrokes also is common between the programs.
Acrobat uses a variety of toolbars that can be opened and docked in the top-level Toolbar Well. Context menus help greatly in accessing tools in Acrobat.
Some tool options are accessible in some CS programs by double-clicking a tool in the program's Toolbox. Corresponding dialog boxes open where attributes are assigned for a given tool.
Illustrator, Photoshop, InDesign, Flash, Fireworks, and Dreamweaver offer options for saving workspaces. Workspaces involve arrangement of tools and panels and the overall look of a program's editing environment.
All the CS programs have some common user-interface features. Among the more popular are context menus and access to help documents.
All CS programs, with the exception of Acrobat, offer you options for customizing keyboard shortcuts.