Cycles
CYCLES, or animation meant to loop or repeat, are a mainstay of the animation industry. From games to film, to TV, cycles will most certainly be a part of your career in animation to a varied extent. The ability to quickly create realistic and appealing cycles is the hallmark of the experienced animator. To do this you must be familiar with all of the tools hat Maya 2014 has to offer. In production it is common for an entire animation team to share cycles, and so having cheats to avoid little technical problems can have a large impact on a project.
We're going to look at the technical aspects of creating a cycle with Pre- and Post-Infinity curves. Then we'll manipulate a walk cycle and create a flying cycle from scratch. With both of these cycles the plan is to use the simplest method to get the best results; with cycles, that cheat is called “offsets”.
Cycle Basics
WHEN WE TALK ABOUT cycling in animation, there are a few terms and technical rules you should be aware of. We'll run through them here in this chapter.
First of all, when dealing with cycles where a character moves “forward”, the Z axis is the axis that is used to show forward movement.
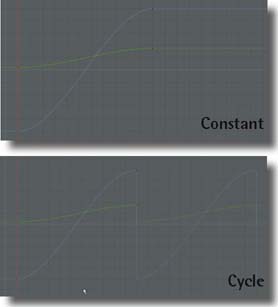
Next, you will be dealing extensively with Maya's Pre- and Post-Infinity curve types. Maya uses these settings to determine how to cycle animation before your first, and after your last keyframe. We'll test out all of the different types here.
Another rule is that all of the controls of your animation need to have the same duration of frames between the first and last frame of the cycle. They don't have to necessarily be the same frames, however. For instance, as long as you have set your animation to cycle correctly, your head could be animated between f01 and f24, and your arms could be animated from f18 to f41. Also, it is typical to counter-animate a master control against the Translate Z to make it so that the cycling animation stays centered over the world origin, as if it's on a treadmill. This is extremely handy when you are working with a cycle that covers a lot of distance, like a run cycle. It is easy to create this treadmill: simply cycle the master controller backwards the same stride length and frame range as the character cycle (we'll talk all about stride length soon).
Finally, cycling is a lot more manageable when you are familiar with the idea of “offsetting” your keyframes in the Graph Editor. The basic idea is to create animation on controllers within your set frame range (1–24 for example), and then move the keyframes backwards or forwards in time. These new offset keys are the same total duration of the cycle, but you don't have to worry about getting some hard-to-create curves cycling on the same frames as your base animation. An example of this is if there is an extremely wobbly antenna on your character; it's hard to imagine exactly at what point in the overall motion that antenna should be started at on f01, whereas it's easy to key the entire flopping motion and then offset it.
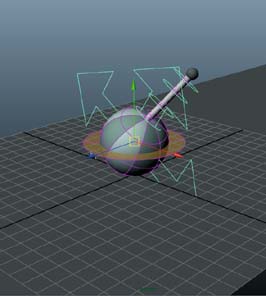
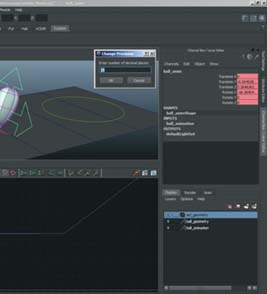
1 Open cycle_basics_start.ma. In this scene we're going to have this ball move up and down, and tilt left and right. You'll see two keys are already created for you. Our cycle length is 24 frames, and there is a key on f1 and f12.

4 Expand the timeline to 48 frames and watch how nicely the animation loops. Now let's key the antenna flopping over from the left to the right. On f01, key the antenna over to the right, and on f12 key the antenna bent over to the left.
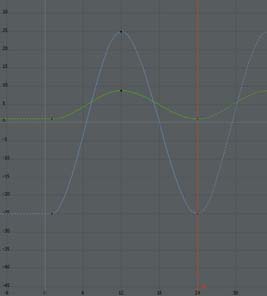
3 “Cycle” means that when it gets to the last keyframe, Maya will loop the animation by going back to the first keyframe. In order for the cycle to work, the first and last keyframes need to be identical! In the timeline, MMB drag f01–f24 and hit ![]() to paste the key at the end of the animation. Flat all tangents.
to paste the key at the end of the animation. Flat all tangents.

cycle_basics_start.ma
cycle_basics_finish.ma
HOT TIP
When working with cycles, it's easy to inadvertently change some of the curves' lengths when editing them. If you select a curve, the frame field in the Graph Editor will display the curve's frame length. This is really handy for hunting down cycle hitches caused by an extra or missing frame, especially when many of the curves are offset.
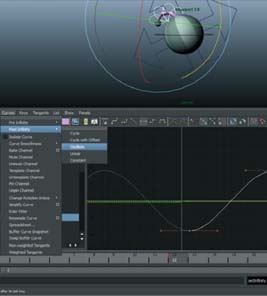
5 In the Graph Editor, select the antenna control's rotation channels. Go to Curves > Post Infinity > Oscillate. Also go to Curves > Pre Infinity > Oscillate. This infinity curve type tells Maya to “bounce” backwards and forwards through the animation when it gets to the first and last key.

6 Now let's make the character move forward. Set a key in Translate Z on the ball_anim control at f01. On f24, move him forward in Z about 10 units.

7 The rule of thumb is that Translate Z channels on your MAIN character controls (body, feet, etc.) should be “Cycle With Offset”. Set the Translate Z curve to this type in the Graph Editor. Flat the tangents on the Z channel and notice that Maya takes the last frame as the “new” start frame and “goes from there”.
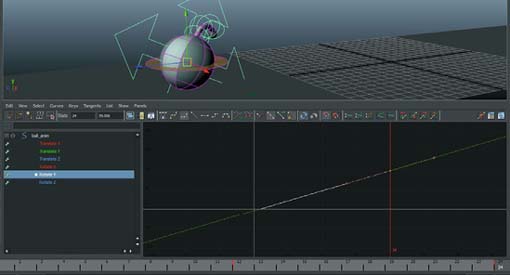
9 Now set the Rotate Y curve Pre- and Post-Infinity type to linear and see the resulting curve. The rotation continues linearly forwards and backwards for infinity. Let's do our first offset. Remember, offsetting animation is a great way to build layers in a cycle.
HOT TIP
Now that you know all the cycle types, be aware of the simplest way to get the motion you need. Pros are always using offset animation curves to build complex motion that would be immensely difficult to create working only within a set frame range.

10 Select the controls of the antenna. In the Graph Editor, select the rotation curves and move them forward four frames to make the motion more overlapped. Notice how the curve retains its shape, but also how hard it would be to create the curve shape that exists between f01–f24 from scratch.
Stride Length
WWHEN CREATING ANIMATED CYCLES, we'll first want to quickly sort out a few decisions, namely cycle length (frame count) and stride length (how far one complete cycle “travels” in space). These two decisions are essentially the principles of timing and spacing applied to walk cycles. However, unlike a performance shot in which these decisions can be eyeballed and changed, you'll want to be sure you are working within your set standards so that the result is predictable, manageable, and most importantly, usable.
What is stride length? Simply put, stride length is the distance that a character travels in one complete cycle. If you are animating a biped, one stride would be two steps. If you are animating a quadruped like a dog or a cat, the stride length is the distance the character covers after all four paws have stepped. Another way to think about stride length is that it is the distance the character travels in the time it takes for any one of its feet to complete one cycle (go from being on the ground, to lifting, to moving forward, up to the instant it touches the ground again). This way of thinking about it works no matter how many feet a character has, assuming that all of its feet move only once in a complete cycle.
Why is calculating stride length so important? If you are working on a project with many animators who are all going to share cycles on the project, then it is extremely important that you create a cycle that will loop perfectly for infinity. Without knowing your EXACT stride length, it is impossible to truly create a perfect cycle. This is one of the most overlooked aspects of creating cycles, but you'll see when we get into this cheat how problematic “eyeballing” a cycle actually can be.
The easiest way to calculate stride length for a walk cycle is to pose a character taking a step using just the root control and one foot. The character should look like he is taking a comfortable step, and isn't too stretched out. Then simply observe the value in the foot's Translate Z channel, and double it to get your stride length. From then on, you will be doing multiple calculations with this number, confident that, armed with stride length, your cycle will loop perfectly for eternity.

1 Open stride_start.ma. This is a bouncing ball animation, in which the ball is taking leaps forward. A good way to think of this for the purposes of stride length is that the ball is a uniped (one footed), and the “foot” is the entire character.

4 Play back the animation. Looks great, right? Now expand the timeline to 480 frames. Play back again. Still looks fine, so what's the problem? Go to f01. Select the ball_Master_CTRL, and right click on the Translate Z channel. Choose “Unmute Selected”.

2He does one complete leap and landing every 24 frames. All that's left is animating the Translate Z channel to give him forward motion. Select the ball_anim control. On f13, translate it forward to about where the next edge in the ground plane is showing. (If the edges are not showing click on Shading > Wireframe on Shaded.)

3 On f24, with the ball_anim control still selected, hit ![]() to set a key. Open the Graph Editor and change your Translate Z to linear interpolation like the one above. Now select the curve and change the Post-Infinity interpolation type to “Cycle With Offset”.
to set a key. Open the Graph Editor and change your Translate Z to linear interpolation like the one above. Now select the curve and change the Post-Infinity interpolation type to “Cycle With Offset”.

stride_start.ma
stride_finish.ma
HOT TIP
The stride length method presented here is the simplest, but it's also possible to animate stride length with an inverse method: by translating the root control forward, countering a cycle that has been animated in place. See the additional content on the How to Cheat in Maya website for a Walks chapter where that method is demonstrated.

5 The master control is counter-animated against the ball_anim control to keep it in place while we work. It is moving backwards according to a set stride length, but since we eyeballed the ball's Z movement, it moves further away from its home position every cycle that goes by.
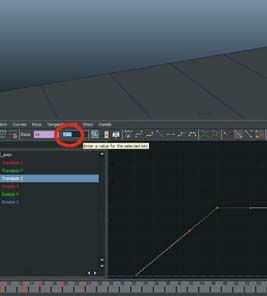
6 Let's investigate why our cycle is getting off of cEnter. Select the ball_anim control and open the Graph Editor. Select the two keyframes on the Translate Z channel that are on f13 and f24. Look up at the value box to see what value is on these frames. Mine is 7.365.

8 It turns out that when you eyeball poses in panel, Maya puts very precise values on keyframes that are nowhere near clean, integer values. Since our stride length is supposed to be 7 units, in the Graph Editor select the Translate Z keys on f13 and f24, type in “7” in the value box and hit ![]() .
.

11 Now let's set some keys. On f01, type in “0” on the ball_anim control's Translate Z channel. Right-click on the Translate Z channel and choose “Key Selected”. We're going to be careful not to add any keys on channels that we don't need to.

12 Advance to f04. Right-click on the Translate Z channel and choose “Key Selected”. On f13, move the ball forward using only the Z axis on the translate tool, and try again to line it up with the edge on the ground plane ahead of the start position.

10 A more common workflow is to eyeball the stride length in panel and correct it later. Select the ball_ anim control and right click on the Translate Z channel in the channel box. Choose “Delete Selected”. On f01, select the ball_Master_CTRL Translate Z channel, right click and choose “Mute Selected”.
HOT TIP
Making your stride length close to an integer value makes keeping the stride equal on all controls easy. But you may have to do a little bit of math: if the stride is 8 units, and the root starts at Translate Z=0, then it obviously moves to 8. But if one foot's Translate Z starts at -3 and the other at 6, then they need to finish at 5 and 14, respectively.
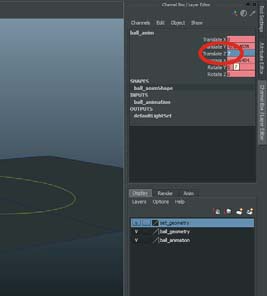
13 Pros will eyeball a pose and then choose nice, round numbers for their stride lengths. After you've set a controller's position, type a value in the channel box. Notice that even with 15 decimal places of precision, when you type it in, it is EXACTLY the value you chose. Type in 7 in Tz, right-click on the Tz channel and choose “Key Selected”.
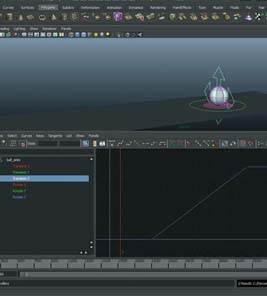
14 Set another key on f24. In the Graph Editor, make the Tz curve interpolation linear, and the Post-Infinity curve type to “Cycle With Offset”. By eyeballing and then correcting, we have a workflow that gives us fast, accurate stride lengths. Unmute the Tz channel on the ball_Master_CTRL and check the animation on frame 50,000 for fun!
Walk Cycle
WE ARE GOING TO LEARN how to find the stride length of a walk cycle quickly. This will be invaluable to your workflow, because a good animator should know how to put together an accurate, looping walk cycle in a short amount of time. Use this cheat whenever you start any looping animation that needs to travel in Z; for walk cycles that stay in place without having a master control counter-animated against the world IK controls (like in games), you need only make sure that, as the animation cycles, there are no visible pops in the animation.
Remember, the stride length is the distance that a character travels in one complete cycle. For a biped, this means two steps. We are going to assume a 20-frame walk cycle, meaning 10 frames per step. Also, the first and last frame need to be the same so we're going to be doing a lot of copying keys, and a lot of math input in the Graph Editor's stat boxes (see the Graph Editor chapter for detailed info on the math operations). However, knowing our stride length, this is a simple process and will quickly become an indispensible part of your workflow.
We are not going to animate the full cycle, only find the stride length and animate the feet accurately (see the additional content at howtocheatinmaya.com for a complete walk cycle tutorial). The rest of the animation on the body that doesn't travel in Z is very simple to make cycle: copy the first frame to the last frame of the cycle, and make sure the Post-Infinity curve type is just “cycle”! Let's give it a shot.
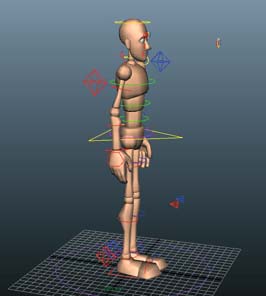
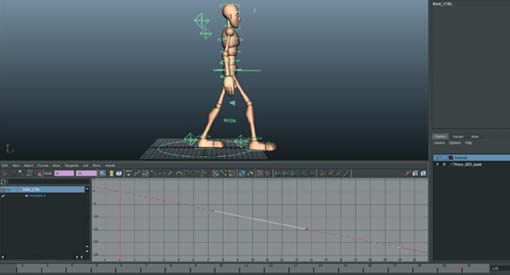
1 Open walk_start.ma. Goon is standing still, ready to animate. Remember that we're going to be using a lot of math operators in the Graph Editor, so open it up in preparation for this.

4 Go to f10, and now pose Goon with his left foot forward, along with the root moving forward as well. Keeping everything exact is not important because we're going to be typing in the Z values once we've found our stride length.
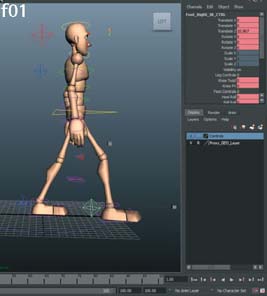
3 Set a key at f01 on all of the world IK controllers that are moving in Z. These are his left and right feet controls, and his root. Take note of what the value is on Goon's right foot. Mine is 10.967.

walk_start.ma
walk_finish.ma
HOT TIP
You can also make your cycles accurate by changing each Translate Z value to an integer as you go instead of applying the math function at the end. Our first step was 10.976, so we could have made our first value 11, and then known right away that our stride length was 22. Just another time-saving cheat to get perfectly looping walk cycles!
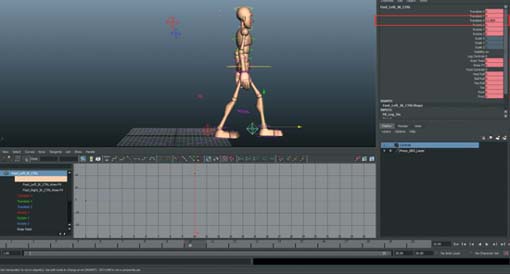
5 Now look at the translate Z value on the left foot. Mine is 21.96. Hey! That is roughly double the first value we had. We now can approximate our stride length. The nearest, nice, integer value is 22. Voila! We have our stride length.
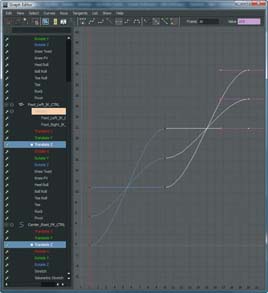
7 Now select the Translate Z channel in the Graph Editor on all three controllers (both feet and root). In the value stats box, type in “+=22”. The last key has now been adjusted to reflect our stride length. Using a math operator means we know the values are exact.

9 Now let's make sure these keys have the right cycle type. Select all of Goon's controls and in the Graph Editor, go to Curves > Post Infinity > Cycle.
HOT TIP
To quickly isolate specific curves on multiple controls in the Graph Editor, just select the channel you want to see in the channel box, such as Tz, and click the Isolate Curve Display button in the Graph Editor (looks like a squiggly line — make sure Classic Toolbar isn't activated in the Display menu). This saves tons of time scrolling through the attribute panel selecting specific curves.
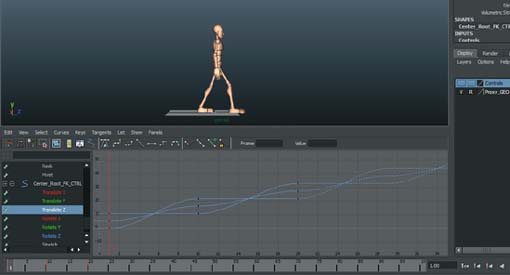
10 Now select both foot controls, the center root, and the ground root control. In the Graph Editor, select only the Translate Z channels. Go to Curves > Post Infinity > Cycle with Offset. Expand your timeline and watch Goon cycle perfectly in place! The rest of the cycle now comes easy.
Flying Cycle
FLYING CREATURES are a popular item in games, a major portion of the animation industry. Flying characters also find their way into popular feature films, TV shows, and commercials. From cartoony characters to the ultra-realistic, a flying cycle is an interesting exercise in the art of offsets. To cycle a flying creature, we are going to be taking advantage of some of Maya's great tools that we learned about in Chapter 4, Graph Editor. We're going to want to be able to see immediate results in the panel from making minor adjustments in the Graph Editor.
The first and best thing for an animator to realize about a flying cycle is that downward motion (thrust) of the wings will produce upwards motion in the body. It seems common sense, but we're going to make sure this concept is deeply engrained in your process by creating the wing motion and body motion together, then practice offsetting again.
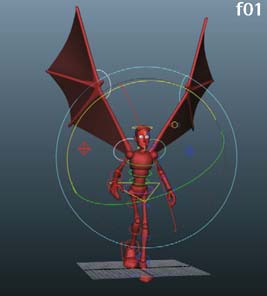
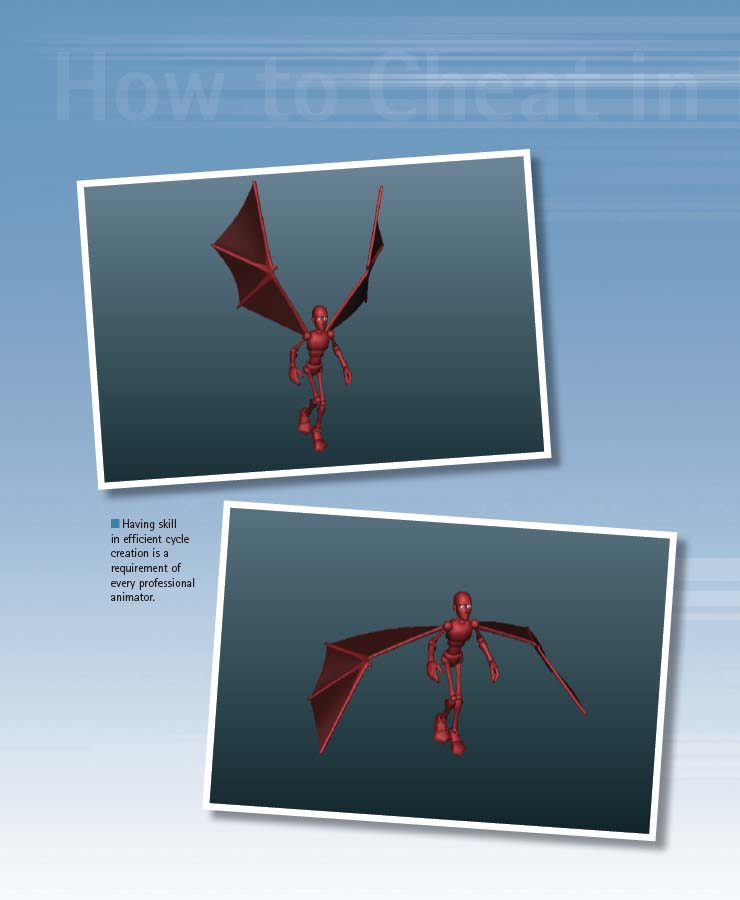
We'll start with a demon version of Goon, with horns and bat-like wings added to our familiar rig to demonstrate fly cycles. It's worth mentioning that a hovering fly cycle like the one we are going to create has application in many different situations, from butterflies to dragons. However, you will quickly find that the principles of bird flight (simply put, forward motion creates the lift in the wings) are wildly different. It will take very extensive research and reference gathering to accurately create any realistic flying cycle. That said, though, the workflow cheats presented here will serve you in all your flying animation.
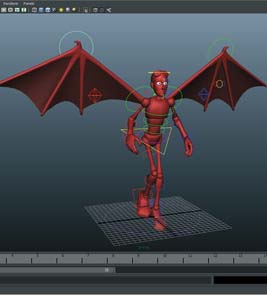
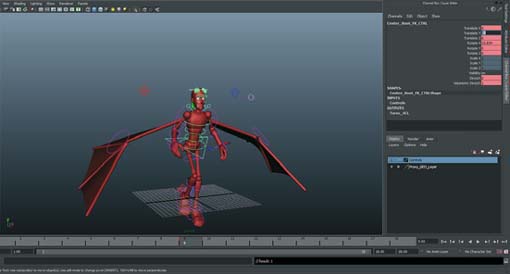
1 Open flyCycle_start.ma. With flying cycles, keying the extremes and offsetting is a quick and easy way to get the motion you want. We will create poses for the up and down wing positions, and then offset the keys on the different controls to get a more natural bend on the wings.
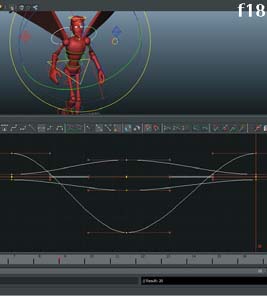
4 Remember that a cycle needs the same first and last frame. Select all of the wing controls, and from f01 on the timeline, MMB drag to copy the key to f18. Let go of the MMB, and hit ![]() . Open the Graph Editor and make sure the frame was copied; then flat all tangents.
. Open the Graph Editor and make sure the frame was copied; then flat all tangents.

3 Now let's make the down pose. It looks really cool if the wings are curled under the body for big creatures. Key the wings down on f09 (we're making an 18 frame fly cycle).

flyCycle_start.ma
flyCycle_finish.ma
HOT TIP
If you are working in games, it is common that the game engine will need all of the keyframes to fall within the set cycle frame range, and not have Maya interpolating Pre- or Post-Infinity Curves. No problem! In the Graph Editor, click Curves > Bake Channel, and then delete outlying keys to change your interpolated frames into true keyframes.
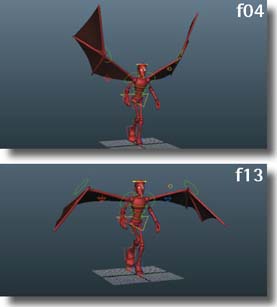
5 To make the breakdown poses for flapping wings, we need to remember that the wings are not flapping in a vacuum — they're pushing air! So on f04, key the tips of the wings bending upwards as if they are being pushed, and on f13 key the tips down.
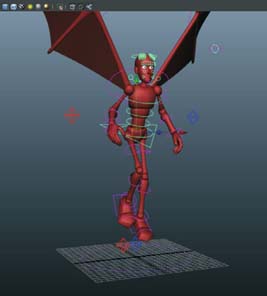
6 Now it's time to key the up and down motion of the character. We're going to get some great practice doing offsets here. Go back to f01 (we're going to create all of our poses on f01 and f09 and then offset). Key the root_CTRL at Translate Y=5.

9 Select all of Goon's controls, and in the Graph Editor, select Curves>Post Infinity>Cycle. Also click Curves>Pre Infinity>Cycle. Remember this setting tells Maya to cycle the animation on any frame before our first and after our last set keyframe. View these curves by clicking View > Infinity in the Graph Editor.
HOT TIP
When creating cycles, experiment with making sections of the cycle slightly different lengths to get a more organic feel. For instance, sometimes in a walk you can make the right foot's step take 9 frames and the left foot 10 frames. Small differences that you imperceptibly feel but don't see can make an animation feel more lifelike.
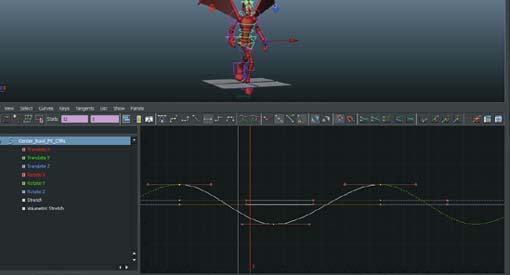
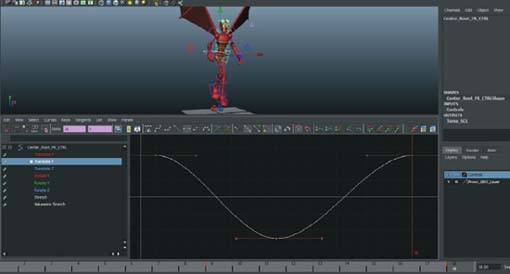
10 Let's offset! Select Goon's root control, and select all of the curves in the Graph Editor. One awesome feature of Maya is that you can make a change in the Graph Editor while the animation is playing and watch the result. Hit play on the timeline and move the selected curves backwards 6 frames in the Graph Editor.
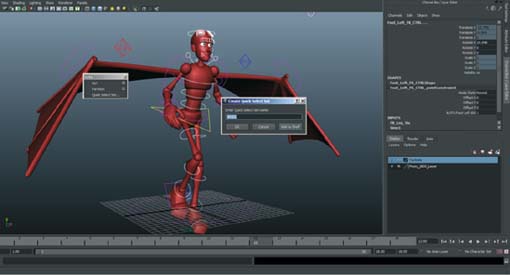
11 Cool! It now looks like his wings are thrusting him in the air! Let's build another layer of offset animation. Since we'll be selecting Goon's spine and legs a lot, let's make a quick select button. Select his spine and leg controls, and click Create > Sets > Quick Select Set. Name it “SPLEG” and click “Add to Shelf.

13 On f09 key Goon's spine bent forwards, and his legs slightly extended. Click the SPLEG shelf button, and copy f01–f18 by MMB-dragging in the time slider like we've become used to. We have our timing engrained in our mind by now, so creating animation on set intervals and offsetting is super easy!
HOT TIP
Don't stop working with your offsets after sliding the curves around. Keep subtly working more in by having the wings flap a frame or two apart from each other. Then use the tangent handles to give each wing a slightly different spacing through their individual flaps. Lots of little tweaks will add up to a big difference!

14 In the Graph Editor, set the Pre- and Post-Infinity curve types to “Cycle” as before. Select all the curves, flat all tangents, and offset! Drag his spine and leg curves backwards two frames. Play back your animation and adjust if necessary. Awesome!
Quad Cycles
QUADRUPEDS ARE PREVALENT in games and feature VFX. Knowing how to quickly block a walk cycle is an important skill for an animator. Finding stride length is an extremely important cheat to have mastered when it comes to quads; any trouble you can get into with two legs is doubled for four!
While teaching a full quad walk is outside the scope of a cheat, you will clearly be able to see the use of offsets throughout the body of this quad walk presented here. Take a few moments to click on a few different controls and go into the Graph Editor. You will see that the animation is cycled for 24 frames on all controls, but offset greatly. This is the fastest way to cheat a cycle, and it applies just as much to quads as it does to flying or walking.
We're going to do another kind of offsetting with this cycle; offsetting VALUES instead of offsetting TIME. We need to do this because we are going to copy the animation from the left front paw to the right. You can save a lot of time by copying animation across a character's body, but as you'll see, we need to offset the values to make the animation work.

4 Let's offset the right paw. In the Graph Editor, select all of the curves, and slide them 12 frames forward in time. With the curves still selected, go to Curves>Pre Infinity>Cycle. Also select the frontl_eg_CON Translate Z channel and go Curves>Pre Infinity>Cycle with Offset.
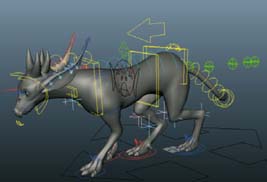
1 Open “quad_Start.ma”. We have a blocked quad cycle that you can look through later, but for now we're going to take a look at copying the animation from the front left paw to the front right.
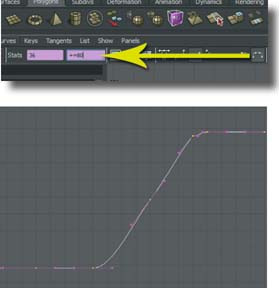
5 Now let's offset the value of the Translate Z channel. Putting the right paw 12 frames behind, put it HALF A STRIDE behind. Select the curve, and in the type-in transform box put in “+=80”. (Half of 160 — our stride length.) Now the right paw is moving where it should.

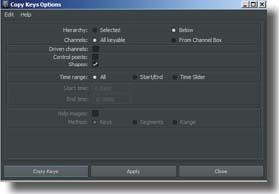
3 Select the front left paw and go to Edit > Keys > Paste Keys ☐. Copy my settings once again. Now the front paws (and toes) have identical animation now. Select the front right paw and all of the toes for the next step.

quad_Start.ma
quad_Finish.ma
HOT TIP
Remember with cycles that your stride length should never change. We offset values by moving the ENTIRE curve, not individual keyframes. Doing so could result in different stride lengths for different limbs, and problems down the road.
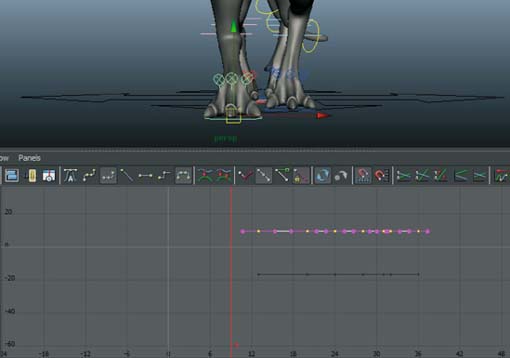
6 Finally, you'll notice that the right paw is sticking out to the side. This is the same X translation that is on the left paw. Select the Translate X curve in the Graph Editor, and watching the result in the panel drag it upwards until the two paws look the same.

