
Maya
SINCE THEIR INTRODUCTION, animation layers have been one of the most powerful tools yet in computer animation. they exponentially increase the ease of creative tasks like trying different approaches and variations, and they make working with curves much simpler and more compartmentalized.
However, they're still a relatively new tool in Maya. I've met many professionals who don't even know they exist, yet their benefits can't be overstated. they allow a flexibility and simplification of animation curves that is completely on another level from how many of us learned Maya. this chapter will show you how to employ this incredibly powerful feature into what will likely evolve into a new and vastly improved workflow for you.
How Animation Layers Work
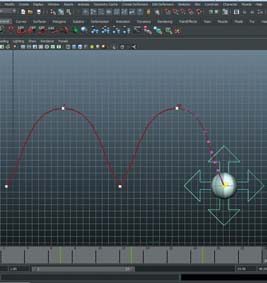
IF YOU'VE USED GRAPHICS PROGRAMS like Photoshop, then understanding Maya's animation layers will be a short leap from there. Layers let us stack multiple versions of spline curves on top of each other, which Maya then mixes together the way we want. This default behavior is one of two available layer modes, and is called Additive mode. A simple example would be two layers for the Translate Y attribute:

You can see how the two Y curves are mixed together for the end result. While this alone can make working with curves simpler, particularly with more complex examples, the real flexibility is how we can adjust the weight of each layer, much like opacity in a graphics program.
Instead of editing the curve itself, simply turning the weight of Layer 2 down to 50% reduces its influence on the final result by half. It looks like this:

Likewise if we switched that concept, and reduced the weight of Layer 1 to 50%, we get this:

Since the weight is just a slider, we can instantly experiment with any ratio of weights, giving us exponentially more options with no extra spline editing.

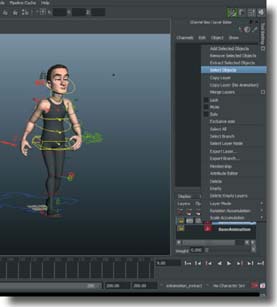
When we use layers, any animation we've done before the first animation layer was created will be labeled as BaseAnimation in the editor. BaseAnimation is not actually an animation layer, so we can't adjust its weight or turn it off.
Creating animation layers stacks them on the base layer. As far as Additive mode layers go (which is the default), the order doesn't really matter and the results should look the same. Override, the other mode, does take the order into account. When we set a layer to this mode, it essentially mutes any animation on layers below it that share the same controls/attributes. Animation above an verride layer will be added into the end result.

HOT TIP
When working with layers, lock the BaseAnimation to keep it from getting accidentally keyed.
Animation Layer Basics
NOW THAT WE UNDERSTAND how animation layers work, let's see in the example that was just illustrated. The Translate Y curves are exactly the same as the previous pages' example to keep things consistent. You'll be able to experiment for yourself and see how the weighting of a layer affects the animation. Weighting can also be animated just like anything else, so curves can have different amounts of influence throughout an animation, continuing to expand the possibilities. Finally, layers offer some nice organizational colorizing, complete with different colored ticks in the timeline, which can be a lifesaver if you're using many layers.
After this cheat, we'll revisit the facial animation we did in the previous chapter and continue to improve it, as well as create some new variations.

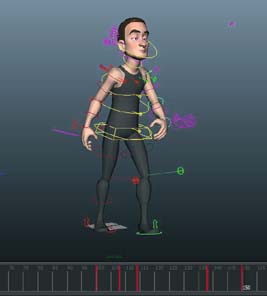
1 Open layerExample.ma and switch to front view. Right now only the BaseAnimation is active, which is the ball translating in X from left to right.
4 Re-mute Layer 1 and unmute Layer 2. You can see the Translate Y curve from Layer 2 in the illustration at work.
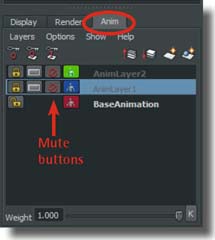
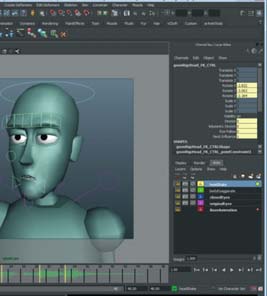
2 In the Layers panel, switch to Anim ayers. There are the two layers above the base, with the same animation as in the example we just talked about. Currently both layers are muted.
3 Click the Mute button for Layer 1 to unmute it. Our Translate Y curve from the illustration is now active and the ball travels upward. Muting is a great feature for comparing how different curves affect the end result.
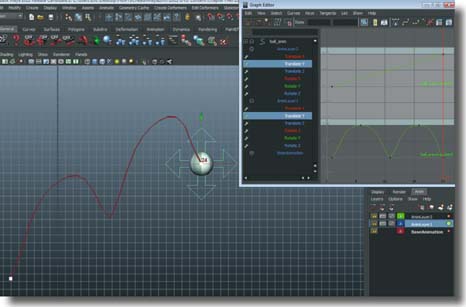
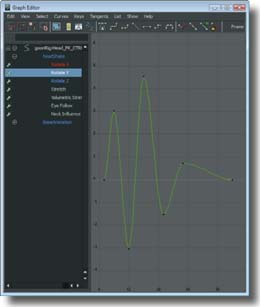
5 Unmute both and they are added together in the final result. You can see that there are two separate Translate Y curves in the Graph Editor, separated by their layers.

layerExample.ma
HOT TIP
If you have lots of layers and the Graph Editor is getting crowded, right click in the Graph Editor's left panel and select Animation Layers Filter > Active. Now only the active layer's curves will appear.


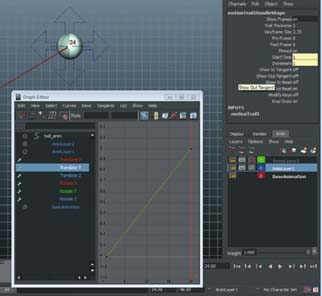
8 The K button next to the weight slider keys the weight attribute. You can set a layer's weight to different amounts throughout an animation. Once you set a key on it, a curve called “Weight” will appear under the layer's name in the Graph Editor, which you can edit as normal.

9 Right click on Layer2 and select Layer Mode > Override. The name turns bold and the ball only moves up and down. Override causes a layer to not evaluate the layers below that have the same controllers. Since the ball's move control is animated in everything below, they are overridden.


10 MMB- drag to reorder layers, and the lock button protects them from being keyed or changed.
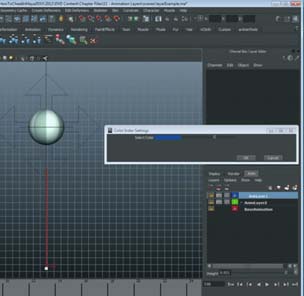
11 Right click on the colored Ghost button to set the layer's color. This will make all the key ticks for that layer in the timeline the color you choose. Clicking on the Ghost button will also enable ghosts for that layer in the color as well.
HOT TIP
A layer in override mode mutes any layer below that has the same controller/ attributes, including the BaseAnimation. You can put variations on separate override layers, and mute back and forth to compare.
Cheating a Cycle
MAYA'S ANIMATION LAYERS HAVE COME a long way in terms of stability and ease of use since their introduction. A very exciting new use for layers is to animate the weight of the layers to create some variations in cycles. We can use a layered approach to creating animation and then isolate layers for some custom movement. In doing so, we will “break up” the repetitive look of a cycle without having to delete the cycle, bake the keys, or alter it in any way. This is a fantastic new way of working. Now is a good time to start playing with layers to see if they have earned a spot in your workflow.
In this cheat, we're going to look at how planning a scene with a walk cycle using layers can give you new flexibility to create some great results in a short amount of time. We will look at how easy it has become to split animation up on the body into layers and then how easy it is to mix and match those layers to create unique results in your scene.
If you are still on the fence about layers after this cheat, then just imagine how many of your scenes that used walk cycles could have been done, and done better, using these cheats. It may be time to rethink your Workflow…

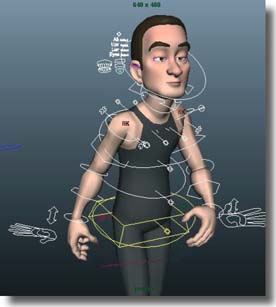
1 Open layer_Walk_Start.ma. You will see Morpheus walking in a cycle. This will be the animation we start with.

4 Select the Base_Animation_Extract layer, play back the animation and notice how you can slide the weight slider for this new layer and remove the movement in the torso as the character is walking.
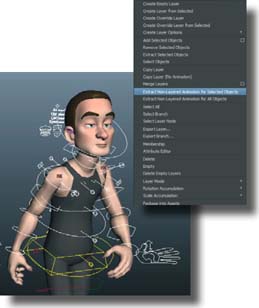
3 In the Anim Layers tab (Channel Box/Layer Editor, then Anim tab), click on Layers>Extract Non Layered Animation on Selected Objects. Maya will create a new anim ayer with the torso animation in it.
5 Now let's create a new layer for the custom animation. Right click on the new animation layer and click on Select Objects.
6 Click on Layers>Create Layer From Selected. Select the new layer, which should be called “AnimLayer1”.

layer_Walk_Start.ma
layer_Walk_Finish.ma
HOT TIP
Remember you can also click on the little button on the right of the Layer Editor to Create Layer From Selected. It looks like this:

7 Making sure that the weight on the Base_Animation_Extract layer is at zero so it does not distract you, set a key on all the controls on f100.

8 On f108, create a pose similar to mine, this is an anticipation pose for a finger point.

11 Turn the weight off the Base_Animation_Extract layer to 1. Go to f100 on the timeline, and key the weight of this anim layer. Key the weight of AnimLayer 1 to 0.
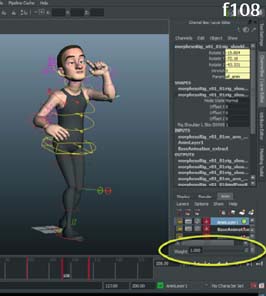
12 On f108, key the weight of the Base_Animation_ Extract layer to 0, and key the weight of AnimLayer1 to 1.
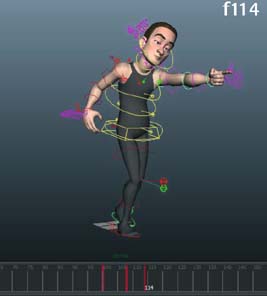
9 On f114, create a pose similar to mine. Key all of the controls again on f138 so that he holds this pose for 24 frames.
10 Select all of the controls and MMB drag on the timeline from f100 to f150 to copy the neutral pose of Morpheus, then hit ![]() . Now turn this anim layer's weight to 0.
. Now turn this anim layer's weight to 0.

13 On f138, key the weight of both anim layers as is. Finall on f150, key the weight of AnimLayer1 to 0, and key the weight of Base_Animation_Extract layer to 1.

14 Play back the animation and watch your cycle take an interesting turn on f100, only to return perfectly to the cycle when Morpheus has done his point!

layer_Walk_Start.ma
layer_Walk_Finish.ma
HOT TIP
If rethinking your scenes in a layered approach is too disruptive to your workflow, remember you can always create your animation normally and then just extract the layers like we did in this cheat.
Layers for Texture
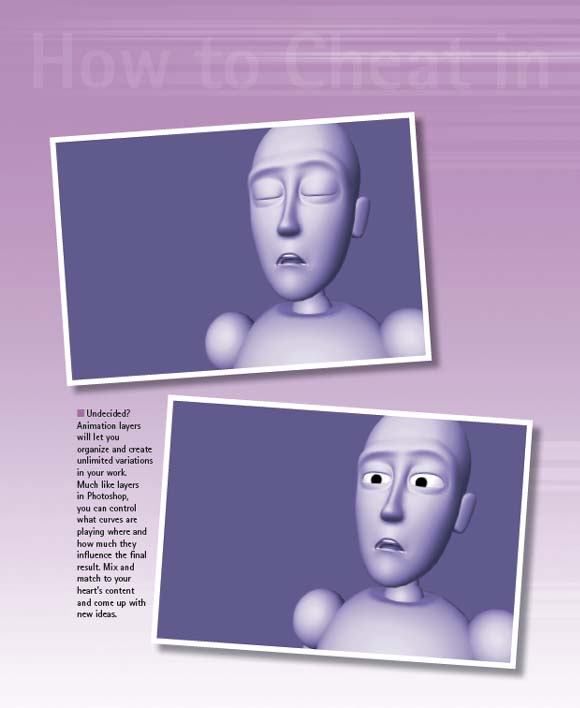
THE ANIMATION IS LOOKING quite a bit better with our recent additions, and we can instantly go back to the original version at any time. Such is the power of layers. Yet it still needs a little something. A little shake when he raises his head and closes his eyes will add a nice bit of texture.
Creating layers to add in texture is a technique that can save you tons of work, especially if working for a picky or indecisive director. It's easy enough to add in the headshake as normal, but if you're then asked to tone it down or take it out, you have to go back in and edit the original curve quite a bit. Using a layer for the shake, you can simply turn the weight down until they're happy. And best of all, it makes your curves simpler to work with. If you were asked to start with the head rotated further in Y, you can simply adjust the original curve while the head shake stays the same in its own layer, rather than having to tweak where Rotate Y starts and all the shaking keys after it.
In short, layers have lots of uses and you'll figure out plenty more as you continue to use them and tailor them to your workflow. Happy (easier) animating!
1 Open texture_start.ma and select the head control. In the Anim layers click the Create Layer from Selected button. Name it “headShake” and give it a unique color.

4 The subtle shake.

3 Work with the curves until the shake looks good to you. I added some more ease in on some of the shakes.

5 With the bigger movement in the body, I noticed his head needs to drag more in Rotate X. Add that in on the headShake layer, or put it on a new layer if you like.

6 Now you can really tweak things to your heart's content. Using the layers and their weights, experiment with different amounts of head shake, body exaggeration, eye versions, and anything else that you want to try!

texture_start.ma
texture_end.ma
HOT TIP
Layers can be parented to other layers. This isn't like parenting with props or anything though. It's simply Maya's way of organizing layers, like folders in Photoshop.
The Final 5%
By Kenny Roy
AT THE VERY END OF WORKING ON A SHOT, we turn to the final polish stage. of course each shot is different, but many have enough in common that you should have a clear list of tasks to look for to be sure that your work is complete. I have always advocated for the practice of writing down one's workflow. If you have enough experience, you can probably get away without a written list. whatever the case, I thought that it would be helpful to you to have an extensive list of some of the things that professionals look at when they are trying to get a shot out the door.
By no means is this a complete list, and conversely there may be many items on this list that don't apply to your current scene. Take this list as much as an indication of the level of detail that feature film and high-end commercial work demands, as a complete rubric for success. The list is also basically ordered from head to toe, as every animated shot will need polish in different areas and so any other ordering might be confusing.
Without further ado, here's the list:
1. Make sure anything attached to the head that is keyable has good overlap and secondary movement. floppy hats, pony tails, and antennae come to mind.
2. Make sure that the ears, if keyable, have a little bit of life to them, perhaps perking up when the character hears something. A tiny bit of wiggle in the tips is good too.
3. If any dynamics exist on the head, turn them on and adjust the settings.
4. Add a tiny bit of micro movement to match the inflection of the dialog.
5. Check that the eyebrows and eyelids do not take on any unharmonious poses.
6. Add some overlap and overshoot to the eyebrow movement.
7. Add some micro darts to the eyes.
8. Untwin the keyframes of the eye blinks and eyebrow movements.
9. Key the cheeks and squints if they haven't been touched yet.
10. Key the sneer and nose controls if they haven't been done already.
11. Add a tiny bit of puff to the cheeks on m, b, and p syllables in the dialog.
12. Key the tongue if it has not been done already.
13. Add asymmetry to the mouth shapes in the dialog.
14. Cheat emotional face shapes like smiles and frowns towards camera.
15. If there are lip puff controls, add them to m, b, and p shapes.
16. If there are controls to keep the lips stuck together as the jaw moves downwards, add a pass of that now for words in the dialog that start with b and p, especially after a long pause.
17. If there are swallow or breathing controls for the neck, add those.
18. Check arcs are clean and smooth on all the head movements.
19. Add breathing movement to the chest.
20. Relieve a little bit of the distress in the neck and shoulder by keying the clavicles if they haven't been keyed already.
21. Check arcs on chest and upper torso.
22. Check arcs of elbows.
23. Make sure the pole vectors are animated — we don't want Maya deciding where our elbows are pointing.
24. If this is a character with wings, add the stretching of the wing membranes against the flow of air.
25. Check wing poses for good silhouette.
26. Refine and nail down overlap amount on wrists.
27. Add and refine overlap on fingers.
28. Break up finger animation timing.
29. Add contact of fingers on any props the character holds or touches.
30. Refine and nail down any IK/FK switching by matching the pose and movement perfectly.
31. Add moving holds to hand poses and finger poses.
32. Add micro movements to hands and fingers.
33. Make sure the spine controls are not counter-animated against each other and that each spine pose is explicit and meaningful.
34. If there is a stomach bulge control, use it in conjunction with the chest controls to further refine the subtle breathing movements.
35. Add secondary movement and overshoot to stomach bulges and fat.
36. Refine the hips by doing a pass where you look closely where the weight is distributed.
37. If the hips and lowest spine control both have IK movement, make sure there is no counter-animation between them.
38. Refine arcs on the hips.
39. Make sure all of the main body movements have a weight shift in the hips to allow the legs to come off the ground.
40. If you are working on a dog-legged character, make sure the femur and the foot bones stay parallel at nearly all times.
41. If there is a tail, smooth the movement on the tail by reducing keys.
42. Add overlap and some bounce on the tail.
43. If the tail is prehensile, make sure there are no penetrations with props or the set, and add contact poses if it touches objects.
44. Remove pops in the knee by refining the height of the root, or by using the stretch control on the legs very sparingly.
45. Key knee pole vectors.
46. Add micro movements on the knees to indicate when a huge amount of force is applied, especially on large creatures.
47. Make sure the knees line up with the foot in general.
48. Avoid bow-legged poses or knees pressed together.
49. Key foot roll.
50. Key toe roll, and a little bit of overlap on the foot and toes.
51. Key sliding and micro movements on the feet, even on a static character.
52. Fix any penetrations that are happening between the ground and feet.
53. Make sure all of the curves on the feet fast-in to the ground in TranslateY — we don't want the feet to slow-in to contact poses.
54. Make sure any FIK/IK switches on the legs are cleaned up nicely.
55. If you are working on a barefoot creature, key the toes splaying as the weight is applied to the foot.
56. Do an overall silhouette pass and make sure there are no unattractive slivers of light in the negative space, or messy silhouettes.
57. Take once last look at your thumbnails, and reference and compare your golden poses.
58. Watch the animation back with the lip sync moved one frame earlier to see if it improves the readability.
59. Watch the animation play backwards to see any pops or hitches in the animation that you couldn't see before.
Phew! of course on a per-shot basis, you could go on forever. hopefully this list will inspire you to create your own, and to integrate a regimented polish pass into your workflow. good luck animating!