Getting to the ASDM GUI
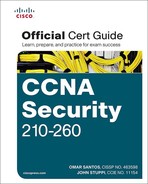
With that in place, the next thing to attempt is opening an HTTPS connection from a Windows PC (whose IP address you identified in the setup script). On the initial connection, your PC is given a digital certificate of the ASA, and unfortunately the certificate is self-signed by the ASA, and your browser will not by default trust that certificate. On a brand new ASA, you need to accept the certificate to get ASDM functionality. Later you can implement a public key infrastructure (PKI) signed certificate for the ASA. (For more information on digital certificates, see the chapter on PKI in this book.) After you accept the certificate, you are given the option of running ASDM as an applet directly from the ASA, or you can install the program on your local PC and launch it from there. Either way, when it is launched, ASDM prompts you for a username and password, which is quite interesting because you did not configure any usernames in the setup script. At this point, you just leave the username blank and supply the enable secret that was configured in the setup script. After you have authenticated, and the configuration is then downloaded from the ASA to ASDM, you are provided with the dashboard for the ASA, as shown in Figure 16-3.
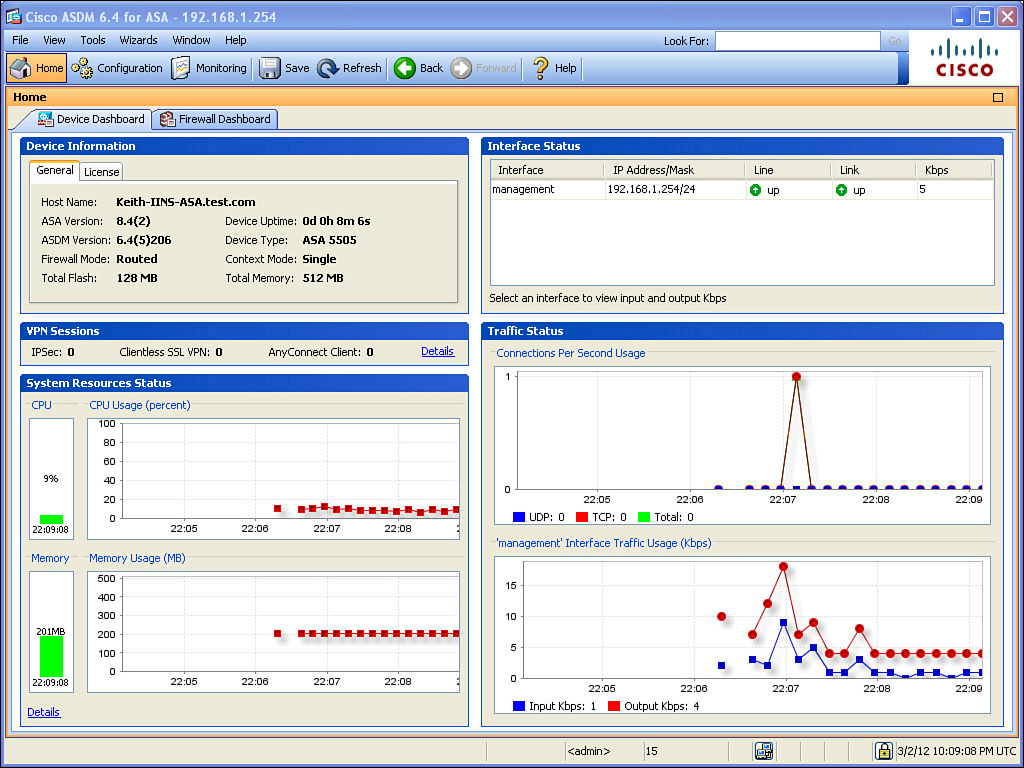
As shown in the figure, the dashboard shows the general information about the firewall, including the version of software, the model, the mode it is running in, and the memory size of flash and RAM. A tab shows current licensing information, as well. The dashboard also graphically represents information about VPN sessions, system resources, and traffic status. When you initially connect to the ASA, one of the options is to run the Startup Wizard. In our example, we chose to go directly to ASDM, but it is not too late; on the menu bar is an option labeled Wizards. By choosing that menu option and from the drop-down selecting Startup Wizard, you can launch the Startup Wizard to help you configure more of the basics to get your firewall up and running. Figure 16-4 shows the welcome screen for the wizard.
When you click the Next button to continue, you are presented with the option to configure many of the components required for a functional firewall, including the IP addresses to use, the names of the interfaces, NAT configuration, and so forth. From an instructional perspective and certification-relevancy issue, I want to walk you through the configuration manually using the GUI (instead of the wizard) so that you will both know where to go in the interface and how to configure each item.