9. Audio, Video, Photos, and Movies

In this chapter, you discover your Galaxy Note II’s audio and video capabilities, including how your Galaxy Note II plays video and music, and how you can synchronize audio and video from your desktop or laptop computer or Google Music. This chapter also covers how to take pictures and videos. Topics include the following:
→ Using Google Music for music
→ Using the Gallery app for pictures and video
→ Applying video effects
→ Enjoying videos with the YouTube app
Your Galaxy Note II is a powerful multimedia smartphone with the ability to play back many different audio and video formats. The large screen enables you to turn your Galaxy Note II sideways to enjoy a video in its original 16:9 ratio. You can also use your Galaxy Note II to search YouTube, watch videos, and even upload videos to YouTube right from your phone. Android version 4 fully embraces the cloud, which enables you to store your music collection on Google’s servers so you can access it anywhere.
Enjoying Music with the Music Application
To get the most out of music on your Galaxy Note II, you probably want to use the Play Music app, which enables you to listen to music stored on your phone as well as from your collection in the Google Music cloud. If your Galaxy Note II does not include the Play Music app, you need to install it first.
Install the Play Music App
Before installing the Play Music app, touch Apps on the Home screen and look through the list of apps. If Play Music is already installed, skip ahead to the next section.
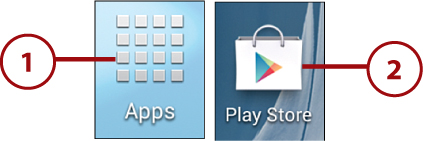
1. Touch the Apps icon on the Home screen.
2. Touch the Play Store icon.
3. Touch Apps.

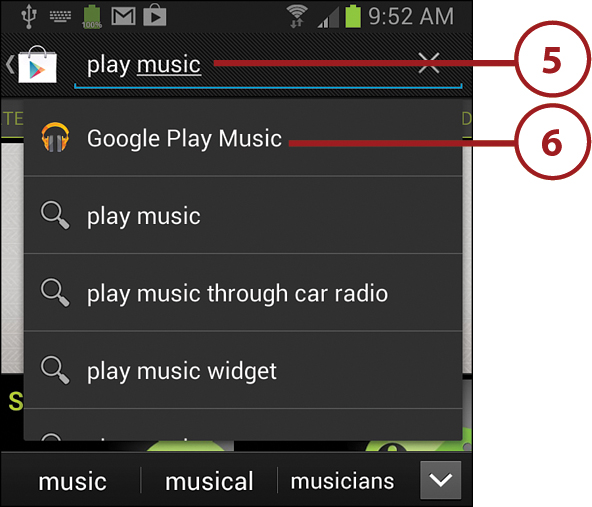
4. Touch the Search icon.

5. Type play music.
6. Touch the Google Play Music search result.
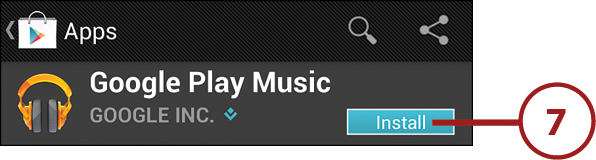
7. Touch Install.
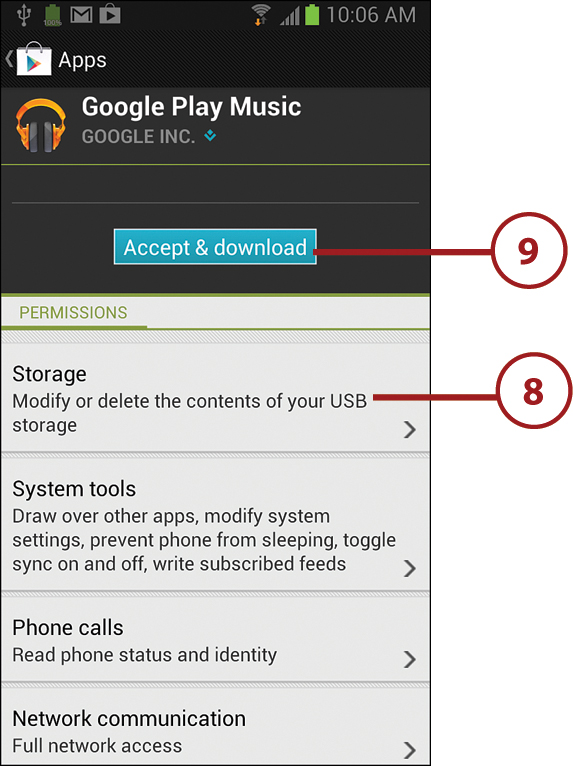
8. Read the permissions the app requires and decide whether to accept them.
9. Touch Accept & Download. Your Galaxy Note II downloads the Play Music app and installs it.
Find Music
Now that the Play Music app is installed on your Galaxy Note II, you can add some music. One way to add music is to purchase it from Google.
1. Touch the Apps icon on the Home screen.
2. Touch the Play Music icon.

3. Touch the Market icon.

4. Touch to see new releases.
5. Swipe left to see a list of music genres.
6. Swipe right to see the Top Albums list. Swipe right again from the Top Albums list to see the Top Songs list.
7. Touch to search for music.

Purchase Music
After you find a song or album you want to purchase, use the following steps to make the purchase.
Free Music
Sometimes songs are offered for free. If a song is offered for free, you see the word Free instead of a price for the song. Even though the song is free, you still need to follow the steps outlined in this section; however, the price appears as 0.
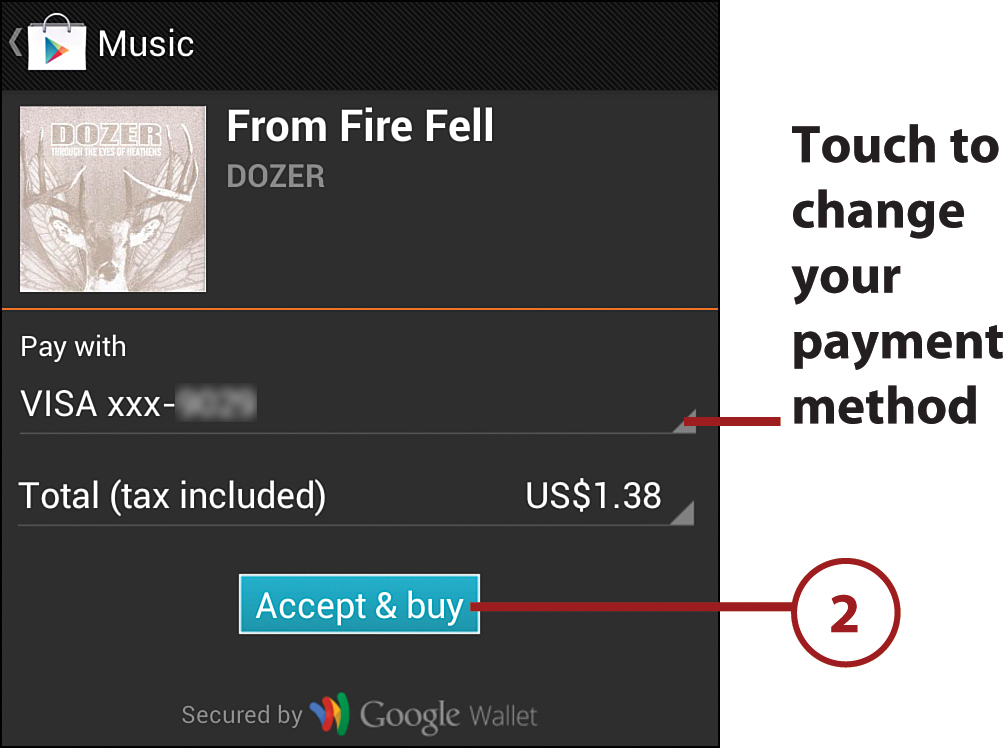
1. Touch the price to the right of the song title or album.

2. Touch Accept & Buy.
3. Touch Listen to hear your song after the purchase is complete. You can also play the song or album from within the Play Music app.

Add Your Existing Music to Google Music
You can upload up to 20,000 songs from Apple iTunes, Microsoft Windows Media Player, or music stored in folders on your computer to your Google Music cloud account by using the Google Music Manager app on your desktop computer. If you haven’t already installed Google Music Manager, please follow the steps in the “Install Google Music Manager” section in the Prologue chapter, “Getting to Know Your Galaxy Note II.”
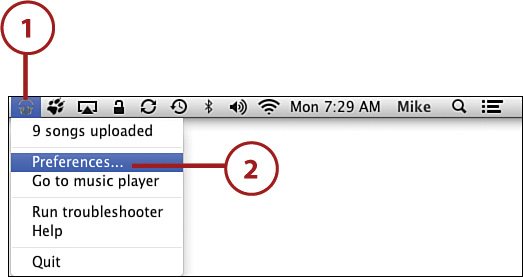
1. Click (right-click for Windows) the Google Music Manager icon. On the Mac, this icon appears in the menu bar at the top of the screen. On Windows, the icon appears in the taskbar at the bottom of the screen.
2. Choose Preferences. (On Windows, choose Options.)
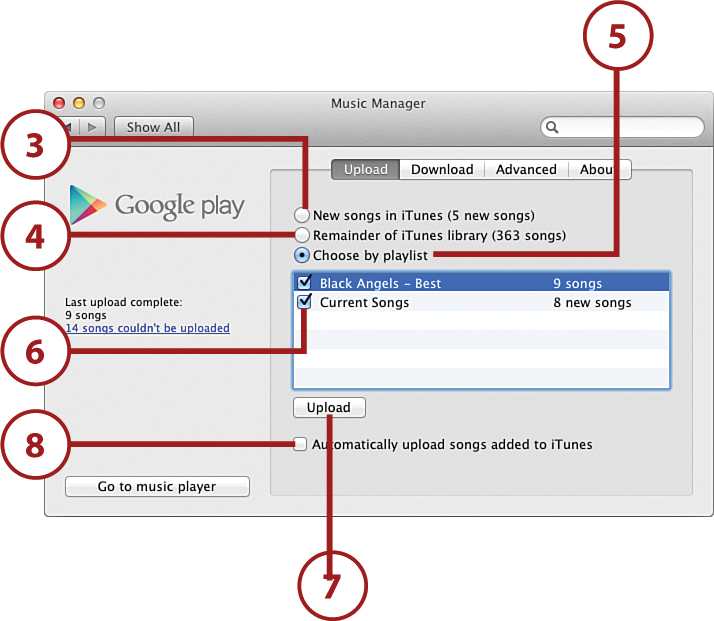
3. Click to upload new songs you have added to iTunes.
4. Click to upload the remainder of songs that have not yet uploaded.
5. Click to upload songs in certain playlists. This only works for iTunes or for Windows Media Player.
6. Choose the playlists to upload.
7. Click Upload after you have made your selections.
8. Click to allow Google Music Manager to automatically upload new songs added.
Automatic Upload
If you choose to have your music uploaded automatically in step 8, Google Music Manager continually monitors Apple iTunes, Microsoft Windows Media Player, or your Music folders to see if music has been added. If it finds new music, it automatically uploads it. After you install Google Music Manager, the app runs continuously, enabling it to detect music you add to iTunes, Windows Media Player, or your Music folders.
What If I Don’t Have iTunes or Windows Media Player?
If you don’t have or don’t use Apple iTunes or Microsoft Windows Media Player to store and play your music, Google Music Manager can use folders on your computer to upload music from. Click the Advanced tab, click Change, and select either Music Folder, to use the folder on your computer called Music, or Other Folders to let you choose folders where you store your music. Click Add Folder to add a new folder to the list.

Can I Download Music to My Computer?
You can download your entire music collection from Google Music to your computer, or just download music you have purchased on your Galaxy Note II. While in Google Music Manager Preferences, click Download.

Use the Music Application
Now that you have some music synchronized to Google Music, it’s time to take a look at the Google Music app on your Galaxy Note II.
1. Touch the Apps icon on the Home screen.
2. Touch the Play Music icon on the Apps screen.

Swiping Between Tabs
As you use the following steps, instead of touching items such as Albums and Artists in the Navigation bar, you can swipe left and right to move between these categories instead.
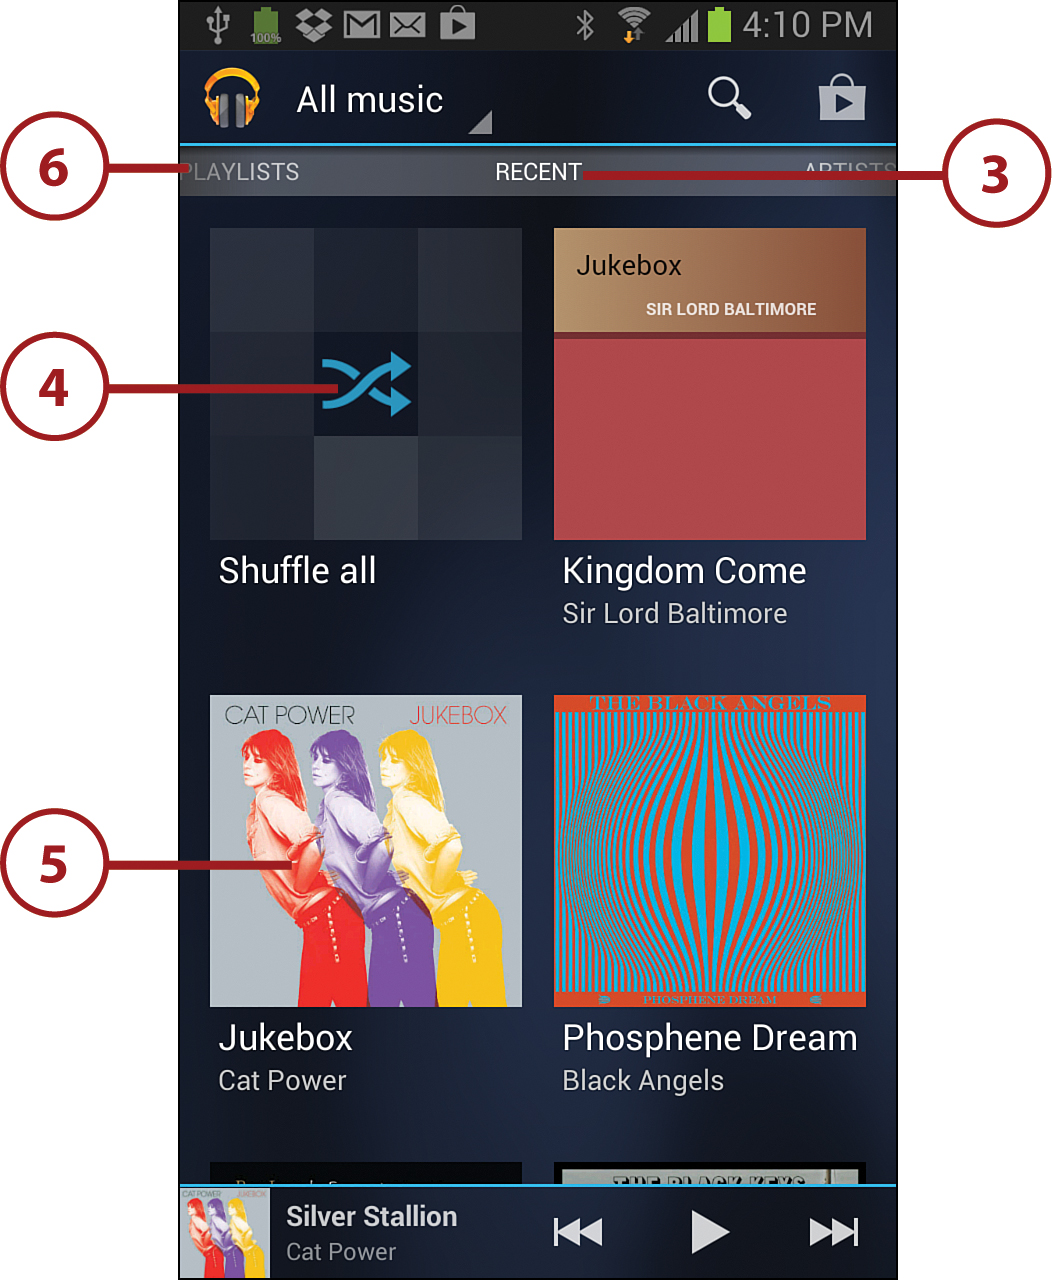
3. Touch Recent in the Navigation bar to display music you have recently added or played.
4. Touch Shuffle All to shuffle the songs into a random order and start one playing.
5. Touch an album to display its contents. You can then touch a song to start it playing.
6. Touch Playlists in the Navigation bar to display the playlists you have synchronized to your Galaxy Note II. Read more about how to do that later in the chapter.
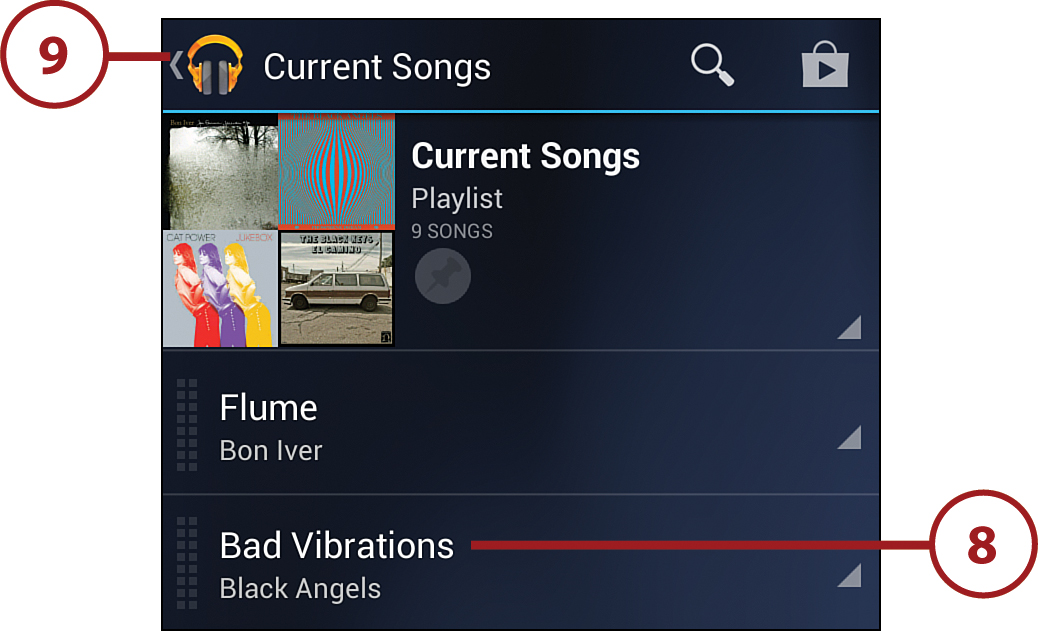
7. Touch a playlist to display its contents.

8. Touch a song in the playlist to start it playing.
9. Touch to return to the Playlists screen. From here, you can navigate to another category.
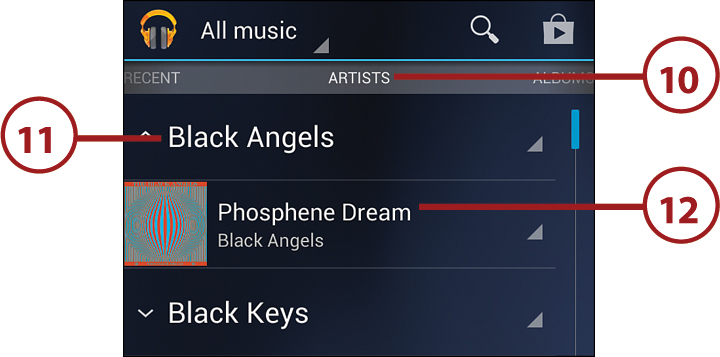
10. Swipe right or touch Artists in the Navigation bar to display your music listed by artists.
11. Touch an artist’s name to show albums by that artist.
12. Touch an album to display the songs it contains. You can then touch a song to play it.
13. Swipe right or touch Songs to display the list of songs by title. This view shows all songs by all artists.
14. Touch a song to play it.

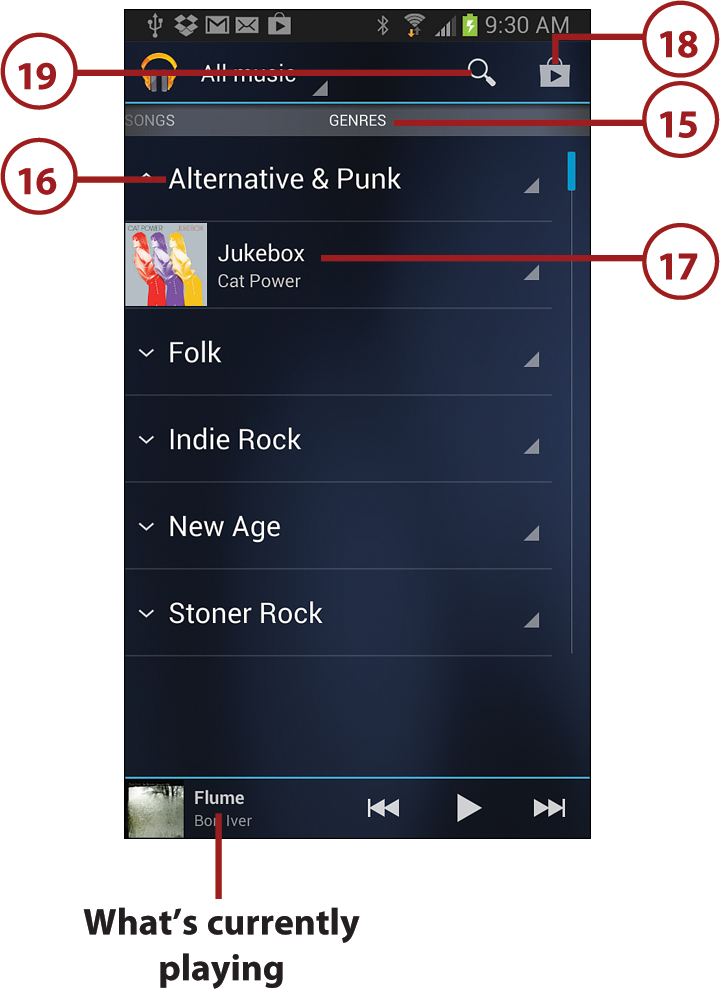
15. Swipe right or touch Genres to display the list of genres for your music.
16. Touch a genre to display the albums it contains.
17. Touch an album to display its contents. You can then tap a song to start it playing.
18. Touch to get music from the Play Store.
19. Touch to search for music in your collection.
Control Playback
While playing music, you can control both how the music plays and the selection of music that plays.
1. If all the controls shown here do not appear on screen, touch the album picture to display the controls. The Play Music app automatically hides the controls after a few seconds of you not using them.
2. Touch once to go back to the start of the current song. Touch again to skip back to the previous song in the album, playlist, or shuffle.
3. Touch to skip ahead to the next song in the album, playlist, or shuffle.
4. Touch to pause the song. The button turns into the Play button when a song is paused. Touch again to resume playing a paused song.
5. Touch to indicate you like the song. The thumbs-up icon turns blue to indicate you have applied the rating. Touch again to remove the rating. The Google Music app also adds the song to the “Thumbs Up” playlist.
6. Touch to indicate you do not like the song. The thumbs-down icon turns blue to indicate you have applied the rating. Touch again to remove the rating.
7. Touch and drag to change the position in the song.
8. Touch to enable or disable song shuffling. When Shuffle is enabled, songs in the current playlist, album, or song list are randomly played.
9. Touch to display the list of songs in the album. The list shows only the songs you have purchased or downloaded.
10. Touch to enable repeating. Touch once to repeat all songs, touch again to repeat the current song only, and touch a third time to disable repeating.


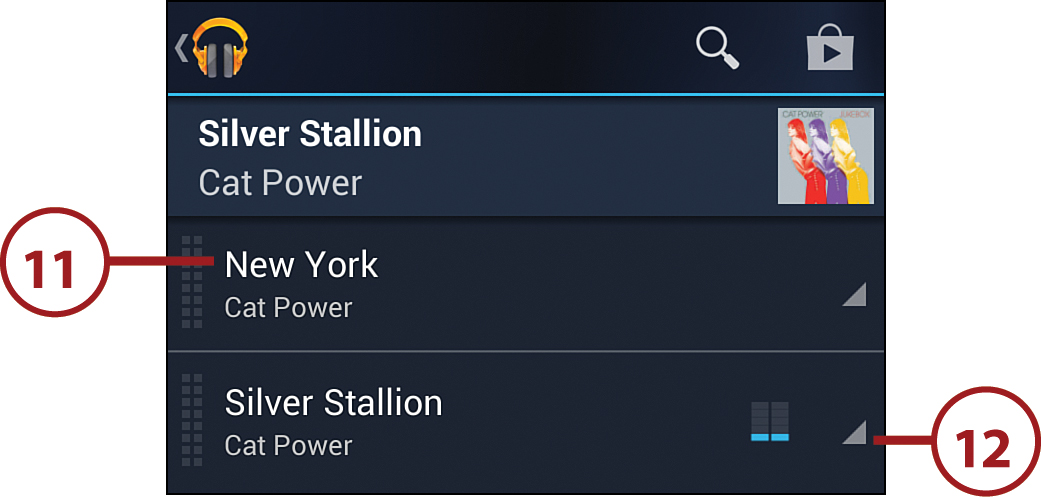
11. Touch a song to play it.
12. Touch to display a menu of actions you can take with the song.
13. Touch to play the song now.
14. Touch to play the song next, after the current song finishes.
15. Touch to make an instant mix based on the song.
What Is an Instant Mix?
If you are playing a song and choose to create an instant mix as mentioned in step 15, the Google Music app creates a new playlist and adds songs to it that are similar to the one you are currently playing. The name of the playlist is the name of the current song plus the word mix. For example, if you are playing the song “Trail” and choose to create an instant mix, the playlist is called “Trail Mix.”
16. Touch to add the song to an existing playlist or create a new playlist using this song.

17. Touch to remove the song from the play queue.
18. Touch to locate more songs by the artist.
19. Touch to shop for more songs by the artist.
20. Touch to delete the song from your library on the Galaxy Note II.
21. Touch to display the album’s art instead of the song list.

Work and Listen to Music
You don’t have to keep the Play Music app displayed while you are playing music. Instead, you can switch back to the Home screen and run any other app but still have the ability to control the music.
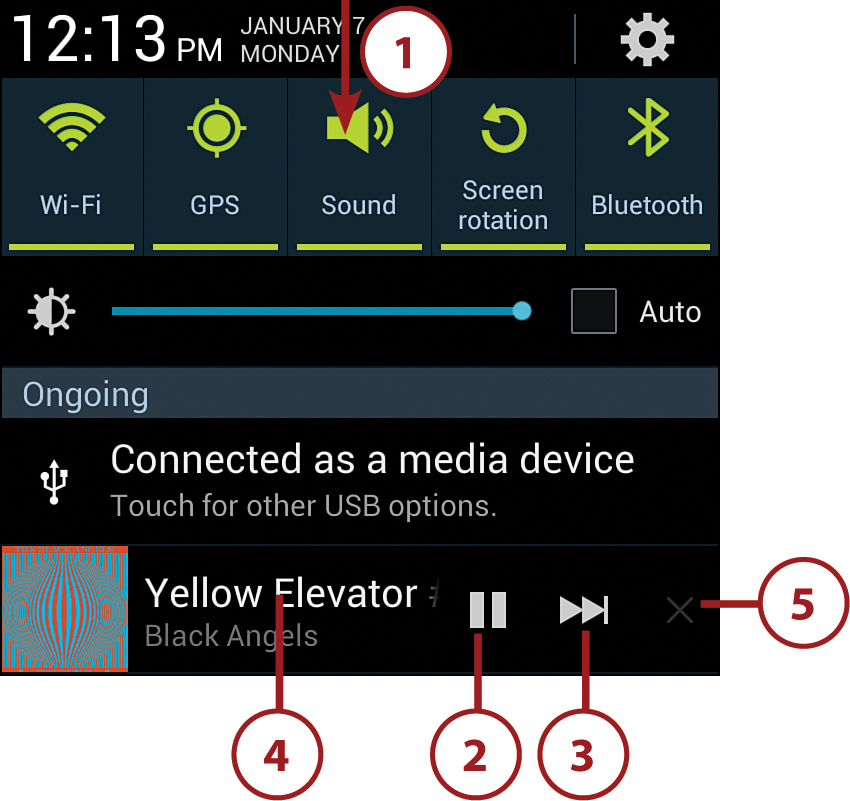
1. Pull down the Notification bar.
2. Touch to pause the song.
3. Touch to skip ahead to the next song in the list, album, or playlist.
4. Touch the song title to open the Google Music app for more control.
5. Touch to stop playing the song and remove the playback control from the Notification bar.
What If I Get a Call?
If someone calls you while you are listening to music, your Galaxy Note II pauses the music and displays the regular incoming call screen. After you hang up, the music continues playing.
Work with Playlists
Playlists can be a great way of listening to music, enabling you to group together related songs or simply those you want to hear in a particular sequence. On your Galaxy Note II, you can create new playlists, add songs to existing playlists, rename playlists, and change the order of the songs they contain.
Create a New Playlist on Your Galaxy Note II
1. Using the techniques described earlier in this chapter, navigate to a song you want to add to the new playlist.
2. Touch to open the dialog of actions. You can also touch and hold the song name to open the dialog.
3. Touch Add to Playlist.

4. Touch New Playlist.
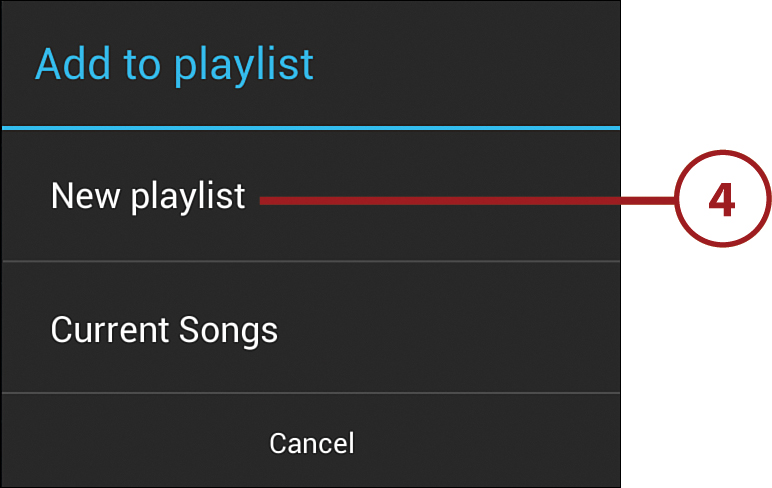
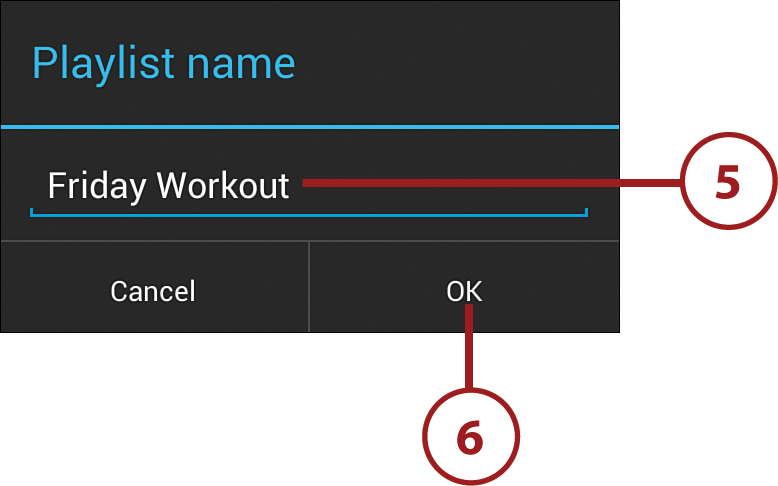
5. Type the name for the new playlist.
6. Touch OK.
Add a Song to an Existing Playlist
1. Using the techniques described earlier in this chapter, navigate to a song you want to add to the new playlist.
2. Touch to open the dialog of actions. You can also touch and hold the song name to open the dialog.
3. Touch Add to Playlist.

4. Touch the playlist you want to add the song to.

Rename a Playlist
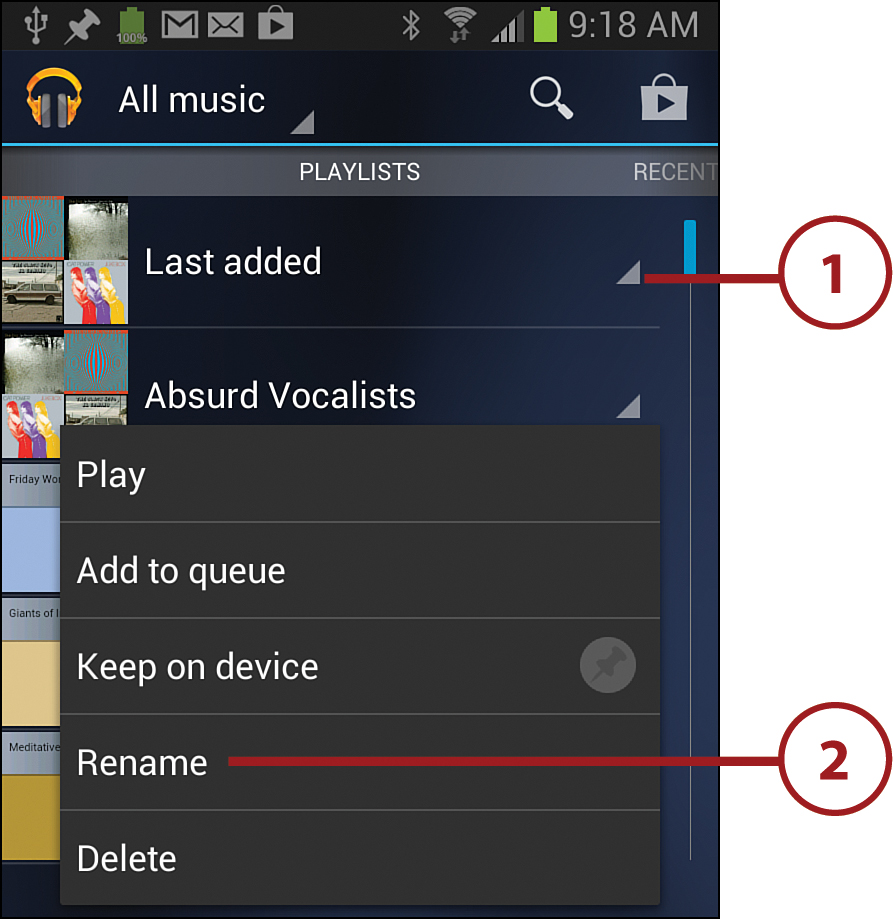
1. Touch to open the dialog of actions.
2. Touch Rename.
Deleting a Playlist
When you no longer need a playlist, delete it. On the Playlists screen, touch and hold the playlist to display the dialog of actions and then touch Delete. In the confirmation dialog, touch OK.
3. Type the new name for the playlist.
4. Touch Rename.


2. Touch and hold the dotted handle to the left of the song you want to move. Drag the song up or down until it is in the right place and then release it.

Listen to Music with No Wireless Coverage
If you use Google Music and store your music online, your Galaxy Note II streams the music over the cellular or Wi-Fi network when you play the music. If you know you are going to be without a signal but still want to listen to your music, you need to store it on your Galaxy Note II.
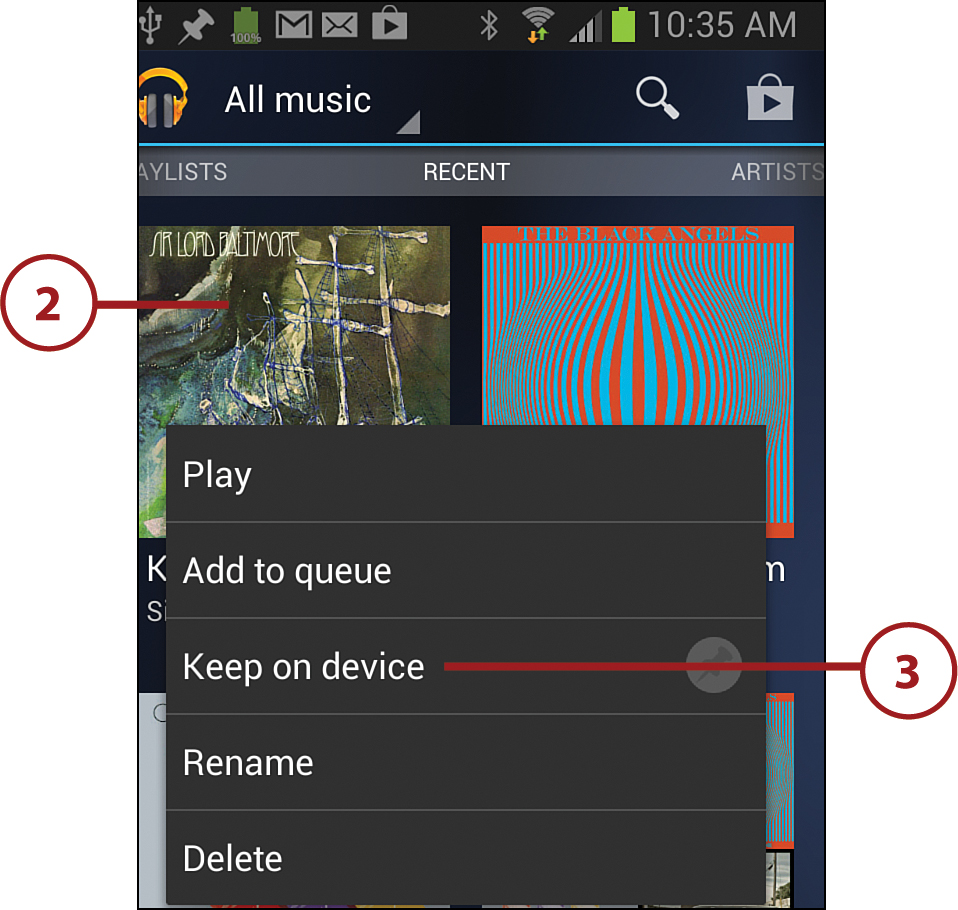
1. Using the techniques discussed earlier in this chapter, go to the music you want to store on your Galaxy Note II.
2. Touch and hold the item to display the dialog of actions.
3. Touch Keep on Device.
Playing and Sharing Videos
The Gallery app enables you to view pictures and video; you can also share pictures and video with people on Facebook, or via MMS, Bluetooth, YouTube, and email. This section explains how you can view and share videos. Later in this chapter, you find out how to take pictures and share them.
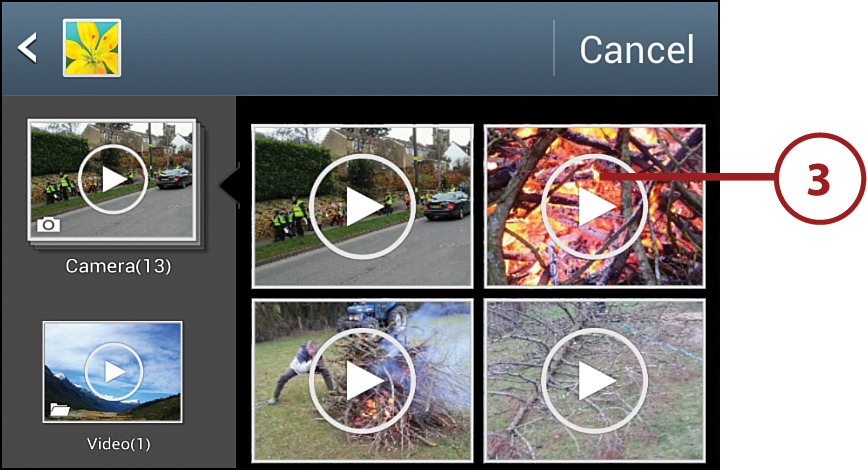
1. Touch the Gallery icon to launch the Gallery app.

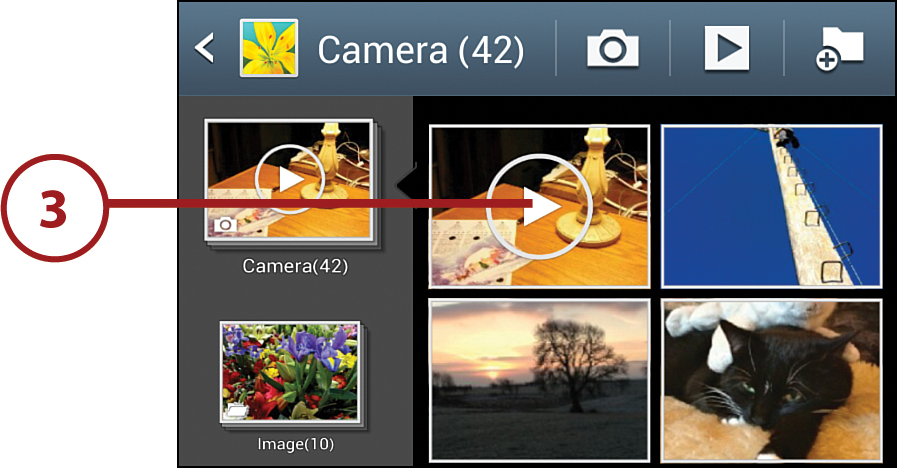
2. Touch an album to open it, revealing the pictures and videos it contains.

3. Touch a video to start it playing. Videos have a little Play icon on them.
4. Touch the screen while the video is playing to reveal the video controls. If you do not use the controls, they disappear after a few seconds.
5. Touch to pause or unpause the video.
6. Drag the slider to scrub quickly forward and backward.
7. Touch to skip to the end of the video.
8. Touch to return to the beginning of the video.
9. Touch to switch between viewing the video full screen and viewing it as best fits the Galaxy Note II’s screen.
Changing the Orientation for a Video
When watching a video shot in landscape orientation, rotate your Galaxy Note II from portrait orientation to landscape orientation so you can enjoy the video full screen.
10. Touch to display the video in a pop-up window. You can then switch to another screen and continue to watch the video as you work or play.

11. Touch to pause or restart the video. When you touch, an X appears in the upper-right corner.
12. Touch to close the pop-up video window.

Share Videos
From the Gallery app, you can share small videos with other people.
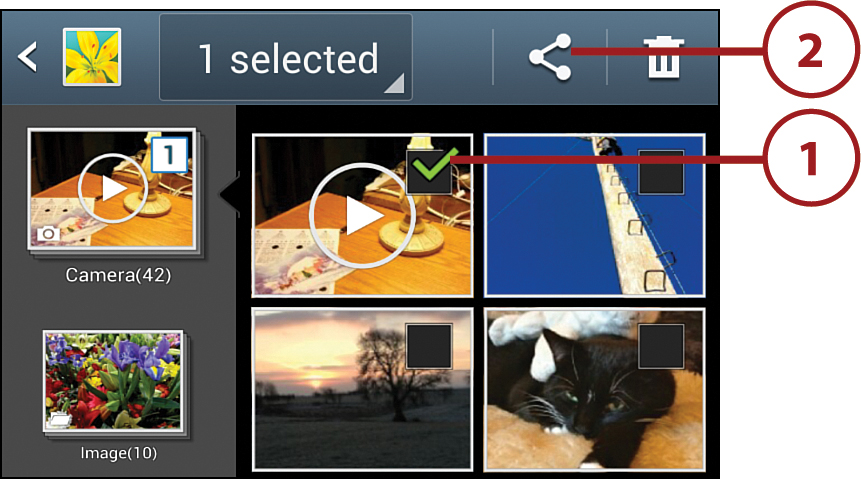
1. Touch and hold the video you want to share. After a moment, a green check mark appears on the video.
2. Touch to open the Share Via dialog.
3. Scroll up if necessary to display other methods of sharing.
4. Touch a method for sharing the video.

Sharing Only Small Videos
It is best to share only small videos from your Galaxy Note II. Even when using email, try to share videos no larger than 10MB, which is only two or three minutes of high-quality video. Otherwise, your videos will be too large to transfer successfully.
Bluetooth Sharing Might Fail
Many phones do not accept incoming Bluetooth files, but devices like computers do. Even on computers, the recipient must configure her Bluetooth configuration to accept incoming files.
Share a Video on YouTube
If you have not previously set up your YouTube account on your Galaxy Note II, you are prompted to do so before you can upload your video.
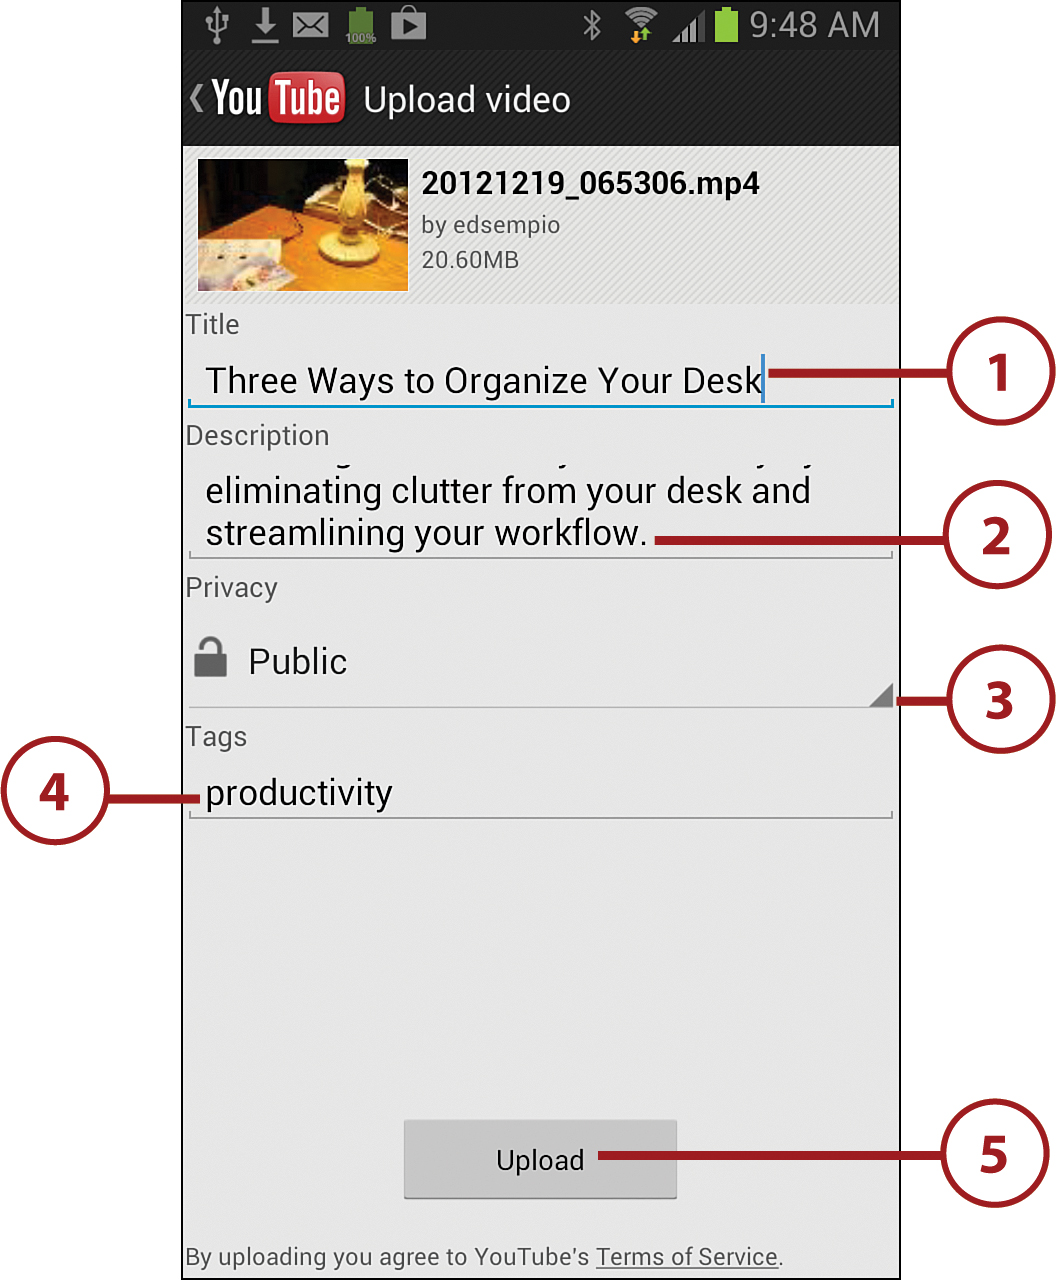
1. Enter the title of your video.
2. Enter a description of your video.
3. Select whether to make your video public for everyone to see or whether to keep it private.
Sharing a YouTube Video Only with Specific People
As well as the Public setting and the Private setting, the Privacy pop-up list provides an Unlisted setting. Choose Unlisted when you need to share the video with some people but not with everyone. The video then does not appear in the public view of your YouTube account, but you can send the URL for the video to anyone you want to view it.
4. Enter any tags for your video. Tags are keywords that help people find videos by searching.
5. Touch Upload.
Share Video on Facebook
If you have not previously set up a Facebook account on your Galaxy Note II, you are prompted to do so before you can upload your video.
1. Enter a description of your video.
2. Touch Post.

Delete Videos
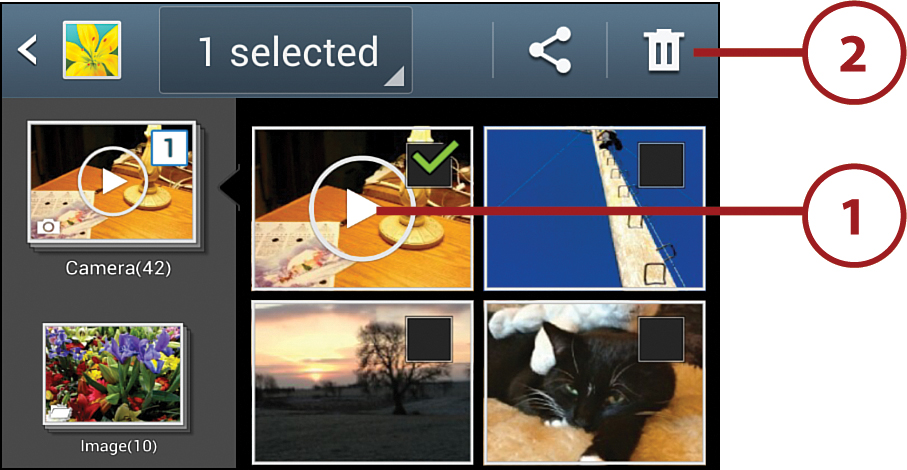
1. Touch and hold the video you want to share. After a moment, a green check mark appears on the video.
2. Touch to delete the video.
3. Touch OK.

Taking Photos and Videos with the Camera App
The Camera app enables you to take still photos and record videos.
Take Photos
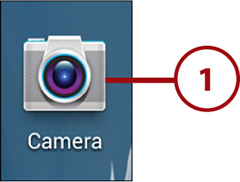
1. Touch to launch the Camera app.

2. Make sure the switch is set to the still camera position. If it isn’t, slide the switch right to the still camera position to switch from the video camera to the still camera.
3. Touch to switch from the rear camera to the front camera so you can take photos of yourself. The front camera is lower resolution than the rear camera, but it works well for capturing candid self-portraits.
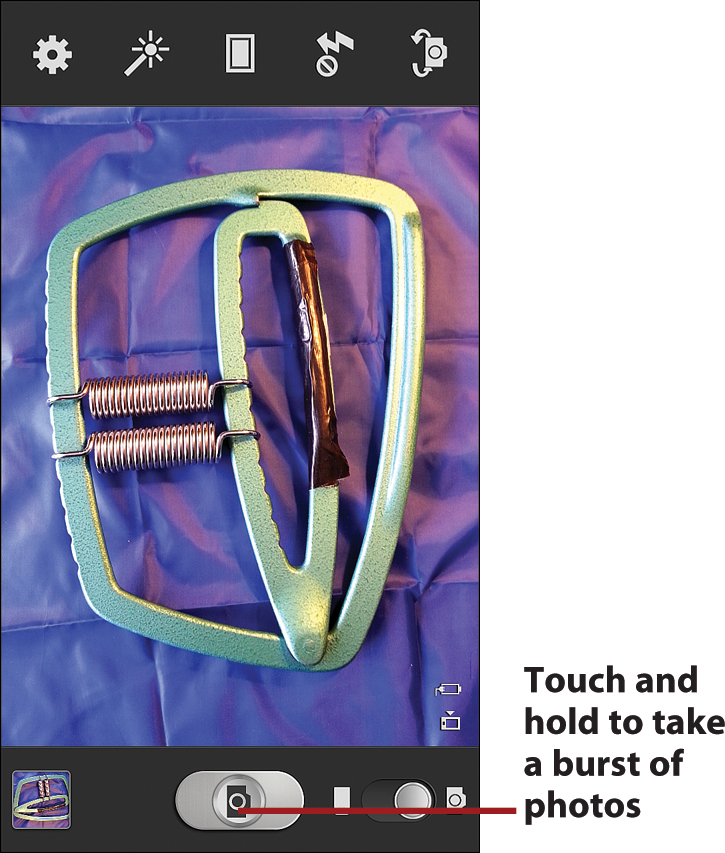
4. Touch to take a photo.

Instead of taking a single shot, the Camera app can take a burst of photos. This feature is great when you do not have time to compose your photo perfectly or your subject is moving. To take a burst of photos, touch and hold the shutter release.
Change Camera Settings
You can get good photos by using your Galaxy Note II as a point-and-shoot camera, as described in the previous section. But you can get photos by changing settings to harness the full power of the Camera app.
1. Touch to change the flash setting among Off, On, and Auto Flash.
Making the Most of the Flash
Choose the Off setting for the flash when you need to take photos where the flash would be disruptive. Choose the On setting when you need to light the foreground of a shot even though the rest of the scene is amply lit—for example, to light your subject’s face in front of a bright background. Choose the Auto setting for general use.
2. Touch to change the Shooting mode setting among Single Shot, Best Photo, Best Faces, Face Detection, Panorama, Share Shot, HDR, Buddy Photo Share, Beauty, Smile Shot, and Low Light.

Sharing Your Photos as You Take Them
Share Shot is a feature for sharing photos with other Samsung phones via a Wi-Fi Direct network. After you turn on Share Shot, your Galaxy Note II immediately shares photos you take to participating phones.
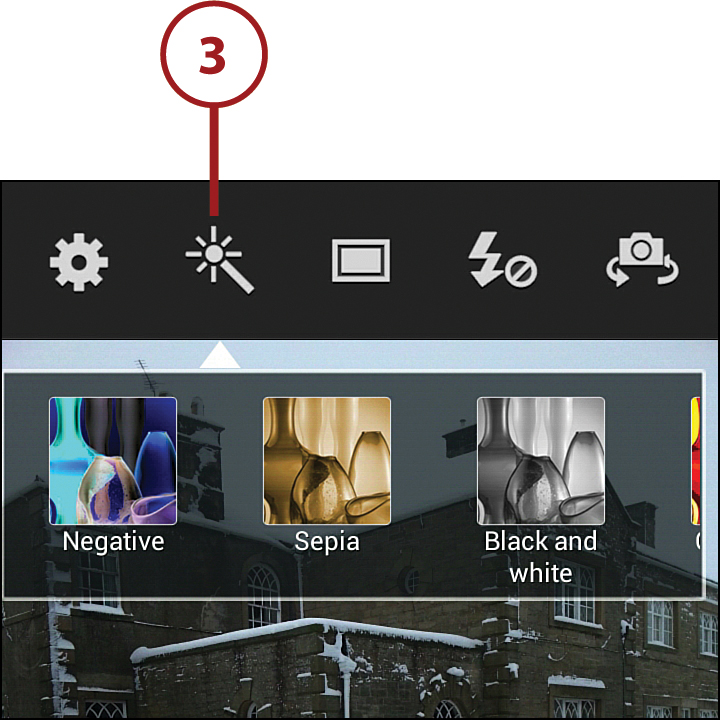
3. Touch to apply an effect such as Negative (reversed colors), Sepia, or Black and White to the photos you take. Choose No Effect when you want to turn off the effect.
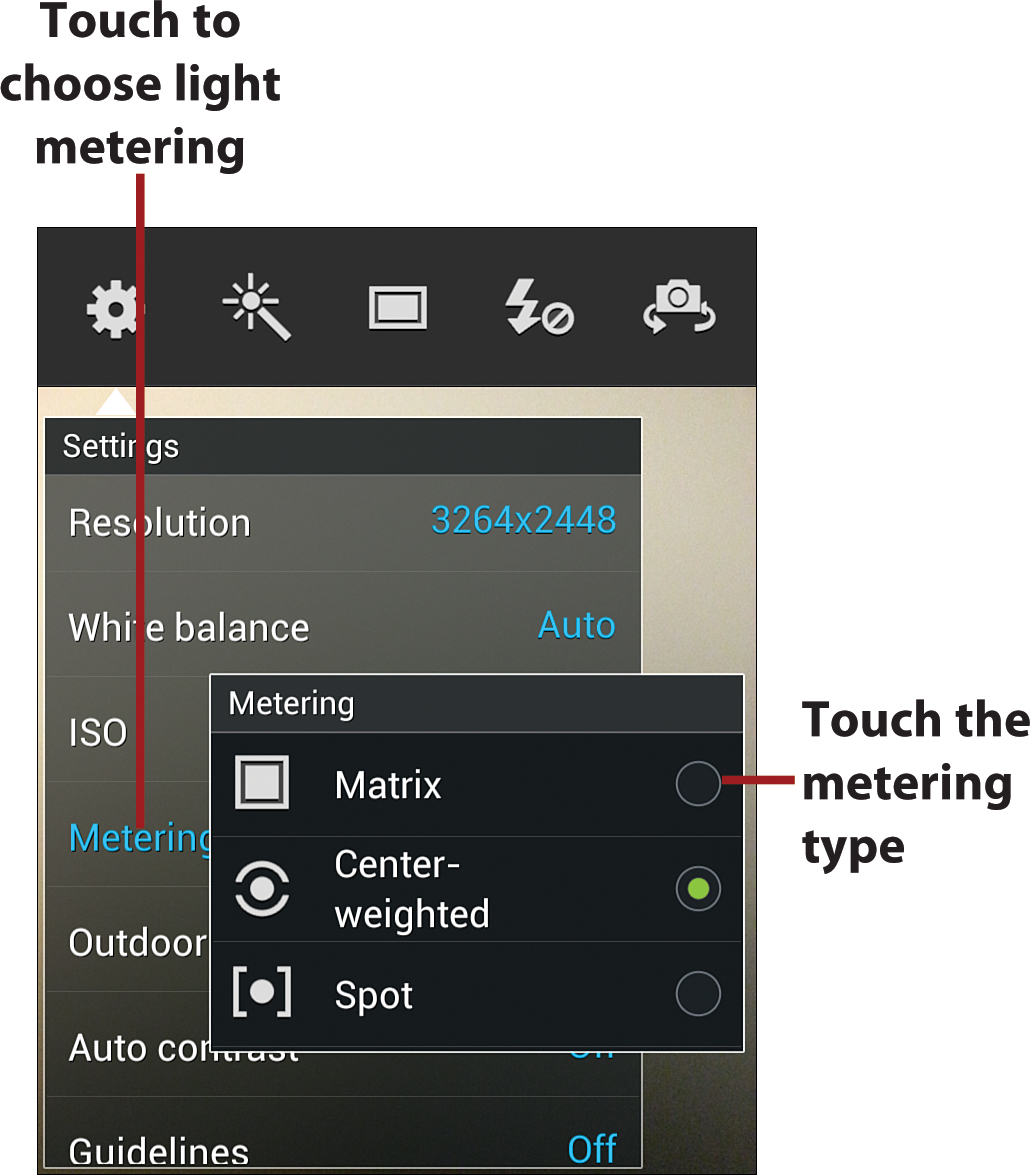
4. Touch to choose further settings, such as Anti-Shake, GPS Tag, Resolution, and White Balance. These settings include the ones whose shortcuts appear at the top of the screen.

Adjusting the Light Metering for Your Photos
By default, your Galaxy Note II uses center-weighted light metering, giving most importance to the light conditions in the center of the photo. Open the Metering dialog and choose Spot instead to base the light metering on the spot you touch in the frame. Choose Matrix to base the metering from samples across the entire frame.
View the Photos You Take
After taking photos, you can quickly view the photos you have taken, mark them as favorites, share them with other people, or simply delete them.
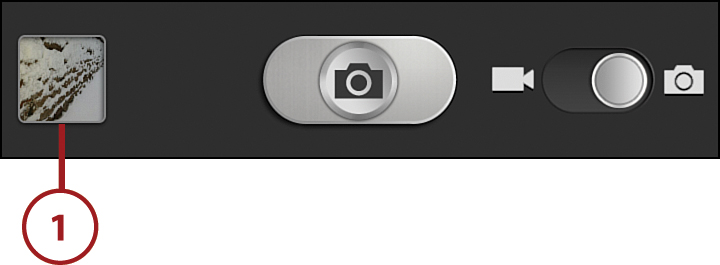
1. Touch to view the last photo you took.
Zooming In and Out on Your Photos
When viewing a photo, you can zoom in by placing two fingers on the screen and pinching outward or by double-tapping on the area you want to expand. Pinch inward or double-tap again to zoom back out.
2. Touch to display the onscreen controls and the row of thumbnails. They disappear after a few seconds of not being used.
3. Touch to mark the photo as a favorite.
4. Touch a thumbnail to display its photo; scroll the thumbnails first if necessary. You can also swipe left from the photo displayed; after that, you can swipe either left or right.

5. Touch to share the photo. In the Share Via dialog, touch the means of sharing, and then provide any information needed—for example, the recipient for a photo you share via email.
6. Touch to delete the photo and then touch OK in the confirmation dialog.
7. Touch to return to the Camera app.

Record Videos with the Camera App
Recording videos with the Camera app is even easier than taking still photos because there are fewer options to choose.
1. Touch to launch the Camera app.
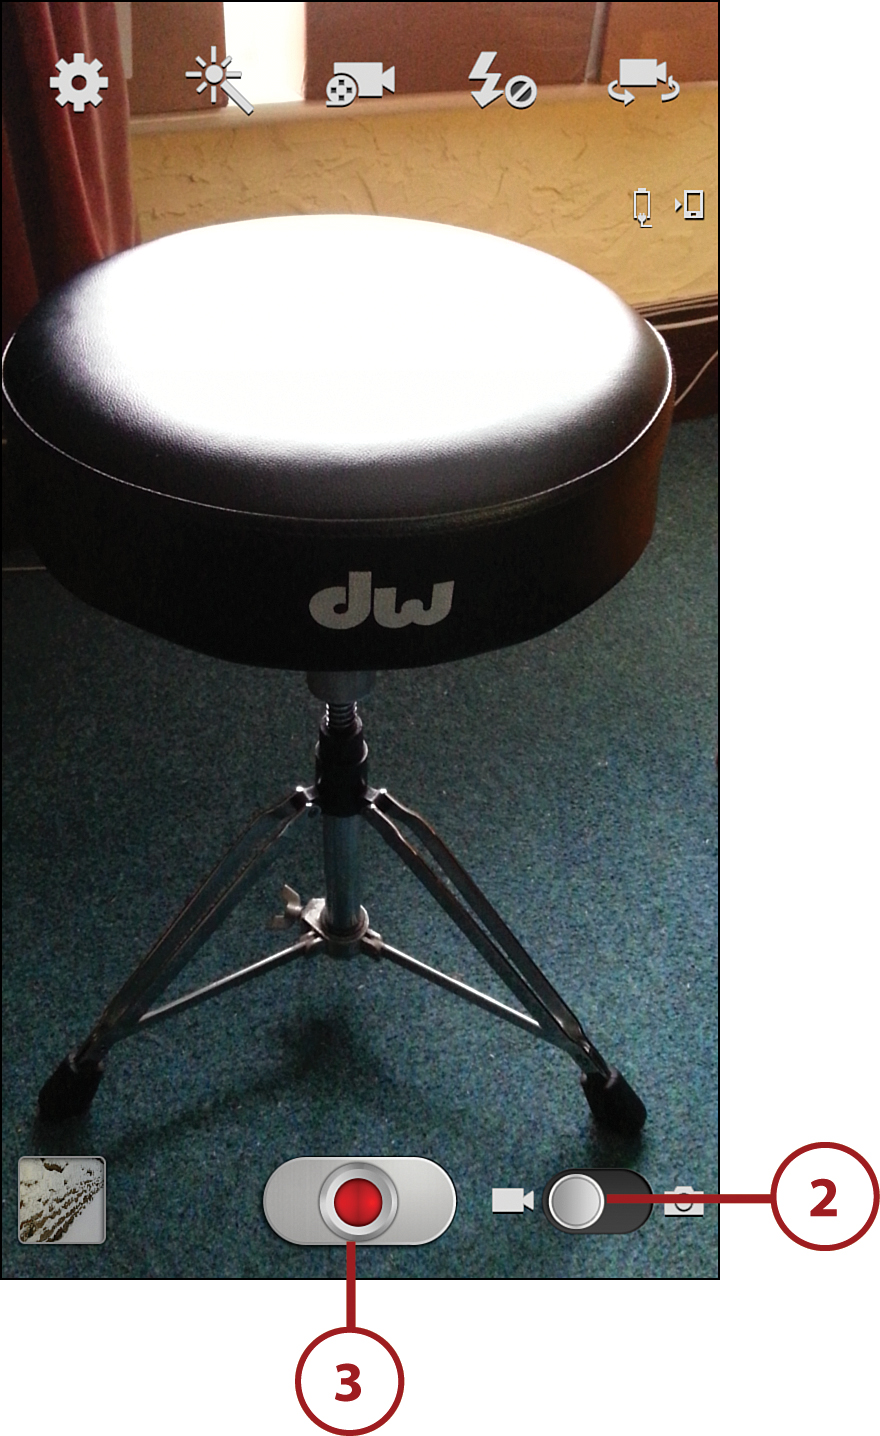
2. Slide the switch from the still camera position to the video camera position.
3. Touch to start recording video. Touch the icon again to stop recording.
Using Automatic and Manual Focusing
While the Camera app is recording video, it automatically adjusts the focus for the object in the center of the screen. If you need to focus on another part of the screen, touch it.
Change Video Settings
Before you record a video, you can change the video settings to control how the Camera app records the video.
1. Touch to switch from the rear camera to the front camera. Touch again to switch back.
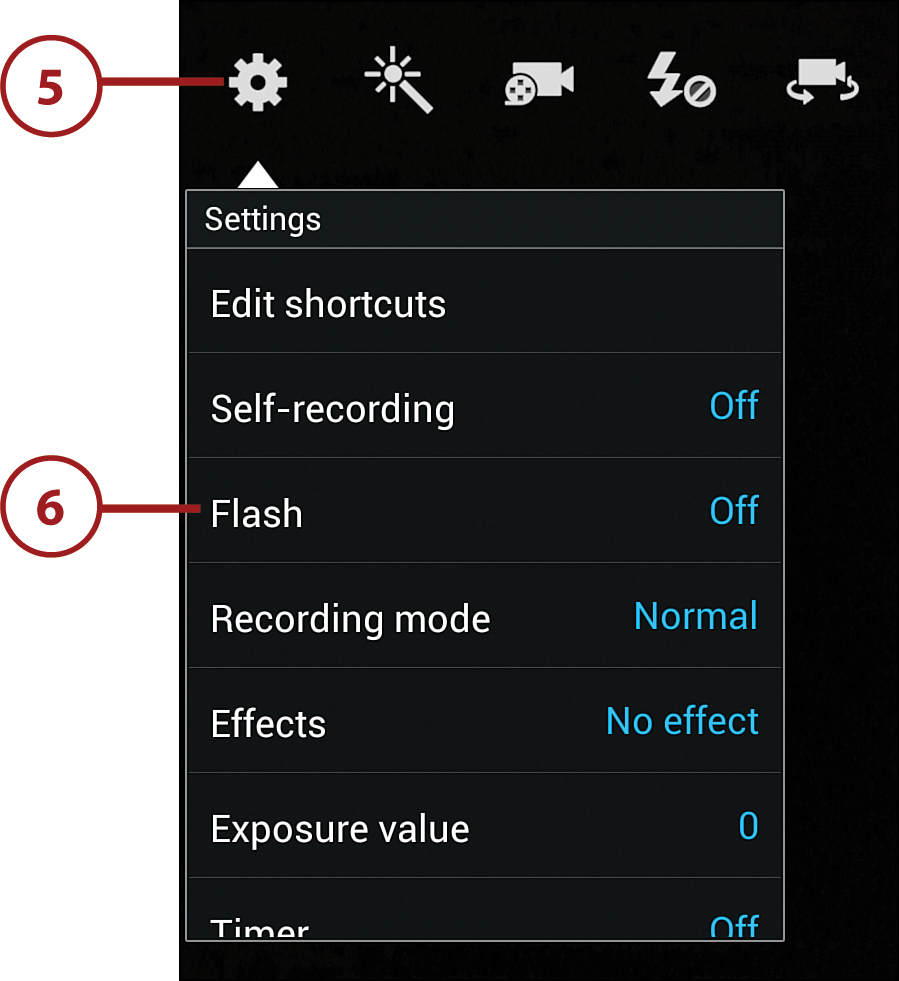
2. Touch to turn the flash on or off.
3. Touch to display the Recording Mode dialog and then touch Normal, Limit for MMS, Slow Motion, or Fast Motion, as needed.
4. Touch to apply effects—such as Black and White, Cartoonify, or Washed Out—to the video you shoot.

5. Touch to see the full list of video settings and then scroll up or down as needed.
6. Touch a setting to display options for it and then touch the option you want.
Enjoying Videos with the YouTube App
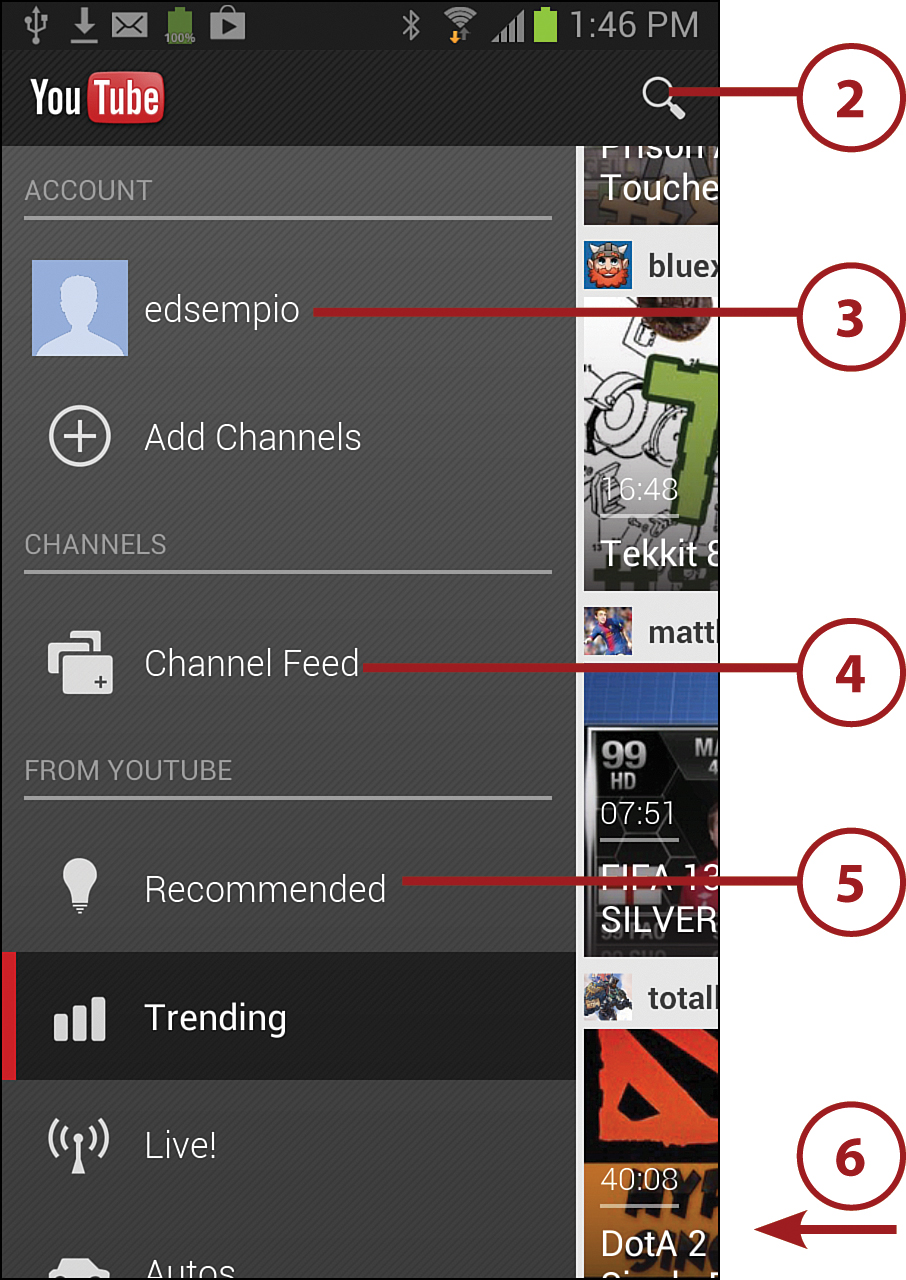
Your Galaxy Note II comes with a YouTube app that enables you to find and watch videos, rate them, add them to your favorites, and share links with other people. The app even enables you to upload your own videos to YouTube.
2. Touch to search YouTube using keywords.
3. Touch your account name to see your account details.
4. Touch to see your YouTube channel (if you have one). Your channel contains the videos you have uploaded to YouTube.
5. Touch a category in the From YouTube list to browse videos by category.
6. Swipe left to close the Account pane and browse the videos in your chosen category full screen.
7. Touch a video to see more information about it and play it.

Play a Video
While playing a YouTube video, you can rate the video, read comments about it, or share it with other people.
1. Touch the video to display the onscreen controls for a few seconds.
2. Touch to start or pause the video.
Viewing a Video Full Screen
Rotate your Galaxy Note II into Landscape mode to see the video full screen. Return your Galaxy Note II to Portrait mode to restore the previous view.
3. Drag to scrub forward or backward through the video.
4. Touch to share the video’s link (its URL) via apps such as Gmail, Facebook, or Twitter.
5. Touch to see information about the video, including who uploaded it, the video title, description, and how many times it has been viewed.
6. Touch to see YouTube videos that are related to the video you are watching. YouTube finds videos that are related because of content and keywords.
7. Touch to comment on the video you are watching and read other people’s comments.
8. Touch to see the YouTube channel of the person who uploaded the video.
9. Touch to like the video.
10. Touch to dislike the video.
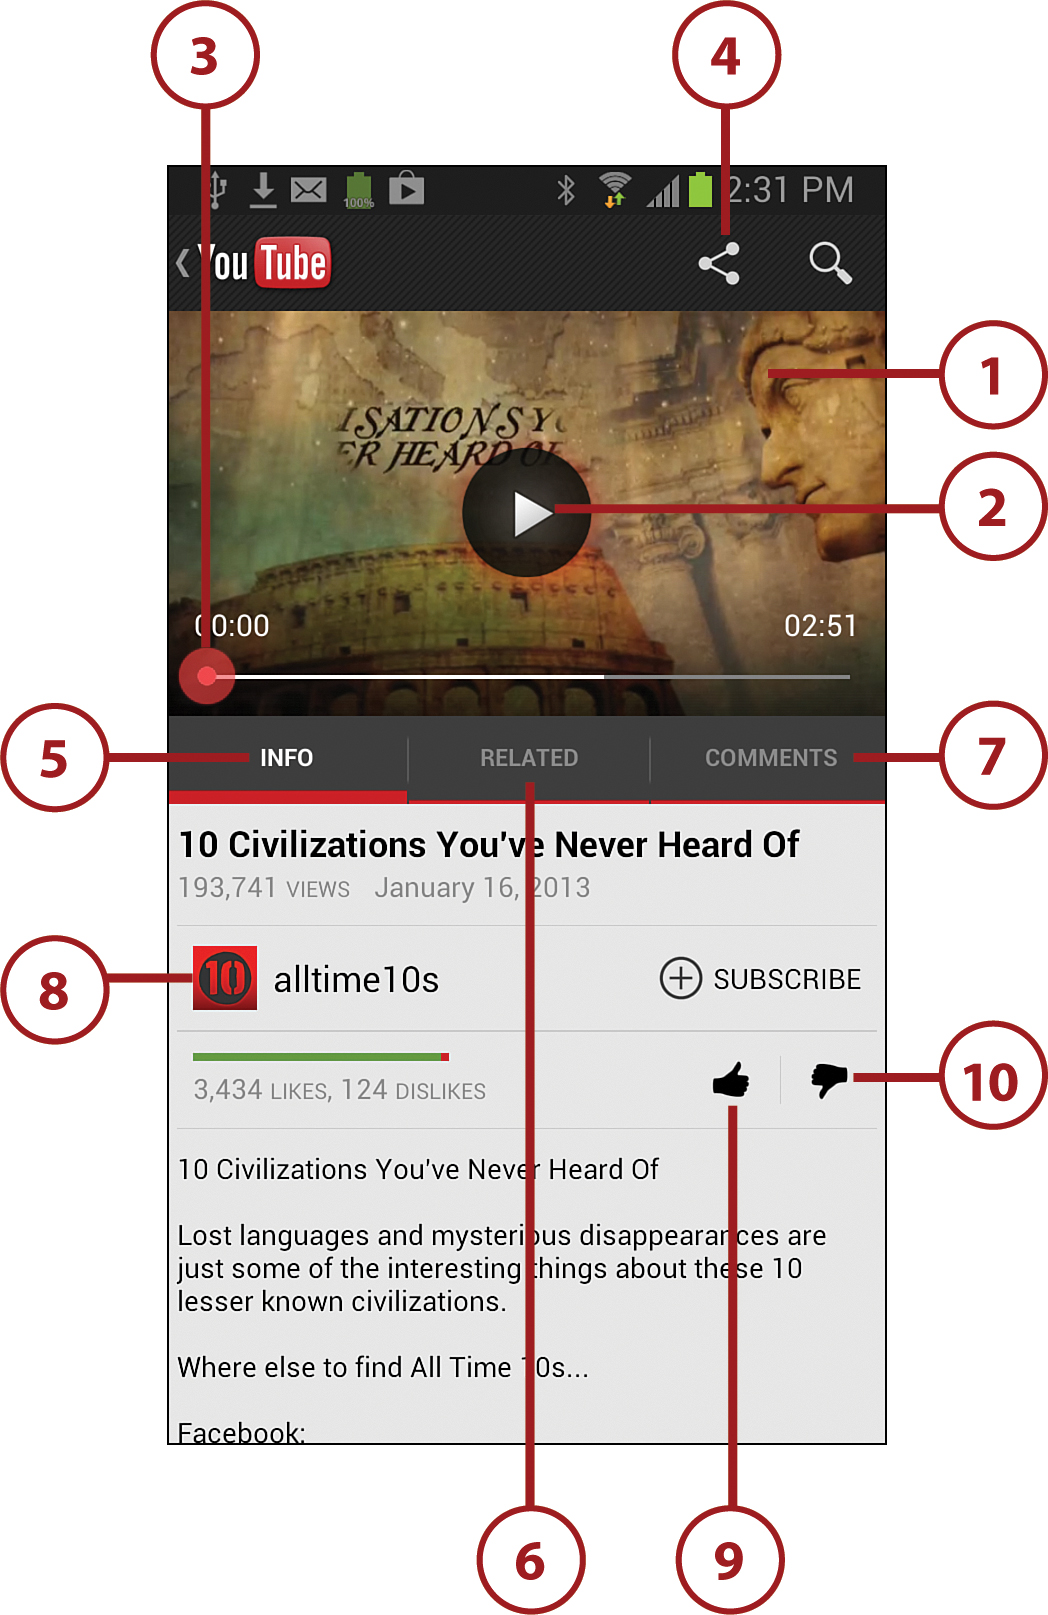
11. Touch the Menu button to display the menu, which contains further options.
12. Touch to add the video to your Watch Later list, your YouTube Favorites list, or another playlist.
13. Touch to like the video.
14. Touch to dislike the video.
15. Touch to add the video to your YouTube TV list.
16. Touch to copy the YouTube video link to the Galaxy Note II’s clipboard. You can then paste it into text in any app—for example, email.
17. Touch to flag the video as inappropriate.
18. Touch to check or change your YouTube settings. See the next section for details.
19. Touch to send feedback to YouTube, either about this video or in general.
20. Touch to open your browser to help screens on using YouTube.

Change YouTube Settings
To get more out of YouTube, you might want to change your settings. Your options include choosing whether to watch high-quality videos on cellular connections, clearing your YouTube search history, and enabling the preloading of items on your subscriptions list or your Watch Later list.
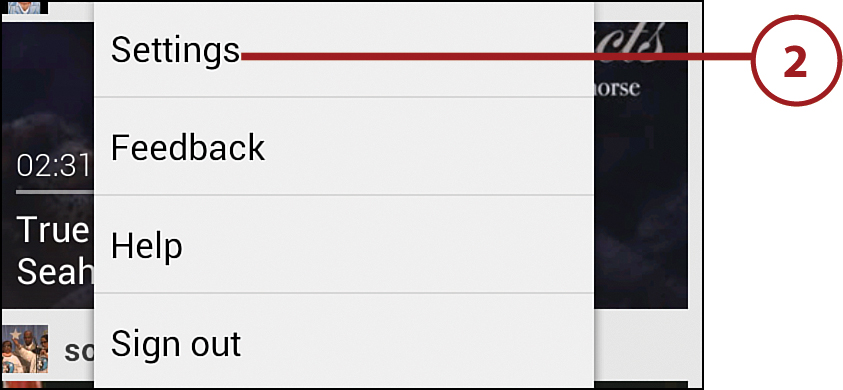
1. From within the YouTube app, touch the Menu button.
2. Touch Settings.
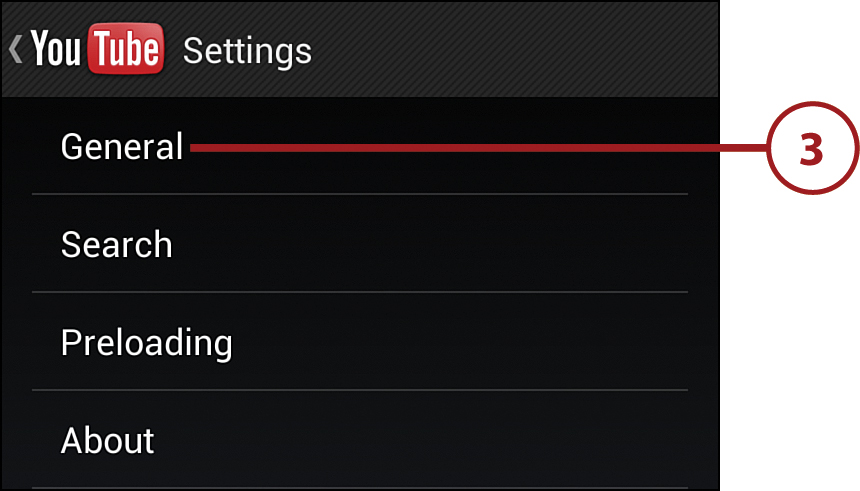
3. Touch General.
4. Touch to enable or disable always starting videos in High Quality mode. The video might take longer to start playing, and it uses more data in High Quality mode.
5. Touch to set the size of the font used when a video has captions.
6. Touch to choose when your Galaxy Note II uploads videos to YouTube. Your choices are Only When on Wi-Fi, and On Any Network.
7. Touch to return to the main Settings screen.

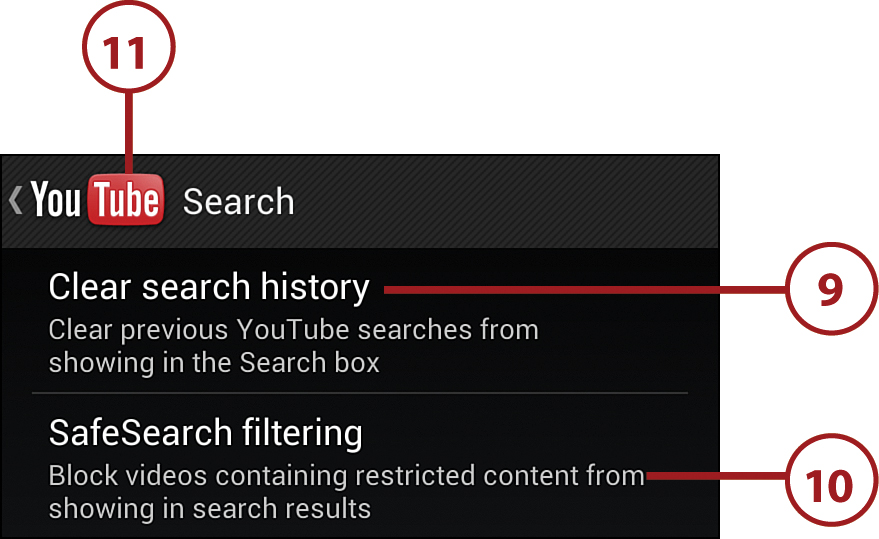
8. Touch Search.
9. Touch to clear your YouTube search history.
10. Touch to set the types of videos that are displayed when you search. If you set this setting to Don’t Filter, no videos are filtered out based on content.
11. Touch to return to the main Settings screen.
12. Touch Preloading.

13. Touch to enable or disable preloading of videos to which you have subscribed. Preloading videos enables you to start watching them sooner on slow networks, but storing the files takes up space on your Galaxy Note II.
14. Touch to enable or disable preloading of videos you have added to your Watch Later list.
15. Touch to return to the main Settings screen.

16. Touch the YouTube button to return to the YouTube app.
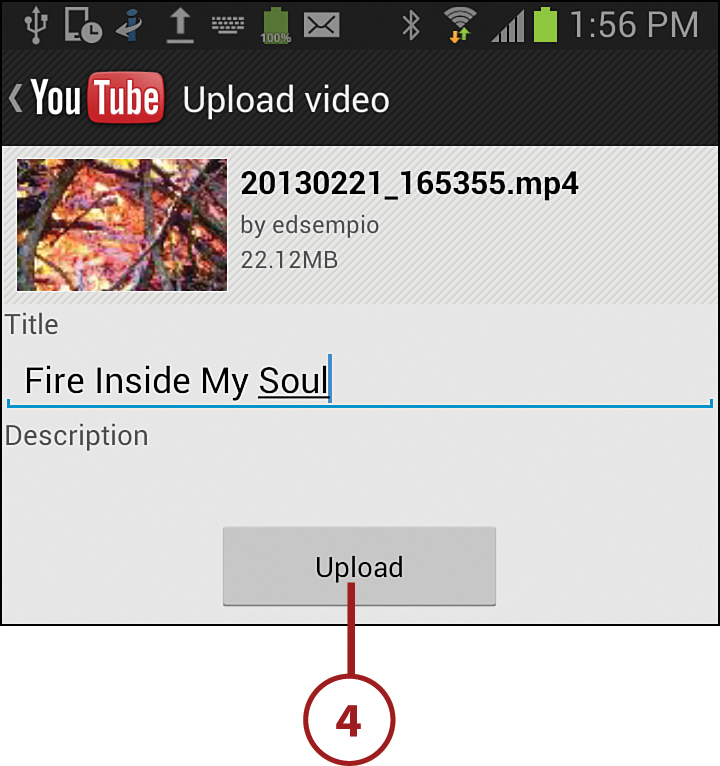
Upload a Video to YouTube from the YouTube App
After you create your own channel, you can easily upload your videos to YouTube straight from the YouTube app.
1. On the main YouTube screen, touch to start uploading a video.

2. In the Choose Video to Upload dialog, touch the source of the video. For example, touch Gallery.

3. Touch the video you want to upload.
4. On the Upload Video screen, enter the information for the video, as discussed earlier in this chapter, and then touch Upload.