
P. Getting to Know iMovie General Concepts

In this chapter, you become familiar with the iMovie screen layout, what each part of the screen does or is for, and some general iMovie concepts and terminology. Topics include the following:
→ Becoming familiar with the iMovie layout
→ Examining the project screen layout
Before you start using iMovie, you should become familiar with the way iMovie looks on your screen, what the different parts of the screen are, and some general terms that are used by iMovie.
iMovie Layout
Becoming familiar with the way that iMovie divides up the screen will allow you to navigate it with ease.
Libraries
On the left of the screen, in the left pane are the libraries. Anything you click on in the Libraries view is displayed in the top-middle pane in iMovie.

• iPhoto Library—When you click on iPhoto Library, you see all photos in your iPhoto Library. You can then search for, select, and drag photos into your movie timeline. Learn more about adding iPhoto images in Chapter 3, “Creating a New Movie Project.”
• All Events—When you click All Events, you see all iMovie events (which are holder videos you have imported) in all iMovie libraries that you have chosen. You can find video footage in the events to drag to your movie timeline. Learn more about events in Chapter 2, “Importing and Organizing Video, Events, and Movie Clips.”
• All Projects—When you click All Projects, you see all iMovie projects in all iMovie libraries that you have chosen. You can then double-click a project to make changes to it. Learn more about projects in Chapter 3.
• iMovie Library—iMovie libraries contain events and projects. You may have selected more than one iMovie Library. Expanding an iMovie Library enables you to see only events and projects in that library.
Content Library
The Content Library is only visible when you are editing an iMovie project. Anything you click in the Content Library is displayed in the top-middle pane in iMovie.
• Transitions—While editing an iMovie project, you can insert transitions between clips by finding them in the Transitions list and dragging them into your movie timeline. Learn more about transitions in Chapter 3.
• Titles—While editing an iMovie project, you can insert titles between clips or over clips by finding them in the Titles list and dragging them into your movie timeline. Learn more about titles in Chapter 5, “Adding Special Effects and Titles Clips.”
• Maps & Backgrounds—While editing an iMovie project, you can insert maps and backgrounds between clips or over clips by finding them in the Maps & Backgrounds list and dragging them into your movie timeline. Read more about using maps in Chapter 5.
• iTunes—While editing an iMovie project, you can insert music from your iTunes library by finding it and dragging it into your movie timeline. Read more about adding music from your iTunes library in Chapter 6, “Adding and Editing Voiceovers, Music, and Sound Effects.”
• Sound Effects—While editing an iMovie project, you can insert sound effects by finding them and dragging them into your movie timeline. Sound effects are also covered in Chapter 6.
• GarageBand—While editing an iMovie project, you can insert music or other audio from your GarageBand library by finding them and dragging them into your movie timeline. Working with audio from GarageBand is covered in Chapter 6.
Movie Timeline
When you create an iMovie project, the movie’s timeline is shown in the Timeline view.

• Title—This shows where you have titles in your movie. Double-click a title to edit it.
• Clip—A clip is a part of your original video footage that you have used in your movie.
• Transition—This shows where you have used a transition between two clips. Double-click the transition to edit it.
• Audio waveform—This shows a visual representation of the audio that is associated with the clips in your movie.
• Playhead—The playhead indicates what part of your movie you are viewing in the Viewer pane. Click anywhere in your movie to make the playhead jump to that location. Press the spacebar to start playing your movie from the playhead. Press the spacebar again to stop playing the movie.
Viewer
The Viewer pane, which is on the top right of the screen, shows your movie when you are playing it, but also doubles as the area where you make all of your edits.

Browser
The Browser window allows you to browse content that you select in the Libraries list. This would be your raw video footage or a list of projects or events. In this example, we are browsing the transitions.

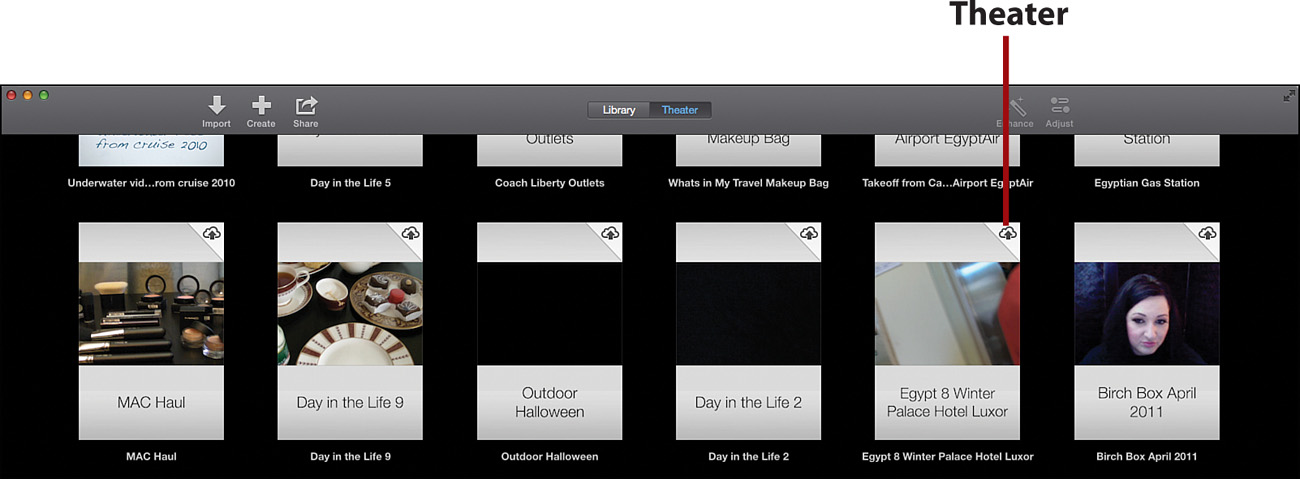
Theater
After you have finished creating your movie, you can save it to the iMovie Theater. Once there, you can easily access it in iMovie, or if you have allowed your theater to synchronize with your iCloud account, you can access the movies on any Apple device (including Apple TV) that is connected to that iCloud account.
Toolbar
The iMovie toolbar allows you quick access to commonly used functions.
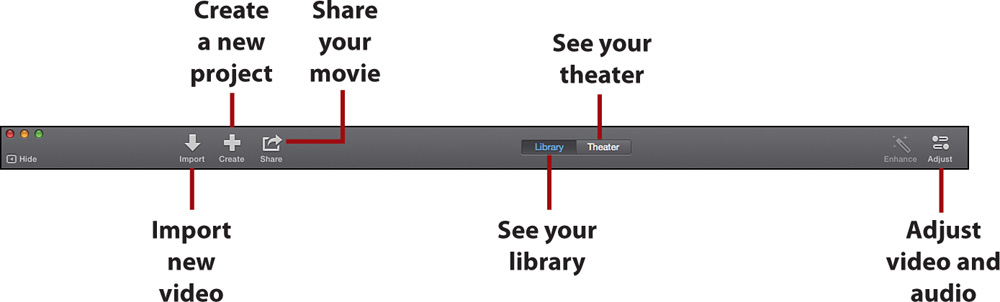
• Create a new project—Click here to create a new iMovie project. You will be able to choose whether your project uses a theme, and after it has been created, you will be able to drag movie clips into it.
• Import new video—Click here to import new video into iMovie so that you can use it in your movies. The video can come from memory cards or from your Mac’s hard disk. You can also use cameras connected to your Mac (including the FaceTime camera) to import video in real time.
• Share your movie—Click here to share your movie project with others. iMovie offers many different ways to share your movie.
• See your library—Click to see your iMovie Library. This is the default view in iMovie and enables you to work on your movie projects.
• See your theater—Click to see your iMovie Theater, which contains all completed movies that you have chosen to import.
• Adjust video and audio—When you select all or part of a clip, you can use the Adjust menu to make changes not only to the look of the clip, but also to the way it sounds.