6. Adding and Editing Voiceovers, Music, and Sound Effects

In this chapter, you find out how to add voiceovers, music, and sound effects to movie projects. Topics include the following:
→ Adding a voiceover
→ Adding music from iTunes
→ Adding sound effects
→ Adding audio from GarageBand
→ Editing audio
→ Slowing down or speeding up audio
A movie is nothing without some music, sound effects, and maybe a voiceover. iMovie enables you to add all three of these to your movies and also to edit the audio to get it sounding just the way you need it to.
Recording a Voiceover
A voiceover is a voice track, such as when you narrate or explain what the viewer is seeing in your movie. iMovie lets you record your voiceover directly over your movie while it’s playing.
1. Click to move the playhead to approximately where you want to add your voiceover.

2. Click the View menu.

3. Click Record Voiceover. The Voiceover icons appear under your video in the Viewer.

4. Click to display the Voiceover recording options.
5. Click the Input Source drop-down list to change the microphone you want to use, if neccessary.
6. Drag the Volume slider to adjust the volume of your voiceover.
7. Uncheck the Mute Project check box to unmute the original audio while you record your voiceover, or leave it checked to keep the audio muted.
Why Would I Unmute the Audio?
In step 7 we see that we can choose to unmute the original project audio while we record our voiceover. By default, the option is selected so that the original audio is muted. Otherwise, while you are recording your voiceover, it could be distracting if the original audio from the project continues to play as you speak. However, if you feel that you need to hear the original audio as you speak, simply uncheck the box.
8. Click the Microphone icon to start recording your voiceover. The icon turns red while the recording is in process.

9. Wait for the countdown to reach 1, and then begin speaking.
10. Click the Microphone icon to stop recording the voiceover.

Adding Music from iTunes
You can add music you have stored in your iTunes library to your movie to enhance the mood.
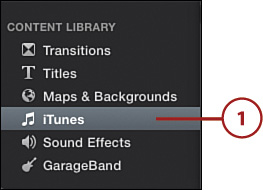
1. Click iTunes in the Content Library.
2. Click to filter the list of content in iTunes to specific categories, such as Podcasts, Music, or TV Shows, and to select specific playlists.
3. Click in the Search field and type a search term to quickly find the audio you are looking for.
4. Double-click a song to start playing it.

5. Drag the song to the music placeholder in the timeline.

Adding Sound Effects
iMovie comes preloaded with many sound effects and theme music that you can use in your movies.
1. Click Sound Effects in the Content Library.

2. Click to filter the list of content to specific categories, such as jingles, machines, people, or theme music.
3. Click in the Search field and type a search term to quickly find the sound effect you are looking for.
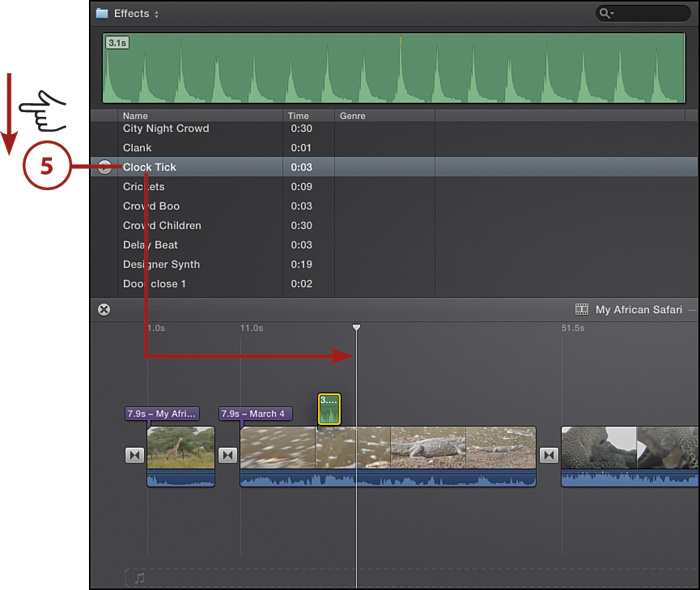
4. Double-click a sound effect to start playing it.

5. Drag the sound effect to above or below your timeline.
Adding Audio from GarageBand
If you have some audio you have put together in GarageBand, you can add it to your movie.
1. Click GarageBand in the Content Library.

2. Click to filter the list of content if you use folders when saving your GarageBand files.
3. Click in the Search field and type a search term to quickly find a GarageBand project.
4. Double-click a GarageBand project to start playing it.

5. Drag the GarageBand project to above or below your timeline.

Editing Audio
Regardless of whether you’ve used a voiceover, iTunes music, sound effects, or a GarageBand project, you can edit the way your audio sounds, including adding fade-in and fade-out.
1. Drag the horizontal black line up and down to increase or reduce the level of the audio.
2. Drag the slider to the left or right to decrease or increase the amount of time it takes to fade in the audio. Moving the slider all the way to the left means the audio starts instantly with no fade-in.
3. Drag the slider to the left or right to increase or decrease the amount of time it takes to fade out the audio. Moving the slider all the way to the right means the audio ends instantly with no fade-out.
4. Drag the outer edges of the audio to lengthen or shorten it.
5. Drag the audio left and right to reposition it.

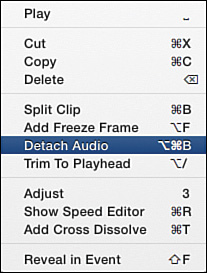
1. Right-click an audio clip and choose Show Speed Editor.

2. Drag the Clip speed slider to the left or right to slow down or speed up the audio.

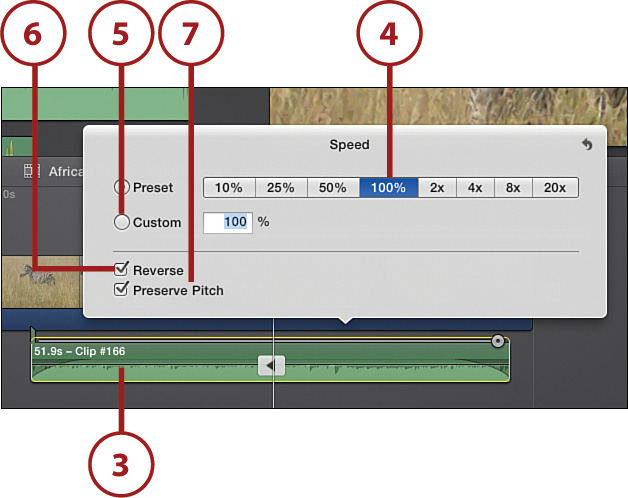
3. Click the speed adjustment line for a more accurate and flexible way of audio speed adjustment.
4. Choose one of the Preset audio speeds by clicking the speed you desire.
5. Click Custom and enter a custom audio speed in the text field.
6. Click the Reverse check box to make the audio play in reverse.
7. Click the Preserve Pitch check box to preserve the pitch of the audio when it is being played in reverse, or when the clip has been sped up or slowed down.