3. Creating and Planning a Website
What You’ll Do
Adding Top Level (Sibling) Pages to the Sitemap
Adding Child Pages to the Sitemap
Adding Master Pages to the Sitemap
Removing Pages from the Sitemap
Rearranging Pages in the Sitemap
Filling the Browser with a Background Color
Filling the Browser with a Background Image
Introduction
After you’ve spent some time becoming familiar with the Muse work environment, the next step is to create a new website from scratch. Thankfully, by utilizing the sitemap features available in Plan Mode, creating and planning a new website has never been easier.
With this chapter, you’ll learn how to use the New Site dialog box to specify the page size for your new site, as well as the placement of margin and column guides and the amount of padding to leave between the pages and the edges of the browser. After you create a new site document, you’ll learn how to add, rearrange, and delete pages—all by working with the sitemap page thumbnails in Plan Mode.
This chapter also shows you how to create and apply master pages. By utilizing master pages, you can ensure that any repeating page elements, such as nav bars and footers, maintain their position throughout your site. This is achieved by placing the repeating elements on a master page, and then applying the master page to site pages.
Additionally, you’ll learn how to fill the browser with a background color or image and set objects to display at 100% browser width. The final sections of the chapter explain how to save and close your website projects.
Creating a New Site
When you create a new site in Muse, you must indicate what page dimensions you’d like to use, as well as where to place the margin and column guides. This is done by entering values in the New Site dialog box, which appears whenever you choose New Site from the File menu, or by clicking the New Site button in the Welcome Screen. The entire process is similar to creating a new page in InDesign.
Use the Welcome Screen
![]() Launch Muse, as described in Chapter 1 “Getting Started with Adobe Muse.” This process varies depending on what platform you are on (Mac OS X or Windows).
Launch Muse, as described in Chapter 1 “Getting Started with Adobe Muse.” This process varies depending on what platform you are on (Mac OS X or Windows).
By default, the Welcome Screen automatically appears.
![]() Click the Create New Site button in the upper left of the Welcome Screen.
Click the Create New Site button in the upper left of the Welcome Screen.
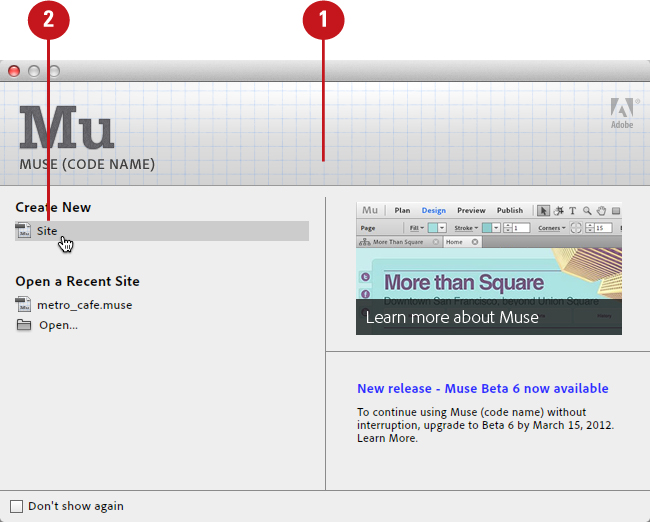
Muse displays the New Site dialog box.
![]() Enter the preferred pixel dimensions in the Page Width and Min Height fields. Generally, 1280 width by 1024 height is considered a standard size.
Enter the preferred pixel dimensions in the Page Width and Min Height fields. Generally, 1280 width by 1024 height is considered a standard size.
![]() To center the web pages horizontally in the browser window, place a check in the Center Horizontally checkbox.
To center the web pages horizontally in the browser window, place a check in the Center Horizontally checkbox.

See Chapter 1, “Getting Started with Adobe Muse,” to learn more about launching the application and accessing the Welcome Screen.
![]() Enter the preferred values in the Columns, Column Width, and Gutter fields. These values determine where the column guides are positioned on the pages.
Enter the preferred values in the Columns, Column Width, and Gutter fields. These values determine where the column guides are positioned on the pages.
![]() Enter the preferred values in the Top, Bottom, Left, and Right Margins fields. These values determine the amount of space surrounding the content on each page, as indicated by the margin guides.
Enter the preferred values in the Top, Bottom, Left, and Right Margins fields. These values determine the amount of space surrounding the content on each page, as indicated by the margin guides.
![]() Enter values in the Top, Bottom, and Left Padding fields to determine the amount of space placed between the web pages and the edges of the web browser.
Enter values in the Top, Bottom, and Left Padding fields to determine the amount of space placed between the web pages and the edges of the web browser.
When you enable the Center Horizontally option (see Step 4), you cannot enter a value in the Left Padding field. The option appears “grayed out” in the dialog box. This is because the padding between your page and the left edge of the browser will change automatically depending on the size of the browser window.
![]() Click OK to apply the New Site settings.
Click OK to apply the New Site settings.

Muse displays the new site in Plan Mode.
You can change these site settings at any time via the Site Properties dialog box. To do so, choose Site Properties from the File menu. Enter the new page dimensions, margin and column guide settings, and padding settings and click OK to apply them to your site.
Choose the New Site command
![]() Choose New Site from the File menu.
Choose New Site from the File menu.
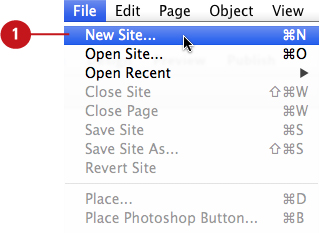
Muse displays the New Site dialog box.
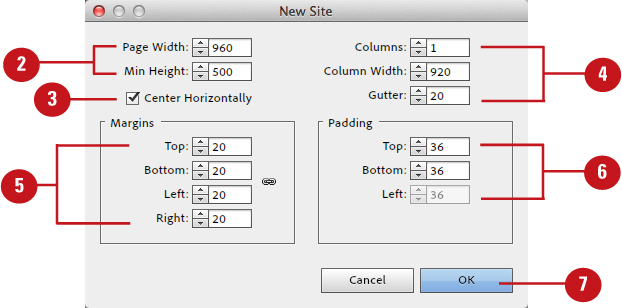
![]() Enter the preferred pixel dimensions in the Page Width and Min Height fields.
Enter the preferred pixel dimensions in the Page Width and Min Height fields.
![]() To center the web pages horizontally in the browser window, place a check in the Center Horizontally checkbox.
To center the web pages horizontally in the browser window, place a check in the Center Horizontally checkbox.
![]() Enter the preferred values in the Columns, Column Width, and Gutter fields. These values determine where the column guides are positioned on the pages.
Enter the preferred values in the Columns, Column Width, and Gutter fields. These values determine where the column guides are positioned on the pages.
![]() Enter the preferred values in the Top, Bottom, Left, and Right Margins fields. These values determine the amount of space surrounding the content on each page, as indicated by the margin guides.
Enter the preferred values in the Top, Bottom, Left, and Right Margins fields. These values determine the amount of space surrounding the content on each page, as indicated by the margin guides.
![]() Enter values in the Top, Bottom, and Left Padding fields to determine the amount of space placed between the web pages and the edges of the web browser.
Enter values in the Top, Bottom, and Left Padding fields to determine the amount of space placed between the web pages and the edges of the web browser.
When you enable the Center Horizontally option (see Step 3), you cannot enter a value in the Left Padding field. The option appears “grayed out” in the dialog box.
![]() Click OK to apply the New Site settings.
Click OK to apply the New Site settings.
Muse displays the new site in Plan Mode.
Adding Top Level (Sibling) Pages to the Sitemap
In Plan Mode, you can use the sitemap to create the page structure and hierarchy for your website. When you add pages, you are not only adding them to the sitemap, but also to the site itself. By double-clicking the page thumbnails in the sitemap, you can open them up in Design Mode and add page contents. You can add pages by choosing the Add New Top Level Page command from the Page menu, or by clicking the Insert Page buttons.
Choose the Add New Top Level Page command
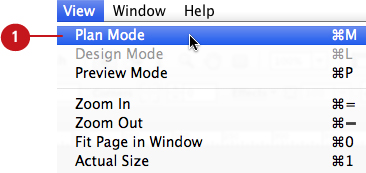
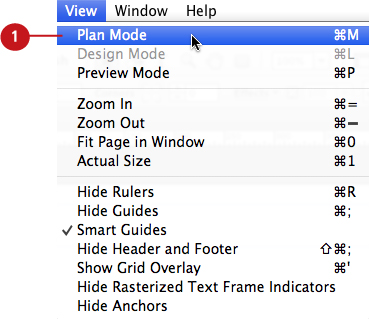
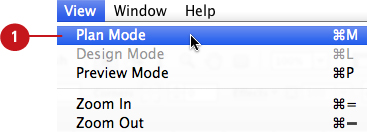
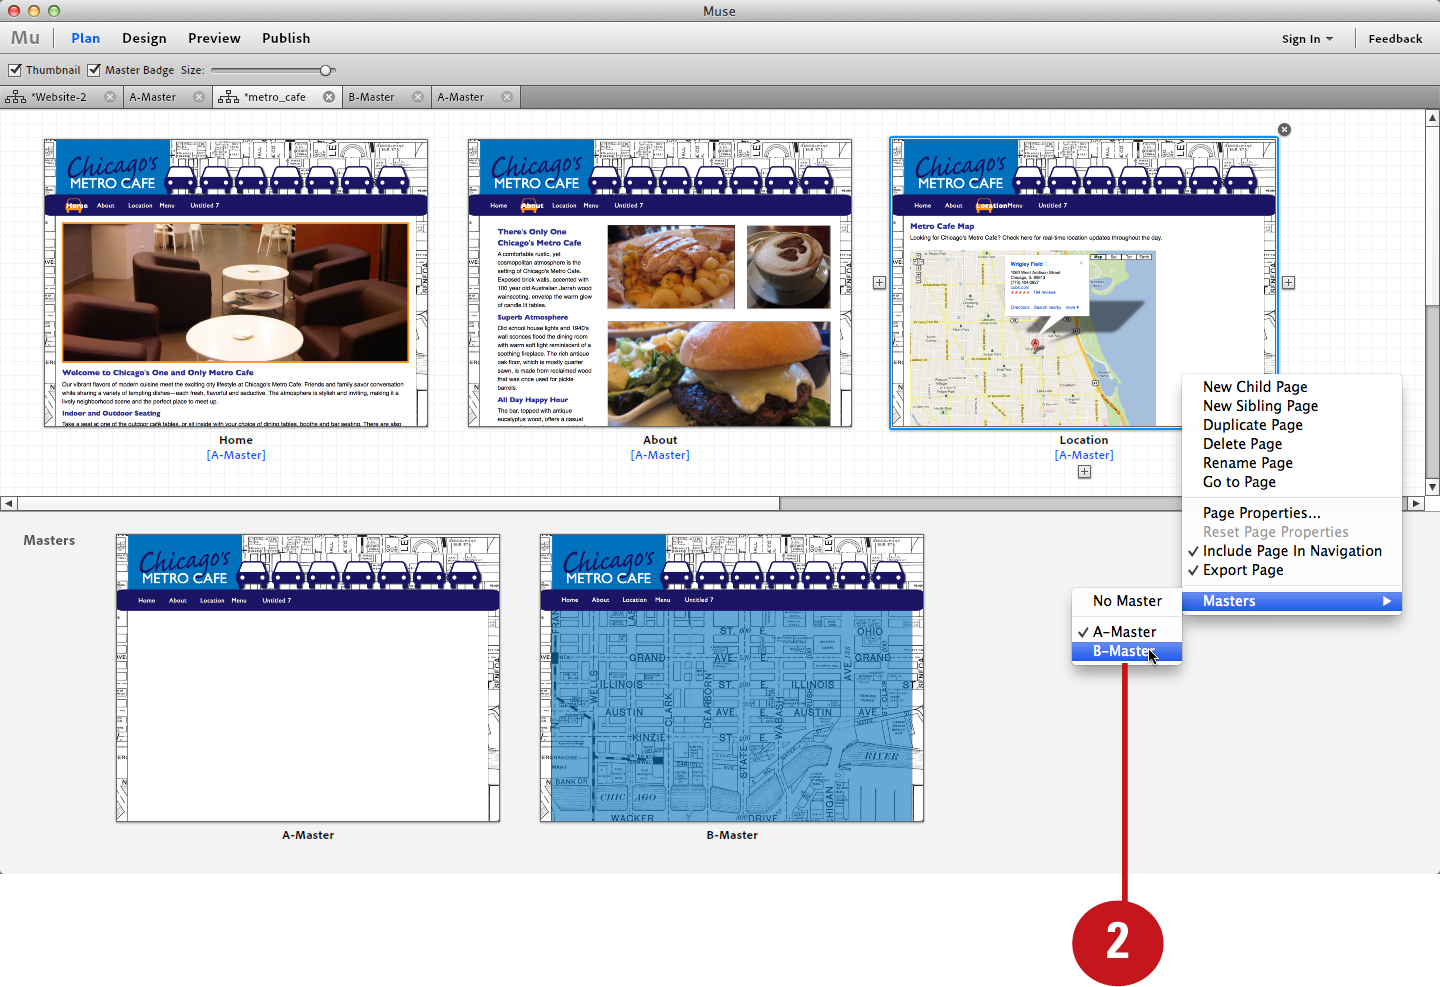
![]() If you’re not already in Plan Mode, choose Plan Mode from the View menu.
If you’re not already in Plan Mode, choose Plan Mode from the View menu.
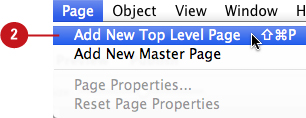
![]() Choose Add New Top Level Page from the Page menu.
Choose Add New Top Level Page from the Page menu.
Press Cmd+Shift+P (Mac) or Ctrl+Shift+P (Win) to apply the Add New Top Level Page command quickly.
Muse adds the page to the site. The new page thumbnail appears to the right of the last page in the sitemap. Muse highlights the page name so that you can enter a new one.
![]() Enter a name for the new page and press Return (Mac) or Enter (Win) to apply it.
Enter a name for the new page and press Return (Mac) or Enter (Win) to apply it.

Click the Insert Page buttons
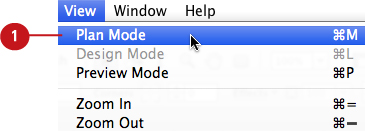
![]() Choose Plan Mode from the View menu.
Choose Plan Mode from the View menu.

![]() Hover the cursor over any page in the sitemap and click the Insert Page button (the plus icon) that appears to the left or right of the thumbnail.
Hover the cursor over any page in the sitemap and click the Insert Page button (the plus icon) that appears to the left or right of the thumbnail.
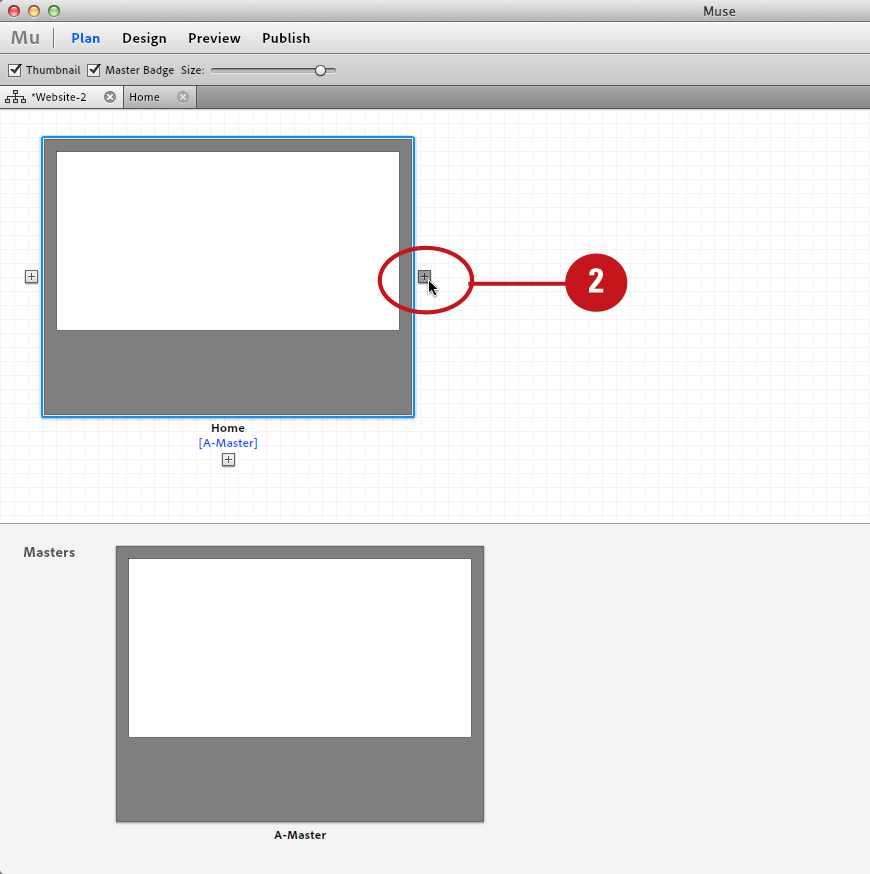
Muse adds the page to the site. The new page thumbnail appears to the left or right of whichever button you clicked. Muse highlights the page name so that you can enter a new one.
![]() Enter a name for the new page and press Return (Mac) or Enter (Win) to apply it.
Enter a name for the new page and press Return (Mac) or Enter (Win) to apply it.

You can also insert top level (sibling) pages using the contextual menu. To do so, right-click or Control-click (Mac) on any page in the sitemap and choose New Sibling Page from the contextual menu. The new page thumbnail appears to the right of the page you clicked.
Adding Child Pages to the Sitemap
End users generally visit a child page by accessing its parent page first. Because of this, child pages do not appear in the top level navigation bar, but rather in a drop-down menu via the top level parent page. Muse even generates and updates nav bars automatically as you add, remove, and rearrange pages in the sitemap (see Chapter 4, “Adding Navigational Content”). You can add child pages by clicking the Insert Child Page button.
Click the Insert Child Page button
![]() Choose Plan Mode from the View menu.
Choose Plan Mode from the View menu.

![]() Hover the cursor over any page in the sitemap and click the Insert Child Page button (the plus icon) that appears underneath the thumbnail.
Hover the cursor over any page in the sitemap and click the Insert Child Page button (the plus icon) that appears underneath the thumbnail.

Muse adds the page to the site. The new page thumbnail appears underneath the button you clicked. Muse highlights the page name so that you can enter a new one.
![]() Enter a name for the new page and press Return (Mac) or Enter (Win) to apply it.
Enter a name for the new page and press Return (Mac) or Enter (Win) to apply it.

You can also insert child pages using the contextual menu. To do so, right-click or Control-click (Mac) on any page in the sitemap and choose New Child Page from the contextual menu. The new page thumbnail appears underneath the button you clicked.
Adding Master Pages to the Sitemap
With master pages, you can ensure that any repeating page elements, such as nav bars and footers, maintain their position throughout your site. This is because master page contents only appear on the pages where the master is applied—these contents can only be edited from the master page itself. You can access master pages from the bottom portion of the Plan Mode window. Every new site you create contains a single, editable master page, but you can add as many master pages as you like.
Choose the Add New Master Page command
![]() Choose Plan Mode from the View menu.
Choose Plan Mode from the View menu.
![]() Choose Add New Master Page from the Page menu.
Choose Add New Master Page from the Page menu.

Muse adds the page to the site. The new page thumbnail appears to the right of the last page in the sitemap. Muse highlights the page name so that you can enter a new one.
![]() Enter a name for the new master page and press Return (Mac) or Enter (Win) to apply it.
Enter a name for the new master page and press Return (Mac) or Enter (Win) to apply it.
You can also insert master pages using the contextual menu. To do so, right-click or Control-click (Mac) on a master page from the Masters section of the sitemap and choose New Master Page from the contextual menu.
Click the Insert Master Page buttons
![]() Choose Plan Mode from the View menu.
Choose Plan Mode from the View menu.

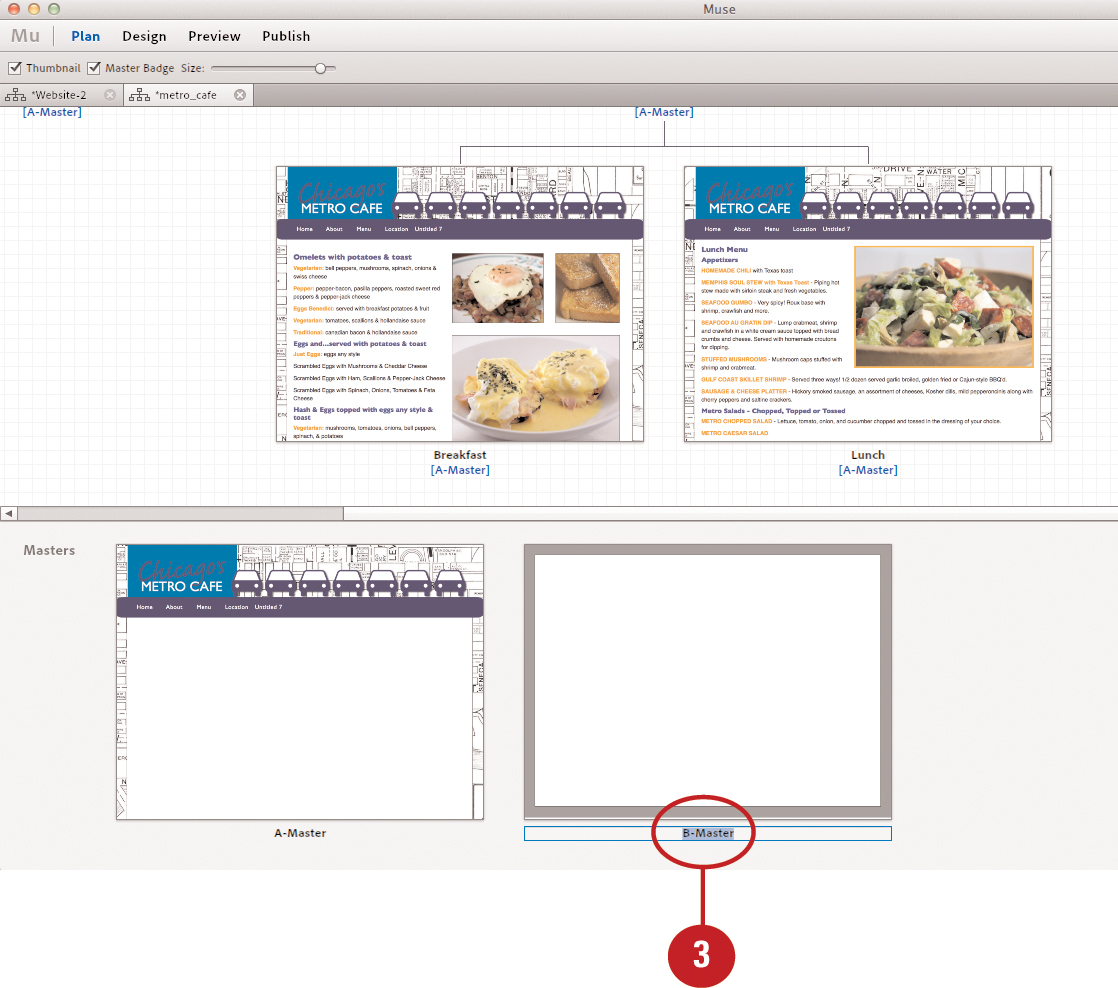
![]() Hover the cursor over any master page in the Masters portion of the sitemap and click the Insert Page button (the plus icon) that appears to the left or right of the thumbnail.
Hover the cursor over any master page in the Masters portion of the sitemap and click the Insert Page button (the plus icon) that appears to the left or right of the thumbnail.

Muse adds the master page to the site. The new master page thumbnail appears to the left or right of whichever button you clicked. Muse highlights the master page name so that you can enter a new one.
![]() Enter a name for the new master page and press Return (Mac) or Enter (Win) to apply it.
Enter a name for the new master page and press Return (Mac) or Enter (Win) to apply it.

Removing Pages from the Sitemap
Removing pages from a site is just as easy as adding them. All you need to do is hover the mouse cursor over the page thumbnail in the sitemap and click the Delete Page button that appears. Muse instantly removes the page from the site and also removes it automatically from any navigational content (see Chapter 4, “Adding Navigational Content”).
Click the Delete Page button
![]() Choose Plan Mode from the View menu.
Choose Plan Mode from the View menu.

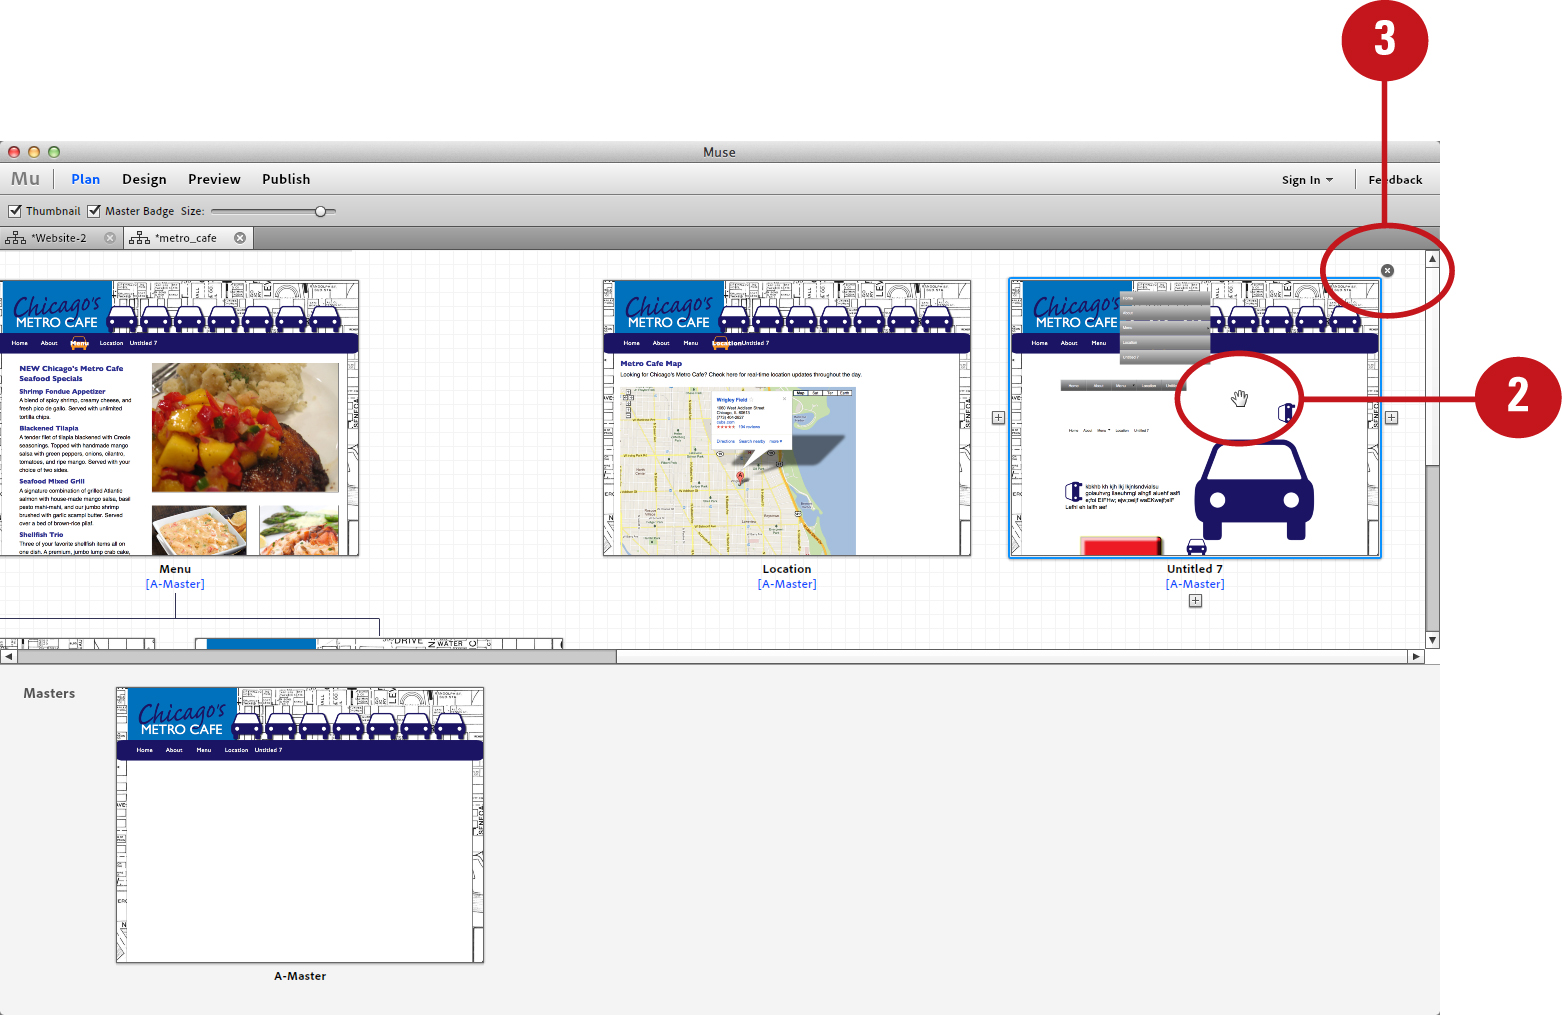
![]() Hover the cursor over any page or master page in the sitemap.
Hover the cursor over any page or master page in the sitemap.
The Delete Page button (the x icon) appears in the upper-right corner, above the page thumbnail.
![]() Click the Delete Page button.
Click the Delete Page button.
If the page contains contents (other than master page contents), then Muse displays the Delete Page warning dialog box.
![]() Click OK to delete the page.
Click OK to delete the page.

Muse removes the page from the site.
You can also delete pages using the contextual menu. To do so, right-click or Control-click (Mac) on any page or master page in the sitemap and choose Delete Page from the contextual menu.
Rearranging Pages in the Sitemap
With Muse, changing the page order of your website has never been easier. By clicking and dragging the page thumbnails in the Plan Mode sitemap, you can easily rearrange the site structure and page hierarchy for a site. If the Include Page in Navigation feature is enabled (Muse enables this by default), then the new site structure and hierarchy are automatically updated in the site’s nav bars (see Chapter 4, “Adding Navigational Content”).
Click and drag the page thumbnail
![]() Choose Plan Mode from the View menu.
Choose Plan Mode from the View menu.

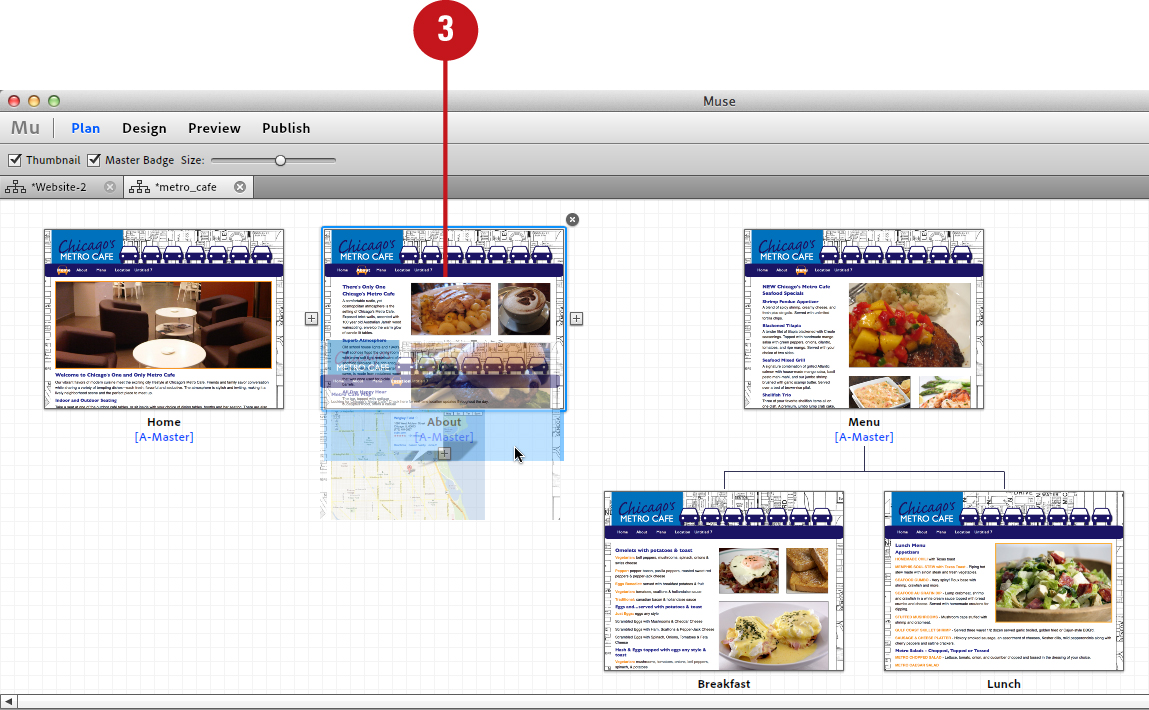
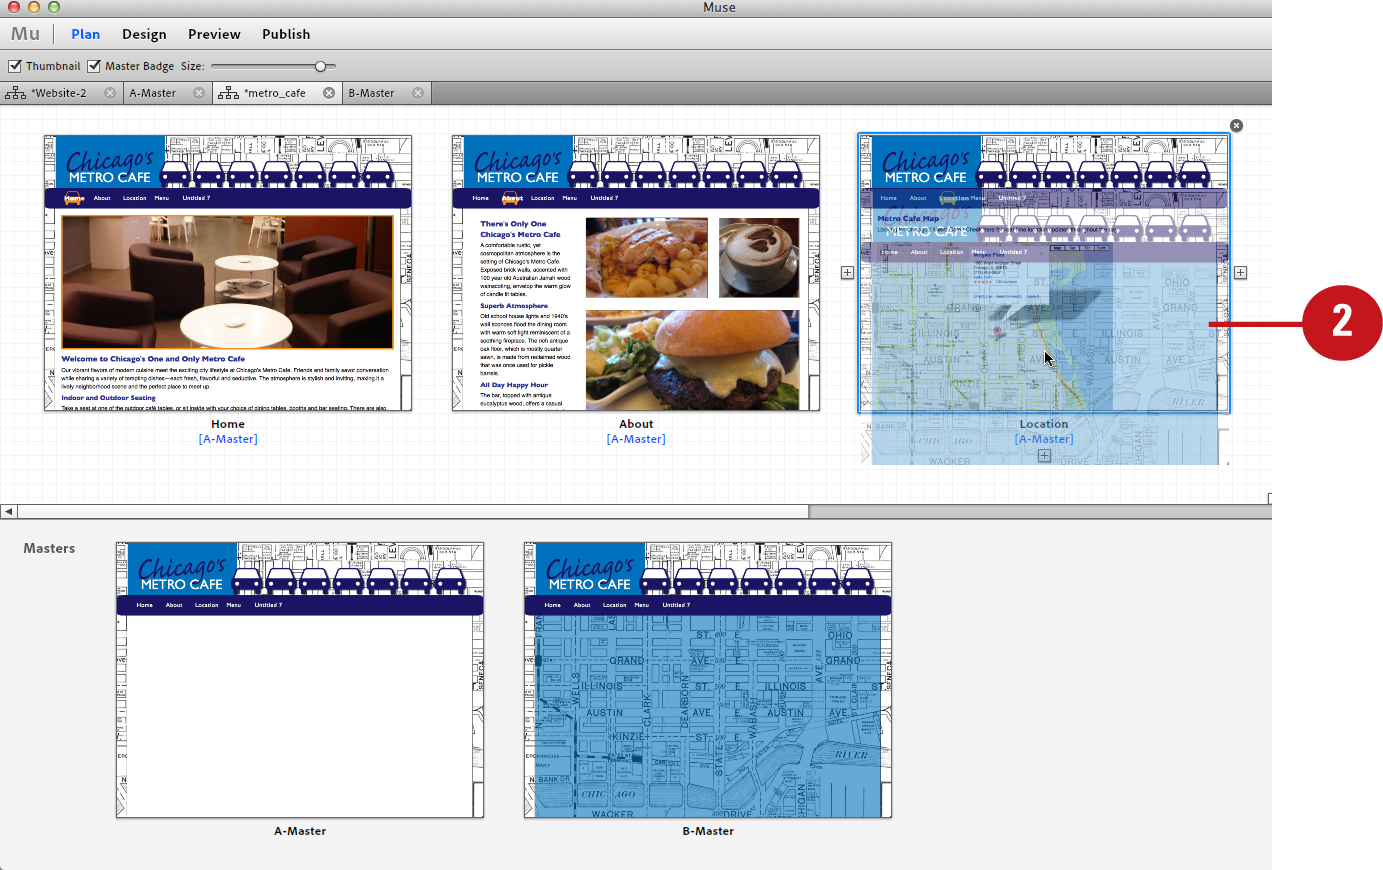
![]() Hover the cursor over any page or master page in the sitemap. Click and drag the thumbnail to move the page to a new location in the sitemap.
Hover the cursor over any page or master page in the sitemap. Click and drag the thumbnail to move the page to a new location in the sitemap.

To place the page between two existing pages, drag the thumbnail between page thumbnails until the blue rectangle appears, and then release the mouse button.
![]() To place the page under an existing page and convert it into a child page, drag the thumbnail over the parent thumbnail until the blue rectangle appears underneath it, and then release the mouse button.
To place the page under an existing page and convert it into a child page, drag the thumbnail over the parent thumbnail until the blue rectangle appears underneath it, and then release the mouse button.
Resizing Sitemap Thumbnails
As you add more and more pages to a website, the Plan Mode sitemap can fill up quickly with thumbnails. In order to view all of the thumbnails at once in the window, you must decrease their size. However, with all of the thumbnails visible, it may become too difficult to see the page names. When this happens, you must increase their size. Thankfully, you can change the size of the sitemap thumbnails in one of two ways: by dragging the Size slider at the top of the interface, or by choosing the Zoom commands from the View menu.
Drag the Size slider
![]() Choose Plan Mode from the View menu.
Choose Plan Mode from the View menu.

![]() Drag the Size slider to the left to decrease the size of all the thumbnails in the sitemap, including master pages.
Drag the Size slider to the left to decrease the size of all the thumbnails in the sitemap, including master pages.
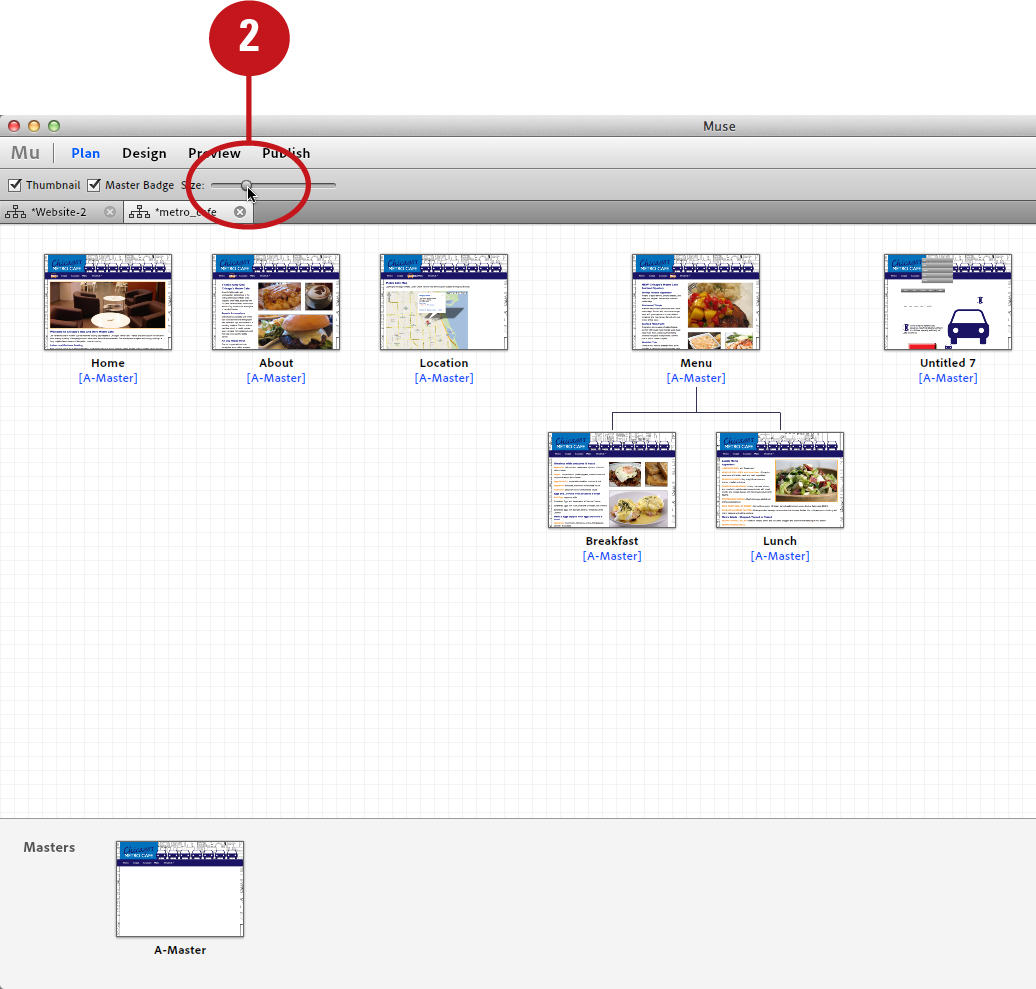
Muse displays the thumbnails at the new size in the Plan Mode window.
![]() Drag the Size slider to the right to increase the size of all the thumbnails in the sitemap, including master pages.
Drag the Size slider to the right to increase the size of all the thumbnails in the sitemap, including master pages.

Muse displays the thumbnails at the new size in the Plan Mode window.
You can hide thumbnail previews. By default, the thumbnail preview option is enabled. This option displays a preview of each page inside the sitemap thumbnails. While this can be a useful feature for helping to identify the pages you want to work with, it can also slow down your workflow, especially when working with sites that contain a large number of pages. To disable the preview fature, uncheck the Thumbnail option located in the upper left of the interface.
Choose the Zoom In/Zoom Out commands
![]() Choose Plan Mode from the View menu.
Choose Plan Mode from the View menu.
![]() Choose View > Zoom In to increase the thumbnail size; choose View > Zoom Out to decrease it.
Choose View > Zoom In to increase the thumbnail size; choose View > Zoom Out to decrease it.

Press Cmd+= (Mac) or Ctrl+= (Win) to apply the Zoom In command quickly; press Cmd+- (Mac) or Ctrl+- (Win) to apply the Zoom Out command quickly.
Muse displays the thumbnails at the new size in the Plan Mode window.
Filling the Browser with a Background Color
One way to maintain consistent color throughout your site is to fill the browser window with the same background color that you’re using on your web pages. You can achieve this effect in Muse by using the Browser Fill feature. To make it even easier, you can use the Browser Fill feature on a master page and apply the master to all of your web pages. You can choose colors to work with using a traditional Color Picker, very similar to what you would use in other Adobe products, such as InDesign, Photoshop, or Illustator.
Use the Browser Fill Color option
![]() In Plan Mode, double-click a new page or master page thumbnail from the sitemap.
In Plan Mode, double-click a new page or master page thumbnail from the sitemap.

Muse opens the page in Design Mode.
![]() Click the Browser Fill Color swatch in the Control panel.
Click the Browser Fill Color swatch in the Control panel.
Muse displays a drop-down Color Picker.
![]() Choose a background color with the Color Picker via any of the following methods:
Choose a background color with the Color Picker via any of the following methods:

• Enter values into the RGB fields.
• Enter a hexadecimal code in the Hex# field.
• Click a swatch from the saved color swatch list.
• Drag the Hue slider up or down to select a color hue. Then click in the color field to the right of the Hue slider to determine the saturation and brightness of the selected color.
• Click the Sample Color tool icon. To sample a color for the background, proceed to click anywhere on the page—including in a placed photo or graphic.

Muse fills the browser with the chosen background color.
Filling the Browser with a Background Image
In web design it’s very common to fill the browser window with a tiled background graphic. By doing so, the background graphics repeat endelssly whenever you enlarge the browser window. You can also incorporate tiled graphics into your overall site design by placing page contents, such as nav bars, text, or photos, over them. One of the best ways to utilize tiled graphics is to fill the browser with them on your master pages. You can also fill a rectangle with tiled graphics and place them as page contents or as footers (see Chapter 5, “Working with Graphics”).
Use the Browser Fill Image option
![]() In Plan Mode, double-click a new page or master page thumbnail from the sitemap.
In Plan Mode, double-click a new page or master page thumbnail from the sitemap.

Muse opens the page in Design Mode.
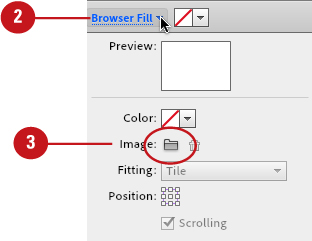
![]() Click the Browser Fill button in the Control panel.
Click the Browser Fill button in the Control panel.
Muse displays a drop-down Fill panel.
![]() Click the Choose Background Image button (the folder icon).
Click the Choose Background Image button (the folder icon).
Muse displays the Import dialog box.
![]() Using the Import dialog box, navigate to the background image on your system disk. Click the image file to select it and then click Select.
Using the Import dialog box, navigate to the background image on your system disk. Click the image file to select it and then click Select.

Muse fills the browser with the chosen background image.
![]() Choose a fitting option from the Fitting drop-down list. Options include: Original Size, Tile, Tile Horizontally, and Tile Vertically.
Choose a fitting option from the Fitting drop-down list. Options include: Original Size, Tile, Tile Horizontally, and Tile Vertically.
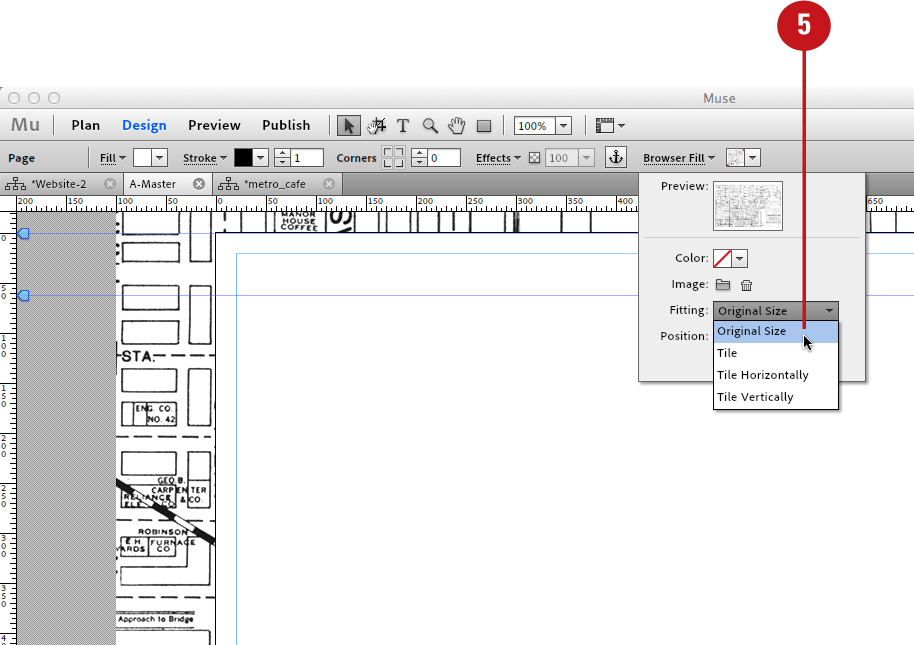
The Tile options enable you to repeat the image in the brower background. The Tile option repeats the image both horizontally and vertically.
![]() Click one of the small squares next to the Position option in the Fill drop-down panel. By doing so, you can determine where the image starts repeating from in the browser window.
Click one of the small squares next to the Position option in the Fill drop-down panel. By doing so, you can determine where the image starts repeating from in the browser window.
![]() Enable the Scrolling option to allow tiled background graphics (that do not fill the entire browser window) to move with the rest of the page contents when scrolling.
Enable the Scrolling option to allow tiled background graphics (that do not fill the entire browser window) to move with the rest of the page contents when scrolling.

Disable the Scrolling option if you’d like the tiled background graphics to remain fixed in position as you scroll the page in a browser.
Applying Master Pages
When you apply a master page, all master page contents are applied to a site page and can only be edited from the master. By default, whenever you create a new site, the A-master page is automatically applied to the intial web page and any additional pages you add. However, when you create additional master pages in Plan Mode, you can apply them to your site pages by dragging-and-dropping the master page thumbnail over the page thumbnail in the sitemap. You can also change the master page that is currently applied to a site page by choosing a diferent master from the contextual menu.
Drag-and-drop the master page thumbnail
![]() Choose Plan Mode from the View menu.
Choose Plan Mode from the View menu.
![]() Click and drag the master page thumbnail over the site page thumbnail in the sitemap.
Click and drag the master page thumbnail over the site page thumbnail in the sitemap.
Muse displays a blue rectangle around the site page thumbnail.
![]() Release the mouse button to apply the master page to the site page.
Release the mouse button to apply the master page to the site page.

Muse adds the master page contents to the site page.
You can hide master badges. By default, the name of the applied master page appears underneath the thumbnail for each page in the sitemap. To hide the master badge, uncheck the Master Badge option located in the upper-left corner of the interface.
Choose a master page from the contextual menu
![]() Choose Plan Mode from the View menu.
Choose Plan Mode from the View menu.
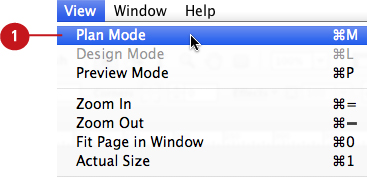
![]() Right-click or Control-click (Mac) on any page in the sitemap to access the contextual menu. Choose the master page from the Masters submenu.
Right-click or Control-click (Mac) on any page in the sitemap to access the contextual menu. Choose the master page from the Masters submenu.

Muse adds the master page contents to the site page.
You can also apply no master page at all. To do so, right-click or Control-click (Mac) on any page in the sitemap to access the contextual menu. Choose No Master from the Masters submenu. Muse removes all master page contents from the page.
Saving a Site
As it is when working with any design software, it’s always a good idea to save often. With Muse, you can save your website projects at any time, no matter whether you are working in Plan Mode, Design Mode, or Preview Mode. To do so, choose Save Site from the File menu. When you do, Muse saves all of the data for the entire site, including all pages, master pages, and their respective contents. To create a copy of a site, or create a different version of it, choose Save Site As.
Choose Save Site
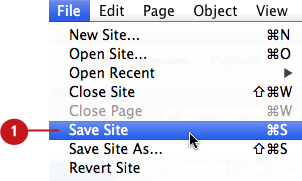
![]() Choose Save Site from the File menu.
Choose Save Site from the File menu.
You can choose the Save Site command from the File menu at any time, while working in any of the three modes (Plan, Design, or Preview).
When saving a site for the first time, Muse displays the Save Muse File As dialog box. You can use this dialog box to name the file and choose a save location for it on your system.
Choose Save Site As
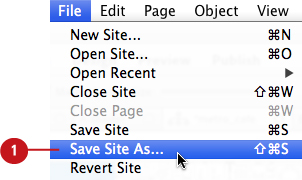
![]() Choose Save Site As from the File menu.
Choose Save Site As from the File menu.
You can choose the Save Site As command from the File menu at any time, while working in any of the three modes (Plan, Design, or Preview).
Muse displays the Save Muse File As dialog box.
![]() Using the Save Muse As dialog box, navigate to a save location on your system disk and then click Save.
Using the Save Muse As dialog box, navigate to a save location on your system disk and then click Save.

Closing a Site
Just as it is with saving sites in Muse, you can also close your website projects at any time, no matter whether you are working in Plan Mode, Design Mode, or Preview Mode. To do so, choose Close Site from the File menu. When you do, Muse closes all of the pages for the entire site, including the sitemap.
Choose the Close Site command
![]() Choose Close Site from the File menu.
Choose Close Site from the File menu.

You can choose the Close Site command from the File menu at any time, while working in any of the three modes (Plan, Design, or Preview).
![]() If the site contains any unsaved changes, Muse displays the Unsaved Changes warning dialog box. To save changes before closing the site, click Save. To close the site without saving any changes, click Don’t Save.
If the site contains any unsaved changes, Muse displays the Unsaved Changes warning dialog box. To save changes before closing the site, click Save. To close the site without saving any changes, click Don’t Save.
