10. Manipulating Artwork with Effects
Introduction
Adobe Illustrator effects are a designer’s dream come true. With effects you can turn an image into an oil painting or a watercolor; you can even change night into day. Illustrator’s Effect menu includes over 100 highly creative effects from Illustrator and Photoshop, which can be applied once, reap-plied, or combined with other filters to create any effect your imagination can dream up.
The potential combination of effects and images literally runs into the millions. This means that effects are truly an undiscovered territory. As a matter of fact, the Photoshop Effect Gallery lets you view the effects of one or more filters on the active document. This level of power gives you unbelievable creative control over your images.
Take a moment to view some of the various effects that Illustrator offers. Because there are over 100 effects available, we can’t show you all of them, but we think you’ll enjoy viewing the selection at the end of the chapter.
Applying Illustrator Effects
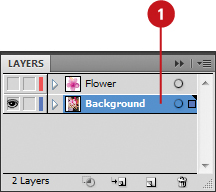
Illustrator effects change the appearance of an object, not its underlying path, and are fully editable. The effects can be edited or removed without permanently affecting the object. So, you can experiment with an effect and then undo it if you don’t like it. The Illustrator effects appear at the top of the Effect menu. Most of the Illustrator effects are vector-based for the display and upon output, so they can be modified without affecting the object. However, some of the effects—Drop Shadow, Inner Glow, Outer Glow, and Feather—are rasterized (converted from vector to raster) upon output, which doesn’t allow for nondestructive modification without affecting the object. After you apply an effect, it appears on the Appearance panel, where you can make changes. If you apply an effect to a targeted layer, sublayer, or group, it automatically is applied to all current and future objects on the target. If you use graphic styles, you can also apply effects to them.
Apply an Illustrator Effect
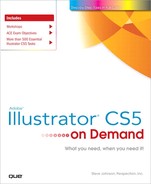
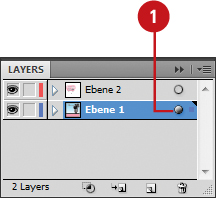
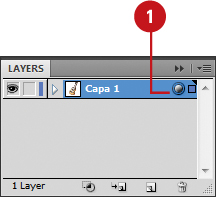
![]() Select the Layers panel, and then select the target circle for a layer, sublayer, group or object.
Select the Layers panel, and then select the target circle for a layer, sublayer, group or object.
• To apply an effect to a part of an object, click the Stroke or Fill on the Appearance panel.
![]() Click the Effect menu, point to a submenu under Illustrator Effects (if needed), and then select an effect.
Click the Effect menu, point to a submenu under Illustrator Effects (if needed), and then select an effect.
![]() To preview an effect in your document, select the Preview check box (if available).
To preview an effect in your document, select the Preview check box (if available).
![]() Select the options you want for the selected effect; options vary depending on the effect.
Select the options you want for the selected effect; options vary depending on the effect.

![]() Click OK.
Click OK.
Did You Know?
You can edit an applied effect. Select the layer, object or object’s stroke or fill, open the Appearance panel, double-click the effect, make changes, and then click OK.
Apply an Illustrator Effect in Graphic Styles
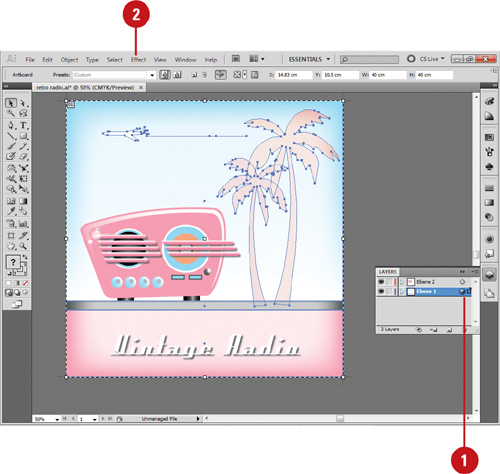
![]() Select a style name or swatch on the Graphic Styles panel or select an object that uses a graphic style.
Select a style name or swatch on the Graphic Styles panel or select an object that uses a graphic style.
The style name appears in the Appearance panel.
![]() Click the Effect menu, point to a submenu under Illustrator Effects (if needed), and then select an effect.
Click the Effect menu, point to a submenu under Illustrator Effects (if needed), and then select an effect.
![]() To preview an effect in your document, select the Preview check box (if available).
To preview an effect in your document, select the Preview check box (if available).
![]() Select the options you want for the selected effect; options vary depending on the effect.
Select the options you want for the selected effect; options vary depending on the effect.
If you enter a value in a box, press Tab to update the preview.
![]() Click OK.
Click OK.
![]() Click the Options button on the Appearance panel, and then click Redefine Graphic Style to update the style.
Click the Options button on the Appearance panel, and then click Redefine Graphic Style to update the style.

Did You Know?
You can remove an effect from a layer, object, or graphic style. Select the layer, object, or graphic style, open the Appearance panel, select the effect name, and then click the Delete Selected Item button. If you’re removing an effect from a style, click the Options button on the Appearance panel, and then click Redefine Graphic Style to update the style.
Applying the Convert to Shape Effect
With the Illustrator Convert to Shape effect, you can change an object’s outline to a rectangle, rounded rectangle, or ellipse without changing the actual underlying path. In the Shape Options dialog box, you can specify the width and height of the converted shape. The size can be set to an absolute value or a relative one based on the original object.
Apply the Convert to Shape Effect
![]() Select the Layers panel, and then select the target circle for a layer, sublayer, group or object.
Select the Layers panel, and then select the target circle for a layer, sublayer, group or object.

![]() Click the Effect menu, point to Convert to Shape, and then click Rectangle, Rounded Rectangle, or Ellipse.
Click the Effect menu, point to Convert to Shape, and then click Rectangle, Rounded Rectangle, or Ellipse.
![]() To preview an effect in your document, select the Preview check box (if available).
To preview an effect in your document, select the Preview check box (if available).
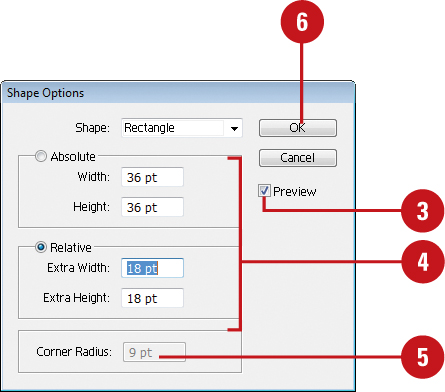

![]() Click the Absolute or Relative option, and then enter values for width and height.
Click the Absolute or Relative option, and then enter values for width and height.
For the Relative option, if you want the shape to be larger or smaller than the actual path, enter a positive or negative value.
![]() For a Rounded Rectangle shape, enter a Corner Radius value.
For a Rounded Rectangle shape, enter a Corner Radius value.
![]() Click OK.
Click OK.
Did You Know?
You can round off sharp corners without converting the shape. Select the shape, click the Effect menu, point to Stylize, and then click Round Corners.
Applying the Scribble Effect
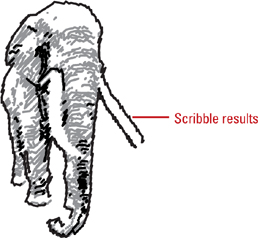
If you want to make an object’s fill look as though it was drawn with a pen or pencil, the Illustrator Scribble effect is the one for you. In the Scribble Options dialog box, you can use one of the many presets to create the look you want. It make the job easy. The presets include Childlike, Dense, Loose, Sharp, Sketch, Swash, Tight, and Zig-zag. After you select a preset (even if it’s just the Default), you can adjust individual settings to customize the Scribble effect. As you make changes, you can preview the results in your document.
Apply the Scribble Effect
![]() Select the Layers panel, and then select the target circle for a layer, sublayer, group or object.
Select the Layers panel, and then select the target circle for a layer, sublayer, group or object.

![]() Click the Effect menu, point to Stylize, and then click Scribble.
Click the Effect menu, point to Stylize, and then click Scribble.
![]() To preview an effect in your document, select the Preview check box (if available).
To preview an effect in your document, select the Preview check box (if available).

![]() Select from the following options:
Select from the following options:
• Settings. Click the Settings list arrow to select a preset for the Scribble effect.
• Angle. Enter an Angle value or rotate the dial to change the angle of the sketch lines.
• Path Overlap. Drag the Path Overlap slider toward Outside to have the sketch lines extend beyond the edge of the path, or toward Inside to have the sketch lines stay inside the path along with the degree of random variation.
• Line Options. Change the Stroke Width for the lines, the Curviness for the lines (angle sharply or loosely) along with the degree of random variation, and the Spacing for the lines (tight or loose) along with the degree of random variation.
![]() Click OK.
Click OK.
Applying the Inner or Outer Glow Effect
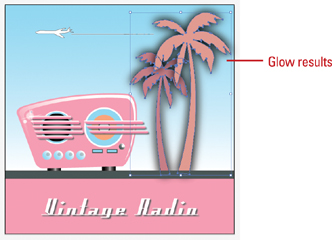
With the Illustrator Inner Glow or Outer Glow effect, you can apply a color special effect to an object. The inner glow effect spreads a color from the edge of an object inward, while the outer glow effect spreads a color from the edge of an object outward. You can also apply both effects to the same object. As you make changes, you can preview the results in your document. It’s important to remember that the Inner Glow and Outer Glow effects are rasterized (converted from vector to raster) upon output.
Apply the Inner Glow or Outer Glow Effect
![]() Select the Layers panel, and then select the target circle for a layer, sublayer, group or object.
Select the Layers panel, and then select the target circle for a layer, sublayer, group or object.
![]() Click the Effect menu, point to Stylize, and then click Inner Glow or Outer Glow.
Click the Effect menu, point to Stylize, and then click Inner Glow or Outer Glow.
![]() To preview an effect in your document, select the Preview check box (if available).
To preview an effect in your document, select the Preview check box (if available).

![]() Select from the following options:
Select from the following options:
• Color. Click the Color box, and then select a glow color.
• Blend Mode. Click the Mode list arrow, and then select a blending mode for the glow color.
• Opacity. Click the arrow, and then drag the slider to adjust the transparency of the glow.
• Blur. Click the arrow, and then drag the slider to adjust how far the glow extends inward or outward.
• Center or Edge. For the Inner Glow effect, click Center to have the glow spread outward from the center of the object, or click Edge to have the glow spread inward from the edge of the object toward the center.
![]() Click OK.
Click OK.
Applying the Drop Shadow Effect
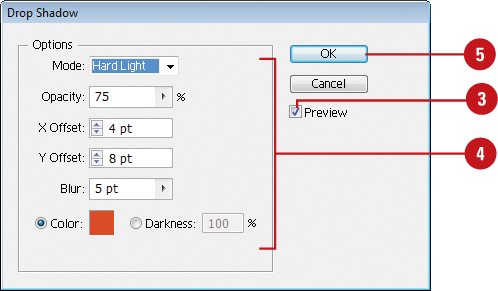
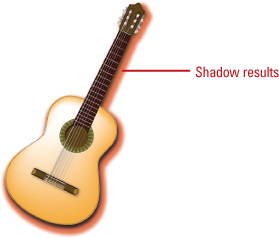
The Illustrator Drop Shadow effect allows you to apply soft, natural shadows to an object. With the Drop Shadow effect, you can specify a color blend, opacity (degree of transparency), offset, blur, and shadow color. As you make changes, you can preview the results in your document. You can apply the Drop Shadow effect to images and editable text. It’s important to remember that the Drop Shadow effect is rasterized (converted from vector to raster) upon output.
Apply the Drop Shadow Effect
![]() Select the Layers panel, and then select the target circle for a layer, sublayer, group or object.
Select the Layers panel, and then select the target circle for a layer, sublayer, group or object.
![]() Click the Effect menu, point to Stylize, and then click Drop Shadow.
Click the Effect menu, point to Stylize, and then click Drop Shadow.
![]() To preview an effect in your document, select the Preview check box (if available).
To preview an effect in your document, select the Preview check box (if available).
![]() Select from the following options:
Select from the following options:
• Blend Mode. Click the Mode list arrow, and then select a blending mode for the shadow color.
• Opacity. Click the arrow, and then drag the slider to adjust to see thoroughness of the shadow.
• X and Y Offset. Enter the distance of the shadow.
• Blur. Click the arrow, and then drag the slider to adjust how far the shadow extends inward or outward.
• Color. Click the Color option, and then select a color or click the Darkness option and specify a percentage.
![]() Click OK.
Click OK.
Applying 3D Effects
With the Illustrator 3D Effects, you can create 3D objects from 2D objects. The 3D Effects include Extrude & Bevel, Revolve, and Rotate. You can specify multiple appearance options including: position, rotation, surface, lighting, shading. Every 3D object is composed of multiple surfaces, such as a front, back, and sides. You can map 2D artwork (as a symbol) from the Symbols panel to each surface on a 3D object to create the look that you want.
Create a 3D Object
![]() Select the object that you want to change.
Select the object that you want to change.
![]() Click the Effect menu, point to 3D, and then click Extrude & Bevel.
Click the Effect menu, point to 3D, and then click Extrude & Bevel.
• Click More Options to display all available options in the dialog box.
![]() To preview an effect in your document, select the Preview check box (if available).
To preview an effect in your document, select the Preview check box (if available).
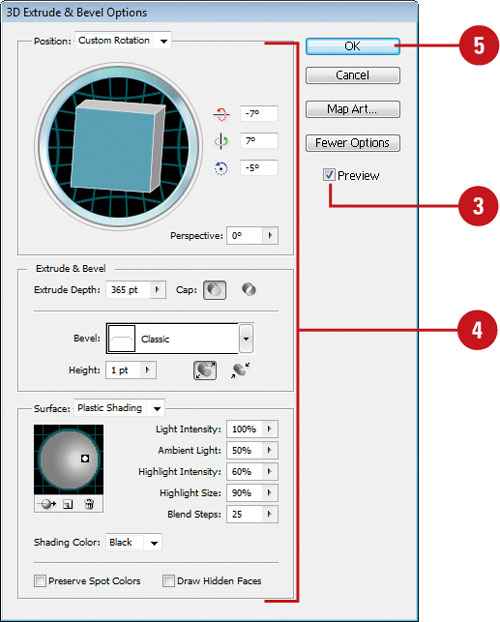
![]() Select from the following options:
Select from the following options:
• Position. Specifies object perspective and rotation angle.
• Extrude & Bevel. Specifies the extent of object depth and bevel.
• Surface. Specifies the surface of the 3D object.
• Lighting. Adds one or more light sources, varies the light intensity, changes shading color, and changes the light source direction.
• Map Art. Click to map 2D artwork (as a symbol) onto the surface of a 3D object.
![]() Click OK.
Click OK.
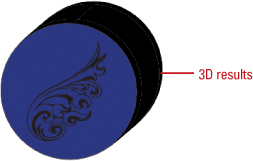
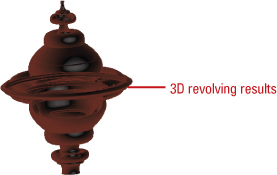
Create a 3D Revolving Object
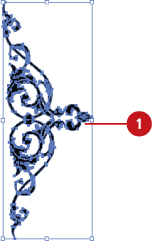
![]() Select the object that you want to change.
Select the object that you want to change.
![]() Click the Effect menu, point to 3D, and then click Revolve.
Click the Effect menu, point to 3D, and then click Revolve.
• Click More Options to display all available options in the dialog box.
![]() To preview an effect in your document, select the Preview check box (if available).
To preview an effect in your document, select the Preview check box (if available).
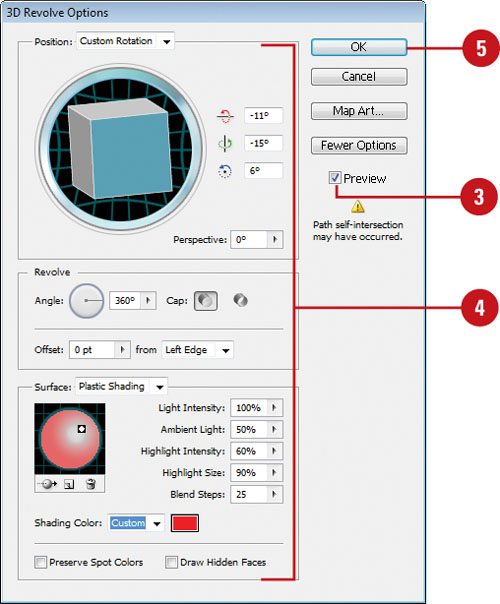
![]() Select from the following options:
Select from the following options:
• Position. Specifies object perspective and rotation angle.
• Revolve. Specifies how to sweep the path around the object to create a 3D object.
• Surface. Specifies the surface of the 3D object.
• Lighting. Adds one or more light sources, varies the light intensity, changes shading color, and changes the light source direction.
• Map Art. Click to map 2D artwork (symbol) onto the surface of a 3D object.
![]() Click OK.
Click OK.
Changing Raster Effects Settings
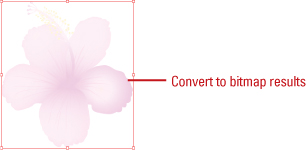
Some of the Illustrator effects—Drop Shadow, Inner Glow, Outer Glow, and Feather—and all of the Photoshop effects, are rasterized upon output. You can control how a raster effect looks in your document and how it will output from Illustrator by using the Document Raster Effects Settings dialog box. The available options allow you to specify a color model, resolution, background type (white or transparent), as well as apply anti-alias, create a clipping mask, and preserve spot colors. These options are globally applied to all raster effects. The raster settings convert a vector object to a bitmap image. When you change the resolution setting, Illustrator applies Resolution Independent Effects (RIE) (New!) and modifies related raster parameter values in the Effect Gallery dialog box to maintain consistency across different types of output. If you want to apply raster settings to an individual object, you can specify many of the same options in the Rasterize dialog box.
Change Raster Effects Settings
![]() Click the Effect menu, and then click Document Raster Effects Settings.
Click the Effect menu, and then click Document Raster Effects Settings.
![]() Select from the following options:
Select from the following options:
• Color Mode. Select a color mode: CMYK, RGB, Grayscale, or Bitmap.
• Resolution. Select a screen size in points per inch (ppi). Use Screen for web or video output, Medium for desktop printers, or High for commercial printing.
• Background. Use White to make any transparent areas white or Transparent to make the background transparent by creating an alpha channel.
• Anti-alias. Select to soften the edges of a rasterized object.
• Create Clipping Mask. Select to create a clipping path around the image and specify a size to extend the effect. If you selected the Transparent option, you don’t need to select this option.
• Preserve Spot Colors. Select to preserve spot colors.

![]() Click OK.
Click OK.
Convert Vector Objects to Bitmap Images
![]() Select the Layers panel, and then select the target circle for a layer, sublayer, group or object.
Select the Layers panel, and then select the target circle for a layer, sublayer, group or object.

![]() Click the Object menu, and then click Rasterize.
Click the Object menu, and then click Rasterize.
![]() Select from the following options:
Select from the following options:
• Color Mode. Select a color mode: CMYK, RGB, Grayscale, or Bitmap.
• Resolution. Select a screen size in points per inch (ppi). Use Screen for web or video output, Medium for desktop printers, High for commercial printing, or Use Document Raster Effects Resolution to apply the global resolution.
• Background. Use White to make any transparent areas white or Transparent to make the background transparent by creating an alpha channel.
• Anti-alias. Use Art Optimized (Supersampling) to soften shape edges. Use Type Optimized (Hinted) to soften type edges. Use None to keep edges jagged.
• Create Clipping Mask. Select to create a clipping path around the image and specify a size to extend the effect. If you selected the Transparent option, you don’t need to select this option.
• Preserve Spot Colors. Select to preserve spot colors.

![]() Click OK.
Click OK.
Working with the Effect Gallery
The Effect Gallery enables you to maintain complete and total control over Photoshop effects. In essence, the Effect Gallery gives you access to all of Photoshop’s effects and lets you apply the effects to any image, while viewing a large preview of the results. The Effect Gallery dialog box is composed of three sections—Image Preview, Effect Selection, and Effect Controls. When you use the Effect Gallery to modify the image, you see exactly how the image will look; there is no guesswork involved. When you apply an effect to an image, you are physically remapping the pixel information within the image. Illustrator provides over 50 Photoshop effects and the combinations of those effects are astronomical. That means there are a lot of different combinations available for you to try...have fun.
Work with the Photoshop Effect Gallery
![]() Select the Layers panel, and then select the layer you want to modify with an effect.
Select the Layers panel, and then select the layer you want to modify with an effect.
![]() Click the Effect menu, and then click Effect Gallery.
Click the Effect menu, and then click Effect Gallery.
![]() Change the image preview by clicking the plus or minus zoom buttons, or by clicking the black triangle and selecting from the preset zoom sizes.
Change the image preview by clicking the plus or minus zoom buttons, or by clicking the black triangle and selecting from the preset zoom sizes.
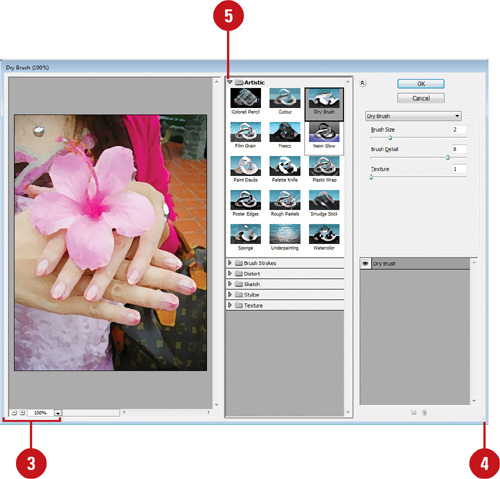
![]() If necessary, drag the lower right corner in or out to resize the Effect Gallery dialog box.
If necessary, drag the lower right corner in or out to resize the Effect Gallery dialog box.
![]() Click the expand triangle, located to the left of the individual categories, to expand an effect category. Effect categories include:
Click the expand triangle, located to the left of the individual categories, to expand an effect category. Effect categories include:
• Artistic
• Brush Strokes
• Distort
• Sketch
• Stylize
• Texture
![]() Click an effect from the expanded list to view its default effects on the image.
Click an effect from the expanded list to view its default effects on the image.
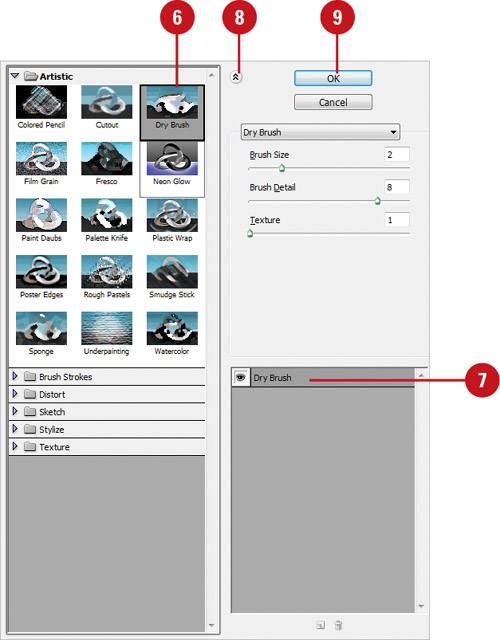
![]() Modify the results of the effect using the effect controls.
Modify the results of the effect using the effect controls.
![]() To temporarily hide the Effect Selections, click the Show/Hide Effect Thumbnails button, located to the left of the OK button.
To temporarily hide the Effect Selections, click the Show/Hide Effect Thumbnails button, located to the left of the OK button.
![]() Click OK.
Click OK.
Did You Know?
You can reapply a specific effect using a shortcut. Press Shift+Ctrl+E (Win) or Shift+![]() +F (Mac) to reapply the last effect to the image.
+F (Mac) to reapply the last effect to the image.
Using the Gaussian Blur Effect
You can also apply the Photoshop Gaussian Blur effect that blurs an image or a selection by a controllable amount. The Gaussian Blur effect can be used to add a sense of depth to the image. For example, you could select and blur the background of an image while leaving the foreground in focus. The outcome of the effect is to create a hazy, out-of-focus effect on the image or selection.
Use the Gaussian Blur Effect
![]() Select the Layers panel, and then select the layer you want to modify with an effect.
Select the Layers panel, and then select the layer you want to modify with an effect.

![]() Click the Effect menu, point to Blur, and then click Gaussian Blur.
Click the Effect menu, point to Blur, and then click Gaussian Blur.
![]() Drag the Radius slider or enter a pixel value to increase or decrease the amount of Gaussian blur applied to the image.
Drag the Radius slider or enter a pixel value to increase or decrease the amount of Gaussian blur applied to the image.
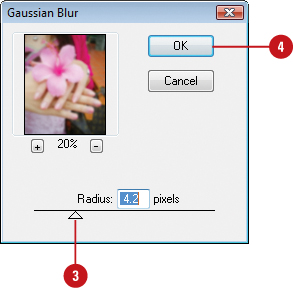
![]() Click OK.
Click OK.
Using the Unsharp Mask Effect
The Photoshop Unsharp Mask effect creates a visually sharper image by locating pixels that differ in value from surrounding pixels. When the effect is applied to the image, the bordering pixels specified by the threshold option get lighter and the darker pixels get darker. It’s important to understand that the Unsharp Mask does not actually sharpen the image; it only attempts to create the illusion of sharpness. Be careful; an over-application of this effect creates harsh images with ragged edges and shadows. Also, the effects of the Unsharp Mask effect appear more severe when viewed with the low resolution of a computer than when the document is output to a printer.
Use the Unsharp Mask Effect
![]() Select the Layers panel, and then select the layer you want to modify with an effect.
Select the Layers panel, and then select the layer you want to modify with an effect.
![]() Click the Effect menu, point to Sharpen, and then click Unsharp Mask.
Click the Effect menu, point to Sharpen, and then click Unsharp Mask.
![]() Select from the following options:
Select from the following options:
• Amount. Drag the slider or enter a value to determine how much to increase the contrast of pixels.
• Radius. Drag the slider or enter a value to determine the number of pixels surrounding the edge pixels that affect the sharpening.
• Threshold. Drag the slider or enter a value to determine how different the sharpened pixels must be from the surrounding area before they are considered edge pixels and sharpened by the effect.


![]() Click OK.
Click OK.
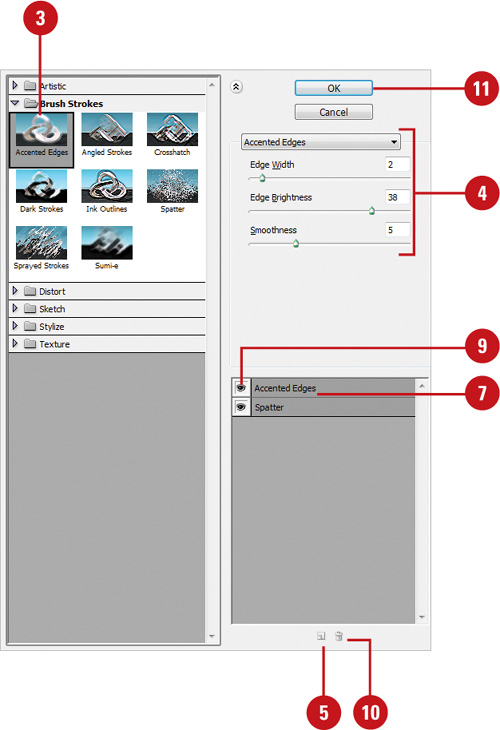
Applying Multiple Effects
Not only does Photoshop’s Effect Gallery let you apply and view an effect, it lets you view the multiple effects of two or more filters. The Effect Gallery has its own Layers panel, and you can have multiple effect layers. The order of the effects influences their impact on the image, so when you use more than one effect, try dragging the layer up or down in the stack to see the different possibilities. Experiment with different stacking orders to create unique, eye-popping special effects.
Apply Multiple Effects
![]() Select the Layers panel, and then select the layer you want to modify with an effect.
Select the Layers panel, and then select the layer you want to modify with an effect.
![]() Click the Effect menu, and then click Effect Gallery.
Click the Effect menu, and then click Effect Gallery.
![]() Select the effect you want.
Select the effect you want.
![]() Adjust the effect as necessary.
Adjust the effect as necessary.
![]() Click the New Layer Effect button, located at the bottom of the Effect Adjustments section. You can add as many effects layers as needed.
Click the New Layer Effect button, located at the bottom of the Effect Adjustments section. You can add as many effects layers as needed.
![]() Select and adjust a second effect (repeat steps 3 and 4).
Select and adjust a second effect (repeat steps 3 and 4).
![]() Adjust each individual effect by clicking on the effect layer you want to change.
Adjust each individual effect by clicking on the effect layer you want to change.
![]() To change the effect’s influence on the image, drag an effect layer to another position in the stack.
To change the effect’s influence on the image, drag an effect layer to another position in the stack.
![]() To temporarily show or hide the effect on the image, click the Show/Hide button.
To temporarily show or hide the effect on the image, click the Show/Hide button.
![]() To delete a selected effect layer, click the Delete button.
To delete a selected effect layer, click the Delete button.
![]() Click OK.
Click OK.
Important
Once you click the OK button, the effects are permanently applied to the active image, unless it’s a Smart Object.
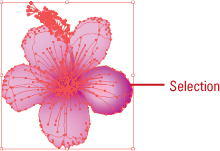
Controlling Effects Using Selections
When you apply an effect, Illustrator applies the effect equally to the entire image. Unfortunately, that might not be what you had in mind. For example, you might want to apply the Gaussian Blur effect to a portion of the image. In that case, Illustrator’s selection tools come to the rescue. The primary purpose of making a selection is to define a work area, and when you select an area before applying an effect, the only area impacted by the effect will be the selected area.
Control Effects Using Selections
![]() Select the Layers panel, and then select the layer to which you want to apply an effect.
Select the Layers panel, and then select the layer to which you want to apply an effect.

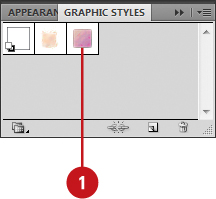
![]() Select the Direct Selection tool on the Tools panel, and then make a selection in the document window.
Select the Direct Selection tool on the Tools panel, and then make a selection in the document window.

![]() Click the Effect menu, and then click Effect Gallery.
Click the Effect menu, and then click Effect Gallery.
![]() Select any Photoshop effects.
Select any Photoshop effects.

![]() Adjust the effect options until you see the effect you want.
Adjust the effect options until you see the effect you want.
![]() Click OK.
Click OK.
The effect is only applied to the selected areas of the image.
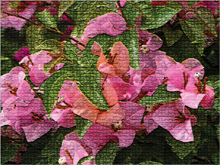
Viewing Various Effects
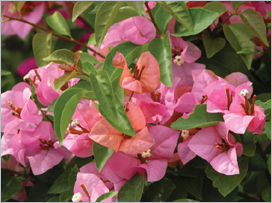
Illustrator and Photoshop provide a bountiful selection of over 100 effects.. Take a moment to view some of the various effects you can use. The original image is shown to the right, and we’ve displayed some common effects on the following pages. A good thing to think about when using effects is your original image. Look at the background colors, and see if they will look good with some of the effects. The best thing to do is open an image that has a lot of varied details, and then apply some effects to see what looks good to you.
Various Effects
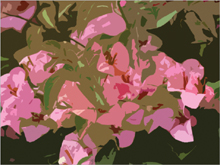
Cutout

Dry Brush

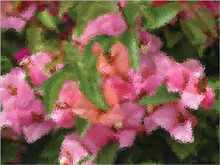
Fresco

Panel Knife

Accented Edges
Glass

Diffuse Glow

Note Paper
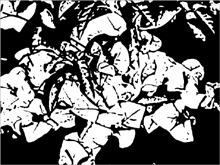
Stamp
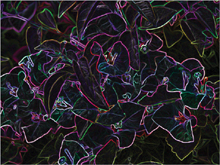
Glowing Edges

Grain

Spatter
Mosaic Tiles
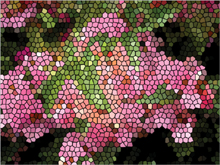
Stained Glass

Graphic Pen

Plastic Wrap