
Chapter 11
Maintaining Your Drone
In This Chapter
![]() Performing routine maintenance
Performing routine maintenance
![]() Creating a post-flight checklist
Creating a post-flight checklist
![]() Storing your drone
Storing your drone
![]() Repairing your drone
Repairing your drone
![]() Finding parts and support online
Finding parts and support online
Drones require great care. Chapters 9 and 10 show you how to fly a drone starting with pre-flight checklists. When you finish flying, you don’t want to just toss your drone in the garage until you are ready for your next flight. There is an extensive amount of work that should be done prior to packing away your drone. In this chapter, you review a sample post-flight checklist and get tips for creating your own. Your post-flight checklist will walk you through inspecting your device for damage, cleaning up your drone, inspecting and handling batteries, and storing your drone.
As you continue to log hours flying your drone, your chances for crashes or hard impacts will increase. Drones are durable but not indestructible, which means that in time you will need to repair your drone and replace parts. By the end of this chapter, you will know how to shop for parts online, find technical support so you can do your own repairs, and in the event your repairs are extensive, you will know how to find a repair technician. This chapter is all about how to take care of your drone so that it lasts.
Post Flight Maintenance
Drones are complex pieces of machine and computer technology that require great care to ensure their longevity. If taking time to clean up and care for things is not in your DNA, then you may be in for a surprise when you get up and running with your drone. After every flight, you must inspect all parts of the drone for damage and integrity. Even if you successfully fly your drone without making hard landings, colliding with objects, or crashing, normal wear and tear can build up over time and cause problems in future flights.
Here are some issues that can arise during flight:
- Flying in wet conditions can cause rust.
- Flying in dry conditions can cause dust buildup.
- Drone motors produce a great deal of vibration, which can slowly loosen tight bonds and bolts or screws.
- Bugs can chip, ding, or otherwise gunk up your propellers.
- Impacts and crash landing can damage propellers, propeller guards, landing gear, hulls, batteries, camera gear, and more.
Creating a post-flight checklist
In Chapter 9, you see how to create a pre-flight checklist. In this chapter, you see how to create a post-flight checklist. If you use a post-flight checklist, you don’t have to leave anything up to memory. Every drone is different, so there is not a standard post-flight checklist that applies to every drone, but the core of the post-flight checklist is similar across the board. To get you started, the following sections cover some examples of what might appear on a post-flight checklist along with some explanations of what you are looking for and why it matters, and a picture to help you better visualize how a post-flight check list is configured.
Having a post-flight checklist will be critical to ensuring the success of your drone flying experiences. Your post-flight check list and your pre-flight check should ensure that you are never flying with dirty cameras and damaged equipment. Spend some time getting to know your drone and customize the checklist covered in the following sections to be a better fit for your equipment.
 Power off your drone
Before you inspect and dismantle your drone, make sure it is disarmed and that your batteries, drone, flight controller, and any other powered equipment are turned off.
 If your drone is not disarmed, the propellers may turn on to stabilize the drone if it is picked up or moved, which can result in serious injury. Always ensure that your drone is disarmed before you handle it. Figure 11-1 shows the arming status indicator on a Pocket Drone.
Courtesy of TJ Johnson
Figure 11-1: Verify that your drone is disarmed by checking its status indicator.
Inspect the body of the drone
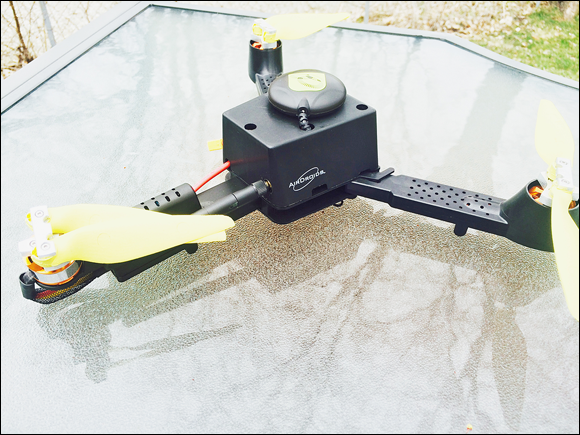
Look over your entire drone to check dirt, dust, water, grime, bugs, or any other sort of filth buildup. Cleaning the drone makes it easier to find any damage that may have been otherwise hidden. Once the drone is clean, look over its body to check for cracks or breaks. Figure 11-2 is a picture of the body of a Pocket Drone that has been cleaned.

Courtesy of TJ Johnson
Figure 11-2: The body of a very clean Pocket Drone.
Inspect the propellers
The propellers are the blades that spin at a high rate of speed to move air and create lift, which causes your drone to be airborne. Propellers are carefully balanced to ensure that at high speeds, they do not create any unnecessary vibration that could make your drone difficult or unfit to fly. Chips, cracks, or any sort of damage no matter how big or small will result in your propeller needing to be replaced. Crashing your drone into an object will almost always ruin unprotected propellers. Flying through bugs can do the same! Figure 11-3 is a picture of the propellers of a Pocket Drone. Notice that one has been chipped.

Courtesy of Mark LaFay
Figure 11-3: Damaged propellers must always be replaced.
Propeller guards and protective hulls
Some drones come with the option to add a protective shield around the propellers. The Parrot AR Drone 2.0 has a very light protective hull that goes around the entire drone. The point of these is to protect the propellers and the body of the drone in the event of an impact. These protective shields, however, can be damaged as well. If your protective hull is damaged, it can cause your drone to become unbalanced and unstable. Also, if a damaged protective hull is involved in another collision, the hull could flex or broken pieces could go into the propellers causing a crash and substantial damage. If your protective hull is broken, replace it. Figure 11-4 is a picture of an intact protective hull on a Parrot AR Drone 2.0.

Source: Yutaka Tsutano/Creative Commons
Figure 11-4: Parrot AR.Drone 2.0 protective hull.
Batteries
Drones require heavy duty, Lithium Polymer batteries (LiPo) because of the amount of power they require to stay airborne. The problem with LiPo batteries is that they are far more dangerous than the batteries you typically find at home. LiPo batteries are extremely volatile and must be cared for. If your battery is damaged, you must dispose of it. Damaged batteries can cause fires or even explosions. Figure 11-5 is a picture of a LiPo battery that has been damaged.

Source: Carlos Sancho/Creative Commons
Figure 11-5: Damaged LiPo batteries are hazardous to your health.
If your batteries made it through your flying unscathed, then disconnect them and let them cool down before charging them.
For more information regarding the safe handling and use of LiPo batteries, see Chapter 6.
Fittings
Drone motors produce a substantial amount of vibration and if any parts of the motor are loose, the vibration can dramatically increase. Loose fittings can cause parts like propellers, motors, and other attachments to shake, rattle, and roll, causing your drone to become unstable. Ensure that your fittings are snug so that nothing comes loose during your next flight. If your previous flight seemed rougher than usual, check the fittings. Figure 11-6 shows the propeller fitting of a Pocket Drone.

Courtesy of TJ Johnson
Figure 11-6: Fittings are screws and washers that keep drone parts secure.
Landing gear
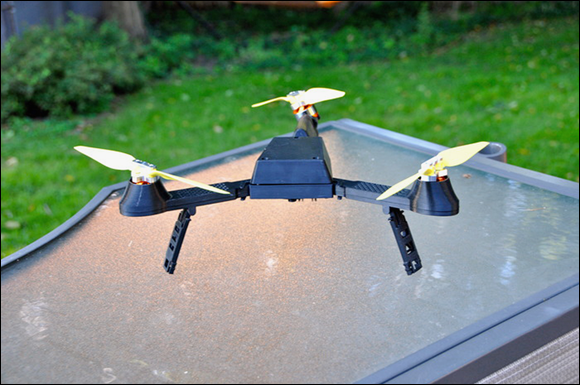
Landing gear can be fixed or retractable. Retractable landing gear has many more parts that must be inspected to ensure that the gear continues to retract and extend as designed. You also must inspect landing gear to make sure that there are no cracks or breaks. Hard landings can have the same effect on your landing gear as a crash landing. Figure 11-7 shows the landing gear on a Pocket Drone.
Courtesy of TJ Johnson
Figure 11-7: Pocket Drone landing gear, cute and effective.
Wiring
Your drone has numerous wires that send power throughout the device. The main wires you will come in contact with are attached to a harness that quickly connects your battery to your drone. When you check your drone after a flight, check the wiring harness to ensure that there are no loose connections. It is also good to check all visible wires for cracks, breaks, burns, or any other sort of damage. There is a lot of juice flowing through your drone and any sort of wiring issue could cause your drone to fall from the sky. Figure 11-8 is a picture of the wiring harness on a Pocket Drone.

Courtesy of TJ Johnson
Figure 11-8: Pocket Drone wiring harness.
Download flight info
Some drones will track and store flight information so that you can review it after you are done flying. Some of the information that is tracked includes speed, altitude, and GPS location. The more you fly, the more information your drone will take in until your storage is completely filled. Some drones store flight information on a removable storage device so that you can download, review, and archive it. Be sure to download this information and archive it, or at least clear it off so that you have space to record flight info, when you need it.
Download camera data
If you are flying and taking pictures and video, you always want to be sure to dump your footage onto a storage device and clean the image and video data off your drone’s camera. If your drone uses removable media to store video and photo data, be sure that you put the storage media back into your drone when you have cleaned off the data. Nothing is worse than getting out to a location and finding that you left your storage media at home or have no room on your device to take new pictures and video. Figure 11-9 shows the Parrot AR Drone 2.0 USB flight recorder.
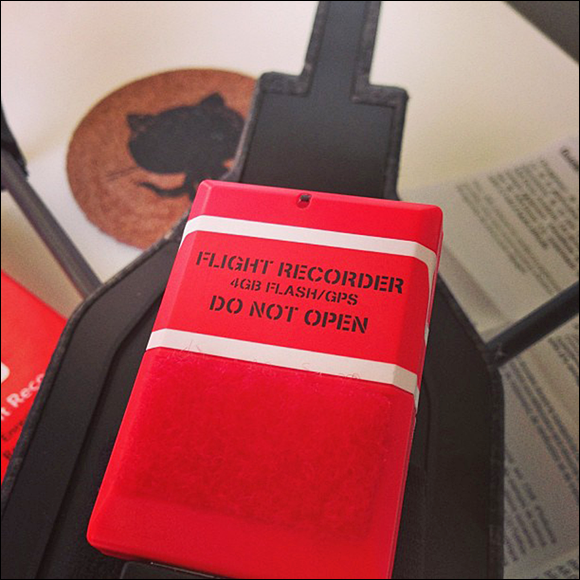
Figure 11-9: The Parrot AR Drone flight recorder.
Source: Andrew/Creative Commons
Clean camera and lens
Several years ago I was tasked with recording video footage of life on the road with a rock and roll band called Haste The Day (www.hastetheday.us). I was good with a video camera but I wasn’t disciplined enough to have any sort of checklist to review before shooting. After a several months of filming I noticed that my lens was dirty and the filth showed up on a decent chunk of footage that I captured in Africa. Five years later I look at that footage and kick myself for not checking the lens to ensure it was clean. Don’t be that guy! If cleaning your lens is on your preflight checklist (covered in Chapter 9) and your post-flight checklist, you don’t have to worry about lens spots on your camera.
Storing your drone
You must ensure that you have a safe place to store your drone. If you did not get a storage case with your drone, then it is well worth it to invest in one. Following is a list of things you should consider when shopping for a storage case for your drone:
- Excess storage: Keeping all your drone gear in one place is the best way to ensure that you have what you need when you go flying. Choose a case that is a snug fit for your drone and offers storage compartments for a battery charger, extra batteries, extra parts, flight controller, and any other critical equipment.
- Waterproof or resistant: To some, this may be overkill, but a waterproof case never hurt anyone (unless it fell on your head). Waterproof or water resistant cases are great if you plan to take your drone to places where it will be exposed to wet conditions.
- Hard or soft shell: If you’re planning to take your drone on long trips where you may want to check it on a plane or put it in a trailer, a hard shell case is the way to go. Hard shell cases such as those made by Pelican can be waterproof and almost bomb-proof.
Regardless of what you decide to store your drone in, you must take great care in how you store your drone’s batteries. LiPo batteries require great care. LiPo batteries have a storage capacity that can be diminished if they are not stored properly.
Here is how to properly care for your LiPo batteries to ensure a safe and long life:
- Half-charge: LiPo batteries should not be stored fully charged. Doing so will slowly erode the battery’s storage capacity, shortening its useful life. Most battery chargers come with a storage mode that will charge the battery to 40%-50% which is an adequate charge level for storage.
Keep cool: LiPo batteries produce heat when they are used. The heat then causes the chemical reaction to produce more heat which can speed the power drain process. By reducing the battery’s temperature during storage, you reduce the rate at which they will lose charge and overtime this will preserve their storage capacity.
 Store your batteries in the refrigerator to ensure they last as long as possible. Only do this with half-charged batteries; never place fully charged batteries in the fridge. Also, never leave your batteries in a hot place, such as in your car in the summer.
- Moisture control: If you store your batteries in the refrigerator, you must let them warm to room temperature before you plug them in to charge. During this time, your batteries may experience a buildup of condensation. Storing your batteries in plastic bags will protect them from atmospheric moisture as they are warming to room temperature. Figure 11-10 is a picture of LiPo batteries being stored in plastic bags in the refrigerator.
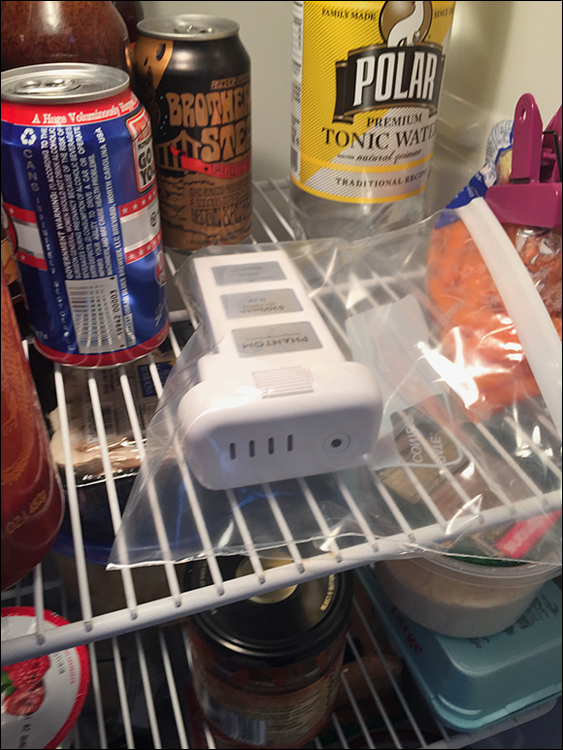
Figure 11-10: Safely storing LiPo batteries in a refrigerator.
Courtesy of Andrew Amato
DIY Repairs and Maintenance
If your drone needs a tune-up, don’t worry. You don’t have to send it in to have a repair technician work on it. You can make the repairs on your own. Several resources are available online where you can find the answers you need to repair your drone. Before you scour random message boards, however, visit the website of your drone manufacturer. For example, if you purchased a Parrot AR.Drone 2.0, follow these steps to get help online:
Using your computer or web-enabled device, launch a web browser and go to
www.parrot.com.The Parrot website appears.
Click the support link located at the top of the web page.
The support homepage appears.
Locate your drone model on the screen, and click its associated link or icon. If you are looking for support for the AR Drone 2.0, click its icon located in the center of the screen.
The Parrot AR Drone 2.0 support site appears. On this site you will find several videos and documents that will help you navigate common repairs. Figure 11-11 is a screen shot of the Parrot AR Drone 2.0 support website.
- If the videos and information contained on the support site do not help you repair your drone, contact the support staff using the email or phone number located at the top of the screen.

Figure 11-11: Get help with your Parrot AR Drone 2.0 online.
Larger and more prominent drone manufacturers are more apt to have a robust online database of help documents, videos, tutorials, and other useful information for repairing your drone. This is one major benefit to buying a drone from a major manufacturer like DJI or Parrot. That is not to say that the milieu of startup drone companies should be avoided. These companies are creating quality products that, in many cases, can take non-manufacturer specific replacement parts.
If you are having a hard time finding information for fixing a particular issue with your drone, you should look into the various drone support groups and online communities. Chapter 4 goes into how to find and navigate these forums in great detail.
How to find replacement parts for your drone
Purchasing spare parts for your drone is a good idea whether you need them or not. The part you will replace most often is your propellers, simply because they are the most likely to get trashed if you run into objects or crash land. It is always good to have a couple spare sets of propellers on hand so that you can repair your drone and get back up and running in no time. You can find replacement parts by going to your device manufacturer’s website. For example, if you own a DJI Phantom 2 drone, purchase replacement parts, like propellers, online through DJI by following these steps:
Using your computer or web-enabled device, open a web browser and go to
www.dji.com.The DJI website will load.
Locate the Store link at the top of the screen, and move your mouse cursor over it.
A submenu appears revealing several options.
Locate and click on the
Tuned Propulsion Systemslink.A page filled with various propeller options appears as shown in Figure 11-12.
Locate the set of propellers you want, and click on the item.
The product page appears, giving you all pertinent information on the propellers.
- If you would like to purchase the propellers, click the Add To Cart button to add them to your cart, and follow the on-screen directions to complete your purchase.

Figure 11-12: Shop for replacement Phantom drone propellers at dji.com.
Sometimes purchasing parts from your device manufacturer is not the most cost-effective option. You can also look for replacement parts on Amazon and eBay.
Finding a drone technician
If you aren’t confident or prepared to repair your drone yourself, it may be time to hire a drone technician. If you purchased your drone from a major manufacturer such as Parrot or DJI, first determine whether your repairs can be covered under your device’s warranty. To do this, you need to refer to the instruction manual that came with your device. If you find that the repairs are not covered under the warranty, you need to pay for the parts and labor.
 Make sure you don’t void your manufacturer’s warranty by doing something inadvertently. To make sure you’re always in compliance, check the manufacturer’s website. It is generally a good idea to not dismantle your drone, fly it in the rain or crash into water, modify your drone with unapproved parts, or lose your proof of purchase.
Parrot Drones does not offer repair service for anyone living outside of the UK. So if you own a Parrot drone, you need to contact the retailer where you purchased the drone to get service for your device. If you purchased a DJI drone, you can send your drone back to DJI for repairs. To do this, you must first contact the DJI service and support team in your region. To get these contacts, visit them online at www.dji.com/service/repair-service.
Sending your drone into a technician can take quite a bit of time, depending on the number of drones that are already waiting to get service. This can mean extended amounts of downtime before you fly again. Before you commit to sending in your drone, see if you can get the help you need online to perform the repairs on your own or go to your drone manufacturer’s website to see if they have a listing of authorized repair centers or a listing of retail partners. You can contact these locations to see if they will repair your drone in shorter time.