
This recipe will show you how to use WebSockets in a client-server application (both web and command-line clients) and what its advantages are. You can find the code in the project websockets.
HTTP is a simple request-response-based protocol, and then the connection is broken from the application's point of view until the next request. In a modern web application (for example, in online multiplayer games), the client and server are of equal importance; changes in the state of the application can take place on both sides. So, we need a bi-directional communication channel between the client(s) and the server that allows for two-way real time updates and more interaction; this is exactly what WebSockets has to offer. WebSocket connections between a browser and a server are made through a handshake request. This is a regular HTTP client request with an upgrade flag in the header, also containing a Sec-WebSocket-Key, which is a random value that has been base64 encoded. To complete the handshake, the server responds with a Sec-WebSocket-Accept response.
WebSockets are implemented in all modern browsers (Internet Explorer v10 and above), and can also be used in non-web applications. The communication takes place over TCP port 80, so it can pass unhindered through firewalls.
Perform the following steps to make a WebSockets server work:
- Use the following code to set up a WebSockets server (see
websocket_server.dart):import 'dart:io'; import 'dart:async'; InternetAddress HOST = InternetAddress.ANY_IP_V6; const PORT = 8080; main() { runZoned(startWSServer, onError: handleError); } startWSServer() { HttpServer.bind(HOST, PORT) .then((server) { print('Http server started on $HOST $PORT'), server.listen(handleRequest); }); } handleError(e, stackTrace) { print('An error occurred: $e $stackTrace'), } handleRequest(HttpRequest req) { if ( (req.uri.path == '/ws') // command-line client || WebSocketTransformer.isUpgradeRequest(req) // web-client ){ // Upgrade a HttpRequest to a WebSocket connection. WebSocketTransformer.upgrade(req).then(handleWebSocket); } else { print("Regular ${req.method} request for: ${req.uri.path}"); serveNonWSRequest(req); } } handleWebSocket(WebSocket socket) { print('Client connected!'), socket.listen((String msg) { print('Message received: $msg'), socket.add('echo from server: $msg'), }, onError: (err) { print('Bad WebSocket request $err'), }, onDone: () { print('Client disconnected'), }); } serveNonWSRequest(req) { var resp = req.response; resp.statusCode = HttpStatus.FORBIDDEN; resp.reasonPhrase = "WebSocket connections only"; resp.response.close(); } - The following code is used for a command-line WebSocket client (
websocket_client.dart):import 'dart:io'; const HOST = 'localhost'; const PORT = 8080; main() { var wsurl = "ws://$HOST:$PORT/ws"; WebSocket.connect(wsurl) //Open the websocket and attach the callbacks .then((socket) { socket.add('from client: Hello Websockets Server!'), socket.listen(onMessage, onDone: connectionClosed); }) .catchError(print); } void onMessage(String msg){ print(msg); } void connectionClosed() { print('Connection to server closed'), }
If we run the server script, websocket_server.dart, and then start a client websocket_client.dart, we get the following output on the server console:
Http server started on InternetAddress('::1', IP_V6)8080 Client connected! Message received: from client: Hello Websockets Server!
The client console prints the following output:
echo from server: Hello Websockets Server!
To make a web client, we need a web page websocket_webclient.html that invokes a script websocket_webclient.dart. The web page is kept very simple with an input field that will collect a string to send to the server and a <div> element that shows the response from the server as follows:
<h1>WebSocket Sample</h1>
<input id="input" type="text"></input>
<div id="output"></div>
<script type="application/dart" src="websocket_webclient.dart"></script>
The following is the script code:
import 'dart:html';

void main() {
  TextInputElement inp = querySelector('#input'),
  DivElement out = querySelector('#output'),

  String srvuri = 'ws://localhost:8080/ws';
  WebSocket ws = new WebSocket(srvuri);

  inp.onChange.listen((Event e){
  ws.send(inp.value.trim());
  inp.value = "";
});

ws.onOpen.listen((Event e) {
  outputMessage(out, 'Connected to server'),
});

ws.onMessage.listen((MessageEvent e){
  outputMessage(out, e.data);
});

ws.onClose.listen((Event e) {
  outputMessage(out, 'Connection to server lost...'),
});

ws.onError.first.then((_) {
  print("Failed to connect to ${ws.url}. "
  "Please rerun bin/websocket_server.dart and try again.");
  });
}

void outputMessage(Element e, String message){
  print(message);
  e.appendText(message);
  e.appendHtml('<br/>'),
  //Make sure we 'autoscroll' the new messages
  e.scrollTop = e.scrollHeight;
}
When the server runs, start the web client by opening websocket_webclient.html, and type in some text. The text received by the web server is echoed back and shown both on the page and in the editor console as follows:
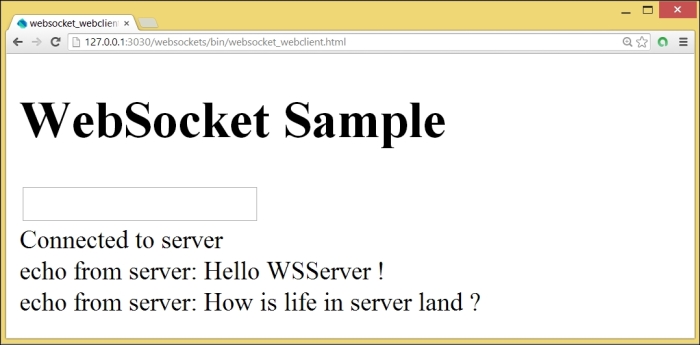
A WebSocket web client
In step 1, the server is run in a runZoned() clause to add additional exception handling capabilities (see the Serving files with http_server recipe). We start a web server as usual. In handleRequest, we check whether the path of the request ends in /ws. In that case, we have a command-line client issuing a WebSocket request. A web client making a WebSocket request will add an upgrade flag in the headers. For this, we can test it with the isUpgradeRequest method of the WebSocketTransformer class. If that is the case, we call the upgrade method on the same class, and when done, we call the handleWebSocket method. This starts listening for client connections, prints out any client message in the server console, and echoes this back to the client. If the message was a JSON string, we could have decoded it before it starts listening to client connections with socket.map((string)=> JSON.decode(string)).
In the case of a normal HTTP request, serveNonWSRequest is used to block it, but of course, we could do normal web request handling as well.
The command-line client in step 2 uses the WebSocket class from dart:io. It connects to a WebSocket server with a ws:// URL as a parameter to the connect method. Then, it can write to the socket with add and receive messages on the socket with listen.
The web client in step 3 uses the WebSocket class from dart:html. Calling its constructor with the URI of the server opens the web socket connection. The send method called on this instance sends the client data (here, the text of the input field) to the server. When the response from the server can be read from the socket, the onMessage event is fired and shows the response. Other useful events of the WebSocket instance are:
The pub package route can be used to associate callbacks with URL patterns. In this recipe, instead of testing the /ws pattern, we could have used Router from the package route to do that for us. We import this package, and then startWSServer will contain the following code:
import 'package:route/server.dart' show Router;

startWSServer() {
  HttpServer.bind(HOST, PORT).then((server) {
  print('Http server started on $HOST $PORT'),
  Router router = new Router(server);
  router.serve('/ws').transform(new WebSocketTransformer()).listen(handleWebSocket);
  });
}
As a more general example of how routing can be useful, consider the following example. Let's suppose our clients search for stock data with URLs ending with /stocks and /stocks/GOOG. Then, we can define pattern1 and pattern2 as instances of the class UrlPattern with a regular expression containing the following pattern:
// Pattern for all stocks(plural).
final stocksUrl = new UrlPattern(r'/stocks/?'),
// Pattern for a single stock('/stock/GOOG', for example).
final stockUrl = new UrlPattern(r'/stock/(d+)/?'),
Our router instance will then bind the callback functions serveStocks and serveStock to those patterns through the serve method:
var router = new Router(server)
..serve(stocksUrl, method: 'GET').listen(serveStocks)
..serve(stockUrl, method: 'GET').listen(serveStock)
  // all other possible patterns and method combinations
..defaultStream.listen(serveNotFound);
As shown in the first example, patterns can also be simple strings like /stockdata.
- Look at the Serving files with http_server recipe for more information on
runZoned - The Dart website has a very good tutorial on a search app implemented with WebSockets and Dartiverse Search, at https://www.dartlang.org/docs/dart-up-and-running/contents/ch05.html