
Imagine developing a board game and the player has to use the keyboard to move the pieces; this wouldn't be acceptable anymore. Before HTML5, drag-and-drop using the mouse was a feature that had to be implemented through an external library like Dojo or jQuery. However, HTML5 provides native browser support to make nearly every element on a web page draggable, thus allowing more user-friendly web apps. This recipe shows you how to implement drag-and-drop (abbreviated as DnD) with Dart.
Run the drag_drop project. The result is a board of images as shown in the following screenshot, where the images are draggable and you can swap an image with any other image, as shown in the following screenshot:
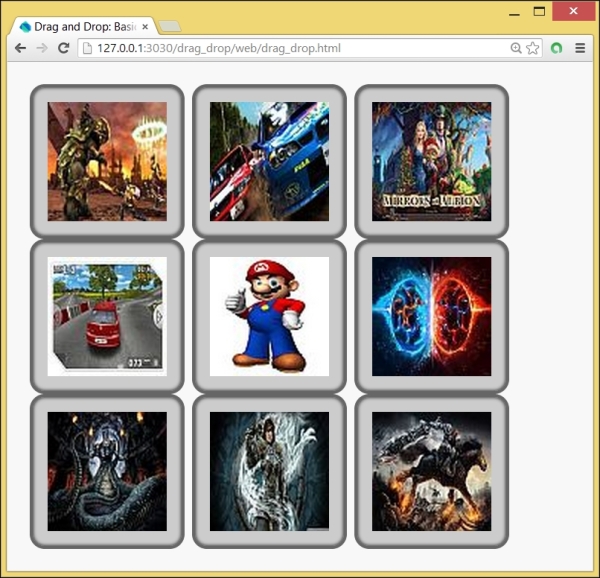
Drag-and-drop images
Perform the following steps to enable drag-and-drop
- The elements that we want to drag-and-drop must get the
draggableattribute in HTML, so indrag_drop.html, we indicate this for the<div>elements of the board:<div id="tiles"> <div id="tile1" class="pict" draggable="true"></div> <div id="tile2" class="pict" draggable="true"></div> ... </div> - In the accompanying script
drag_drop.dart, we make a class,DragnDrop, to integrate all the drag-and-drop event handling. All our<div>tiles have a CSS classpictand are hence captured in thecolscollection. Themain()function makes an object,dnd, and calls theinit()method on it:void main() { var dnd = new DragnDrop(); dnd.init(); } class DragnDrop { Element dragSource; Map tiles; var rand = new Random(); var cols = document.querySelectorAll('.pict'), // ... } - The i
nit()function constructs a map with images from theimgfolder ingenerateMap(). It sets up listeners for all theDndevents of our tiles, and the images are set up as background images for the tiles viastyle.setPropertyby callinggetRandomTile():void init() { generateMap(); for (var col in cols) { col ..onDragStart.listen(_onDragStart) ..onDragEnd.listen(_onDragEnd) ..onDragEnter.listen(_onDragEnter) ..onDragOver.listen(_onDragOver) ..onDragLeave.listen(_onDragLeave) ..onDrop.listen(_onDrop) ..style.setProperty("background-image", getRandomTile(), "") ..style.setProperty("background-repeat", "no-repeat", "") ..style.setProperty("background-position", "center", ""); } } void generateMap() { tiles = new Map(); for (var i = 1; i <= 9; i++) { tiles[i] = "url(img/tiles_0$i.jpg)"; } } String getRandomTile() { var num = rand.nextInt(10); var imgUrl = tiles[num]; while (imgUrl == null) { num = rand.nextInt(10); imgUrl = tiles[num]; } tiles.remove(num); return imgUrl; } - The code for each of the
Dndevent handlers is as follows:void _onDragStart(MouseEvent event) { Element dragTarget = event.target; dragTarget.classes.add('moving'), dragSource = dragTarget; event.dataTransfer.effectAllowed = 'move'; // event.dataTransfer.setData('text/html', dragTarget.innerHtml); } void _onDragEnd(MouseEvent event) { Element dragTarget = event.target; dragTarget.classes.remove('moving'), for (var col in cols) { col.classes.remove('over'), } } void _onDragEnter(MouseEvent event) { Element dropTarget = event.target; dropTarget.classes.add('over'), } void _onDragOver(MouseEvent event) { // This is necessary to allow us to drop. event.preventDefault(); event.dataTransfer.dropEffect = 'move'; } void _onDragLeave(MouseEvent event) { Element dropTarget = event.target; dropTarget.classes.remove('over'), } void _onDrop(MouseEvent event) { // Stop the browser from redirecting and bubbling up the // event: event.stopPropagation(); // Don't do anything if dropping onto the same tile we're dragging. Element dropTarget = event.target; if (dragSource != dropTarget) { var swap_image = dropTarget.style.backgroundImage; dropTarget.style.backgroundImage = dragSource.style.backgroundImage; dragSource.style.backgroundImage = swap_image; } }
Drag-and-drop makes an element on a page draggable by working with the following event life cycle: Drag, DragStart, DragEnd, DragEnter, DragLeave, DragOver, and finally Drop. They generate a stream of MouseEvents caught by the onDragEvent event handlers (where the event is Start, End, and so on). The event.target option changes for each type of event, depending on where we are in the drag-and-drop event model.
The basic requirement for an element to move is that it has the attribute draggable="true". In drag-and-drop, we can distinguish three objects:
- The source element is where the drag originates (this can be an image, list, link, file object, or block of HTML code)
- The data payload is what we're trying to drop
- The target element is an area to catch the drop or the drop zone, which accepts the data the user is trying to drop
Nearly everything can be drag enabled, including images, files, links, or other DOM nodes. However, not all elements can be targets, for example images, but our example shows that it is easy to work around that.
The visual effects that accompany drag-and-drop are implemented through CSS. Every tile has the CSS class pict, which contains the attribute cursor: move, which gives users a visual indicator that something is moveable.
When a drag action is initiated, _onDragStart is executed, adding the CSS class moving to our tiles. This class can be found in drag_drop.css:
.pict.moving {
  opacity: 0.25;
  -webkit-transform: scale(0.8);
  -moz-transform: scale(0.8);
  -ms-transform: scale(0.8);
  transform: scale(0.8);
}
We see that the opacity is reduced to 0.25 and size is scaled with factor 0.8, exactly what we see when a drag operation is started. In this example, we don't need it, but if the dragging involves HTML text, _onDragStart should contain the following code line:
event.dataTransfer.setData('text/html', dragTarget.innerHtml);
The preceding code indicates what data will be transferred during the drag-and-drop process. The dataTransfer property is where it all happens; it stores the piece of data sent in a drag action. The dataTransfer option is set in the DragStart event and read/handled in the Drop event. Calling e.dataTransfer.setData(format, data) will set the object's content to the MIME type and the data payload will be passed as arguments.
The _onDragEnter function is executed when we hover over another tile; this adds the CSS class over, making the borderlines dashed:
.column.over {
  border: 2px dashed #000;
}
Finally, the _onDrop event swaps the tile images. If HTML text has to be swapped, the following lines should be added:
dragSource.innerHtml = dropTarget.innerHtml;
dropTarget.innerHtml = event.dataTransfer.getData('text/html'),
The article at http://www.html5rocks.com/en/tutorials/dnd/basics/ by Eric Bidelman is a good resource, but it uses JavaScript to explain the DnD event model. To make it easier to work with DnD in Dart, Marco Jakob developed the library dart-html5-dnd, available on pub. For more information on this nice package, refer to http://code.makery.ch/dart/html5-drag-and-drop/. DnD functionality is also implemented in the dart:svg library.