CHAPTER 5
WASTE NOT
I ’ve never been all that interested in perfection. The works of art that speak the loudest to my soul are always those in which the artist’s hand is clearly evident. I love to search for wayward marks, cracks, odd proportions, and strange color combinations in every piece I consume because, to me, the “mistakes” are the fulcrums of magic in a given work of art. Kintsugi is the Japanese art of lovingly repairing broken ceramics with a special gold, silver, or platinum lacquer—essentially highlighting a mistake and turning it into something sparkling and special. These final projects are exercises in letting go of failures and embracing the imperfect nature of print.

Project:
FRANKENSTEIN'S MONSTER
Much like the monster in Mary Shelley’s Frankenstein, this project focuses on repurposing interesting and useful parts of failed prints to create something new and wholly unexpected. This is the perfect opportunity for experimentation and play: Because the prints you’ll be using are unsuitable to edition, they are thus devoid of preciousness. That means you have complete freedom from your original intentions and how things are “supposed” to look. So use that freedom to really stretch your legs creatively; for example, if you’re usually neat, orderly, and organized, try approaching this project with wild expression. I recommend playing mad scientist in the laboratory. Cut things up, move them around, crank up the music, and work by instinct. When you land on an arrangement or pairing that makes you say to yourself, oh that’s interesting, follow that stream wherever it takes you. Don’t be surprised if you get swept up in a flood of new ideas.
Tools and Materials
A small stack of failed prints
One sheet 8" x 10" (20.5 x 25.5 cm) heavyweight tagboard paper
Repositionable adhesive
Glue brush
Scissors or craft knife
Optional: needle and thread or sewing machine
Optional: tracing paper
Optional: paint kit
Optional: lightning storm


1 Because this is a collage that involves layering papers, the background is the first consideration. I used a misprint from Texture Quilt (shown here).
2 I cut the composition into four 3" x 4" (7.5 x 10 cm) rectangles, rotated them, and then pieced them together to form a 6" x 8" (15 x 20.5 cm) field of textures and values that will be the basis of the background. Glue in place on a sturdy background paper such as heavyweight tagboard.

3 As a nod to the iconic stitching used in most cinematic interpretations of Frankenstein’s monster, I ran the print through my sewing machine, stitching the pieces of the background together. A similar effect can be achieved by hand sewing the paper, if preferred.

4 Cut up pieces of other misprints, according to what is most visually interesting to you. I like to use a variety of papers in my collages, but tracing paper is interesting as a somewhat analog way to play with background opacity.

5 Use a repositionable glue, such as Nori Paste, when you start collaging elements—this will allow you to make edits as you go.

6 I used the hands from the Puzzle Block Print (shown here) as a foundation for my composition, and used layered-up pieces of tracing paper to create another space within the image. Think about ways to get your viewer’s eye moving around the composition.

7 Cutting up pieces out of a misprint of my 2016 print Pencils, I arranged them within the area made by the tracing paper forms. The tracing paper tones down the “noise” of the background, keeping the pencils from getting visually lost.
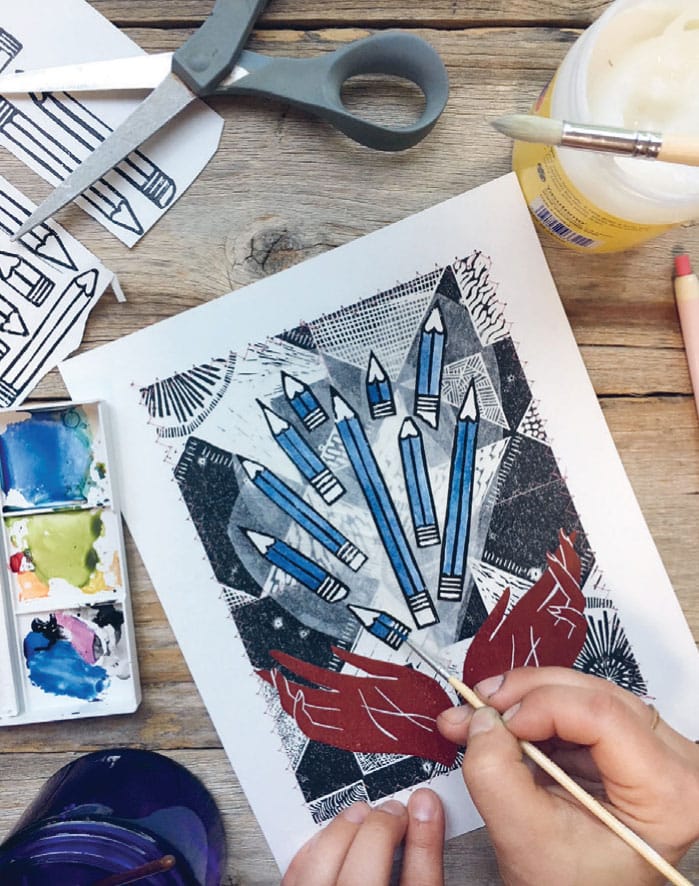
8 You can further inject life into your print—not by electrical charge via lightning but rather by paint! Use watercolor or gouache to bring color to the composition and highlight what you want your viewers to see.


9 Part of the beauty of collage is in the mess, but no one likes a messy margin. Easily clean up the presentation of your one-of-a-kind collaged print by placing it in a mat.
Project:
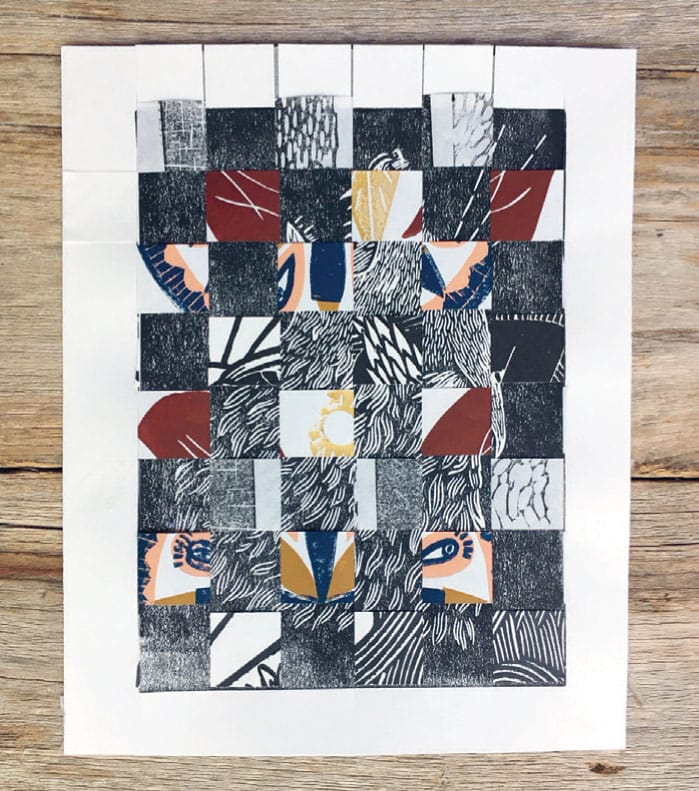
WOVEN PRINT
This little adventure in paper manipulation is a quick and effective project for using up any misprints that might be cluttering up your drying rack or studio table. When you weave several prints together into one abstract composition, the result—turning chaos into order—is always a surprise. When choosing prints to combine for this project, I recommend looking for a range of values and textures and even colors to give the final result maximum visual variety. Now rummage through your reject pile!
Tools and Materials
3–4 failed prints
Scissors
Ruler
Pencil
Optional but helpful: paper cutter
Tape

1 Choose a “base” print—this will be the print that all the other prints are woven into. For ease of cutting, I recommend choosing a print with a very clear, straight border.

2 Use a ruler, pencil, and scissors or a paper cutter, to cut your base print into 1" (2.5 cm) wide strips, starting at the edge of the image. Stop as you get to the end of the image, just into the margin of the paper—don’t cut any further, because you want your base print to stay in one piece.

3 Cut your remaining misprints into 1" (2.5 cm) wide strips. These will be woven into the base print, alternating each strip as indicated.

4 Take one 1" (2.5 cm) strip of paper and weave it into the base print, sliding the strip all the way down to where your cuts stopped at the margin.

5 Continue weaving in the other strips, scooting each down tightly against the previous strip.


7 Flip it over and tape strips into place.

8 Trim the excess strip lengths.
9 Trim any strips on the front of the print that fall outside of the original border.

10 In order to achieve a clean presentation, a tightly fit mat hides any less-than-perfect edges. Voilà! You have a one-of-a-kind print with a variety of textures both simulated (from your cuts) and real (from the woven paper).