Chapter 4
Scene Setup
If we already have a nice tracking solution, the next step is to set up the scene in a proper way to get the right plates to use in postproduction. In this chapter we’re going to see how to set up the scene and a few tricks to avoid problems. Keep in mind that this book is not about modeling or animation, so previous knowledge about this might be necessary.
World Creation
Now that we have an empty scene with the right camera, let’s start adding some objects or elements we’re going to use in the next steps. There are a few important steps to follow. It is important in complex projects to keep everything organized so we can more easily handle the situation if it gets complicated. The most useful tool for this is the layer manager:
We can move elements from one layer to another just by pressing the M key and then selecting the layer where we want to place the element. Also you can organize your bones and other animation helpers in the armature visibility manager:

We are going to use these tools in the next chapter to generate the layers we need in the composition stage.
Setting up Elements
For this book I created an example scene to go through all the stages. I modeled a robot and I created some animations for it.

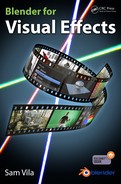
Usually when the tracking camera is solved, the camera won’t be aligned correctly:

It’s always better to keep all the elements on the correct axis because this makes it much easier to work with objects and is especially useful for animations. To correct this issue, we can select the origin track point in the 3D viewport and manually adjust to the desired coordinates. You can also parent the camera to an empty object and then move the entire camera setup to the location you need.
Of course, objects have to be placed on the correct axis to avoid problems:

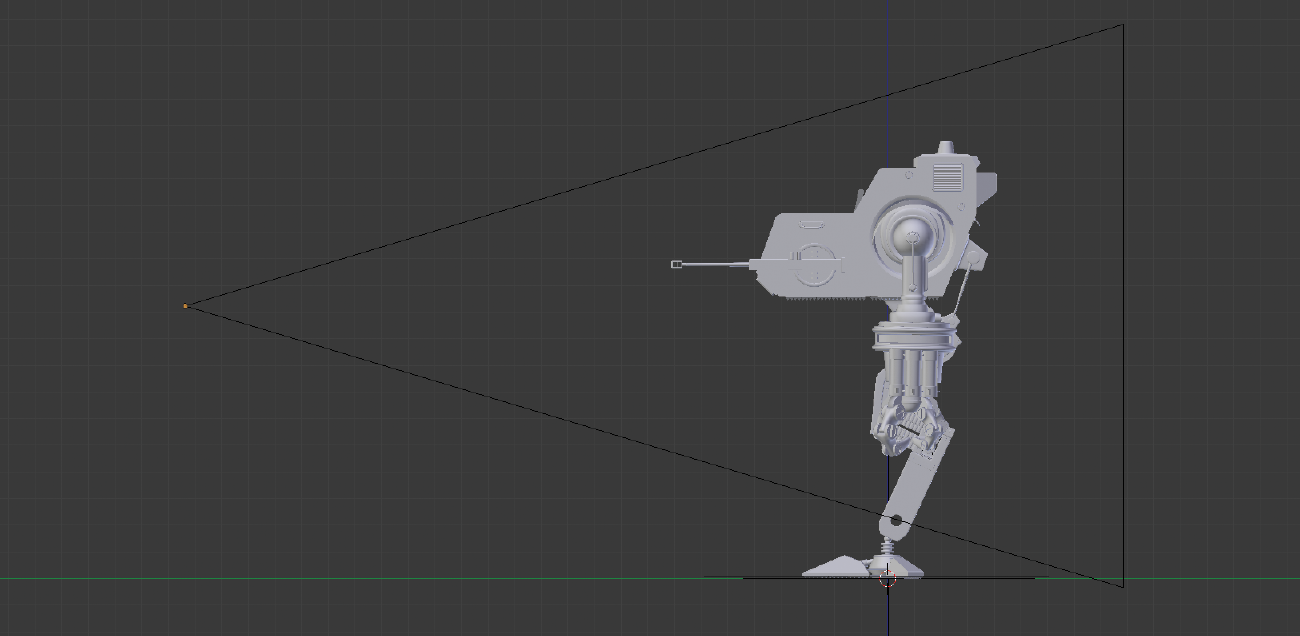
Now that we have the camera and the objects in the right positions, we can create some supporting objects for the composition, like a 3D ground to receive shadows:
We can also create some occluding objects by creating some cutouts in the plates like a matte pass for our elements:

We are going to see how to set up these elements for rendering in the next chapter, so for this chapter we need to set up the models so that we can proceed to the next stage. Just keep in mind that you might need some of these elements to help you later on during the composition.
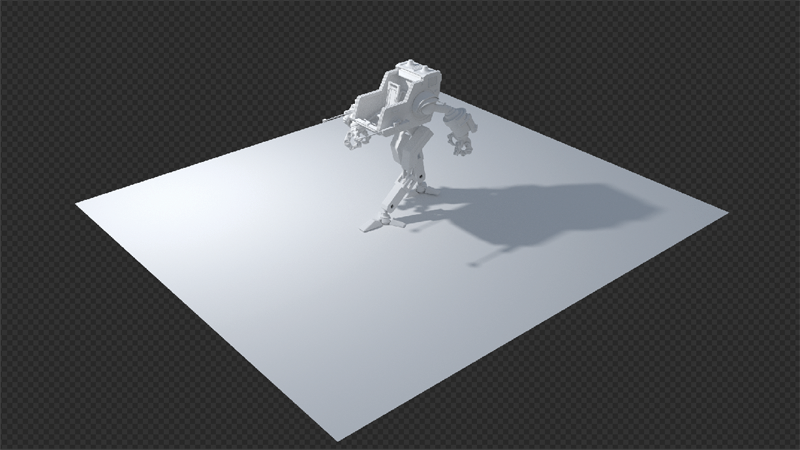
A useful tool is the Open GL preview, which is a very fast way to preview what our scene looks like before the final render:
Remember to set up the output settings before using the Open GL preview to generate the file in the format you need:

Lighting
How to light up your scene in the correct way is one of the most important things to learn in 3D. By setting up the lights in the right way, we can not only increase the quality of our final images but also decrease the render times. Keeping low render times is very important in any production, especially if you’re doing animations. This is particularly critical if you try to achieve realistic lighting and rendering, due to the fact that achieving a realistic look requires more complex calculations.
In the example for this book, we are trying to approach a realistic production so we are going to use a combination of three different lighting techniques that together provide the look we are trying to achieve.
The basic setup for lighting is the manual method of placing light sources where we think they can best help us achieve our goals. Different types of lights provide different results:


There are also mesh lights. We can use any object to emit light from, but keep in mind the normals of the object to direct the light in the way you want. Here is an example of a scene lighted by a mesh emit object only, with no additional lights:

The final lighting technique we can use is IBL (image-based lighting). We can select a panoramic image to light up a scene in a very accurate way. It will also provide us with nice reflections. By using an HDR image, we will be able to calculate the lighting in a more accurate way as it contains more lighting information with different expositions on the same file:

Make sure you check the Multiple Importance option in the World panel to speed up the rendering if you use IBL or HDR lighting:

In the robot example, I used a combination of these techniques. The main light is an IBL setup, whereas I used a manual light to light up some areas and mesh lights for some of the lights that the robot has.
Summary
The main goal in this chapter was to understand the different types of lights and learn how to set up our scene. From here, we can jump into the next chapter, where we will be dealing with different rendering techniques to get the elements we will need for the composition.