
Chapter 6
Masking
Now that we have all the 3D plates ready, we need to work on the real footage that will be used in the composition, the same one we used during the tracking stage. Because we created some tracking marks to achieve better tracking on several locations, we need to remove these marks to have a clean plate for compositing. We cannot remove the marks directly by using a chroma key effect because other tones and elements need to be removed from the plate as well, so to clean this plate we are going to use the masking tool. We will start with a plate like this:

And we will turn it into something like this:

We use a very bright color to differentiate the subject from the background, so it is easier to see any artifact or problem with our mask; then we can change this color to any other background with total confidence in the quality of our mask.
Starting to Mask
Let’s start by going to the mask editor. The interface is the same as the one we used for the tracking:

This time, however, we need to click on the pop-up menu to change to the mask editor:

And we click on New:

Nothing really changes in the user interface, but now Blender is set up to start working with masks. To place the first point, just press Ctrl and the left mouse button and you will see how one point is created. Find another area to continue drawing a silhouette over the subject you want to mask by repeating the same combination to add more points.
One suggestion is to create the points around the subject in a counterclockwise direction to ensure that the mask is pointing in the right direction to play later on with the feather options.
If you need to correct some points, you can use the standard hotkeys in Blender to select, grab, or perform any other necessary operation on the points.
To close the mask, press Alt+C:

We are actually creating a basic mask. We will add some refinements later on. We can even create multiple masks to define areas in a better way. For the moment, we will focus on creating a base mask.
The next step is to move through the frames and adjust the mask for the actual frame. Once we have adjusted the mask, we press I to insert a keyframe; if we need to delete a keyframe, we can press Alt+I.
We don’t have to go through this process for each frame. You can do it every five or ten frames or so, but the frequency mostly depends on the footage you are working on.
By pressing V we can access a menu to change the handle type for each point:

Clean Plate Preview
We know how to work with masks, but now we need to see the results to do finer adjustments to get a clean plate after this process. To do this, I suggest splitting the view and having on one side the mask editor and on the other side the node editor:

This makes it much easier to adjust things with the mask editor and see the results in the node editor. We could also use the image editor later on to output the final image while we keep working with the masks.
For now let’s set up a basic chroma key workspace. It doesn’t have to be perfect, just usable enough to at least give us a better idea of what we are doing while we are working in the mask editor. Don’t forget to turn on Use Nodes and Backdrop before the next steps.
We are not going to go over complex details about nodes and other stuff, as this chapter is mainly about masking. In the next chapter, which focuses on compositing with nodes, we will have a close look at each individual node. For now we can set up something very basic, as in the example I am going to show. If you have any trouble with keying, you might find it interesting to jump to the next chapter and read a little bit about the nodes and then continue with Chapter 6.
This is the basic setup I am using to preview the quality of my masking:
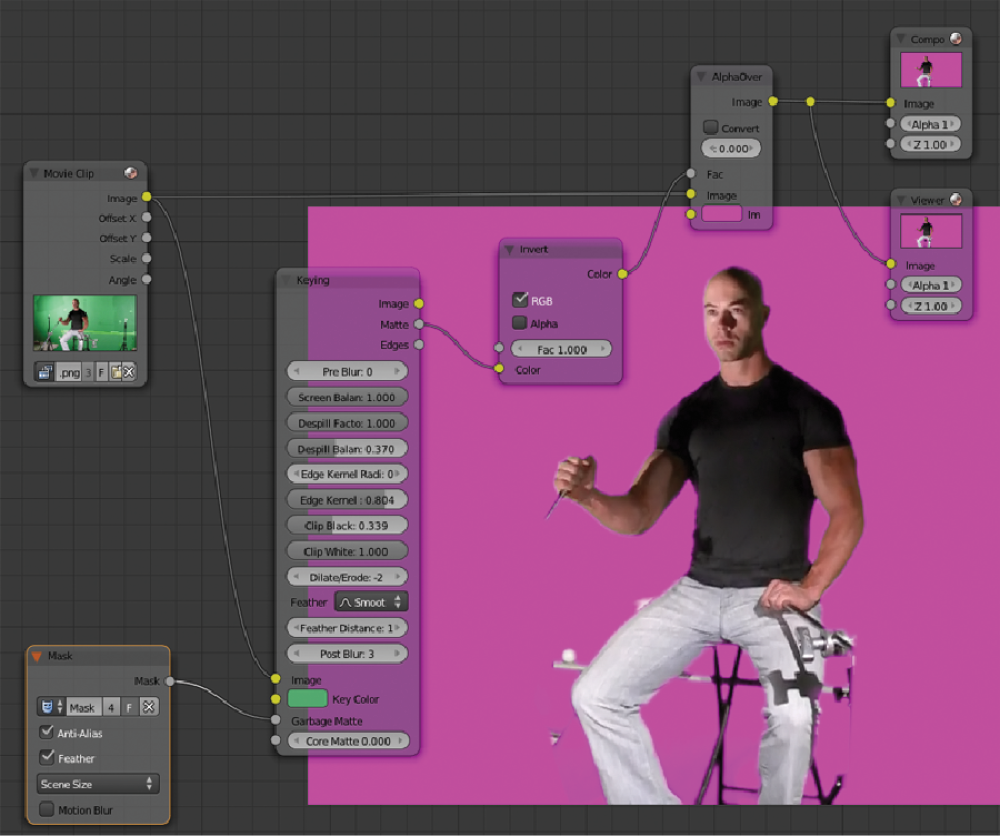
We can use the channel toolbar to preview a particular channel:

Refining the Mask
Now that we have the basic stuff and we can preview how our plate is getting clean, we can adjust a few other things. Let’s talk about feathering.
We can make our mask work as a sharp shape or as a smooth shape, by selecting the masking point we want to smooth/sharpen and pressing Alt+S; then, when we move the mouse, we would notice how the contour of our mask is growing a secondary shape, which controls the feathering of our mask. Here is an example of a sharp mask and a smooth one:

There are additional options in the side panel to adjust a few other things about masking:

In this panel we can add additional masks into the main one and use these secondary masks to cut out or to extend the main mask. There are different options to blend the masks:

Tracking the Mask
This is a very useful technique. It basically allows us to automatically move our masks according to a tracker marker previously tracked. Let’s see an example.
We want to mask this tripod in our footage, but instead of having to keyframe our mask in all the frames in our footage, we can automatically move the mask following any mark. To do this, we need to select a tracking point already tracked appropriately.

Once we have our tracking mark, we can create the mask as usual.

Finally all we have to do is select all the points in our mask and parent our mask to the tracking point:

Make sure you have previously selected the tracking point you want to use to translate the mask accordingly. If you have not, you can always go back to the tracking module to select the right one.

Now we should be able to see how our mask automatically moves with our tracking point. We can still manually tweak the mask in case we want to adjust the shape in a particular way during the footage. We can also parent mask points into tracking points, and doing this will deform the mask following the tracking marks as well. It’s a very powerful tool.
So that’s the basics of masking in Blender, but before we close this chapter I would like to mention an additional way to clean up a plate. You can use this alternative method as your main one or in conjunction with the masking tools to refine some areas of your footage; whichever method you use is fine if the results are good. The alternative method is called frame-by-frame painting.
Frame-by-Frame Painting
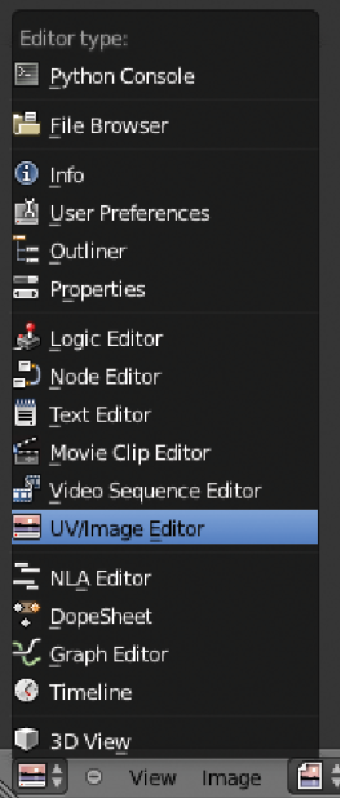
We can paint areas frame by frame. To do that, we need to switch to the UV/Image Editor.
Then we click on Image and Open Image and select the first frame or the movie file we want to use. After this, press N to open the side panel. If you are working with a sequence of frames instead of a movie file, you need to change the source from Single Image to Image Sequence and then select the option Auto Refresh. Don’t forget to adjust the length of the sequence.
Now we can click on the pop-up menu to select Paint mode:

You will notice that a new series of options is added to the side panel:

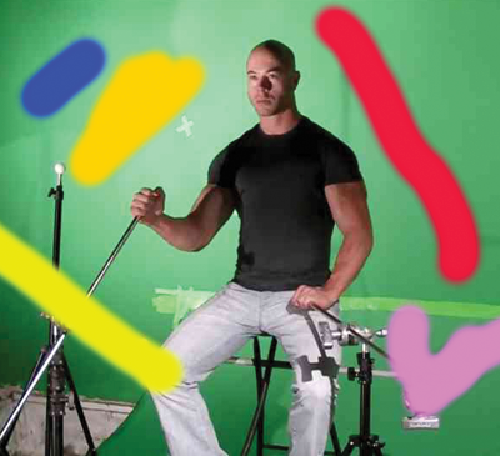
A new toolset for painting is ready for use. Now we are able to go to any frame we want and start painting all over as if we were in a 2D paint program:
Don’t forget to save each frame to commit the changes. You can use the shortcut key Alt+S to speed up the process.
Summary
If we followed all the steps in Chapters 1 to 6, we should be in very good shape to do the final polish to our project in Chapter 7. All the plates are ready, and we have seen different techniques for having the plates in the right way for the compositing stage. In this chapter we learned two different techniques for cleaning up our footage. Now let’s head into the final chapter.