
The first step in developing a new site is to develop the visual site design, consisting of the site's overall layout, use of graphics, and user interaction elements. Today the visual architecture defines more than just the "look and feel" from the user's perspective; it also means the ease of use and encouraging user interaction. You start by establishing the user experience you want people to have, and then you design the plumbing behind the scenes that will provide that user experience. Some basic considerations that affect the user's experience are the menu and navigation, use of images, organization of elements on the page, and use of AJAX.
The menu must be intuitive and should be augmented by navigation hints such as a site map or breadcrumbs that can remind users where they are, relative to the site as a whole. Breadcrumbs in this context refer to a set of small links on the page that form a trail that enables users to back up to a previous page by clicking on the link segment for a page higher in the page hierarchy.
Consider the specific ASP.NET features before writing any code, so you can take advantage of the work that's already been done by Microsoft. By laying a good foundation for the technical architecture, you can improve code reusability and enhance maintainability. This chapter looks at the overall visual layout of the site and explains how you can take advantage of powerful features such as master pages and themes. Master pages are used to group functionality into templates that provide the common elements shared by many pages, and themes enable users to customize certain aspects of the site to give them a unique look and feel that appeals to them (also called skinning).
Over the last few years the .NET development community has begun to work hard toward creating great user interfaces for its applications. We really started seeing a good effort made in this direction with the introduction of ASP.NET AJAX and now with Windows Presentation Foundation (WPF) and Silverlight. The marketplace has really driven this paradigm change through competition and users' demanding it. It is more than just having pretty graphics and whiz-bang features; it has to do with just plain usability. Users do not want to have to think; an application should just work.
Many developers start out writing source code without paying attention to the primary goal of the site: to provide a simple but highly functional graphical application for users to interact with. This is not acceptable in today's competitive world. Developing the user interface seems like a very basic task, but if it is not done properly, you may have to revisit it several times during development. Every time you go back and change fundamental features it will require a certain amount of rework, not to mention a whole new round of unit, integration, and user acceptance testing. Even worse, if you take the user interface too lightly, you will likely end up regretting it because users may choose not to visit your site. There are various elements to consider when creating the site design. First, you must convince yourself of one simple fact: appearance is important! You should repeat this out loud a couple of times.
If your site doesn't look appealing or if interacting with the site is not natural, people may regret being there. It's easy for a developer to get caught up with the difficult tasks of organizing source code into classes and coding the business logic — the cosmetics of the site just don't seem so important, right? Wrong! The user interface is the first thing presented to the end user and, more importantly, your customer if you are a typical developer. If it is ugly, unclear, and basically unusable, chances are good the user will be left with a bad impression of the site and the company behind it. Sadly, this will happen regardless of how fast and scalable the site is.
In addition, you need to consider that not all users have the same opinion about a site template. Some users may find it difficult to read text in a site with a specific color scheme and prefer a different color scheme that might be unclear to many others. It's very difficult to make everybody happy with a single template and color scheme. That's why some sites have multiple color schemes and possible layouts available from which users can choose, enabling them to customize their own user experience according to their personal taste — and possibly physical impediments such as color blindness. Studies have shown that a surprising number of people suffer from partial color blindness that makes it hard for them to distinguish certain colors, so they must be able to select colors they can distinguish but that still appear somewhat pleasant.
Note
The term UX (an acronym for "user experience") has become very common in the last 2-3 years when referencing software. When AJAX started coming of age a few years ago, the interaction that website visitors had with the site or application started increasing. The release of WPF and Silverlight (and I'll have to throw Adobe Flex in here, too) has driven users' expectations even higher. This does not mean that a site needs to be completely done in Silverlight to be acceptable these days, but gone are the days of blinking and clashing text, as well as the visible postback model. Users expect to feel comfortable while using an application, knowing that everything is going as they expect. This means that they should not have to struggle to understand how an application works, and so forth. A good example in the new version of the Beer House is the use of pure AJAX to allow users to comment on articles. The topic of UX is really outside the scope of this book; however, I hope this upgrade adds several good UX improvements not in the previous edition.
After you choose the layout and colors to use, you need to ensure that the site will look the same on different browsers. A few years ago, Internet Explorer (IE) was the absolute dominant browser among Windows users, and if you were developing a technical site targeted at Windows developers, you could assume that the majority of your user base would use IE to browse the site, and thus develop and test it only against IE. However, Firefox, Opera, Safari, and now Google Chrome are gaining noticeable market share among Internet users, not to mention browsing from other operating systems, such as Linux and Mac OS. To make things a little more complicated Microsoft is getting close to releasing Internet Explorer 8, which promises to be ACID 2 compliant, a standard test to measure a site's compliance with CSS standards.
You are not targeting just a small niche of users (i.e., not just Windows developers but all people that go to your client's pub), and because there are other popular browsers besides Internet Explorer, it is absolutely necessary to ensure that your site works well for the most popular browsers. If you ignore this and just target IE, Firefox users may come to the site and find a layout much different from what they expect, with the wrong alignments, sizes, and colors, with panels and text over other elements — in other words, a complete mess. As you can guess, a user who is presented such an ugly page will typically leave it, which means losing a potential client or customer for the online store. At the very least, this person's visit would have generated page views and, thus, banner impressions.
Because you don't want to lose visitors, we'll make sure the new Beer House site renders and works properly in as many browsers as we can. Typically, if you can make the site work consistently in Internet Explorer, Firefox, and Chrome, it will work in the other browsers as well. The real key is testing against the popular browser engines, Internet Explorer, Gecko (Firefox), and WebKit (Chrome).
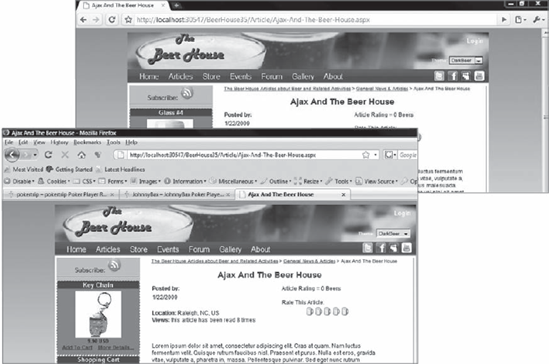
Designing the user interface layer doesn't mean just writing the HTML for a page; it also involves the navigation system and the capability of the webmaster or site administrator (if not the end user) to easily change the appearance of the site without requiring them to edit the actual content pages (which are numerous). Once you're done with the site's home page, developing all the other pages will take much less time because the home page establishes layout and navigation elements that will apply throughout the site. And if you need to modify something in the site's layout (for example, adding a new poll box to be displayed on the right-hand side of any page), you will be able to do this easily if you've developed a common user interface shared among many pages. This is why it's definitely worth spending some additional time thinking about a well-designed UI foundation layer instead of firing up Visual Studio .NET and starting to code right away. This is really a strategic decision that can save you hours or even days of work later. Remember that fundamental changes applied later in the development phase will require more time and effort to implement. Figure 2-1 shows the new Beer House in the Mozilla and WebKit engines.
Note
The previous version of the Beer House made the use of Web Parts, which is a concept brought over from SharePoint to allow users to move content around the page. I chose to remove that chapter from the book because the use of Web Parts is very minimal, and it drastically adds to the weight of the pages. This technology was not revised in ASP.NET 3.5 either. If you need to see how to implement Web Parts in your site, then I recommend the 2.0 version of this book.
In this section, I'll take the problems described in the first section and discuss how to solve them by devising a technical system design. In practice, you will design and implement the following:
A good-looking graphical template (layout) that appears the same with all major browsers, and a mechanism to dynamically apply different color schemes and other appearance attributes to it.
A way to easily share the created template with all pages of the site, without physically copying and pasting the entire code in each page.
A navigation system that enables users to easily find resources on the site and clearly tells users where they currently are in the site map, enabling them to navigate backward.
A way to apply not only a common design to all pages of the site, but also a common behavior, such as counting page views or applying the user's favorite style to the page.
I'll describe how you can utilize some of the features in ASP.NET when implementing your reusability, menu, navigation, and customization requirements. I'll also review how to utilize CSS layouts to build an easy-to-manage template that is also search engine optimization (SEO) friendly. Later, in the "Solution," section, you'll put these powerful new features into action!
When you develop a site design, you typically create a mock-up with a graphics application such as Adobe Photoshop, Jasc Paint Shop Pro, Paint.NET, or just a piece of paper to show you what the final site may should look like before you do any specific layout or coding in HTML. Once you have a mock-up, you can show it to the various model users, testers, and managers, who can then decide whether to apply it to the front of the application. You might create a simple picture like the one shown in Figure 2-2, in which you show how the content will be laid out in the various areas of the page.
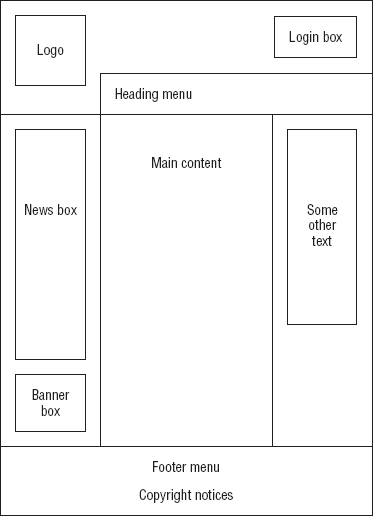
This is a typical three-column layout, with a header and footer. When the layout is approved, you must recreate it with real graphics and HTML. It makes sense to do this in the graphics program because, on average, it takes much less time for a web designer to produce these mock-ups as images than as real HTML pages. Once the client approves the final mock-up, the web designer can cut the mock-up image into small pieces and use them in an HTML page.
Creating a mock-up is not always easy for those of us who aren't very artistic by nature. For a medium or large company, this is not a problem because there is usually a professional designer to create the graphical design, and then the developers (people like you and me) build the application around it, or the designer creates a nice design to fit the application you create. Sometimes it can be helpful to enlist the assistance of a third-party company if you're faced with creating the graphical design by yourself — you can, in effect, subcontract that one aspect of the site to someone more artistically talented, and they can make you a site template. This can also mean licensing a prebuilt template from a company like TemplateMonster (www.templatemonster.com. For the purposes of creating the website discussed in this book, I used an image of three beer steins I found doing a search for "beer" through Creative Commons (creativecommons.org), a large collection of free resources such as images and videos. Next, I wanted to decide on a consistent color scheme and used http://kuler.adobe.com, a site that demonstrates color schemes, to help me find just the right scheme, "Dark Beer." I then created some supporting graphics, consisting of some gradients and a logo in Paint.NET. Paint.NET is a graphic design program that is similar to Adobe Photoshop, but written entirely in .NET and available for free. Combining all this made a site design that I could use as a starting point.
I kept things pretty simple, so I did not have to do too much work to get the layout of the site together. I really needed to get started with defining the stylesheets in the Dark Beer theme to apply the graphics and the color scheme to the site.
ASP.NET 3.5 SP1 is the overriding technology that makes the site work. This runs on the web server and takes advantage of the functionality provided by the .NET Framework. However, ASP.NET does not run on the user's computer; instead, it dynamically generates the elements that a browser uses to render a page. The elements that are sent down to the browser consist of HTML, images, and Cascading Style Sheets (CSS), which provide colors, sizes, and alignments for various items in the HTML. ASP.NET also generates some JavaScript procedural code that is also sent down to the browser to handle data validation and to tell the browser how to interact with the web server.
HTML is created in several ways. You can use the visual form designer in Visual Studio to drop controls onto the form, and this automatically creates the markup for the controls that ultimately emit HTML. You can hand-edit or author your own HTML code in the .aspx files to give it features that aren't easily specified in the form designer. Last, HTML can be dynamically generated by your code or by classes in the .NET Framework, HttpHandlers are the best example of this.
It is not possible to give an exhaustive explanation of CSS in this book, but I'll cover some of the general concepts. You should consult other sources for complete details about CSS. The purpose of CSS is to specify how visual HTML tags are to be rendered by specifying various stylistic elements such as font size, color, alignment, and so on. These styles, called Selectors, can be included as attributes of HTML tags, or they can be stored separately and referred to by Class, by ID or by defining a rule for a specific HTML element.
Sometimes HTML files have the styles hard-coded into the HTML tags as attributes, as in the following example:
<div style="align: justify; color: red; background-color:
yellow; font-size: 12px;">some text</div%>
This is bad because it is difficult to modify these stylistic elements without going into all the HTML files and hunting for the CSS attributes. It also adds volume to each page being downloaded, thus hurting the overall perceived performance of the pages. Instead, always put the style definitions in a separate stylesheet file with an extension of .css; or if you insist on including styles inside an HTML file, at least define them in a <style> section at the top of the HTML file.
Note
There are many blogs and websites that focus entirely on Web Design and CSS. A quick search will give you a pretty good list to start with. Some books you might want to reference include:
Mastering Integrated HTML and CSS by Virginia Debolt (
www.wiley.com/WileyCDA/WileyTitle/productCd-047009754X.html), HTML, XHTMLCSS Bible by Steven Schafer, (
www.wiley.com/WileyCDA/WileyTitle/productCd-0470128615.html)Beginning CSS by Richard York, (
www.wiley.com/WileyCDA/WileyTitle/productCd-0470096977.html)CSS Instant Results by Richard York (
www.wiley.com/WileyCDA/WileyTitle/productCd-047175126X.html)
Maintaining style definitions in a separate stylesheet file makes the site more maintainable, increases performance and minimizes the administrative effort required to maintain styles and to enforce a common look and feel among many pages. You often hear the term "separation of concerns" in terms of application architecture; it applies to web development of user interfaces with CSS. The idea is to separate as much of the design concerns from the application code as possible. Keeping styles in a file means that there is only one place where you need to manage elements when you need to adjust a style. Using inline style definitions is no different from repeating a routine multiple times in code. In programming terms, it means that you can refactor a style definition to a central location instead of repeating it in each page of markup. This is a common theme you will see in modern ASP.NET with the use of master pages, themes, and user controls.
Let's assume that the client wants to change some styles of a site that's already in production. If you've hard-coded styles into the HTML elements of the page, then you'd have to look in many files to locate the styles to change, and you might not find them all, or you might change something else by mistake — this could break something! However, if you've used style classes stored separately in CSS files, then it's easier to locate the classes that need to be changed, and your HTML code will be untouched and safe.
Furthermore, CSS files can make a site more efficient. The browser will download the CSS file once and then cache it on the client. The browser will use the cached instance of the .css file and not download all the styles again, so each subsequent request will be much smaller, and therefore faster to download. In some cases, this can dramatically speed up the loading of web pages in a user's browser.
On top of downloading fewer resources, this can also help with rendering tables, which browsers do more slowly than a series of DIV and SPAN elements. That's because browsers wait until the entire contents of a table have been downloaded before rendering it to the user. Tables are good for tabular data, and that is what they should be used for. While using stylesheet layouts is tougher to become familiar with, it can be a much more flexible way to create a site layout.
While many sites use multiple stylesheet files, I personally like to have just one. The reason is that each file will need to be downloaded and thus add to the time required to download the content. While the hit may seem to be negligible, it all adds up. On the flip side, organizing related styles into specific files can be very helpful in managing styles. It can also add to confusion and duplication of styles, meaning that efforts get overwritten during rendering. The ultimate choice will come down to the needs of the application and your personal management style.
When you group CSS styles, you can create Selectors, which syntactically resemble classes or functions. You can assign them a class name, preceded by a period (.), to allow them to be referenced in the class= attribute of HTML tags. You can also associate an HTML element with an element name simply by creating a style rule with the same name as the element. For example, H1 maps to the <h1> element. You can also refer to specific elements by their client-side ID; just precede the name of the style rule with a # followed by the ID of the element. Finally, you can combine class, element, and ID selectors to create complex style rules.
For a more detailed explanation of CSS
SelectorsI recommend visiting the W3C recommendations,www.w3.org/TR/CSS2/selector.html.
If you use a stylesheet Selector, an ID, or element selectors, and you want to change the font size of all corresponding HTML elements, you only need to find that style rule and change that single occurrence in order to change many visual HTML elements of that given type. If the stylesheet is defined in a separate file, you will benefit even more from this approach, because you will change a single file and n pages will change their appearance accordingly.
Here is an example of how you can redefine the style of a DIV object by storing it in a separate file named styles.css. First, define a new class called mystyle in a file called mystyles.css as follows:
.mystyle
{
   align: justify;
   color: red;
   background-color: yellow;
   font-size: 12px;
}
Then, in the .aspx or .htm page, you will link the CSS file to the HTML as follows:
<head>
   <link href="/styles.css" text="text/css" rel="stylesheet" />
   <!-- other metatags... -->
</head>
Finally, you write the HTML DIV tag and specify which CSS class you want it to use:
<div class="mystyle">some text</div>
Note that when the style was declared, I used the dot ( . ) prefix for the class name. You have to do this for all of your custom style Selectors.
If you want to define a style to be applied to all HTML elements of a certain kind (for example, to all <p> paragraphs, or even the page's <body>; tag) that don't have another explicit class associated with them, you can write the following specification in the stylesheet file:
body
{
   margin: 0px;
   font-family: Verdana;
   font-size: 12px;
}

p
{
   align: justify;
   text-size: 10px;
}
This sets the default style of all body tags and all <p> (paragraph) tags in one place. However, you could specify a different style for some paragraphs by stating an explicit class name in those tags.
Yet another way to associate a Selector to a HTML object is by ID, which you will see used as we start defining the layout for the new Beer House site. You define the Selector name with a # prefix, as follows:
#header
{
   padding: 0px;
   margin: 0px;
   width: 100%;
   height: 184px;
   background-image: url(images/HeaderSlice.gif);
}
Then you could use the id attribute of the HTML tag to link the CSS to the HTML. For example, this is how you could define an HTML division tag and specify that you want it to use the #header style:
<div id="header">some text</div>
You typically use this approach for single objects, such as the header, the footer, the container for the left, right, center column, and so on. If you need to apply a style to multiple elements in a page, use a class Selector.
Finally, you can mix the various approaches. Suppose that you want to give a certain style to all links in a container with the sectiontitle style, and some other styles to links into a container with the sectionbody style. You could do it this way:
In the .css file
.sectiontitle a
{
   color: yellow;
}
.sectionbody a
{
color: red;
}<div class="sectiontitle"> <p>some text</p> <a href="http://www.wrox.com">Wrox</a> <p>some text</p> </div> <div class="sectionbody"< <p<some other text</p< <a href="http://www.wiley.com">Wiley</a> <p>some other text</p> </div>
Often developers will use HTML tables to control the positioning of other items on a web page. This was considered the standard practice before CSS matured, but many developers still use this methodology today. I admit it took me a long time to make the switch. Although this is a very common practice, the W3C officially discourages it (www.w3c.org/tr/wai-webcontent), saying "Tables should be used to mark up truly tabular information ("data tables"). Content developers should avoid using them to lay out pages ("layout tables"). Tables for any use also present special problems to users of screen readers." In other words, HTML tables should be used for displaying tabular data on the page, not to build the entire layout of the page. For that, you should use container elements (such as DIVs) and their style attribute, possibly through the use of a separate <style> section or a separate file. This is ideal for a number of reasons:
If you use container elements and a separate stylesheet file to define appearance and position, you won't need to repeat this definition again and again, for each and every page of your site. This leads to a site that is both faster to develop and easier to maintain once you have a standard set of templates to build pages.
The site will load much faster for end users. Remember that the stylesheet file will be downloaded by the client only once, and then loaded from the cache for subsequent requests of pages until it changes on the server. If you define the layout inside the HTML file using tables, the client instead will download the table's layout for every page, and thus it will download more bytes, with the result that downloading the whole page will require a longer time. Typically, a CSS-driven layout can trim the downloaded bytes by up to 50%, and the advantage of this approach becomes immediately evident. Furthermore, this savings has a greater impact on a heavily loaded web server — sending fewer bytes to each user can be multiplied by the number of simultaneous users to determine the total savings on the web server side of the communications.
Screen readers, software that can read the text and other content of the page for blind and visually impaired users, have a much more difficult job when tables are used for layout on the page. Using a table-free layout can increase the accessibility of the site. This is a very important requirement for certain categories of sites, such as those for public administration and government agencies. Few companies are willing to write off entire groups of users over simple matters like this.
CSS styles and DIVs provide greater flexibility than tables. You can, for example, have different stylesheet files that define different appearances and positions for the various objects on the page. By switching the linked stylesheet, you can completely change the appearance of the page, without changing anything in the content pages themselves. With dynamic ASP.NET pages, you can even change the stylesheet at runtime and, thus, easily implement a mechanism that enables end users to choose the styles they prefer. And it's not just a matter of colors and fonts — you can also specify positions for objects in CSS files and therefore have one file that places the menu box on the upper-left corner of the page and another one that puts it on the bottom-right corner. Because we want to allow users to pick their favorite styles from a list of available themes, this is a particularly important point.
CSS enables you to target different classes of devices in some cases without requiring new HTML markup, such as mobile devices like PDAs or smartphones. Because of their constrained screen size, it is necessary to adapt the output for them, so that the content fits the small screen well and is easily readable. You can do this with a specific stylesheet that changes the size and position of some containers (placing them one under the other, rather than in vertical columns), or hide them completely. For example, you might hide the container for the banners, polls, and the header with a big logo. Try to do this if you use tables — it will be much more difficult. You'll have to think about a custom skinning mechanism, and you'll need to write separate pages that define the different layouts available. This is much more work than just writing a new CSS file.
Note that the preceding discussion refers to avoiding the use of tables for the site's overall layout. However, using tables is acceptable to create input forms with a tabular structure because otherwise too much CSS code would be required to be easily writeable and maintainable. It's also not very likely that you'll need to dynamically change the layout of the input form, so you don't need all the flexibility of CSS for that, and using HTML tables is more immediate.
Once you finish creating your beautiful site design, you need to find a way to quickly apply it to n pages, where n could be dozens or even hundreds of pages. Master pages are used to control the overall layout of the site. They have replaced the common ASP.NET 1.1 practice of using a series of user controls on every page. With Visual Studio 2008, it becomes very natural to develop with nested master pages.
ASP.NET 2.0 introduced a master page feature that enables you to define common areas that every page will share, such as headers, footers, menus, and so on. A master page enables you to put the common layout code in a single file and have it visually inherited in all the content pages. A master page contains the overall layout for your site. Content pages can inherit the appearance of a master page, and place their own content where the master page has defined a ContentPlaceHolder control.
What actually happens at runtime is that the content of the master page and the content page are merged together as one cohesive unit. Behind the scenes, the master page actually injects itself in the child control hierarchy of the Page class itself (see www.odetocode.com/Articles/450.aspx). If you think about it, this makes perfect sense because the MasterPage class inherits the UserControl class, it is just a special user control in reality.
Once the master page has injected itself into the content page's control tree, it then looks for corresponding Content controls for each of the ContentPlaceHolders declared in the master page's markup. In this action, the overall layout is produced and the page proceeds to build itself as expected. Figure 2-3 illustrates the hierarchy being implemented with master pages.

All of this magic actually happens after the PreInit event, but before the Init event of the content page. This means that the content page's master page must be set in the PreInit event and not after it. Generally, this will be done in the @Page Directive or the web.config file. But there are occasions where you want to define the actual master page at runtime, such as when you open your site up to layout customizations by the end user. You just have to remember to do this in the PreInit event handler or an InvalidOperationException will be thrown when your page is executed.
An example is worth a thousand words, so let's see how this concept turns into practice. A master page has a .master extension. Because it is an extended version of a UserControl, it can be programmed in the same fashion. The following is code for a master page that contains some text, a header div tag, and a footer div tag. It also defines a ContentPlaceHolder control between the header and the footer:
<%@ Master Language="VB" AutoEventWireup="true"
CodeFile="MasterPage.master.vb" Inherits="MasterPage" %>

<html>
<head id="Head1" runat="server">
   <title>The Beer House</title>
</head>

<body>
<form id="Main" runat="server">
   <div id="header"<The Beer House</div>
   <asp:ContentPlaceHolder ID="MainContent" runat="server" />
   <div id="footer">Copyright 2008 WROX</div>
</form>
</body>
</html>
As you see, it is extremely similar to a standard page or user control, except that it has a @Master directive at the top of the page instead of a @Page or @Control directive, and it declares one or more ContentPlaceHolder controls where the .aspx pages will add their own content. The master page and the content page will merge at runtime — therefore, because the master page defines the <html>, <head>, <body>, and <form> tags, you can easily guess that the content pages must not define them again. Content pages define the content for the master's ContentPlaceHolder controls and nothing else. The following extract shows an example of a content page:
<%@ Page Language="VB" MasterPageFile="~/MasterPage.master" AutoEventWireup="false"
CodeFile="MyPage.aspx.vb" Inherits="MyPage" Title="The Beer House - My Page" %>

<asp:Content ID="MainContent" ContentPlaceHolderID="MainContent" Runat="Server">
   My page content goes here...
</asp:Content>
The first key point is that the @Page directive sets the MasterPageFile attribute to the virtual path of the master page to use. The content is placed into Content controls whose ContentPlaceHolderID must match the ID of one of the ContentPlaceHolder controls of the master page. In a content page, you can't place anything but Content controls, and other ASP.NET controls that actually define the visual features must be grouped under the outermost Content controls. Another point to note is that the @Page directive has a new attribute, Title, that allows you to override the value specified in the master page's <title> metatag. If you fail to specify a Title attribute for a given content page, then the title specified on the master page will be used instead.
Figure 2-4 illustrates the master page feature.

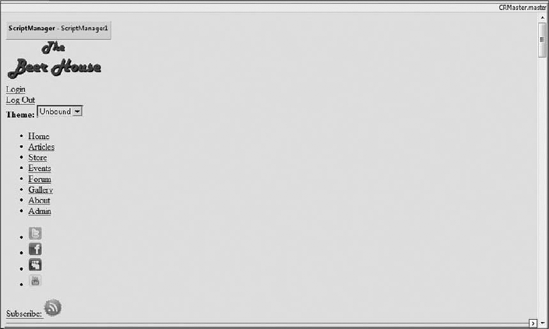
When you edit a content page in Visual Studio in Design or Split View, it properly renders both the master page and the content page in the form designer, but the master page content appears to be "grayed out." This is done on purpose as a reminder to you that you can't modify the content provided by the master page when you're editing a content page. Figure 2-5 shows the home page in design mode. Notice how its master page is listed in the top-right corner (CRMaster.master), and the elements contained in the master pages are rendered in the editor but are disabled.
I'd like to point out that your master page also has a code-behind file that could be used to write properties and functions that could be accessed in the .aspx or code-behind files of content pages. This is because the master page is actually a user control, so working in a master page is almost identical to working with a user control.
When you define the ContentPlaceHolder in a master page, you can also specify the default content for it, which will be used in the event that a particular content page doesn't have a Content control for that ContentPlaceHolder. Here is a snippet that shows how to provide some default content:
<asp:ContentPlaceHolder ID="MainContent" runat="server">
   The default content goes here...
</asp:ContentPlaceHolder>
Default content is helpful to handle situations in which you want to add a new section to a number of content pages, but you can't change them all at once. You can set up a new ContentPlaceHolder in the master page, give it some default content, and then take your time in adding the new information to the content pages — the content pages that haven't been modified yet will simply show the default content provided by the master.
Setting the MasterPageFile attribute at the page level may be useful if you want to use different master pages for different sets of content pages. If, however, all pages of the site use the same master page, it's easier to set it once for all pages from the web.config file, by means of the <pages> element, as shown here:
<pages masterPageFile="~/Template.master" />
If you still specify the MasterPageFile attribute at the page level, however, that attribute will override the value in web.config for that single page.
You can take this a step forward and have a master page be the content for another master page. In other words, you can have nested master pages, whereby a master page inherits the visual appearance of another master page, and the .aspx content pages inherit from this second master page. The second-level master page can look something like the following:
<%@ Master Language="VB" MasterPageFile="~/MasterPage.master"
AutoEventWireup="false" CodeFile="MasterPage2.master.vb"
Inherits="MasterPage2" %>

<asp:Content ID="Content1" ContentPlaceHolderID="MainContent" Runat="Server">
   Some other content...
   <hr style="width: 100%;" />
   <asp:ContentPlaceHolder ID="MainContent" runat="server" />
</asp:Content>
Because you can use the same ID for a ContentPlaceHolder control in the base master page and for another ContentPlaceHolder in the inherited master page, you wouldn't need to change anything in the content page but its MasterPageFile attribute, so that it uses the second-level master page.
This possibility has great promise because you can have an outer master page that defines the very common layout (often the company-wide layout), and then other master pages that specify the layout for specific areas of the site, such as the online store section, the administration section, and so on. Visual Studio 2005 did not have design-time support for nested master pages, making it very difficult to manage development with nested master pages. Visual Studio 2008 has resolved that issue and made working with master pages much easier all around. In this version of the Beer House I will leverage several uses of nested master pages to allow a more flexible design of the site. There will be child master pages to define two- and three-column layouts.
Other improvements around master pages in Visual Studio 2008 make it easier to see how styles are applied to the layout, even through all the layers of master pages. While I tend to spend most of my time working with the layout in the Source View, it is nice to be able to switch to Design View to get a decent idea of how things are actually shaping up without launching the site. Figure 2-6 illustrates the principle of nested master pages.

You also have the capability to access the master page from a content page, through the page's Master property. The returned object is of type MasterPage, which inherits directly from UserControl (remember that I said master pages are similar to user controls) and adds a couple of properties. It exposes a Controls collection, which allows you to access the master page's controls from the content page. This may be necessary if, for example, in a specific page you want to programmatically access a control on the master page, such as a TextBox, Button, or the like. Accessing the Controls collection directly would work, but would require you to do a manual cast from the generic Control object returned to the right control type, such as a TextBox or Button. A much better, and objected-oriented, approach is to add custom properties to the master page's code-behind class. In fact you can create public properties and functions in a MasterPage's code-behind that can be accessed from the content page. The following example wraps a property to enable or disable personalization. This is what you could write in the MasterPage's code-behind:
Private _enablePersonalization As Boolean = False
Public Property EnablePersonalization() As Boolean
    Get
        Return _enablePersonalization
    End Get
    Set(ByVal value As Boolean)
        _enablePersonalization = value
    End Set
End Property
Now in the content page you can add the following line after the @Page directive:
<%@ MasterType VirtualPath="~/MasterPage.master" %>
With this line you specify the path of the master page used by the ASP.NET runtime to dynamically create a strongly typed MasterPage class that exposes the custom properties added to its code-behind class. I know that it seems a duplicate for the MasterPageFile attribute of the @Page directive, but that's how you make the master page properties visible in the content page. You can specify the master type not just by virtual path (as in the preceding example) but also by name of the master page's class, by means of the TypeName attribute. Once you've added this directive, in the content page's code-behind file (or in a <script runat="server"> section of the .aspx file itself), you can easily access the master page's EnablePersonalization property in a strongly typed fashion, as shown here:
Protected Sub Page_Load(ByVal sender As Object, ByVal e As System.EventArgs)
Handles Me.Load
    If Not IsPostBack Then
        Me.Master.EnablePersonalization = True
    End If
End Sub
When I say "strongly typed" I am implying that you'll have Visual Studio IntelliSense on this property, and that's true: Type Me.Master. and when you press that second period, you'll see your new property in the IntelliSense list!
This methodology of accessing master objects from content pages is particularly useful when you want to put common methods in the master page, to be used by all the pages that use it. If we didn't have access to a strongly typed MasterPage object built at runtime by ASP.NET, you'd need to use reflection to access those methods, which is slower and certainly much less immediate to use (in this case, it would have been easier to put the shared methods in a separate class that every page can access).
You can cast the Master property to the master page type at runtime as well. This comes in handy when you set the master page at runtime. You just have to know what the actual type the master page is for your content page. By doing this, you can access any public members of the actual master page's class, including assigning event handlers.
Another thing to remember when using nested master pages is keeping track of which master page is actually being referenced. If you are using nested master pages then the Master property of the class returns a reference to that master page, not its master page. To access the parent master page, you need to access the content page's master page's master page. Wow! Say that a few times real fast!
Protected Sub Page_Load(ByVal sender As Object, ByVal e As System.EventArgs) _
Handles Me.Load
    If Not IsPostBack Then
        Me.Master.Master.EnablePersonalization = True
    End If
End SubThe last thing I want to describe in this introduction to master pages is the capability to dynamically change the master page used by a content page at runtime. That's right; you can have multiple master pages and pick which one to use after the site is already running. You do this by setting the page's MasterPageFile property from within the page's PreInit event handler, as follows:
Protected Sub Page_PreInit(ByVal sender As Object, ByVal e As EventArgs)
    Me.MasterPageFile = "~/OtherMasterPage.master"
End Sub
The PreInit event was new in ASP.NET 2.0, and you can only set the MasterPageFile property in this event handler because the merging of the two pages must happen very early in the page's life cycle (the Load or Init event would be too late).
When changing the master page dynamically, you must make sure that all master pages have the same ID for the ContentPlaceHolder controls, so that the content page's Content controls will always match them, regardless of which master page is being used. This exciting possibility enables you to build multiple master pages that specify completely different layouts, allowing users to pick their favorite one. The downside of this approach is that if you write custom code in the master page's code-behind file, you will need to replicate it in the code-beside class of any page; otherwise, the content page will not always find it. In addition, you won't be able to use the strongly typed Master property, because you can't dynamically change the master page's type at runtime; you can only set it with the @MasterType directive.
This problem can be mitigated by creating a common base MasterPage class each of the MasterPage variations inherit from. Any common member of the master pages would be contained in the parent class. For example you would want to have the EnablePersonalization property defined in the common base class and, thus, available to any of the master page variations.
While changing a MasterPage at runtime is pretty cool, a more common practice used on the web is changing stylesheets to produce a different layout. Because we've decided to use a table-free layout, we can completely change the appearance of the page (fonts, colors, images, and positions) by applying different styles to it. ASP.NET provides a mechanism called themes to help us accomplish just that.
Themes were a new feature in ASP.NET 2.0 that enabled users to have more control over the look and feel of a web page. A theme can be used to define color schemes, font names, sizes and styles, and even images (square corners versus round corners, or images with different colors or shades). The concept of "skin" support was also new in ASP.NET 2.0. It is really an organized extension of CSS but applied at a control level. Individual users can select a theme from various options available to them, and the specific theme they choose determines a "skin" that specifies which visual stylistic settings will be used for their user session. Skins are server-side relatives of CSS stylesheets. A skin file is similar to a CSS file, but, in contrast to CSS, a skin can override various visual properties that were explicitly set on server controls within a page (a global CSS specification can never override a style set on a particular control). You can store special versions of images with themes, which may be useful if you want several sets of images that use a different color scheme based on the current skin. However, themes do not displace the need to use CSS; you can use both CSS files and skin files to achieve a great deal of flexibility and control.
A special note about Web Controls and CSS: out of the box most do not render the content using container controls and instead use tables. A good example is the
Menucontrol, which the default version does not even function correctly in IE 7 and above. This can be very inefficient and make your pages heavy. There is a set of "CSS Friendly Control Adapters" that you can download to change the way the some of the default Web Controls are rendered in the browser (http://cssfriendly.codeplex.com/). While we will not cover the use of the control adapters in this book, it is worth your time to check out.
A theme is a group of related files stored in a subfolder under the site's /App_Themes folder, which can contain the following items:
One cool thing about the way ASP.NET implements themes is that when you apply a theme to the page (you'll learn how to do this shortly), ASP.NET automatically creates a <link> metatag in each page for every .css file located in the theme's folder at runtime. You should be aware the links generated by Themes are in alphabetical order. This is very important because CSS rules are applied in a specific order and you may have rules overridden if they are applied in an unexpected order. This is good because you can rename an existing CSS file or add a new one, and all your pages will still automatically link to all of them. This is especially important because, as you will see, you can dynamically change the theme at runtime (as you can do with the master page), and ASP.NET will link the files in the new theme's folder, thus changing the site's appearance to suit the preferences of individual users. Without this mechanism, you would need to manually create all the <link> metatags at runtime according to the theme selected by the user, which would be a pain.
As mentioned, themes can contain skin files. These are files with a .skin extension that contain one or more declarations of ASP.NET controls, such as the following one:
<asp:TextBox runat="server" BorderStyle="Dashed" BorderWidth="1px" />
Everything is the same as a normal declaration you would put into an .aspx page, except that in the skin file you don't specify the controls' ID. Once you apply the theme to your page(s), their controls will take on the appearance of the definitions written in the skin file(s). For a TextBox control, it may not seem such a great thing, because you could do the same by writing a style class for the <input> HTML element in a .css stylesheet file. However, as soon as you realize that you can do the same for more complex controls such as the Calendar or the GridView control, you will see that it makes much more sense. Those controls don't have a one-to-one relationship with an HTML element, and thus you could not easily define their style with a single class in the classic stylesheet file. Note that not every control, nor every attribute of the skinable controls, can be styled via skins.
You can have a single
.skinfile in which you place the definition for controls of any type, or you can create a separate.skinfile for every control type, such asTextBox.skin, DataGrid.skin, Calendar.skin, and so on. At runtime, these files will be merged together in memory, so it's just a matter of organizing things the way you prefer.
To apply a theme to a single page, you use the Theme attribute in the @Page directive:
<%@ Page Language="VB" Theme="DarkBeer" MasterPageFile="~/TBHMain.master" ... %>
To apply it to all pages, you can set the theme attribute of the <pages> element in web.config, as follows:
<pages theme="DarkBeer" masterPageFile="~/TBHMain.master" />
As for master pages, you can also change the theme programmatically, from inside the PreInit event of the Page class. For example, this is how you apply the theme whose name is stored in a Session variable:
Protected Sub Page_PreInit(ByVal sender As Object, ByVal e As EventArgs)
    If Me.Session("CurrentTheme") IsNot Nothing Then
        Me.Theme = Me.Session("CurrentTheme")
    End If
End Sub
In Chapter 5, we will improve this mechanism by replacing the
Sessionvariables withProfileproperties.
Note
When you use the Theme attribute of the @Page directive (or the theme attribute in web.config), the appearance attributes you specify in the skin files override the same attributes that you may have specified in the .aspx files. If you want themes to work like .css stylesheets — whereby you define the styles in the .skin files, but you can override them in the .aspx pages for specific controls — you can do that by linking to a theme with the StylesheetTheme attribute of the @Page directive, or the styleSheetTheme attribute of the <pages> element in web.config. Try not to confuse the Theme attribute with the StylesheetTheme attribute.
So far, I've described unnamed skins — namely, skins that define the appearance of all the controls of a specific type. However, in some cases you will need to have a control with an appearance that differs from what you've defined in the skin file. You can do this in three different ways:
As described previously, you can apply a theme with the
StylesheetThemeproperty (instead of theThemeproperty), so that the visual properties you write in the.aspxfiles override what you write in the skin file. However, the default behavior of the theming mechanism ensures that all controls of some type have the same appearance, which was intended for situations in which you have many page developers and you can't ensure that everyone uses attributes in the.aspxpages only when strictly required.Disable theming for that control only, and apply the appearance attributes normally, as in the following code:
<asp:TextBox runat="server" ID="btnSubmit" EnableTheming="False"
   BorderStyle="Dotted" BorderWidth="2px" />
Use a named skin for a control, which is a skin definition with the addition of the
SkinIDattribute, as shown here:<asp:Label runat="server" SkinID="FeedbackOK" ForeColor="green" /> <asp:Label runat="server" SkinID="FeedbackKO" ForeColor="red" />
When you declare the control, you'll need to use a matching value for its SkinID property, such as the following:
<asp:Label runat="server" ID="lblFeedbackOK"
   Text="Your message has been successfully sent."
   SkinID="FeedbackOK" Visible="false" />

<asp:Label runat="server" ID="lblFeedbackKO"
   Text="Sorry, there was a problem sending your message."
   SkinID="FeedbackKO" Visible="false" />
In my opinion, this is the best way to go, because it enables you to define multiple appearances for the same control type, all in a single file, and then apply them in any page. Additionally, if you keep all style definitions in the skin files instead of in the pages themselves, you'll be able to completely change the look and feel of the site by switching the current theme (which is the intended purpose behind themes). Otherwise, with hard-coded styles, this is only partially possible.
In the "Solution" section of this chapter, you'll use themes to create a few different visual representations for the same master page.
The Menu control and the use of a static SiteMap file to define navigation are useful for relatively static sites, but a truly dynamic and growing site like the Beer House needs a way to grow and adjust as new content is added to the site. While the main navigation of the site will stay fairly static, the use of the BreadCrumb navigation control will benefit from a full and accurate site map.
ASP.NET sites are dynamic and grow and expand all the time. Many are a content management system if you actually look at them objectively. An online store, for example, routinely changes its catalog and, thus, the overall site map.
Because the vast majority of ASP.NET sites are driven by a backend database, typically SQL Server, we will create a custom SiteMapProvider driven by a table in the database. The nice thing about driving from a site map table is we can add and remove nodes to and from the overall map as needed. This means that each time there is a new article, event, photo, or poll added to the site it can be added to the site map table. It also means that, when an article expires or content is removed from the site, it can be removed from the site in real time.
Maintaining the site map in the database will also make it easier for search engine spiders to crawl our site. We will create a custom HttpHandler to render a SiteMaps.org-compliant site map.
In addition to showing the menu, you want to provide users with a visual clue as to where they are and some way to allow them to navigate backward from their current location to the home page. This is usually done through the use of breadcrumbs, a navigation bar that shows links to all pages or sections, starting from the home page, that the user visited to arrive on the current page, such as the following:
Home > Store > Shopping cart
With this navigation system, the user can go back two pages without pressing the browser's Back button and without starting over from the home page and trying to remember the path previously followed. With ASP.NET, you can add a breadcrumb bar with a single line of code by declaring an instance of the SiteMapPath control on the page:
<asp:SiteMapPath ID="SiteMapPath1" runat="server" />
As usual, this control has a number of properties that enable you to fully customize its look and feel, as you'll see in practice in the "Solution" section.
All ASP.NET built-in standard controls render well-formatted XHTML 1.0 Transitional code by default. XHTML code is basically HTML written as XML, which means it must comply with much stricter syntax rules. For example, all attribute values must be enclosed within double quotation marks, all tags must have a closing tag or must be explicitly self-closing (e.g., no more <br> and <img src="...">, but <br /> and <img src="..." />), and nested tags must be closed in the right order (e.g., no more <b><p>hello</b> Chris</p> but <p><b>Hello</b> Chris</p>). In addition, many HTML tags meant to format the text, such as <font>, <center>, <s>, and the like are now deprecated and should be replaced by CSS styles (such as font-family: Verdana; text-align: center). The same is true for some attributes of other tags, such as width and align.
The reasoning behind this new standard is to attain a greater separation of presentation and content (something I've explained earlier) and to create cleaner code — code that can be read by programs that work with XML data. The fact that ASP.NET automatically renders XHTML code, as long as you use its controls, is a great time saver for the developer and makes the process of getting used to XHTML smoother. The official W3C documentation about XHTML 1.0 can be found at www.w3.org/TR/xhtml1/.
Note
W3C's online HTML validator (http://validator.w3.org) allows you to supply your HTML, which it analyzes and then provides you with a list of improper markup. You can supply your HTML by pasting the code in the browser and submitting it, uploading a file, or pointing the validator to a public URL.
At the top of every top-level master page (one without a parent) or Web Form not using a master page, you will find the following markup:
<!DOCTYPE html PUBLIC "-//W3C//DTD XHTML 1.0 Transitional//EN"
"http://www.w3.org/TR/xhtml1/DTD/xhtml1-transitional.dtd">
This is a directive telling the browser which version of HTML or XHTML the page is using. If this directive is omitted, the browser will render the page in Quirks mode. This is a mode in which the browser assumes the page is invalid, and therefore the page may not render correctly in the browser. The !DOCTYPE directive is required for XHTML compliance.
As for accessibility, the W3C defines a set of rules meant to ease the use of the site by users with disabilities. The official page of the Web Content Accessibility Guidelines 1.0 (commonly referred as WCAG) can be found at www.w3.org/TR/WCAG10. Section 508 guidelines were born from WCAG, and must be followed by U.S. federal agencies' sites, as well as by the sites of most companies that want to do business with the U.S. government. You can read more at www.section508.gov. For example, you must use the alt attribute in <img>, tags to provide an alternate text for visually impaired users, so that screen readers can describe the image, and you must use the <label> tag to associate a label to an input field.
Other guidelines are more difficult to implement and are not specifically related to ASP.NET, so you can check out the official documentation for more information. ASP.NET makes it easier to follow some of the simpler rules, such as those mentioned previously. For example, the Image control has a GenerateEmptyAlternateText property that, when set to true, generates alt="" (setting AlternateText="" would generate nothing instead), and the Label control has the AssociatedControlID property that is set to the name of an input control and at runtime generates the <label> control for it (this should be used together with the AccessKey property, to create shortcuts to the input field).
If you want to read more about XHTML, accessibility, and the ASP.NET features that pertain to this subject, you can refer to the following online articles: Alex Homer's "Accessibility Improvements in ASP.NET 2.0 — Part 1" (www.15seconds.com/issue/040727.htm) and "Accessibility Improvements in ASP.NET 2.0 - Part 2" (www.15seconds.com/issue/040804.htm), or Stephen Walther's "Building ASP.NET 2.0 Web Sites Using Web Standards" (http://msdn.microsoft.com/en-us/library/aa479043.aspx).
Master pages and themes do a great job of sharing the same design and look and feel among all pages of the site. However, you may also want the pages to share some common behavior, that is, code to run at a certain point of their life cycle. For example, if you want to log access to all pages so that you can build and show statistics for your site, you have to execute some code when the page loads. Another case where you need to run some code for every page is when you need to set the page's Theme property in the PreInit event handler. It's true that you can isolate the common code in an external function and just add a line of code to execute it from within each page, but this approach has two drawbacks:
You must never forget to insert that line to call the external function when you design a new page. If multiple developers are creating
.aspxpages — which is often the case — you will need to make sure that nobody forgets it.You may want to run some initialization from inside the
PreInitevent and some other code from theLoadevent. In this case, you have to write two separatexxxInitializemethods, and add more lines to each page to call the proper method from inside the proper event handler. Therefore, don't rely on the fact that adding a single line to each page is easy, because later you may need to add more and more. When you have hundreds of pages, I'm sure you'll agree that going back and modifying all the pages to add these lines is not a workable solution.
These two disadvantages are enough to make me discard that option. Another option is to write the common code in the master page's code-behind. This may be a very good choice in many situations. Not in our case, however, because we must handle the PreInit event, and the MasterPage class (and its base classes) does not have such an event. You can handle the Init or Load events, for example, but not PreInit, so we must think of something else.
In the previous editions of this book, there was a BasePage class from which all the content pages would inherit, instead of inheriting directly from the standard System.Web.UI.Page class. I believe this is still the best option, because you can handle any page event from inside this class by overriding the OnXXX methods, where XXX is the event name.
The snippet that follows is a basic skeleton for such a custom base class that inherits from Page and overrides the OnPreInit and OnLoad methods:
Public Class BasePage
Inherits System.Web.UI.Page

Protected Overrides Sub OnPreInit(ByVal e As System.EventArgs)

        ' add custom code here...

MyBase.OnPreInit(e)
End Sub

Protected Overrides Sub OnLoad(e as EventArgs)

        ' add custom code here

      Mybase.OnLoad(e)
End Sub
End Class
The classes in the pages' code-behind files will then inherit from your custom BasePage, rather than the standard Page, as shown here:
Public Partial Class Contact
   Inherits BasePage

   ' normal page code here...

End Sub
You still need to change some code in the code-behind class of every page but, once that's done, you can later go back to BasePage, add code to the existing methods or overload new methods, and you will not need to modify any additional lines in the code-behind classes. If you take this approach initially, you'll modify the code-behind classes one by one as you create them, so this will be easy and it gives you a future-proof design.
Now that we have laid out the visual requirements of the site, it's time to start working on the layout. You can go about this many different ways. If you are working with a designer, they will most likely work on a complete layout in Photoshop and provide a PSD file. Designers can often create some pretty amazing layouts. What I have experienced over the years, though, is that some of those designs are not flexible enough for dynamic sites that ASP.NET data-driven applications require because the content is variable. For this reason, you should strive to be a part of the design process to advise the designers about what ramifications their choices may have on the actual implementation.
I have learned to keep my site designs simple, flexible, and manageable, over the years. So, the layout that I created for this version of the Beer House consists of a stock photo under Creative Commons license and some supporting graphics I created using Paint.NET. The layout is applied by CSS stylesheets, as part of a theme. This choice means that I can quickly change the color scheme and supporting graphics simply by changing the stylesheet or theme applied to the site or even the page.
First, create a new website project in Visual Studio .NET 2008 (files
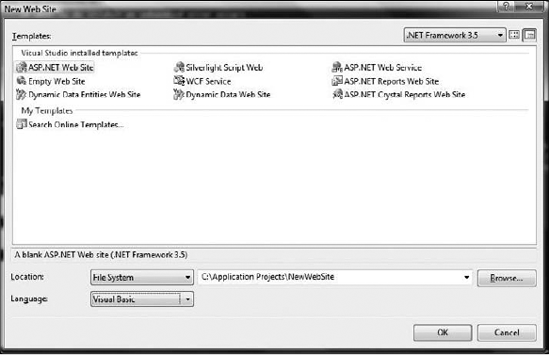
This enables you to create an ASP.NET project without creating a related virtual application or virtual directory in the IIS metabase (the metabase is where IIS stores its configuration data), and the project is loaded from a real hard disk folder, and executed by an integrated lightweight web server (called ASP.NET Development Server) that handles requests on a TCP/IP port other than the one used by IIS (IIS uses port 80). The actual port number used is determined randomly every time you press F5 to run the website in debug mode or Ctrl+F5 to run without debug mode. For example, it handles requests such as http://localhost:1168/ProjName/Default.aspx. This makes it much easier to move and back up projects, because you can just copy the project's folder and you're done — there's no need to set up anything from the IIS Management console. In fact, Visual Studio 2008 does not even require IIS unless you choose to deploy to an IIS web server, or you specify a web URL instead of a local path when you create the website project.
If you've developed with any previous version of ASP.NET or Visual Studio prior to 2005, I'm sure you will welcome this option. I say this is an option because you can still create the project by using a URL as project path — creating and running the site under IIS — by selecting HTTP in the Location drop-down list. I suggest you create and develop the site by using the File System location, with the integrated web server, and then switch to the full-featured IIS web server for the test phase. VS2008 includes a deployment wizard that makes it easier to deploy a complete solution to a local or remote IIS web server. For now, however, just create a new ASP.NET website in a folder you want, and call it TheBeerHouse35.
Note
The integrated web server was developed to make development and quick testing easier. However, you should never use it for final quality assurance or integration testing. Use IIS for that. IIS has more features, such as caching, HTTP compression, and many security options that can make your site run very differently from what you see in the new integrated ASP.NET Development Server.
One of the reasons for this is that all requests for any resource are passed through the development web server and processed by the ASP.NET engine. This means that any images, stylesheets, and so forth will be processed by the entire ASP.NET pipeline. Therefore, you may notice some minor differences between the experience with the development web server from a production deployment using IIS 6 or 7. All testing prior to approving a production push should be done in as close to real environment as possible to ensure that the application functions as desired the final environment.
After creating the new website, right-click on Default.aspx and delete it. We'll make our own default page soon.
Creating the master page with the shared site design is not that difficult once you have a mocked-up image (or a set of images if you made them separately). Basically, you cut the logo and the other graphics and put them in the HTML page. The other parts of the layout, such as the menu bar, the columns, and the footer, can easily be reproduced with HTML elements such as DIVs. Figure 2-8 shows the site layout. It is composed of an image found under a Creative Commons license and a few custom-created graphics. I used Paint.NET to create the simple Beer House logo and a gradient background for the menu. The remaining elements are a collection of DIV elements and cascading stylesheets.

Note
In this book I am assuming a certain amount of familiarity with ASP.NET and Visual Studio .NET. More specifically, I assume that you have a working knowledge of the basic operation of any previous version of Visual Studio .NET. Therefore, the steps I explain here focus on the changes in version 2.0–3.5 but do not cover every small detail. If you are not comfortable following the steps presented here, consult a beginner's book on ASP.NET before tackling this project.
After creating the website, create a new master page file (select Website
<%@ Master Language="VB" CodeFile="TBHMain.master.vb" Inherits="TBHMain" %>

<%@ Register Src="controls/FooterCopyright.ascx" TagName="FooterCopyright"
TagPrefix="uc1" %>
<%@ Register Src="controls/ThemeSelector.ascx" TagName="ThemeSelector"
TagPrefix="uc2" %>
<!DOCTYPE html PUBLIC "-//W3C//DTD XHTML 1.0 Transitional//EN"
"http://www.w3.org/TR/xhtml1/DTD/xhtml1-transitional.dtd">
<html xmlns="http://www.w3.org/1999/xhtml">
<head id="Head1" runat="server">
    <title>The Beer House</title>
    <asp:ContentPlaceHolder ID="head" runat="server">
    </asp:ContentPlaceHolder>
</head>
<body runat="server" id="pageBody">
    <form id="form1" runat="server">
    <div id="dHeader">
    ...
    </div>
    <div id='dContainer'>
        <asp:ContentPlaceHolder ID="MainContent" runat="server">
        </asp:ContentPlaceHolder>
    </div>
    <div id="dMainfooter">
        ...
    </div>
    </form>
</body>
</html>
Note
Similar to the way that the table content does not render until the entire table has been downloaded, all rendering is stopped as soon as JavaScript is encountered. By specification, all browsers stop everything until the entire script is loaded and evaluated; this mean loaded either from the server or inline scripts. This is why pushing any JavaScript routines to dedicated files instead of inline scripts is vital to a web application's performing fast.
A page is composed of a series of nested DIV elements, such as the header, content, and footer areas. Inside each of these DIV elements will be more DIV or SPAN tags that further define the actual layout of the page. Something of interest in the new layout is that it leverages nested master pages. This gives us the flexibility of defining multiple implementations of a classic two- or three-column layout. For example, the home page is a three-column layout where the main content section is the wider than the two side columns. There are two nested master pages used in the site, one with a narrow column to the left of the primary content, the other with a narrow column to the right of the main content.
The primary master page is a collection of DIVs that are used throughout the site, such as the header, the main content area, and the footer. At the top of the layout architecture is a main DIV with the ID of dHeader. This DIV contains the markup that defines the common header used in the layout, the header, and horizontal navigation. Inside the dHeader element there are two child DIV tags, dMainHeader and dMainNav.
<div id="dHeader">
        <div id="dMainHeader">
</div>
<div id="dMainNav">
</div>
</div>The dHeader, dContent, and dMainFooter elements share common positioning style rules, so they have a common style definition. This definition is used to position the elements in the horizontal center with a width of 780 pixels and no border. Further, the use of a background image is defined to start at the top-left corner with no scrolling.
Note
Why 780 pixels? Until recently a large majority of computer users had a screen resolution of 800 × 600 pixels, so a browser set to full screen would only have 800 pixels available to it horizontally. Add a vertical scroll bar 20 pixels wide and you have 780 pixels. Even with the advent of higher screen resolutions and much larger monitors, sticking to this rule is generally a good idea. Average users are still in the 1024 × 768 or just slightly higher resolutions. Advanced users will go much higher, but with the added real estate, most users do not go full screen with their browsers. The style definitions can be altered to allow the page to fill 100% of the horizontal space, but in the case of this layout, the header background image will not extend to fill anything past 780 pixels. Background images do not scale using CSS, but rather repeat. This means that setting the width of the Beer House to 100% width would cause the header image to repeat. The ultimate decision is usually a matter of personal preference rather than a functional decision.
Here are the style properties shared by all of the main layout elements:
div#dHeader, div#footer, div#dContainer
{
    background-position: 0 0;
    background: none repeat scroll 0 0;

    border: none;
    width: 780px;
    margin: auto;
}The dMainHeader DIV is composed of several child DIV elements for the logo, login elements, and theme selection.
<div id="dMainHeader">
            <div id="dLogo"
                <img src="~/images/tbh_logo.gif" runat="server"
alt="The Beer House" enableviewstate="false" />
            </div>
            <div id="dLoginLinks">
                <div id="dLoginMenu">
                    <a id="btnDisplayLogin"
href="javascript:DisplayLoginHandler();"
class="LoginLink">Login</a></div>
<div id="dLogoutMenu">
<div id="dUserName">
</div>
<a id="btnDisplayLogout" href="javascript:logoutHandler();"
class="LoginLink">Log Out</a>
</div>
</div>
<div id="dThemeselector">
<uc2:ThemeSelector ID="ThemeSelector1" runat="server" />
</div>
</div>Each of these elements has further style rules used to define their positioning and visual representations. The dMainHeader uses a background-image (the beer steins from Creative Commons), a height of 80 pixels, and width of 780 pixels. clear is set to both, clearing the element's floating inheritance from its parent element. both designates both left and right clearing.
/* Header Elements */

#dMainHeader
{
    background-image: url('images/bh_header.png'),
    clear: both;
    color: #800000;
    float: left;
    height: 80px;
    padding: 0;
    width: 780px;
}

H1.dMainHeader
{
    font-size: 24px;
    font-weight: bold;
    color: #996633;
}

#dLogo
{
    width: 480px;
    float: left;
    margin-right: 40px;
    margin-left: 40px;
}

#dLoginLinks
{
    width: 200px;
    float: right;
    margin-top: 10px 5px 0 0;
    padding-right: 10px;
    padding-top: 10px;
}
/* Login */
#dLoginMenu
{
text-align: right;
display: none;
}
#dLogoutMenu
{
text-align :right;
display: none;
}
a.LoginLink:link
{
padding: 2px 1px 2px 1px;
color: #FFFFFF;
font-size: Small;
text-decoration: none;
font-weight: bolder;
}
a.LoginLink:visited
{
padding: 2px 1px 2px 1px;
color: #FFFFFF;
font-size: Small;
text-decoration: none;
font-weight: bolder;
}
a.LoginLink:active
{
padding: 2px 1px 2px 1px;
color: #FFFFFF;
font-size: Small;
text-decoration: none;
font-weight: bolder;
}
a.LoginLink:hover
{
padding: 2px 1px 2px 1px;
color: #FFFFFF;
font-size: Small;
text-decoration: none;
font-weight: bolder;
}
/* Themes */
#dThemeselector
{
text-align: right;height: 80px;
padding: 2px;
font-size: 10px;
margin-top: 50px;
margin-right: 10px;
color: #FFFFFF;
}
#dThemeselector select
{
color: black;
background-color: #e1e1e1;
font-size: 10px;
}The next section in the header is the site's primary horizontal navigation, composed of a specially styled unordered list (<UL>). There are actually two child DIVs in the dMainNav DIV: dMenu and dSocial. The first DIV is the traditional menu; the second is a series of image links pointing to Beer House pages on various social networking sites. Following is a list of the dMainNav's style properties; they define the background gradient image, dimensions, and position of the element.
#dMainNav
{
    background: url(images/menu_bg.gif) repeat-x;
    float: left;
    padding: 2px 0 0px 0;
    top: 85px;
    height: 28px;
    bottom: 100px;
    left: 1px;
    width: 780px;
    font-family: Arial, Helvetica, sans-serif;
}
The horizontal menu is defined by a series of style selectors applied to the UL and its child elements. The most important rule to notice is the one applied to the list items (<LI>). It defines how each of the list items is rendered in the list, which is inline. This tells the browser not to render the list as a stacked list of elements, but rather as if it is normal text or horizontal. Once this is defined, the remaining rules define the actual appearance, such as spacing, size, and colors for the elements in the list. Collectively, these rules define a list of horizontal links that compose a nice horizontal menu. The resulting HTML output is much thinner than the output of the Menu control, which outputs a large set of nested tables to accomplish the same effect. Similar rules are applied to the dSocial element to display the social site icon links. Following is the HTML markup:
<div id="dMenu">
<ul>
            <li><a href="<% =ResolveUrl("default.aspx") %>">
<span>Home</span></a></li>
                <li><a href="<% =ResolveUrl("showcategories.aspx") %>">
<span>Articles</span></a></li>
                <li><a href="<% =ResolveUrl("ShowDepartments.aspx") %>">
<span>Store</span></a></li>
<li><a href="<% =ResolveUrl("BrowseEvents.aspx") %>">
<span>Events</span></a></li>
<li><a href="<% =ResolveUrl("ShowForums.aspx") %>">
<span>Forum</span></a></li>
<li><a href="<% =ResolveUrl("BrowseAlbums.aspx") %>">
<span>Gallery</span></a></li>
<li><a href="<% =ResolveUrl("About.aspx") %>">
<span>About</span></a></li>
<li id="liAdmin"><a href="<% =ResolveUrl("Admin") %>">
<span>Admin</span></a></li>
</ul>
</div>Here are the styles applied to the menu:
#dMenu
{
    width: 550px;
    float: left;
}

#dMenu ul
{
    clear: left;
    float: left;
    width: 100%;
    list-style: none;
    margin: 1px 0 0 0;
    padding: 0;
}

#dMenu ul li
{
    display: inline;
    list-style: none;
    margin: 0;
    padding: 0;
}

#dMenu ul li a
{
    display: block;
    float: left;
    margin: 0 0 0 1px;
    padding: 3px 10px;
    text-align: center;
    color: #FFFFFF;
    text-decoration: none;
    position: relative;
    left: 15px;
    font-size: medium;
}
#dMenu ul li a:hover
{
background: transparent;
color: #CECECE;
}
#dMenu ul li a.active, #dMenu ul li a.active:hover
{
font-weight: bolder;
}
#dMenu ul li a span
{
display: block;
}The footer section is a collection of two DIVs — one for navigation and one for a copyright notice. The menu is, again, a UL and applies similar style rules as the primary navigation. The other DIV contains the site's copyright notice — more on that later.
<div id="dMainfooter">
<div id="footermenu">
            <ul>
                <li><a href="<% =ResolveUrl("default.aspx") %>">
<span>Home</span></a></li>
                <li><a href="<% =ResolveUrl("showcategories.aspx") %>">
<span>News</span></a></li>
                <li><a href="<% =ResolveUrl("ShowDepartments.aspx") %>">
<span>Store</span></a></li>
                <li><a href="<% =ResolveUrl("BrowseEvents.aspx") %>">
<span>Events</span></a></li>
                <li><a href="<% =ResolveUrl("BrowseAlbums.aspx") %>">
<span>Gallery</span></a></li>
                <li><a href="<% =ResolveUrl("Contact.aspx") %>">
<span>Contact</span></a></li>
                <li><a href="<% =ResolveUrl("Privacy.aspx") %>">
<span>Privacy</span></a></li>
                <li><a href="<% =ResolveUrl("Terms.aspx") %>">
<span>Terms</span></a></li>
                <li><a href="<% =ResolveUrl("SiteMap.aspx") %>">
<span>Site Map
</span></a></li>
            </ul>
        </div>
        <div id="footerCopyright">
            <uc1:FooterCopyright ID="FooterCopyright1" runat="server"
CompanyName="The BeerHouse"
                StartYear="2003" EnableViewState="false" />
        </div>
</div>
There are some more elements that complete the main master page for the login dialog, and those will be explained in Chapter 4. The remaining element is nested between the header and footer elements and contains a ContentPlaceHolder control named MainContent.
There are two more master pages used in the site, plus another for the site's administration. The remaining two master pages; LCMaster.master (2-Column layout with thin right column and left primary content) and CRMaster.master (another 2-Column layout with a thin left column and right primary content). Both of these master pages are nested master pages from the primary master page. Inside each of these master pages is a Content control that corresponds to the MainContent ContentPlaceHolder of the TBHMain.master page. Each of these child master pages contains two DIV elements, one for the primary content of the page and one for a side column with ancillary content. The side column contains a link to the site's overall RSS feed and then a ContentPlaceHolder control that lets the actual page set the remaining content.
<div id='left-column'>
        <div id="dRSS">
            <a href="thebeerhouse.rss">Subscribe:
                <img id="Img1" runat="server" src="~/images/beercap.gif" border="0"
 alt="Follow The BeerHouse via RSS." /></a>
            <hr />
        </div>
        <asp:ContentPlaceHolder ID="RightColumn" runat="server">
        </asp:ContentPlaceHolder>
</div>
<div id='right-main-content'>
        <asp:SiteMapPath runat="server" ID="TBHSiteMapPath"
CssClass="tbhSiteMapPath" ParentLevelsDisplayed="2">
        </asp:SiteMapPath>
        <asp:ContentPlaceHolder ID="CenterColumn" runat="server">
        </asp:ContentPlaceHolder>
</div>
The primary content DIV contains a SiteMapPath control and a ContentPlaceHolder. I'll discuss the SiteMapPath in more detail in the next chapter. I want to point out here the use of a DIV element with a specific name. In the preceding example, the content DIV is named right-main-content. The other child master page uses left-main-content. This allows different style rules to be defined for each element to position them either on the left or right side of the page.
When pages are rendered by ASP.NET, the markup will contain the DIV elements in the desired nesting hierarchy. The reason the columns are contained within a wrapping DIV element is to keep the footer element below the dynamic content rendered by the site. The two columns apply style rules that define their float or horizontal position and their width:
#left-main-content, #right-main-content
{
    background-color:#FFF;
    margin:5px;
    min-height:400px;
    width:570px;
}

#left-main-content
{
border-right:thin solid #000080;
float:left;
}
#right-main-content
{
border-right:thin solid #000080;
float:right;
}
#right-column, #left-column
{
background-color: #E6BB70;
margin: 4px;
min-height: 190px;
width: 180px;
}
#right-column
{
float: right;
left: 380px;
}
#left-column
{
clear:left;
float: left;
margin-right: 5px;
}A quick tutorial on the CSS Box Model is in order. Every element in HTML is defined as a box or a rectangle. The position of the box is determined by the Top, Left, Right, and Bottom values, which are either an integer value or a percentage. There are different unit types, but I use pixels (px) throughout this book to keep it simple. Generally I use absolute positioning, but this may vary from relative to static as needed. When absolute positioning is used the values for the position are calculated from the containing element, which would be the body, a DIV, and so on. As you will see by examining the layout of the new Beer House, this helps control where content is rendered (see Figure 2-9).

In the actual Box Model, there are three important value groups to understand: margin, border, and padding. The margin is the effective space around the box from another element. Think of it as cellspacing in a table. The border defines a line that designates one or more of the sides of the box and can have its style, width, and color defined. Padding refers to the space between the border and the actual content of the element. Effective use of these values enables you to produce some pretty stunning layout effects.
Figure 2-10 shows these concepts being applied to the About page.

A three-column layout that keeps the footer below all the page's content is often referred to as the Holy Grail of CSS layouts.
The only page in the new Beer House that uses a three-column layout is the home page. I chose to use the two-column layouts on the remaining pages because I wanted more room for the actual content. The home page, however, needs to expose as much content as possible to the visitor, so using three columns on the page — a column on each side of 180 pixels in width and a center column — made the most sense. The difference between a three-column layout and a two- column layout is that one of the thin columns is contained within the larger content DIV element. This keeps the footer element from overlapping any of the content elements.
<div id="MainColHome">
        <div id="center-main-content">
            /* Main Content */
        </div>
        <div id="right-column">
                 /* Side Content */
        </div>
</div>
Following are the style rules applied to the layout elements:
#center-main-content
{
    background-color:#FFFFFF;
    border-right:thin solid #000080;
    float:left;
    margin:5px;
    min-height:400px;
    width:360px;
}

#left-main-content, #right-main-content
{
    background-color:#FFF;
    margin:5px;
    min-height:400px;
    width:570px;
}

#left-main-content
{
    border-right:thin solid #000080;
    float:left;
}

#right-main-content
{
    float:right;
}Helping users know where they are in the site is not just a feature but a requirement to help users feel comfortable using your site. BreadCrumb navigation is a common way to let users see where they are in the site from a hierarchical perspective, meaning that it not only provides a visual representation but also lets users quickly navigate back up the site tree.
The SiteMapPath control was introduced with a series of navigation controls in ASP.NET 2.0. It is used to create a BreadCrumb navigation strip for a website and relies on the presence of a site map as part of the website; to be more specific, it automatically works with the site's SiteMapProvider. Again, I will cover creating a data-driven custom SiteMapProvider after we establish how to use the Entity Framework.
The SiteMapPath creates a link from each of the nodes in the hierarchy to the current page. There is a node for each parent URL above the current page, so it shows users where they are in relation to the rest of the site.
It's time to create the first theme for the master page: DarkBeer. There are two ways to do this that are functionally equivalent. You could add a new folder to the project named App_Themes and then a new subfolder under it called DarkBeer. Alternately, you could let Visual Studio assist you: select Website
I could go on and on about how and why the styles are defined the way they are, but that would make an entire book to itself. My advice is to carefully study the CSS used to create this layout and adjust it to your liking. A great resource to get up to speed on CSS layouts is www.csszengarden.com. There you will find a large set of examples using the same HTML page but with various stylesheets or themes applied to the site.
All images pointed to in this stylesheet file are located in an Images folder under
App_Themes/DarkBeer.That keeps together all related objects that make up the theme. The ASP.NET engine sort of fakes things and automatically maps them correctly for you when the page renders.
Now that you have a complete master page and a theme, you can test it by creating a sample content page. To begin, add a new web page named Default.aspx to the project (select the project in Solution Explorer and choose Website
<%@ Page Language="vb" AutoEventWireup="false" CodeBehind="Default.aspx.vb"
 Inherits="TBH_Web35._Default"
    MasterPageFile="~/CRMaster.Master" %>
<%@ Import Namespace="System.IO" %>
<%@ Register Src="controls/RSSReader.ascx" TagName="RSSReader" TagPrefix="uc3" %>
<asp:Content ID="CenterColumnContent" ContentPlaceHolderID="CenterColumn"
runat="Server">
    <div id="MainColHome">
        <div id="center-main-content">
            <asp:ListView ID="lvArticles" runat="server">
                <LayoutTemplate>
                    <div id="itemPlaceholder" runat="server" />
</LayoutTemplate>
<EmptyDataTemplate>
<p>
Sorry there are no articles available at this time.</p>
</EmptyDataTemplate>
<ItemTemplate>
<div class="Homearticlebox">
<div class="articletitle">
<a class="articletitle" href='<%# ResolveUrl("~/" &
SEOFriendlyURL( _
Settings.Articles.URLIndicator & "" & Eval("Title"),
".aspx")) %>'>
<%# HttpUtility.HTMLEncode(Eval("Title")) %></a>
</div>
<div class="articleabstract">
<p>
<%# Eval("Abstract") %>'></p>
</div>
</div>
</ItemTemplate>
<AlternatingItemTemplate>
<div class="Homearticlebox">
<div class="articletitle">
<a class="articletitle" href='<%#
ResolveUrl(SEOFriendlyURL("~/" & _
Path.Combine(Settings.Articles.URLIndicator, Eval("Title")),
".aspx")) %>'>
<%# HttpUtility.HTMLEncode(Eval("Title")) %>
</a></div>
<div class="articleabstract">
<p>
<%# Eval("Abstract") %>'></p>
</div>
</div>
</AlternatingItemTemplate>
</asp:ListView>
</div>
<div id="right-column">
<uc1:PollBox ID="PollBox1" runat="server" />
<uc3:RSSReader ID="RSSReader1" runat="server" />
</div>
</div>
</asp:Content>
<asp:Content ID="leftColumnContent" ContentPlaceHolderID="RightColumn"
runat="Server">
<uc1:Featuredproduct ID="Featuredproduct1" runat="server" />
<uc1:ShoppingCartBox ID="ShoppingCartBox1" runat="server" />
<uc1:NewsletterBox ID="NewsletterBox1" runat="server" />
</asp:Content>You could have also added the Theme attribute to the @Page directive, setting it equal to "DarkBeer". However, instead of doing that here, you can do it in the web.config file, once, and have it apply to all pages. Select the project
<?xml version="1.0"?>
<configuration xmlns="http://schemas.microsoft.com/.NetConfiguration/v2.0">
   <system.web>
      <pages theme="DarkBeer" masterPageFile="~/CRMaster.master" />
      <!-- other settings here... -->
   </system.net>
</configuration>
Why select a master page from the New Item dialog box when creating
Default.aspx, just to remove the master page attribute immediately afterward? Because that way, VS2008 will create the properContentcontrols and not the HTML code of a normal page.
To test the user-selectable theming feature described earlier in the chapter, we must have more than one theme. Thus, under the App_Themes folder, create another folder, named LightBeer (select the project, right-click Add Folder
In the provided example, I've changed most of the containers so that no background image is used, and the header and footer are filled with simple solid colors, like the left and right columns. Not only is the size for some elements different but the position is as well. The positions of the left and right columns in particular (which use absolute positioning) are completely switched, so that the container named leftcol is docked on the right border, and the rightcol container is docked on the left. This is done by changing just a couple of style classes, as shown here:
body
{
    font-family: Arial, Helvetica, sans-serif;
    font-size: 12px;
    background-color: #FFCC00;
}

div#dHeader, div#footer, div#dContainer
{
    background-position: 0 0;
    background: none repeat scroll 0 0;

    border: none;
    width: 780px;
    margin: auto;
}

/* Header Elements */

#dMainHeader
{
    clear: both;
    color: #800000;
float: left;
height: 80px;
padding: 0;
width: 780px;
background-color: #CC6600;
}
H1.dMainHeader
{
font-size: 24px;
font-weight: bold;
color: #996633;
}
#dLogo
{
width: 480px;
float: left;
margin-right: 40px;
margin-left: 40px;
}This is the power of DIVs and stylesheets: change a few styles, and the colors change and there are no background images. This was a pretty simple example, but you can push this much further and create completely different layouts, with some parts hidden and others made bigger, and so on.
You now have a master page, with a couple of themes for it, so now you can develop a user control that will display the list of available themes and allow the user to pick one. Once you have this control, you will plug it into the master page, in the "themeselector" DIV container. Before creating the user control, create a new folder named "Controls", inside of which you'll put all your user controls so that they are separate from the pages for better organization (select the project, right-click Add Folder
<%@ Control Language="VB" AutoEventWireup="false" CodeFile="ThemeSelector.ascx.vb"
 Inherits="MB.TheBeerHouse.UI.Controls.ThemeSelector" %>
<asp:DropDownList runat="server" ID="ddlThemes" AutoPostBack="True"
 meta:resourcekey="ddlThemesResource1" />
Note that the drop-down list has the AutoPostBack property set to true, so that the page is automatically submitted to the server as soon as the user changes the selected value. The real work of filling the drop-down list with the names of the available themes, and loading the selected theme, will be done in this control's code-behind file, and in a base page class that you'll see shortly. In the code-behind file, you need to fill the drop-down list with an array of strings returned by a helper method and then select the item that has the same value as the current page's Theme:
Public Partial Class ThemeSelector
    Inherits System.Web.UI.UserControl
    Protected Sub Page_Load(ByVal sender As Object, ByVal e As EventArgs)
        ddlThemes.DataSource = Helpers.GetThemes()
        ddlThemes.DataBind()

        ddlThemes.SelectedValue = Me.Page.Theme
    End Sub
End Class
The GetThemes method is defined in a Helpers.vb file that is located in the root folder of the TBHBLL class library; you will have to compile the library after any changes before those changes can be used by the site. You'll read more about the compilation model later in the book, and especially in Chapter 13 about deployment.
Note
Going forward with the new Beer House application, you will need a class library as part of the overall solution. This can easily be added by selecting File
You work is still not done, and we will cover more of the details in remaining chapters. But you need to add a reference to the class library in your website. You can do this by right-clicking on the root node of the website and selecting Add Reference from the context menu. Select the Projects tab in the dialog, double-click the name of your new class library, and you have a reference. You will have to compile the class library before any changes you make can be used by the website.
Several supporting classes are discussed in the rest of the chapter. While you can just as easily place them in the App_Code folder, for the purposes of this book, I will be including these classes in a supporting class library. There will be more details on this process in the next chapter.
The GetThemes method uses the GetDirectories method of the System.IO.Directory class to retrieve an array with the paths of all folders contained in the ~/App_Themes folder (this method expects a physical path, not a URL — you can, however, use a URL to point to the physical path by using the Server.MapPath method). The returned array of strings contains the entire path, not just the folder name, so you must loop through this array and overwrite each item with that item's folder name part (returned by the System.IO.Path.GetFileName static method). Once the array is filled for the first time, it is stored in the ASP.NET cache, so that subsequent requests will retrieve it from there, more quickly. The following code shows the entire content of the Helpers class (Helpers.vb):
Imports System.IO
Imports Microsoft.VisualBasic
Imports System.Collections.Specialized
Imports System.Web
Imports System.Web.Caching
Imports System.Web.UI
Imports System.Web.UI.WebControls

Namespace UI
    Public NotInheritable Class Helpers
'
' Returns an array with the names of all local Themes
'
Public Shared Function GetThemes() As String()
If Not IsNothing(HttpContext.Current.Cache("SiteThemes")) Then
Return DirectCast(HttpContext.Current.Cache("SiteThemes"), String())
Else
Dim themesDirPath As String = HttpContext.Current.Server.MapPath("~/App_Themes")
' get the array of themes folders under /App_Themes
Dim themes As String() = Directory.GetDirectories(themesDirPath)
For i As Integer = 0 To themes.Length - 1
themes(i) = Path.GetFileName(themes(i))
Next
Dim dep As New CacheDependency(themesDirPath)
HttpContext.Current.Cache.Insert("SiteThemes", themes, dep)
Return themes
End If
End Function
End Class
End NamespaceNow that you have the control, go back to the master page, and add the following line at the top of the file in the Source view to reference the external user control:
<%@ Register Src="Controls/ThemeSelector.ascx" TagName="ThemeSelector"
TagPrefix="uc2" %>
Then, declare an instance of the control where you want it to appear — namely, within the "themeselector" container:
<div id="themeselector">
   <uc2:ThemeSelector id="ThemeSelector1" runat="server" />
</div>
The code that handles the switch to a new theme can't be placed in the DropDownList's SelectedIndexChanged event, because that happens too late in the page's life cycle. As I said in the "Design" section, the new theme must be applied in the page's PreInit event. Also, instead of recoding it for every page, we'll just write that code once in a custom base page. Our objective is to read the value of the DropDownList's selected index from within our custom base class, and then we want to apply the theme specified by the DropDownList.
You can't access the controls and their values from the PreInit event handler because it's still too early in the page's life cycle. Therefore, you need to read the value of this control in a server event that occurs later: the Load event is a good place to read it. However, when you're in the Load event handler, you won't know the specific ID of the DropDownList control, so you'll need a way to identify this control, and then you can read its value by accessing the row data that was posted back to the server, via the Request.Form collection.
And there is a remaining problem: you must know the ID of the control to retrieve its value from the collection, but the ID may vary according to the container in which you place it, and it's not a good idea to hard-code it because you might decide to change its location in the future. Instead, when the control is first created, you can save its client-side ID in a static field of a class, so that it will be maintained for the entire life of the application, between different requests (postbacks), until the application shuts down (more precisely, until the application domain of the application's assemblies is unloaded). Therefore, add a Globals.vb file to the supporting class library, and write the following code inside it:
Imports System.Web.Configuration
Imports Microsoft.VisualBasic

Public NotInheritable Class Globals

    Public Shared ThemesSelectorID As String = String.Empty

End Class
Then, go back to the ThemeSelector's code-behind file and add the code to save its ID in that static field:
Imports TheBeerHouse
Imports TheBeerHouse.UI

Namespace UI.Controls
    Partial Class ThemeSelector
        Inherits System.Web.UI.UserControl

        Protected Sub Page_Load(ByVal sender As Object, ByVal e As
System.EventArgs) Handles Me.Load
            If Globals.ThemesSelectorID.Length = 0 Then
                Globals.ThemesSelectorID = ddlThemes.UniqueID
            End If

            ddlThemes.DataSource = Helpers.GetThemes()
            ddlThemes.DataBind()

            ddlThemes.SelectedValue = Me.Page.Theme
        End Sub
    End Class
End Namespace
You're ready to create the custom base class for your pages, and this will just be another regular class you place in UI folder in the class library and that inherits from System.Web.UI.Page. You override its OnPreInit method to do the following:
Check whether the current request is a postback. If it is, check whether it was caused by the
ThemeSelectordrop-down list. In ASP.NET, all pages with a server-side form have a hidden field named "__EVENTTARGET", which will be set with the ID of the HTML control that causes the postback (if it is not a Submit button). To verify this condition, you can just check whether the"__EVENTTARGET"element of theFormcollection contains the ID from the drop-down list, based on the ID read from theGlobalsclass.If the conditions of point 1 are all verified, you retrieve the name of the selected theme from the
Formcollection's element with an Id equal to the ID saved inGlobals, and use it for setting the page'sThemeproperty. Then, you also store that value in aSessionvariable. This is done so that subsequent requests made by the same user will correctly load the newly selected theme and will not reset it to the default theme.If the current request is not a postback, check whether the
Sessionvariable used in point 2 is empty (null) or not. If it is not, retrieve that value and use it for the page'sThemeproperty.
The following snippet translates this description into real code:
Namespace TheBeerHouse.UI
    Public Class BasePage
        Inherits System.Web.UI.Page
        Protected Overloads Overrides Sub OnPreInit(ByVal e As EventArgs)
            Dim id As String = Globals.ThemesSelectorID
            If id.Length > 0 Then
                If Me.Request.Form("__EVENTTARGET") = id AndAlso Not
 String.IsNullOrEmpty(Me.Request.Form(id)) Then
                    Me.Theme = Me.Request.Form(id)
                    Me.Session("CurrentTheme") = Me.Theme
                Else
                    If Me.Session("CurrentTheme") IsNot Nothing Then
                        Me.Theme = Me.Session("CurrentTheme").ToString()
                    End If
                End If
            End If

            MyBase.OnPreInit(e)
        End Sub
    End Class
End Namespace
The downside of the approach used here is that the selected theme is stored in a session variable, which is cleared when the session ends — namely, when the user closes the browser or when the user does not make a page request for 20 minutes (the duration can be customized). A much better solution would be to use Profile properties, which are persistent between sessions and also have other advantages. You'll examine this feature of ASP.NET — and modify this code to use it — in Chapter 5.
The last thing you have to do is change the default code-behind class for the Default.aspx page so that it uses your own BasePage class instead of the default Page class. Your custom base class, in turn, will call the original Page class. You only need to change one word, as shown here (change Page to BasePage):
Public Partial Class _Default
    Inherits TheBeerHouse.UI.BasePage
    Protected Sub Page_Load(ByVal sender As Object, ByVal e As EventArgs)
    End Sub
End Class
You're done! Run the project; by default, you'll see the home page shown earlier in Figure 2-7 (except for the login box, which doesn't contain anything so far — it will be filled in Chapter 5) with the DarkBeer theme applied to it. If you pick the LightBeer item from the ThemeSelector drop-down list, the home page should change to something very similar to what is shown in Figure 2-11.

The same page with the LightBeer theme applied is shown in Figure 2-12.

The user control elements in the sidebar boxes have a consistent layout and style applied to them. Each content box is composed of a wrapper DIV element and two child DIVs. The first child DIV is the content's title bar. The second child element is the actual content. Notice how style classes are applied to the elements; remember, these elements are repeated several times on each page. Therefore, you need to apply the style settings using the class attribute:
<div class="SideBarbox">
    <div class="SideBarTitle">
        <asp:Image ID="imgArrow" runat="server" ImageUrl="~/images/arrowr.gif"
 GenerateEmptyAlternateText="True" meta:resourcekey="imgArrowResource1" />
        Newsletter
    </div>
    <div class="SideBarContent">
/* Content Goes Here */
    </div>
</div>
Here are the corresponding styles:
/* Side Bar Box */

.SideBarbox
{
    padding: 0px 1px 3px 1px;
    font-size: 11px;
    text-align: center;
    border: 1px dashed #FFFFFF;
    background-color: #CC6600;

}

.SideBarbox a
{
    color: #521300;
    font-weight: bold;
}

.SideBarTitle
{
    font-family: Arial, Helvetica, sans-serif;
    font-size: small;
    font-weight: bold;
    color: #FFFFFF;
    background-color: #800000;
}

.SideBarTitle img
{
    float: left;
    margin-left: 3px;
    margin-right: 3px;
}
.SideBarContent
{
padding: 6px;
}Figure 2-13 shows an example of these styles in action.

A single page (Default.aspx) is not enough to test everything we've discussed and implemented in this chapter. For example, we haven't really seen the SiteMapPath control in practice, because it doesn't show any link until we move away from the home page, of course. You can easily implement the Contact.aspx and About.aspx pages if you want to test it. I'll take the Contact.aspx page as an example for this chapter. The final page is represented in Figure 2-14.
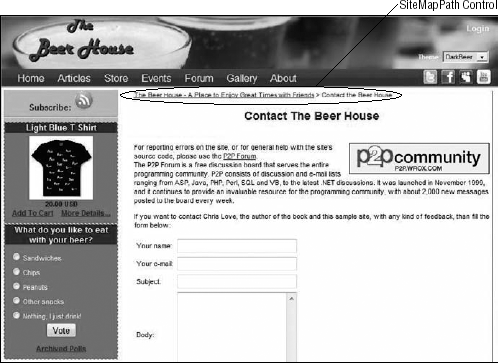
In this chapter, you've built the foundations for the site's user interface layer. You've designed and implemented nested master pages with common HTML and graphics, making it easy to change the layout and the graphics of the site by modifying a single file. You have seen how to create a variety of two- and three-column page layouts using CSS. You've also used themes to create a couple of different visual appearances for the same master page. You've created a mechanism to enable users to dynamically pick their own favorite theme from a drop-down list, so that they can change the appearance of your site to meet their needs and desires. You have also created a lean set of menus using Unordered List and stylesheets. You have also added a SiteMapPath control to display breadcrumb navigation based on the SiteMapProvider we will build in a later chapter. Finally, you've used a custom BasePage class to provide not just a common look and feel among the pages but also some common behavior. All in all, you've already developed some significant new features, but with comparatively few lines of code. In the next chapter, we'll continue to talk about foundations, but for the business layer and data layers.