
Chapter 19: Logging and Testing
In this chapter, we will cover logging and testing from the jOOQ perspective. Relying on the fact that these are common-sense notions, I won't explain what logging and testing are, nor will I highlight their obvious importance. That being said, let's jump directly into the agenda of this chapter:
- jOOQ logging
- jOOQ testing
Let's get started!
Technical requirements
The code for this chapter can be found on GitHub at https://github.com/PacktPublishing/jOOQ-Masterclass/tree/master/Chapter19.
jOOQ logging
By default, you'll see the jOOQ logs at the DEBUG level during code generation and during queries/routine execution. For instance, during a regular SELECT execution, jOOQ logs the query SQL string (with and without the bind values), the first 5 records from the fetched result set as a nice formatted table, and the size of the result is set as shown in the following figure:

Figure 19.1 – A default jOOQ log for a SELECT execution
This figure reveals a few important aspects of jOOQ logging. First of all, the jOOQ logger is named org.jooq.tools.LoggerListener and represents an implementation of the ExecuteListener SPI presented in Chapter 18, jOOQ SPI (Providers and Listeners). Under the hood, LoggerListener uses an internal abstraction (org.jooq.tools.JooqLogger) that attempts to interact with any of the famous loggers, sl4j, log4j, or the Java Logging API (java.util.logging). So, if your application uses any of these loggers, jOOQ hooks into it and uses it.
As you can see in this figure, jOOQ logs the query SQL string when the renderEnd() callback is invoked, and the fetched result set when the resultEnd() callback is invoked. Nevertheless, the jOOQ methods that rely on lazy (sequential) access to the underlying JDBC ResultSet (so, methods that uses Iterator of the Cursor– for instance, ResultQuery.fetchStream() and ResultQuery.collect()) don't pass through resultStart() and resultEnd(). In such cases, only the first five records from ResultSet are buffered by jOOQ and are available for logging in fetchEnd() via ExecuteContext.data("org.jooq.tools.LoggerListener.BUFFER"). The rest of the records are either lost or skipped.
If we execute a routine or the query is a DML, then other callbacks are involved as well. Are you curious to find out more?! Then you'll enjoy studying the LoggerListener source code by yourself.
jOOQ logging in Spring Boot – default zero-configuration logging
In Spring Boot 2.x, without providing any explicit logging configurations, we see logs printed in the console at the INFO level. This is happening because the Spring Boot default logging functionality uses the popular Logback logging framework.
Mainly, the Spring Boot logger is determined by the spring-boot-starter-logging artifact that (based on the provided configuration or auto-configuration) activates any of the supported logging providers (java.util.logging, log4j2, and Logback). This artifact can be imported explicitly or transitively (for instance, as a dependency of spring-boot-starter-web).
In this context, having a Spring Boot application with no explicit logging configurations will not log jOOQ messages. However, we can take advantage of jOOQ logging if we simply enable the DEBUG level (or TRACE for more verbose logging). For instance, we can do it in the application.properties as follows:
// set DEBUG level globally
logging.level.root=DEBUG
// or, set DEBUG level only for jOOQ
logging.level.org.jooq.tools.LoggerListener=DEBUG
You can practice this example in SimpleLogging for MySQL.
jOOQ logging with Logback/log4j2
If you already have Logback configured (for instance, via logback-spring.xml), then you'll need to add the jOOQ logger, as follows:
…
<!-- SQL execution logging is logged to the
LoggerListener logger at DEBUG level -->
<logger name="org.jooq.tools.LoggerListener"
level="debug" additivity="false">
<appender-ref ref="ConsoleAppender"/>
</logger>
<!-- Other jOOQ related debug log output -->
<logger name="org.jooq" level="debug" additivity="false">
<appender-ref ref="ConsoleAppender"/>
</logger>
…
You can practice this example in Logback for MySQL. If you prefer log4j2, then consider the Log4j2 application for MySQL. The jOOQ logger is configured in log4j2.xml.
Turn off jOOQ logging
Turning on/off jOOQ logging can be done via the set/withExecuteLogging() setting. For instance, the following query will not be logged:
ctx.configuration().derive(
new Settings().withExecuteLogging(Boolean.FALSE))
.dsl()
.select(PRODUCT.PRODUCT_NAME, PRODUCT.PRODUCT_VENDOR)
.from(PRODUCT).fetch();
You can practice this example in TurnOffLogging for MySQL. Note that this setting doesn't affect the jOOQ Code Generator logging. That logging is configured with <logging>LEVEL</logging> (Maven), logging = 'LEVEL' (Gradle), or .withLogging(Logging.LEVEL) (programmatically). LEVEL can be any of TRACE, DEBUG, INFO, WARN, ERROR, and FATAL. Here is the Maven approach for setting the WARN level – log everything that is bigger or equal to the WARN level:
<configuration xmlns="...">
<logging>WARN</logging>
</configuration>
You can practice this example in GenCodeLogging for MySQL.
In the second part of this section, let's tackle a suite of examples that should help you to get familiar with different techniques of customizing jOOQ logging. Based on these examples, you should be capable of solving your scenarios. Since these are just examples, they won't cover all possible cases, which is worth remembering in your real scenarios.
Customizing result set logging
By default, jOOQ truncates the logged result set to five records. However, we can easily log the entire result set via format(int size), as shown here:
private static final Logger log =
LoggerFactory.getLogger(...);
var result = ctx.select(...)...
.fetch();
log.debug("Result set:
" + result.format
(result.size()));
How about logging the whole result set for every query (excluding queries that rely on lazy, sequential access to an underlying JDBC ResultSet)? Moreover, let's assume that we plan to log the row number, as shown in the following figure:
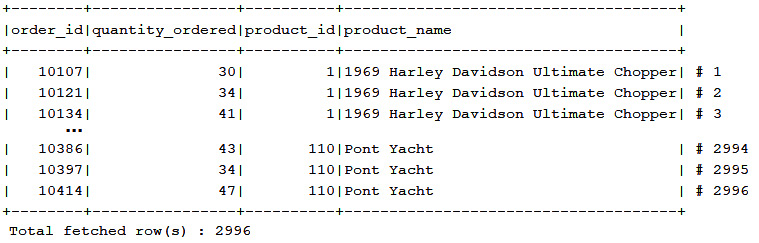
Figure 19.2 – Customizing result set logging
One approach for accomplishing this consists of writing a custom logger as ExecuteListener and overriding the resultEnd() method:
public class MyLoggerListener extends DefaultExecuteListener {private static final JooqLogger log =
JooqLogger.getLogger(LoggerListener.class);
@Override
public void resultEnd(ExecuteContext ctx) {Result<?> result = ctx.result();
if (result != null) { logMultiline("Total Fetched result", result.format(), Level.FINE, result.size());
log.debug("Total fetched row(s)", result.size());}
}
// inspired from jOOQ source code
private void logMultiline(String comment,
String message, Level level, int size) {// check the bundled code
}
}
You can practice this example in LogAllRS for MySQL.
Customizing binding parameters logging
If we switch the logging level to TRACE (logging.level.root=TRACE), then we get more verbose jOOQ logging. For instance, the bind parameters are logged as a separate list, as shown in this example:
Binding variable 1 : 5000 (integer /* java.lang.Integer */)
Binding variable 2 : 223113 (bigint /* java.lang.Long */)
...
Challenge yourself to customize this list to look different and to be logged at DEBUG level. You can find some inspiration in LogBind for MySQL, which logs bindings like this:
... : [1] as integer /* java.lang.Integer */ - [5000]
... : [vintageCars] as bigint /* java.lang.Long */ - [223113]
...
How about log bindings as a nice formatted table? I'm looking forward to seeing your code.
Customizing logging invocation order
Let's assume that we plan to enrich jOOQ logging to log a chart, as shown here:

Figure 19.3 – Logging a chart
This chart is logged only for SELECT statements that contain PRODUCT.PRODUCT_ID (represented on the X axis of the chart – category) and PRODUCT.BUY_PRICE (represented on the Y axis of the chart – value). Moreover, we don't take into account the queries that rely on lazy sequential access to the underlying JDBC ResultSet, such as ctx.selectFrom(PRODUCT).collect(Collectors.toList());. In such cases, jOOQ buffers for logging only the first five records, so, in most of the cases, the chart will be irrelevant.
The first step consists of writing a custom ExecuteListener (our own logger) and overriding the resultEnd() method – called after fetching a set of records from ResultSet. In this method, we search for PRODUCT.PRODUCT_ID and PRODUCT.BUY_PRICE, and if we find them, then we use the jOOQ ChartFormat API, as shown here:
@Override
public void resultEnd(ExecuteContext ecx) { if (ecx.query() != null && ecx.query() instanceof Select) {Result<?> result = ecx.result();
if (result != null && !result.isEmpty()) {final int x = result.indexOf(PRODUCT.PRODUCT_ID);
final int y = result.indexOf(PRODUCT.BUY_PRICE);
if (x != -1 && y != -1) {ChartFormat cf = new ChartFormat()
.category(x)
.values(y)
.shades('x'); String[] chart = result.formatChart(cf).split("
"); log.debug("Start Chart", ""); for (int i = 0; i < chart.length; i++) { log.debug("", chart[i]);}
log.debug("End Chart", ""); } else { log.debug("Chart", "The chart cannot be constructed (missing data)");
}
}
}
}
There is one more thing that we need. At this moment, our resultEnd() is invoked after the jOOQ's LoggerListener.resultEnd() is invoked, which means that our chart is logged after the result set. However, if you look at the previous figure, you can see that our chart is logged before the result set. This can be accomplished by reversing the order of invocation for the fooEnd() methods:
configuration.settings()
.withExecuteListenerEndInvocationOrder(
InvocationOrder.REVERSE);
So, by default, as long as the jOOQ logger is enabled, our loggers (the overridden fooStart() and fooEnd() methods) are invoked after their counterparts from the default logger (LoggingLogger). But, we can reverse the default order via two settings: withExecuteListenerStartInvocationOrder() for fooStart() methods and withExecuteListenerEndInvocationOrder() for fooEnd() methods. In our case, after reversion, our resultEnd() is called before LoggingLogger.resultEnd(), and this is how we slipped our chart in the proper place. You can practice this example in ReverseLog for MySQL.
Wrapping jOOQ logging into custom text
Let's assume that we plan to wrap each query/routine default logging into some custom text, as shown in the following figure:

Figure 19.4 – Wrapping jOOQ logging into custom text
Before checking a potential solution in WrapLog for MySQL, consider challenging yourself to solve it.
Filtering jOOQ logging
Sometimes, we want to be very selective with what's being logged. For instance, let's assume that only the SQL strings for the INSERT and DELETE statements should be logged. So, after we turn off the jOOQ default logger, we set up our logger, which should be capable of isolating the INSERT and DELETE statements from the rest of the queries. A simple approach consists of applying a simple check, such as (query instanceof Insert || query instanceof Delete), where query is given by ExecuteContext.query(). However, this will not work in the case of plain SQL or batches containing the INSERT and DELETE statements. Specifically for such cases, we can apply a regular expression, such as "^(?i:(INSERT|DELETE).*)$", to the SQL string(s) returned via ExecuteContext passed in renderEnd(). While you can find these words materialized in code lines in FilterLog for MySQL, let's focus on another scenario.
Let's assume that we plan to log only regular SELECT, INSERT, UPDATE, and DELETE statements that contain a suite of given tables (plain SQL, batches, and routines are not logged at all). For instance, we can conveniently pass the desired tables via data() as follows:
ctx.data().put(EMPLOYEE.getQualifiedName(), "");
ctx.data().put(SALE.getQualifiedName(), "");
So, if a query refers to the EMPLOYEE and SALE tables, then, and only then, should it be logged. This time, relying on regular expressions can be a little bit sophisticated and risky. It would be more proper to rely on a VisitListener that allows us to inspect the AST and extract the referred tables of the current query with a robust approach. Every QueryPart passes through VisitListener, so we can inspect its type and collect it accordingly:
private static class TablesExtractor
extends DefaultVisitListener {@Override
public void visitEnd(VisitContext vcx) { if (vcx.renderContext() != null) { if (vcx.queryPart() instanceof Table) {Table<?> t = (Table<?>) vcx.queryPart();
vcx.configuration().data()
.putIfAbsent(t.getQualifiedName(), "");
}
}
}
}
When VisitListener finishes its execution, we have already traversed all QueryPart, and we've collected all the tables involved in the current query, so we can compare these tables with the given tables and decide whether or not to log the current query. Note that our VisitListener has been declared as private static class because we use it internally in our ExecuteListener (our logger), which orchestrates the logging process. More precisely, at the proper moment, we append this VisitListener to a configuration derived from the configuration of ExecuteContext, passed to our ExecuteListener. So, this VisitListener is not appended to the configuration of DSLContext that is used to execute the query.
The relevant part of our logger (ExecuteListener) is listed here:
public class MyLoggerListener extends DefaultExecuteListener {...
@Override
public void renderEnd(ExecuteContext ecx) {if (ecx.query() != null &&
!ecx.configuration().data().isEmpty()) {...
Configuration configuration = ecx.configuration()
.deriveAppending(new TablesExtractor());
...
if (configuration.data().keySet().containsAll(tables)) {...
}
...
}
Check out the highlighted code. The deriveAppending() method creates a derived Configuration from this one (by "this one", we understand Configuration of the current ExecuteContext, which was automatically derived from the Configuration of DSLContext), with appended visit listeners. Practically, this VisitListener is inserted into Configuration through VisitListenerProvider, which is responsible for creating a new listener instance for every rendering life cycle.
However, what's the point of this? In short, it is all about performance and scopes (org.jooq.Scope). VisitListener is intensively called; therefore, it can have some impact on rendering performance. So, in order to minimize its usage, we ensure that it is used only in the proper conditions from our logger. In addition, VisitListener should store the list of tables that are being rendered in some place accessible to our logger. Since we choose to rely on the data() map, we have to ensure that the logger and VisitListener have access to it. By appending VisitListener to the logger via deriveAppending(), we append its Scope as well, so the data() map is accessible from both. This way, we can share custom data between the logger and VisitContext for the entire lifetime of the scope.
You can practice this example in FilterVisitLog for MySQL. Well, that's all about logging. Next, let's talk about testing.
jOOQ testing
Accomplishing jOOQ testing can be done in several ways, but we can immediately highlight that the less appealing option relies on mocking the jOOQ API, while the best option relies on writing integration tests against the production database (or at least against an in-memory database). Let's start with the option that fits well only in simple cases, mocking the jOOQ API.
Mocking the jOOQ API
While mocking the JDBC API can be really difficult, jOOQ solves this chore and exposes a simple mock API via org.jooq.tools.jdbc. The climax of this API is represented by the MockConnection (for mocking a database connection) and MockDataProvider (for mocking query executions). Assuming that jUnit 5 is used, we can mock a connection like this:
public class ClassicmodelsTest {public static DSLContext ctx;
@BeforeAll
public static void setup() {// Initialise your data provider
MockDataProvider provider = new ClassicmodelsMockProvider();
MockConnection connection = new MockConnection(provider);
// Pass the mock connection to a jOOQ DSLContext
ClassicmodelsTest.ctx = DSL.using(
connection, SQLDialect.MYSQL);
// Optionally, you may want to disable jOOQ logging
ClassicmodelsTest.ctx.configuration().settings()
.withExecuteLogging(Boolean.FALSE);
}
// add tests here
}
Before writing tests, we have to prepare ClassicmodelsMockProvider as an implementation of MockDataProvider that overrides the execute() method. This method returns an array of MockResult (each MockResult represents a mock result). A possible implementation may look as follows:
public class ClassicmodelsMockProvider
implements MockDataProvider {private static final String ACCEPTED_SQL =
"(SELECT|UPDATE|INSERT|DELETE).*";
...
@Override
public MockResult[] execute(MockExecuteContext mex)
throws SQLException {// The DSLContext can be used to create
// org.jooq.Result and org.jooq.Record objects
DSLContext ctx = DSL.using(SQLDialect.MYSQL);
// So, here we can have maximum 3 results
MockResult[] mock = new MockResult[3];
// The execute context contains SQL string(s),
// bind values, and other meta-data
String sql = mex.sql();
// Exceptions are propagated through the JDBC and jOOQ APIs
if (!sql.toUpperCase().matches(ACCEPTED_SQL)) { throw new SQLException("Statement not supported: " + sql);}
// From this point forward, you decide, whether any given
// statement returns results, and how many
...
}
Now, we are ready to go! First, we can write a test. Here is an example:
@Test
public void sampleTest() {Result<Record2<Long, String>> result =
ctx.select(PRODUCT.PRODUCT_ID, PRODUCT.PRODUCT_NAME)
.from(PRODUCT)
.where(PRODUCT.PRODUCT_ID.eq(1L))
.fetch();
assertThat(result, hasSize(equalTo(1)));
assertThat(result.getValue(0, PRODUCT.PRODUCT_ID),
is(equalTo(1L)));
assertThat(result.getValue(0, PRODUCT.PRODUCT_NAME),
is(equalTo("2002 Suzuki XREO")));}
The code that mocks this behavior is added in ClassicmodelsMockProvider:
private static final String SELECT_ONE_RESULT_ONE_RECORD =
"select ... where `classicmodels`.`product`.`product_id`=?";
...
} else if (sql.equals(SELECT_ONE_RESULT_ONE_RECORD)) {Result<Record2<Long, String>> result
= ctx.newResult(PRODUCT.PRODUCT_ID, PRODUCT.PRODUCT_NAME);
result.add(
ctx.newRecord(PRODUCT.PRODUCT_ID, PRODUCT.PRODUCT_NAME)
.values(1L, "2002 Suzuki XREO"));
mock[0] = new MockResult(-1, result);
}
The first argument of the MockResult constructor represents the number of affected rows, and -1 represents that the row count not being applicable. In the bundled code (Mock for MySQL), you can see more examples, including testing batching, fetching many results, and deciding the result based on the bindings. However, do not forget that jOOQ testing is equivalent to testing the database interaction, so mocking is proper only for simple cases. Do not use it for transactions, locking, or testing your entire database!
If you don't believe me, then follow Lukas Eder's statement: "The fact that mocking only fits well in a few cases can't be stressed enough. People will still attempt to use this SPI, because it looks so easy to do, not thinking about the fact that they're about to implement a full-fledged DBMS in the poorest of ways. I've had numerous users to whom I've explained this 3-4x: 'You're about to implement a full-fledged DBMS" and they keep asking me: "Why doesn't jOOQ 'just' execute this query when I mock it?" – "Well jOOQ *isn't* a DBMS, but it allows you to pretend you can write one, using the mocking SPI." And they keep asking again and again. Hard to imagine what's tricky about this, but as much as it helps with SEO (people want to solve this problem, then discover jOOQ), I regret leading some developers down this path... It's excellent though to test some converter and mapping integrations within jOOQ."
Writing integration tests
A quick approach for writing integration tests for jOOQ relies on simply creating DSLContext for the production database. Here is an example:
public class ClassicmodelsIT {private static DSLContext ctx;
@BeforeAll
public static void setup() { ctx = DSL.using("jdbc:mysql://localhost:3306/classicmodels" + "?allowMultiQueries=true", "root", "root");
}
@Test
...
}
However, this approach (exemplified in SimpleTest for MySQL) fits well for simple scenarios that don't require dealing with transaction management (begin, commit, and rollback). For instance, if you just need to test your SELECT statements, then most probably this approach is all you need.
Using SpringBoot @JooqTest
On the other hand, it's a common scenario to run each integration test in a separate transaction that rolls back in the end, and to achieve this while testing jOOQ in Spring Boot, you can use the @JooqTest annotation, as shown here:
@JooqTest
@ActiveProfiles("test") // profile is optionalpublic class ClassicmodelsIT {@Autowired
private DSLContext ctx;
// optional, if you need more control of Spring transactions
@Autowired
private TransactionTemplate template;
@Test
...
}
This time, Spring Boot automatically creates DSLContext for the current profile (of course, using explicit profiles is optional, but I added it here, since it is a common practice in Spring Boot applications) and automatically wraps each test in a separate Spring transaction that is rolled back at the end. In this context, if you prefer to use jOOQ transactions for certain tests, then don't forget to disable Spring transaction by annotating those test methods with @Transactional(propagation=Propagation.NEVER). The same is true for the usage of TransactionTemplate. You can practice this example in JooqTest for MySQL, which contains several tests, including jOOQ optimistic locking via TransactionTemplate and via jOOQ transactions.
By using Spring Boot profiles, you can easily configure a separate database for tests that is (or not) identical to the production database. In JooqTestDb, you have the MySQL classicmodels database for production and the MySQL classicmodels_test database for testing (both of them have the same schema and data and are managed by Flyway).
Moreover, if you prefer an in-memory database that is destroyed at the end of testing, then in JooqTestInMem for MySQL, you have the on-disk MySQL classicmodels database for production and the in-memory H2 classicmodels_mem_test database for testing (both of them have the same schema and data and are managed by Flyway). In these two applications, after you inject the DSLContext prepared by Spring Boot, you have to point jOOQ to the test schema – for instance, for the in-memory database, as shown here:
@JooqTest
@ActiveProfiles("test")@TestInstance(Lifecycle.PER_CLASS)
public class ClassicmodelsIT {@Autowired
private DSLContext ctx;
// optional, if you need more control of Spring transactions
@Autowired
private TransactionTemplate template;
@BeforeAll
public void setup() {ctx.settings()
// .withExecuteLogging(Boolean.FALSE) // optional
.withRenderNameCase(RenderNameCase.UPPER)
.withRenderMapping(new RenderMapping()
.withSchemata(
new MappedSchema().withInput("classicmodels") .withOutput("PUBLIC")));}
@Test
...
}
You should be familiar with this technique from Chapter 17, Multitenancy in jOOQ.
Using Testcontainers
Testcontainers (https://www.testcontainers.org/) is a Java library that allows us to perform JUnit tests in lightweight Docker containers, created and destroyed automatically for the most common databases. So, in order to use Testcontainers, you have to install Docker.
Once you've installed Docker and provided the expected dependencies in your Spring Boot application, you can start a container and run some tests. Here, I've done it for MySQL:
@JooqTest
@Testcontainers
@ActiveProfiles("test")public class ClassicmodelsIT {private static DSLContext ctx;
// optional, if you need more control of Spring transactions
@Autowired
private TransactionTemplate template;
@Container
private static final MySQLContainer sqlContainer =
new MySQLContainer<>("mysql:8.0") .withDatabaseName("classicmodels").withStartupTimeoutSeconds(1800)
.withCommand("--authentication-policy=mysql_native_password");
@BeforeAll
public static void setup() throws SQLException {// load into the database the schema and data
Flyway flyway = Flyway.configure()
.dataSource(sqlContainer.getJdbcUrl(),
sqlContainer.getUsername(), sqlContainer.getPassword())
.baselineOnMigrate(true)
.load();
flyway.migrate();
// obtain a connection to MySQL
Connection conn = sqlContainer.createConnection("");// intialize jOOQ DSLContext
ctx = DSL.using(conn, SQLDialect.MYSQL);
}
// this is optional since is done automatically anyway
@AfterAll
public static void tearDown() { if (sqlContainer != null) { if (sqlContainer.isRunning()) {sqlContainer.stop();
}
}
}
@Test
...
}
Note that we've populated the test database via Flyway, but this is not mandatory. You can use any other dedicated utility, such as Commons DbUtils. For instance, you can do it via org.testcontainers.ext.ScriptUtils, like this:
...
var containerDelegate =
new JdbcDatabaseDelegate(sqlContainer, "");
ScriptUtils.runInitScript(containerDelegate,
"integration/migration/V1.1__CreateTest.sql");
ScriptUtils.runInitScript(containerDelegate,
"integration/migration/afterMigrate.sql");
...
That's it! Now, you can spin out a throwaway container for testing database interaction. Most probably, this is the most preferable approach for testing jOOQ applications in production. You can practice this example in Testcontainers for MySQL.
Testing R2DBC
Finally, if you are using jOOQ R2DBC, then writing tests is quite straightforward.
In the bundled code, you can find three examples for MySQL, as follows:
- The TestR2DBC example: ConnectionFactory is created via ConnectionFactories.get() and DSLContext via ctx = DSL.using(connectionFactory). The tests are executed against a production database.
- The TestR2DBCDb example: ConnectionFactory is automatically created by Spring Boot and DSLContext is created as @Bean. The tests are executed against a MySQL test database (classicmodels_test), similar to the production one (classicmodels).
- The TestR2DBCInMem example: ConnectionFactory is automatically created by Spring Boot and DSLContext is created as @Bean. The tests are executed against an H2 in-memory test database (classicmodels_mem_test).
Summary
As you just saw, jOOQ has solid support for logging and testing, proving yet again that it is a mature technology ready to meet the most demanding expectations of a production environment. With a high rate of productivity and a small learning curve, jOOQ is the first choice that I use and recommend for projects. I strongly encourage you to do the same!