
Open Main.storyboard and locate the Mood Selection View Controller Scene. Select and delete the stack view in its interface.
Drag a plain old View from the object library (it will be easier to find if you search for the class name UIView) and place it within the visual effect view’s content view, where the stack view had been placed. You will want this new view to have the same constraints that the stack view had.
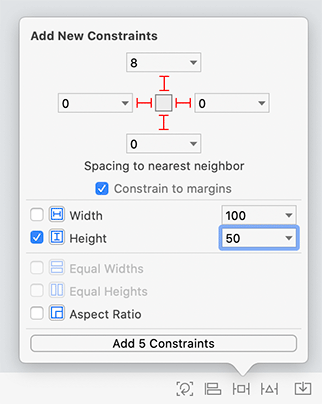
To do this, first resize the new view to be smaller than its superview; it should be positioned completely inside of its superview. Then open the Add New Constraints menu and configure it as shown in Figure 18.3. Confirm that Constrain to margins is checked, and then click Add 5 Constraints.
Open the identity inspector for the new view. Set the Class to ImageSelector. Now open its attributes inspector and change the Background to Clear Color.
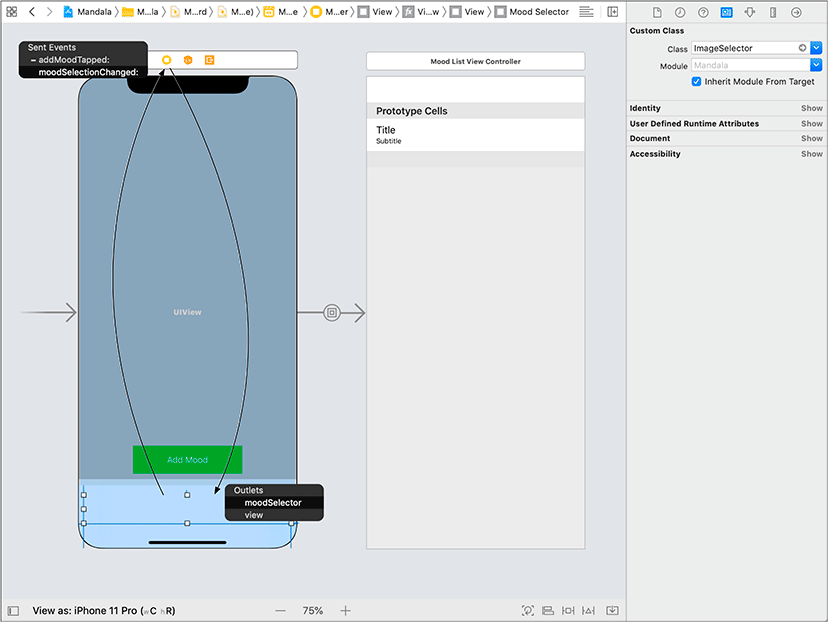
Now you need to connect your outlets and actions. Control-drag from the Mood Selection View Controller in the scene dock to the ImageSelector on the canvas and connect the moodSelector outlet. Now Control-drag from the ImageSelector to the Mood Selection View Controller in the scene dock and connect this control to the moodSelectionChanged: action (Figure 18.4).
Build and run the application. The application should work just as it did at the end of the previous chapter.