Chapter 10
To HTML and Beyond!
In This Chapter
![]() Knowing the differences between HTML and XML
Knowing the differences between HTML and XML
![]() Outputting HTML documents from your XML
Outputting HTML documents from your XML
![]() Creating an HTML table from an XML file
Creating an HTML table from an XML file
![]() Linking an XSLT stylesheet with an XML document
Linking an XSLT stylesheet with an XML document
![]() Examining Web browser support for XSLT
Examining Web browser support for XSLT
![]() Transforming XML into other formats
Transforming XML into other formats
I ’d like to nominate Buzz Lightyear as an honorary X-Team member. You know Buzz, don’t you? He’s the friendly spaceman of Toy Story fame. Buzz fits right in with the X-Team mates: He’s a no-nonsense guy with a well-defined mission — to save the galaxy from the evil Zurg. Plus, he’s the coolest and hippest of the Toy Story bunch (sorry, Woody). So too, the X-Team members are all cool, hip technologies with well-defined missions.
As you begin this chapter, it’s time to expand this mission of XSLT to include outputting result documents as HTML. In this chapter, you find out all you need to know to transform XML into HTML, as well as find out ways to output into other formats. So, in the words of Buzz, “To HTML and beyond!”
XML and HTML
When you take a glance at HTML code, it sure does look an awful lot like an XML document, doesn’t it? Ahhhhh, but a quick look like that can be deceiving, because HTML is not the same as XML. I overview the similarities and differences in Chapter 1, but I will dive deeper in this section.
HTML is a markup language with a collection of those familiar elements and attributes, but HTML is a lot more lax than its stricter XML cousin. Think of HTML as the laid-back surfer dude from California and XML as the New York accountant type.
Here are a few notable differences between HTML and XML:
![]() Many empty HTML elements such as <p>, <br>, and <hr> are used with no corresponding end tags.
Many empty HTML elements such as <p>, <br>, and <hr> are used with no corresponding end tags.
![]() HTML doesn’t recognize the XML shortcut syntax for an empty element, such as <p/>. The browser altogether ignores an empty element like this.
HTML doesn’t recognize the XML shortcut syntax for an empty element, such as <p/>. The browser altogether ignores an empty element like this.
![]() In HTML, you don’t need to enclose attribute values in quotes. You can if you want to, but HTML doesn’t fuss if you don’t.
In HTML, you don’t need to enclose attribute values in quotes. You can if you want to, but HTML doesn’t fuss if you don’t.
![]() HTML is case-insensitive, whereas case matters for XML.
HTML is case-insensitive, whereas case matters for XML.

I knew XML. XML was a friend of mine. Senator, you’re no XML.
To illustrate the difference between these two markup languages, consider the following HTML document. It is perfectly acceptable HTML, but breaks every rule in the book for XML:
<html>
<hEaD>
<META NAME=Generator CONTENT=’Star Web Page Commander’>
</HeAd>
<body BGCOLOR=’#FFFFFF’ link=”#0000FF”>
<p>Buzz: You are a sad, strange, little man. You have my pity. Farewell.
<hr>
</body>
A Web browser can display that HTML flawlessly, but you don’t want to run this code through an XML processor. It would barf all over the place! To make the code XML friendly, you need to change it to:
<html>
<head>
<meta name=”Generator” content=”Star Web Page Commander”/>
</head>
<body bgcolor=”#FFFFFF” link=”#0000FF”>
<p>Buzz: You are a sad, strange, little man. You have my pity. Farewell.</p>
<hr/>
</body>
</html>
The problem is that, even in this simplest of examples, many browsers don’t display the code exactly as you intended. For example, a browser doesn’t recognize the <hr/> empty tag element as a horizontal rule element, because that is not part of HTML standard. Therefore, outputting tags as a pure XML document doesn’t give you reliable formatting results.
Fortunately, you and I aren’t the only ones who see these variations as problematic. To reconcile the differences between HTML and XML, there is a new W3C standard afoot called XHTML, which is an XMLized version of HTML. In other words, XHTML gives the California surfer a shirt and tie and aims to give it some semblance of discipline. Everyone has to grow up, sooner or later!
Over time, when the use of XHTML becomes widespread and browsers fully support it, switching between XML and HTML and displaying the results on the Web will be a breeze. But because older browsers will be around for some time to come, this XML Nirvana is still quite a ways off. Therefore, living with these nuances is something that you and I just have to get used to.
So how do these differences between HTML and XML impact you as an XSLT stylesheet author? The most important implication is on the input side: Before you can transform an HTML document with XSLT, you first need to make the HTML document well-formed. XSLT can’t work with HTML documents that aren’t well-formed.

Outputting to HTML
The disparities between HTML and XML may cause you to despair when you’re inputting HTML documents. Happily, the output side is a completely different story. In fact, you don’t even need to think about whether the resulting HTML code is well-formed when you create your XSLT stylesheets, because the XSLT processor handles all the messy conversions for you.
To demonstrate, I start with the quotes.xml file shown in Listing 10-1 as my source document.
Listing 10-1: filmquotes.xml
<?xml version=”1.0”?>
<filmquotes>
<quote>
<spokenby>Buzz Lightyear</spokenby>
<source>Toy Story</source>
<text>To infinity, and beyond!</text>
</quote>
<quote>
<spokenby>Sam</spokenby>
<source>Bennie and Joon</source>
<text>It seems to me that, aside from being a little mentally ill, she’s pretty normal.</text>
</quote>
<quote>
<spokenby>Sabrina</spokenby>
<source>Sabrina</source>
<text>More isn’t always better, Linus. Sometimes it’s just more.</text>
</quote>
<quote>
<spokenby>Rick Blaine</spokenby>
<source>Casablanca</source>
<text>Who are you really, and what were you before? What did you do, and what did you think, huh?</text>
</quote>
<quote>
<spokenby>Phil Connors</spokenby>
<source>Groundhog Day</source>
<text>Well, it’s Groundhog Day... again...</text>
</quote>
<quote>
<spokenby>Wesley</spokenby>
<source>Princess Bride</source>
<text>To the pain...</text>
</quote>
<quote>
<spokenby>Delmar</spokenby>
<source>O Brother, Where Art Thou</source>
<text>We thought you was a toad.</text>
</quote>
<quote>
<spokenby>Inigo Montoya</spokenby>
<source>Princess Bride</source>
<text>Hello. My name is Inigo Montoya. You killed my father. Prepare to die.</text>
</quote>
</filmquotes>
To transform this source file to an HTML document, my first step is to use the xsl:output element and define its method attribute to html:
<xsl:output method=”html”/>
The xsl:output element is used to specify the structure of the result document. By default, XSLT outputs an XML file. But you can use the method attribute to also specify text or html. (Chapter 9 showed some examples of using xsl:output to create text files with method=”text”.) When you use html, the processor outputs standard HTML 4.0.
I now need to add the content to my HTML document. Because HTML knows only formatting elements, such as p or h1, I don’t want to carry over any XML element names into the result document. So, to start off, I change the filmquotes document element into an HTML document “wrapper” with html and body elements and apply the filmquotes element contents:
<!-- Wrap html and body elements around rest of document -->
<xsl:template match=”filmquotes”>
<html>
<body>
<xsl:apply-templates/>
</body>
</html>
</xsl:template>
For each quote element, I prepare a formatted template for its contents, listing the values of the three child elements:
<!-- Render each quote as HTML -->
<xsl:template match=”quote”>
<h2><font color=”#000099” face=”Arial, Helvetica, sans-serif”><xsl:value-of select=”source”/></font></h2>
<font face=”Georgia, Times New Roman, Times, serif”>
<p><xsl:value-of select=”spokenby”/> said the following memorable line in <i><xsl:value-of select=”source”/></i>:</p>
<p>”<xsl:value-of select=”text”/>”</p></font>
<hr></hr>
</xsl:template>
The entire stylesheet is shown here:
<xsl:stylesheet version=”1.0” xmlns:xsl=”http://www.w3.org/1999/XSL/Transform”>
<xsl:output method=”html”/>
<!-- Wrap html and body elements around rest of document -->
<xsl:template match=”filmquotes”>
<html>
<body>
<xsl:apply-templates/>
</body>
</html>
</xsl:template>
<!-- Render each quote as HTML -->
<xsl:template match=”quote”>
<h2><font color=”#000099” face=”Arial, Helvetica, sans-serif”><xsl:value-of select=”source”/></font></h2>
<font face=”Georgia, Times New Roman, Times, serif”>
<p><xsl:value-of select=”spokenby”/> said the following memorable line in <i><xsl:value-of select=”source”/></i>:</p>
<p>”<xsl:value-of select=”text”/>”</p></font>
<hr/>
</xsl:template>
</xsl:stylesheet>
Check out the HTML that the transformation generates:
<html>
<body>
<h2><font color=”#000099” face=”Arial, Helvetica, sans-serif”>Toy Story</font></h2><font face=”Georgia, Times New Roman, Times, serif”>
<p>Buzz Lightyear said the following memorable line in <i>Toy Story</i>:
</p>
<p>”To infinity, and beyond!”</p></font><hr>
<h2><font color=”#000099” face=”Arial, Helvetica, sans-serif”>Bennie and Joon</font></h2><font face=”Georgia, Times New Roman, Times, serif”>
<p>Sam said the following memorable line in <i>Bennie and Joon</i>:
</p>
<p>”It seems to me that, aside from being a little mentally ill, she’s pretty normal.”</p></font><hr>
<h2><font color=”#000099” face=”Arial, Helvetica, sans-serif”>Sabrina</font></h2><font face=”Georgia, Times New Roman, Times, serif”>
<p>Sabrina said the following memorable line in <i>Sabrina</i>:
</p>
<p>”More isn’t always better, Linus. Sometimes it’s just more.”</p></font><hr>
<h2><font color=”#000099” face=”Arial, Helvetica, sans-serif”>Casablanca</font></h2><font face=”Georgia, Times New Roman, Times, serif”>
<p>Rick Blaine said the following memorable line in <i>Casablanca</i>:
</p>
<p>”Who are you really, and what were you before? What did you do, and what did you think, huh?”</p></font><hr>
<h2><font color=”#000099” face=”Arial, Helvetica, sans-serif”>Groundhog Day</font></h2><font face=”Georgia, Times New Roman, Times, serif”>
<p>Phil Connors said the following memorable line in <i>Groundhog Day</i>:
</p>
<p>”Well, it’s Groundhog Day... again...”</p></font><hr>
<h2><font color=”#000099” face=”Arial, Helvetica, sans-serif”>Princess Bride</font></h2><font face=”Georgia, Times New Roman, Times, serif”>
<p>Wesley said the following memorable line in <i>Princess Bride</i>:
</p>
<p>”To the pain...”</p></font><hr>
<h2><font color=”#000099” face=”Arial, Helvetica, sans-serif”>O Brother, Where Art Thou</font></h2><font face=”Georgia, Times New Roman, Times, serif”>
<p>Delmar said the following memorable line in <i>O Brother, Where Art Thou</i>:
</p>
<p>”We thought you was a toad.”</p></font><hr>
<h2><font color=”#000099” face=”Arial, Helvetica, sans-serif”>Princess Bride</font></h2><font face=”Georgia, Times New Roman, Times, serif”>
<p>Inigo Montoya said the following memorable line in <i>Princess Bride</i>:
</p>
<p>”Hello. My name is Inigo Montoya. You killed my father. Prepare to die.”</p></font><hr>
</body>
</html>
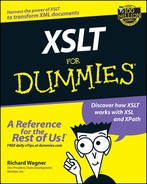
The XSLT processor not only formats the HTML nicely, but also converts the markup into the kind of HTML that gives browsers warm fuzzies. For example, my <hr/> element was automatically converted to <hr>. Figure 10-1 shows the resulting HTML document when you open it with Internet Explorer.
|
Figure 10-1: Transformed HTML document in Internet Explorer. |

|
Creating an HTML Table
Because of their well-formed structure, many XML documents naturally can be represented as a table. No, not the kind you eat off of in your kitchen, but the kind that has columns and rows. To show you how this process works, look again at the quotes.xml source document shown in Listing 10-1. I’d like to show these quotes inside an HTML table.
To start, I create a template rule that sets up the document container elements as I do in the example earlier in this chapter. That part is easy, because you always know that, for a given HTML document, there is always one html element and one body element. However, the number of rows in my table is based on the number of quote elements in my source document. Therefore, the common method of creating an HTML table lies in using an xsl:for-each instruction to create each of the table’s rows. Consider the following stylesheet:
<?xml version=”1.0”?>
<xsl:stylesheet version=”1.0” xmlns:xsl=”http://www.w3.org/1999/XSL/Transform”>
<xsl:output method=”html”/>
<!-- Wrap html and body elements around rest of document -->
<xsl:template match=”/”>
<html>
<body bgcolor=”#FFFFFF”>
<xsl:apply-templates/>
</body>
</html>
</xsl:template>
<!-- Create HTML table for quote elements -->
<xsl:template match=”filmquotes”>
<table width=”95%” border=”1” cellspacing=”2” cellpadding=”2”>
<tr bgcolor=”#FFCCCC”>
<th>Source</th>
<th>Spoken By</th>
<th width=”60%”>Quote</th>
</tr>
<xsl:for-each select=”quote”>
<tr>
<td><i><xsl:value-of select=”source”/></i></td>
<td><xsl:value-of select=”spokenby”/></td>
<td width=”60%”><xsl:value-of select=”text”/></td>
</tr>
</xsl:for-each>
</table>
</xsl:template>
</xsl:stylesheet>
In the filmquotes template rule, I use literal text to define the table element and the header row. I then add xsl:for-each to loop through each quote element in the source document. For each instance, a row is created, and the values of its source, spokenby, and text child elements are inserted as columns.
The result is shown here:
<html>
<body bgcolor=”#FFFFFF”>
<table width=”95%” border=”1” cellspacing=”2” cellpadding=”2”>
<tr bgcolor=”#FFCCCC”>
<th>Source</th>
<th>Spoken By</th>
<th width=”60%”>Quote</th>
</tr>
<tr>
<td><i>Toy Story</i></td>
<td>Buzz Lightyear</td>
<td width=”60%”>To infinity, and beyond!</td>
</tr>
<tr>
<td><i>Bennie and Joon</i></td>
<td>Sam</td>
<td width=”60%”>It seems to me that, aside from being a little mentally ill, she’s pretty normal.</td>
</tr>
<tr>
<td><i>Sabrina</i></td>
<td>Sabrina</td>
<td width=”60%”>More isn’t always better, Linus. Sometimes it’s just more.</td>
</tr>
<tr>
<td><i>Casablanca</i></td>
<td>Rick Blaine</td>
<td width=”60%”>Who are you really, and what were you before? What did you do, and what did you think, huh?</td>
</tr>
<tr>
<td><i>Groundhog Day</i></td>
<td>Phil Connors</td>
<td width=”60%”>Well, it’s Groundhog Day... again...</td>
</tr>
<tr>
<td><i>Princess Bride</i></td>
<td>Wesley</td>
<td width=”60%”>To the pain...</td>
</tr>
<tr>
<td><i>O Brother, Where Art Thou</i></td>
<td>Delmar</td>
<td width=”60%”>We thought you was a toad.</td>
</tr>
<tr>
<td><i>Princess Bride</i></td>
<td>Inigo Montoya</td>
<td width=”60%”>Hello. My name is Inigo Montoya. You killed my father. Prepare to die.</td>
</tr>
</table>
</body>
</html>
Figure 10-2 shows the table when you view it with a Web browser.
|
Figure 10-2: HTML table created from XML document. |

|
Linking an XSLT Stylesheet with an XML Document
Under most circumstances, you link together an XML document with an XSLT stylesheet by specifying the .xml and .xsl files when you call the XSLT processor. However, XML offers a way to “direct connect” an XML file with an XSLT stylesheet by using the xml-stylesheet processing instruction. The instruction’s basic syntax is:
<?xml-stylesheet href=”lyon.xsl” type=”text/xsl”?>
When declared in an XML file, this instruction tells the processing engine to apply the specified stylesheet to the contents of the source XML. The instruction has two parameters:
![]() href specifies the URI of the XSLT stylesheet.
href specifies the URI of the XSLT stylesheet.
![]() type tells what kind of file the stylesheet is (or its MIME type). XSLT stylesheets have the type of text/xsl.
type tells what kind of file the stylesheet is (or its MIME type). XSLT stylesheets have the type of text/xsl.
Therefore, if I want to apply the quotes.xsl stylesheet to the quotes.xml document when the XML file is processed, I add the xsl-stylesheet processing instruction to the top of the file (note that most of the quote elements are removed in this abbreviated Listing 10-2).
Listing 10-2: quoteslink.xml
<?xml version=”1.0”?>
<?xml-stylesheet href=”quotes.xsl” type=”text/xsl”?>
<filmquotes>
<quote>
<spokenby>Buzz Lightyear</spokenby>
<source>Toy Story</source>
<text>To infinity, and beyond!</text>
</quote>
<quote>
<spokenby>Sam</spokenby>
<source>Bennie and Joon</source>
<text>It seems to me that, aside from being a little mentally ill, she’s pretty normal.</text>
</quote>
<quote>
<spokenby>Sabrina</spokenby>
<source>Sabrina</source>
<text>More isn’t always better, Linus. Sometimes it’s just more.</text>
</quote>
</filmquotes>
.jpg)
Browser Support of XSLT
If you plan to convert your XML documents to HTML so that people can view your information with a Web browser, you have a decision to make: Where are you going to perform the transformation? You have three basic options:
![]() Offline transformation: If your transformation is a one-time or infrequent event, you can do a batch process of transforming your XML documents to HTML. The advantage to this option is that it enables you to do transformations before the result documents are ever accessed. You can then put the output HTML files in the appropriate location when done, and any Web browser can display the output. If your information changes constantly, the disadvantage is that the processing is not done in “real time,” so the HTML documents may show stale information.
Offline transformation: If your transformation is a one-time or infrequent event, you can do a batch process of transforming your XML documents to HTML. The advantage to this option is that it enables you to do transformations before the result documents are ever accessed. You can then put the output HTML files in the appropriate location when done, and any Web browser can display the output. If your information changes constantly, the disadvantage is that the processing is not done in “real time,” so the HTML documents may show stale information.
![]() Server-side transformation: If you need to have up-to-the-minute transformations when a user requests the Web page, you can perform the transformation when the user requests the XML file. The document can then be transformed on the server, and the resulting HTML is sent to the Web browser so that the user can view the document.
Server-side transformation: If you need to have up-to-the-minute transformations when a user requests the Web page, you can perform the transformation when the user requests the XML file. The document can then be transformed on the server, and the resulting HTML is sent to the Web browser so that the user can view the document.
![]() Client-side transformation: A third option is to have the Web browser on the client do the transformations on the fly. In this case, a user receives an XML document from the server with a link to a stylesheet. The browser then performs the transformation, rendering the results in the Web browser as HTML. The advantage to this option is that it enables you to focus only the XML data and the XSLT stylesheet, and letting the browser concern itself with the transformation. However, the caveat is that the Web browser must support XSLT or else the transformation never happens.
Client-side transformation: A third option is to have the Web browser on the client do the transformations on the fly. In this case, a user receives an XML document from the server with a link to a stylesheet. The browser then performs the transformation, rendering the results in the Web browser as HTML. The advantage to this option is that it enables you to focus only the XML data and the XSLT stylesheet, and letting the browser concern itself with the transformation. However, the caveat is that the Web browser must support XSLT or else the transformation never happens.
If all Web browsers supported XSLT, then letting the transformation occur on the client would be a legitimate option. Take, for example, Internet Explorer 5.0 or higher. You can open up the preceding quoteslink.xml in Internet Explorer, and voilà! — the result document is a formatted Web page in full living color! So if you know all your users have an XSLT-capable browser, you can create an entire XML-based Web site and have Internet Explorer transform each page on the fly.
Yes, this idea rocks, but unfortunately you can’t always count on all Web browsers to support XSLT. In fact, most don’t. Microsoft Internet Explorer 5.0 and higher support XSLT 1.0, as does Netscape Navigator 6.1 and higher. But even these two browsers have some peculiarities and differences in how they display transformed XML documents. However, given XSLT’s popularity, you will start to see more standardized and consistent support for XSLT within the major browsers.
For the latest on browser support, check out the XMLSoftware’s Browser page at www.xmlsoftware.com/browsers.
To Infinity and Beyond (Into Other Formats)
XML is an excellent general-purpose language for storing structured data. Because XSLT has tremendous flexibility in how it can output XML data, you can create almost any kind of output imaginable. Consider a real-world case in point that I encountered recently. I needed to create JavaScript objects from XML elements, and then use those objects inside a Web page or other JavaScript application.
For this section, don’t worry if you don’t know JavaScript. The point of this example is to illustrate that XSLT can do much more than just output XML and HTML. You can do most anything, and JavaScript is but one example. Also, see Chapter 15 for an example on how to transform XML into a Microsoft Word document.
To demonstrate how I solved my JavaScript scenario, I’ll use the employees.xml file shown in Listing 10-3.
Listing 10-3: employees.xml
<?xml version=”1.0”?>
<employees>
<employee id=”101”>
<lastname>Lamotte</lastname>
<firstname>Mitch</firstname>
<nickname>The Mitchster</nickname>
<title>Director of Sales</title>
</employee>
<employee id=”102”>
<lastname>Williams</lastname>
<firstname>Tim</firstname>
<nickname>Timmy Boy</nickname>
<title>Director of Quality Assurance</title>
</employee>
<employee id=”103”>
<lastname>Magruder</lastname>
<firstname>Randy</firstname>
<nickname>Randall</nickname>
<title>Senior Engineer</title>
</employee>
<employee id=”104”>
<lastname>Drohan</lastname>
<firstname>Doug</firstname>
<nickname>Tooltime</nickname>
<title>Building Director</title>
</employee>
<employee id=”105”>
<lastname>Burrer</lastname>
<firstname>Phillip</firstname>
<nickname>Flip</nickname>
<title>Resident Physician</title>
</employee>
</employees>
My goal is transform an employee element like this:
<employee id=”101”>
<lastname>Lamotte</lastname>
<firstname>Mitch</firstname>
<nickname>The Mitchster</nickname>
<title>Director of Sales</title>
</employee>
Into this JavaScript custom object:
// Mitch Lamotte object
emp_IDANZJS = new employee(
“101”,
“Lamotte”,
“Mitch”,
“The Mitchster”,
“Director of Sales”
)
After I transform the employee elements into JavaScript objects, I can access the employee information from inside my JavaScript code and work with it as native JavaScript, rather than parsing through XML data.
The result document I want to create is a text-based file with a .js extension. This type of file (called a JavaScript include file) is used to store JavaScript code and can be accessed from an HTML page using the script element.
I use the following stylesheet to perform the transformation:
<?xml version=”1.0”?>
<xsl:stylesheet version=”1.0” xmlns:xsl=”http://www.w3.org/1999/XSL/Transform”>
<xsl:output method=”text”/>
<!-- Create constructor function and employees array -->
<xsl:template match=”/”>
// Employee constructor
function employee( id, lastname, firstname, nickname, title )
{
this.id = id;
this.lastname = lastname;
this.firstname = firstname;
this.nickname = nickname;
this.title = title;
}
var employees = new Array( <xsl:value-of select=”count( //employee )”/> )
<xsl:apply-templates/>
</xsl:template>
<!-- Create instances of JavaScript objects for each employee -->
<xsl:template match=”employees”>
<xsl:for-each select=”employee”>
// <xsl:value-of select=”firstname”/><xsl:text> </xsl:text>
<xsl:value-of select=”lastname”/> object
var emp_<xsl:value-of select=”generate-id()”/> = new employee(
“<xsl:value-of select=”@id”/>”,
“<xsl:value-of select=”lastname”/>”,
“<xsl:value-of select=”firstname”/>”,
“<xsl:value-of select=”nickname”/>”,
“<xsl:value-of select=”title”/>”
)
employees[<xsl:value-of select=”position()-1”/>] = emp_<xsl:value-of select=”generate-id()”/>;
</xsl:for-each>
</xsl:template>
</xsl:stylesheet>
In the first template rule in the preceding code, I declare JavaScript code that’s needed to work with the new objects I’m creating. (If you’re a JavaScripter, I will add that I’m defining the employee constructor and an array to store the employee objects that I’m creating.)

In the employees template rule, I use an xsl:for-each instruction to write the JavaScript code needed to create an object instance for that employee. I use the generate-id() function to give each variable a unique name. After creating the object, I add it to an employees array where I could then reference it later.
Here’s the resulting JavaScript code:
// Employee constructor
function employee( id, lastname, firstname, nickname, title )
{
this.id = id;
this.lastname = lastname;
this.firstname = firstname;
this.nickname = nickname;
this.title = title;
}
var employees = new Array( 5 )
// Mitch Lamotte object
var emp_IDAGLJS = new employee(
“101”,
“Lamotte”,
“Mitch”,
“The Mitchster”,
“Director of Sales”
)
employees[0] = emp_IDAGLJS;
// Tim Williams object
var emp_IDAMLJS = new employee(
“102”,
“Williams”,
“Tim”,
“Timmy Boy”,
“Director of Quality Assurance”
)
employees[1] = emp_IDAMLJS;
// Randy Magruder object
var emp_IDASLJS = new employee(
“103”,
“Magruder”,
“Randy”,
“Randall”,
“Senior Engineer”
)
employees[2] = emp_IDASLJS;
// Doug Drohan object
var emp_IDAYLJS = new employee(
“104”,
“Drohan”,
“Doug”,
“Tooltime”,
“Building Director”
)
employees[3] = emp_IDAYLJS;
// Phillip Burrer object
var emp_IDA4LJS = new employee(
“105”,
“Burrer”,
“Phillip”,
“Flip”,
“Resident Physician”
)
employees[4] = emp_IDA4LJS;