
![]()
Creating and Using Custom Controls
The built-in desktop application controls that you’ve seen so far include labels, textboxes, auto-complete boxes, and data grids. If you can’t find a control that suits your needs, there’s no need to worry. With desktop applications, you can bind data items to custom Silverlight controls. This opens up many additional ways for users to interact with data. To further enhance your screens, you can build your own Silverlight custom controls or use controls that other people have developed. In this chapter, I’ll show you how to do the following:
- display data using custom controls
- bind screen data to custom controls
- develop your own Silverlight custom controls
To start off, I’ll describe the controls in the Silverlight SDK (Software Development Kit). I’ll show you how to apply a masked input control to a password-entry screen. Next, you’ll find out how to replace the auto-complete box with a ComboBox control. In the context of the Help Desk application, this control can better limit the choices that a user can select. I’ll also show you how to allow users to enter numeric data through the use of a slider control. Finally, I’ll show you how to build a custom duration control that can make it easier for users to enter time durations. This control will enable users to separately enter the hour and minute components of a time duration.
Using Custom Controls
The easiest way to get started with custom controls is to use the UI controls in the Silverlight SDK. You’ll find these controls in the System.Windows.Controls namespace. Of course, you could choose to use other third-party Silverlight controls, but the advantage of directly using the controls in the Silverlight SDK is that it quickly opens up a whole host of additional UI controls that you can use, including:
- PasswordBox
- WebBrowser
- TreeView
- RichTextBox
- MediaElement
- MultiScaleImage
- HyperLinkButton
- ComboBox
A benefit of this technique is that you don’t need to create a separate project, and you don’t need to write very much code either. In this section, I’ll show you how to use the password box control from the Silverlight SDK. This control provides a masked password input box that replaces the characters that the user enters with a series of dots. I’ll show you how to apply this control to the Email Settings section of the Application Options screen, as shown in Figure 13-1.
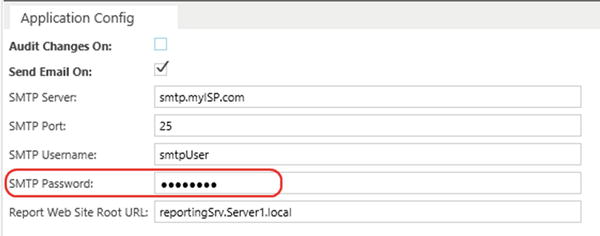
Figure 13-1. Password box control as it appears at runtime
There are two parts to using a custom control. First, you need to specify a custom control for the data item that you want to use. Second, you need to write the code that binds the control to your underlying data. Here’s how to carry out both of these tasks.
Specifying a Custom Control
To use the password box control, create a New Data screen for the AppOptions table (or reuse the AppOptionsEdit screen that you created in Chapter 11). Now, carry out the following steps in the screen designer:
- Select the SMTPPassword data item and change the control type from a textbox to a custom control (Figure 13-2)

Figure 13-2. Selecting the password box control
- Open the properties sheet and click the Change link.
- When the Add Custom Control dialog appears, select System.Windows.Controls
 PasswordBox.
If the password box control doesn’t appear, make sure to select the System.Windows DLL rather than one of the other DLLs (Figure 13-3).

Figure 13-3. Make sure to choose the first System.Windows.Controls node
Binding Data to Custom Controls
Once you have configured a data item to use a custom control, the next step is to bind the control to your underlying data item. In this example, you need to bind the password control’s PasswordProperty to the AppOption entity’s password property. To do this, click the Write Code button, select the InitializeDataWorkspace method, and enter the code that’s shown in Listing 13-1.
Listing 13-1. Calling the SetBinding method

This code uses the FindControl method ![]() to return an IContentItemProxy object. This object exposes a method called SetBinding. The purpose of this method is to data bind a control with a data source; it accepts three arguments.
to return an IContentItemProxy object. This object exposes a method called SetBinding. The purpose of this method is to data bind a control with a data source; it accepts three arguments.
The first argument specifies the dependency property of the control to bind to. If you’re not sure what a dependency property is, just think of it as a property that you can bind data to. To help you choose the correct dependency property, use the code editor’s IntelliSense to view all the possible choices. You need to fully qualify the dependency property with the control type. In this example, the code prefixes the dependency property with the type System.Windows.Controls.PasswordBox.
The second argument is the binding path. This is the most difficult part to get right, because this method requires you to supply a string value, and Visual Studio provides no guidance as to what you should enter. If you get this wrong, the control will not data bind correctly and LightSwitch won’t provide you with any compile or runtime errors. Therefore, this makes it difficult to trace the exact cause of a binding-path error.
Developers often supply the binding path Value. This binding path binds your dependency property to the Data Context item that appears in the properties sheet (Figure 13-4). Table 13-1 shows other binding path values you can use.

Figure 13-4. The Value data-binding path references the Data Context textbox
Table 13-1. Data-Binding Values
|
Binding Path |
Data Binds to… |
|---|---|
|
Value |
The property that appears against the Data Context setting in the properties sheet |
|
StringValue |
The string-formatted version of the property that appears against the Data Context setting in the properties sheet |
|
Details.Entity.Surname |
Another property in the same entity (Surname, in this example) |
|
Screen.localPropertyName |
A local property on your screen |
You could also choose to use the binding path StringValue rather than Value. StringValue reflects any specific formatting that the property applies, whereas Value simply returns the raw value. These property names (Value and StringValue) are public properties of the Microsoft.LightSwitch.Presentation.Implementation.ContentItem object.
The final argument is the binding mode. You can supply one of three values: OneTime, OneWay, or TwoWay. When you set the binding mode to OneTime, the screen updates the control value when the control first binds to the data source. The OneWay setting configures the screen to update the control when the control binds to the data source and also whenever the source data changes afterward. The TwoWay option configures the control to update itself whenever a change in underlying data occurs, and to also update the underlying data source whenever a change in the control occurs. This completes the example, and you can now run your screen.
![]() Tip Rather than using hard-coded binding paths, you could create a helper library that exposes a set of constants. The C# class would look something like this:
Tip Rather than using hard-coded binding paths, you could create a helper library that exposes a set of constants. The C# class would look something like this:
 public static class ContentItemProperty
 {
     public const string Value = “Value”;
     public const string StringValue = “StringValue”;
     public const string DisplayName = “DisplayName”;
     public const string Details = “Details”;
     // etc.
 }
Binding Data Collections to Custom Control
The password box example showed you how to bind a scalar value to a dependency property. In different circumstances, you might need to supply a custom control with a list of data or the results of a query. You would do this by binding a collection of data to a dependency property on the custom control; this example will show you how.
To show you a practical illustration of how to apply this technique, this example will show you how to replace the priority auto-complete box on a new Issue screen. A disadvantage of the auto-complete box control is that users can type whatever text they choose, and if they enter invalid data, LightSwitch won’t notify them of the mistake until they attempt to save the record. To overcome this problem, I’ll show you how to use the combo box control. This control enables you to limit item selections to only those that the control shows (Figure 13-5).

Figure 13-5. Illustration of combo box control
Designing the Screen
The steps to use a combo box control are very similar to the steps you used to set up a password box control. However, there’s one additional task that’s required. LightSwitch doesn’t know how to populate your combo box control with data, so you need to add code that populates it with choice items.
To create this example, add a New Data screen based on the Issue table. Name your screen CreateNewIssue. Select the Priority data item and change it from an auto-complete box to a custom control. From the properties sheet, click on the Change link and use the Add Custom Control dialog to select System.Windows.Controls ![]() ComboBox.
ComboBox.
Now click the Add Data Item button and create a new query called Priorities to returns all priorities. Figure 13-6 illustrates the screen layout. Click the Write Code button, select the screen’s Activated method, and enter the code that’s shown in Listing 13-2.

Figure 13-6. Configuring a data item to use a combo box control


This code carries out two data-binding tasks with the SetBinding method. First, it populates the items that the combo box shows by binding the combo box’s ItemsSourceProperty to your Priorities query ![]() . The binding path to reference the Priorities query is Screen.Priorities
. The binding path to reference the Priorities query is Screen.Priorities ![]() . The next line of code sets the selected item in the combo box by binding the combo box’s SelectedItemsProperty to the Issue property’s Priority property
. The next line of code sets the selected item in the combo box by binding the combo box’s SelectedItemsProperty to the Issue property’s Priority property ![]() . This completes the example, and you can now run your screen.
. This completes the example, and you can now run your screen.
Converting Values When Data Binding
Sometimes, the data type of the dependency property that you want to use might not match the data type of your data source. In this case, you’ll need to create a value converter to allow the control to correctly bind to the data source.
To demonstrate this technique, I’ll show you how to use the Silverlight slider control on a screen. This screen binds to a table called Office (Figure 13-7). This table stores details about office locations and includes a property to store the building capacity of each location.

Figure 13-7. Office table schema
The Office table defines the building capacity property as an integer, but the Silverlight slider control expects to bind to a number that’s of data type double. This mismatch means that in order to use the slider control, you will need to create a value converter that converts doubles to integers, and vice versa. To show you how to do this, this example creates a New Data Screen that allows users to create new offices and binds the building capacity property to a slider control. To carry out this example, here are the steps to follow:
- Create a New Data screen based on the Office table and name it CreateNewOffice.
- Change the BuildingCapacity data item from a textbox to a custom control.
- In the properties sheet, click on the Change link. When the Add Custom Control dialog appears, select System.Windows.Controls Slider
- Set the minimum width of the slider control to 300. It’s important to set this to a value other than auto; otherwise, LightSwitch shows only the Slider button, and not the Slider section that allows the user to make a selection.
- Create a new columns layout beneath the main rows layout for your Office property. Set the label position of this group to Collapsed.
- Drag your slider control into the columns layout. When you do this, make sure the Label Position setting is set to Left-aligned.
- Add another BuildingCapacity data item into the columns layout and set the control type to be a label. Set the label position of the label to Collapsed. This label is designed to show the selected integer value when the user uses the slider control. Figure 13-8 shows how your screen now looks.

Figure 13-8. Screen layout in design view
- In your client project, create a new folder called UserCode (if it doesn’t already exist) and add a new class called IntToDouble.
- Add a reference to the PresentationFramework.dll assembly in the project where you added your IntToDouble class. The default location of this file on a 64-bit machine is (C:Program Files (x86)Reference AssembliesMicrosoftFrameworkSilverlightv5.0).
Now, add the code that’s shown in Listing 13-3 to your IntToDouble class.


The IntToDouble class implements the IValueConverter interface ![]() and contains the logic that carries out the data conversion. The Convert method
and contains the logic that carries out the data conversion. The Convert method ![]() converts an integer value to a double, whereas the ConvertBack
converts an integer value to a double, whereas the ConvertBack ![]() method coverts a double value to an integer.
method coverts a double value to an integer.
Now, return to the screen designer, click the Write Code button, and select the screen’s Activated method. Add the code that’s shown in Listing 13-4.
Listing 13-4. Data-binding the slider control

You’re now ready to run your application; Figure 13-9 shows the appearance of the slider control at runtime.

Figure 13-9. Illustration of slider control at runtime
![]() Tip You can develop value converters to perform tasks that go beyond the simple task of converting a data type from one type to another. An imaginative example is the following. You could bind the background color of a textbox or text block control to an integer value. Your data could include a priority field that stores numbers, say, from 1 to 5. If the priority is set to 1, the background color should be green. If the value is 5, the priority should be red. A value converter would allow you to bind to the BackgroundProperty dependency property by converting the priority number into an object of type System.Drawing.Color.
Tip You can develop value converters to perform tasks that go beyond the simple task of converting a data type from one type to another. An imaginative example is the following. You could bind the background color of a textbox or text block control to an integer value. Your data could include a priority field that stores numbers, say, from 1 to 5. If the priority is set to 1, the background color should be green. If the value is 5, the priority should be red. A value converter would allow you to bind to the BackgroundProperty dependency property by converting the priority number into an object of type System.Drawing.Color.
Creating a Custom Silverlight Control
The examples that you’ve seen so far have used the controls from the System.Windows.Controls namespace. If there isn’t a control here that suits your needs, and if you can’t find a third-party control that does what you need, another possibility is to create your own custom Silverlight control.
The timesheet feature in the Help Desk application allows users to record the amount of time that has been spent on issues, expressed in minutes. To improve the presentation of this screen, create a custom control that users can use to view and edit time durations in hours and minutes (Figure 13-10).

Figure 13-10. Duration control
Understanding Dependency Properties
The duration control that we’ll create requires a dependency property to support the data binding between the control and the data source. Before we move on further, let’s take a closer look at what dependency properties are and how they work.
Developers frequently use dependency properties in Silverlight and WPF (Windows Presentation Foundation) applications. They’re very similar to normal .NET properties but are more powerful. They use memory more efficiently, help support features like styles and animations, and also provide advanced features like coercion (I’ll explain what this is later), validation, and change notification. Change notification is particularly important because it alerts your LightSwitch screen whenever a user makes a change to a custom control value.
Traditional .NET properties include two methods called get and set. In the vast majority of cases, these methods retrieve and set the value of a private field. Unlike traditional .NET properties, dependency properties don’t read their values from a private field. When you retrieve the value of a dependency property, .NET dynamically calculates the return value by using a process called dynamic value resolution.
Let’s suppose that you write some code to retrieve the background color of a Silverlight textbox control. The background color might depend on various factors. It could inherit the setting from a parent control or it could be set through styles and themes. Furthermore, the control might be involved in an animation that constantly changes the background color. To retrieve the correct value, Silverlight searches for the background color in the following places in the order shown. It returns the first value that’s found.
- Animations
- Binding Expression
- Local Value
- Styles
- Property Value Inheritance
- Default Value
Dynamic value resolution begins by checking if the textbox is involved in an animation. If so, it returns the background color that the animation applies. If not, it checks whether the background color binds to an underlying data source. If so, dynamic value resolution returns the value from the data source.
If there is no data binding in place, dynamic value resolution searches for a local value. A local value refers to the value that you explicitly set in code (for example, MyCtrl.BackColor = Colors.Green) or in XAML. If you’ve not set a local value, dynamic value resolution searches for a value that’s been set in a style or a template. If that doesn’t return a match, it’ll try to find the value that’s been set at the parent control. It’ll carry on searching up the tree of parent controls until it reaches the root control. And if a value isn’t found here, it returns the default value.
The big benefit of this approach is that it’s highly efficient in terms of memory usage. Around 90% of the properties on a typical control stay at their initial value, so it’s inefficient to allocate memory by storing the value of every property on a control. Dependency properties only store the value of properties that have changed, which is a far more efficient approach. The local value of a dependency property isn’t stored in a field of your object, but rather in a dictionary of keys and values that the base class DependencyObject provides. The dictionary uses the property name as the key value for the dictionary entry.
So, in summary, dependency properties don’t hold a concrete value. Their value can derive from many places—hence the name dependency property. They’re important in LightSwitch because if you want to bind screen data to a property on a custom control, that property must be a dependency property.
Creating a New Control and Dependency Property
Now that we’ve covered what a dependency property is, let’s create our time duration custom control. This process requires you to create a Silverlight class library that contains a Silverlight user control. This Silverlight user control contains the textboxes and UI elements that define your custom control. To create a custom control, follow these steps:
- Start Visual Studio. Click File New Project. When the New Project dialog appears, select the Silverlight Class Library template and name your project ApressControls. If you can’t find this template, use the search box that appears at the top of the New Project dialog.
- Once your project opens, right-click your project in Solution Explorer and choose the right-click “Add New Item” option.
- When the Add New Item dialog appears, choose Silverlight User Control and name your control DurationEditorInternal.xaml.
- Drag two textbox controls from the toolbox into your user control. Name these controls HourTextbox and MinuteTextbox. Add two text block controls to the right of each textbox control and set the text attribute of the controls to “Hrs” and “Mins.” Listing 13-5 shows the XAML for the control.
- Right-click an area of your XAML file, click on the “View Code” option, and add the .NET code that’s shown in Listing 13-6.
Listing 13-5. DurationEditorInternal.XAML Contents

Listing 13-5 shows the XAML for the VB version of the custom control. In this code, the name of the project is ApressControlsVB. If you recreate this example, make sure that your Class setting ![]() matches the class name of your custom control.
matches the class name of your custom control.
The line of code in ![]() defines the textbox that allows users to enter the number of hours in the time duration. The text block control
defines the textbox that allows users to enter the number of hours in the time duration. The text block control ![]() shows the text “Hrs” to the right of the textbox. The next block of code repeats the same procedure with the minute component of the time duration.
shows the text “Hrs” to the right of the textbox. The next block of code repeats the same procedure with the minute component of the time duration.
If you dragged the controls onto your control (as described in step 4), Visual Studio adds formatting attributes such as HorizontalAlignment, TextWrapping, VerticalAlignment, Width, and Height. I’ve omitted these attributes to make the code easier to read, but when you recreate this example, make sure to set the sizing and positioning details with the designer. If you don’t do this, all the controls will overlap each other.


This code in this listing contains three distinct parts:
- The first part of the code
 registers the dependency property. I’ll explain exactly how this code works in the next section.
 - The code in
 runs when underlying data value changes. This code updates the values of the hour and minute textboxes.
 - The code in
 runs when the user updates the value of the hour or minute textboxes. It uses the CalculateDuration method to convert the duration that the user enters into minutes, and updates the dependency property.
Creating a Dependency Property
Listing 13-6 includes the code that creates a dependency property. Here are the exact two tasks you need to carry out to create a dependency property:
- Create a shared/static field of type DependencyProperty and call the Register method to create an instance of a DependencyProperty object.
- Create a normal .NET property that “backs” your dependency property. This property stores the dependency property value by using the GetValue and SetValue methods that are inherited from DependencyObject. The DependencyProperty you just created in Step 1 acts as the key for the GetValue and SetValue methods.
Let’s take a closer look at the code that registers your dependency property. To illustrate the arguments you need to supply, here’s the C# code from Listing 13-6.

This code defines a dependency property called DurationProperty. This name identifies your dependency property when you call the SetBinding method from your LightSwitch code. To adhere to .NET naming conventions, you should always name your dependency property with the suffix Property.
The Register method accepts four arguments and returns an instance of a new dependency property object. There are four arguments that you need to supply to this method, as follows:
- The first argument specifies the .NET property that backs your dependency property. In this example, the .NET property is called Duration.
- The second argument specifies the data type of the .NET property.
- The third argument specifies the type that the dependency property belongs to.
 The fourth argument allows you to specify PropertyMetadata. I’ll explain what this does next.
Specifying the Behavior of Dependency Properties
The beauty of dependency properties is that you can specify default values, run code when the value of your dependency property changes, coerce values, and attach validation logic. The PropertyMetadata object is the key that makes all of this possible. As the line the follows shows, the PropertyMetadata constructor accepts four arguments.
new PropertyMetadata(0, OnDurationPropertyChanged, null, null)
- The first argument specifies the default value. The dependency property uses the default value only if it’s unable to determine a value elsewhere. Dynamic value resolution chooses the default value as the very last resort. Therefore, it chooses the default value if a value hasn’t been explicitly set, or if it isn’t able to find an inherited value. If you don’t want to set a default value, you can supply null (C#) or nothing (VB).
- The second argument specifies a value-changed callback method. This is a method that runs each time your dependency property value changes. In this example, OnDurationPropertyChanged is the value-changed callback method. This method contains the logic that updates the values of the hour and minute textboxes.
- The third argument specifies a coerce callback method. This allows you to run certain code in cases where a user attempts to set the value of your dependency property to a value that’s beyond what you intend your dependency property to store. For example, you could create a method that sets the duration value to 0 when a user attempts to supply a negative value. Your method could also set the duration to a predefined maximum value in instances when the user attempts to supply a value that is too large. The coerce callback method executes before the value-changed callback method.
- The fourth argument specifies a validation callback method. The method that you specify here must return a Boolean result. This method enables you to write code to validate the value the user wants to set. If your method returns false, your dependency property will throw an ArgumentException.
Binding Dependency Properties to the Data Context
At this point, you almost have a working custom control. Although you can now build and use the duration control in your applications, you would need to write code on your LightSwitch screen to call the SetBinding method, just like the code sample that I showed you in Listing 13-1. Let’s look at how to improve the duration control so that it binds directly to the associated data item on your LightSwitch screen. This improvement saves you from having to write extra code on your LightSwitch screen each time you use the duration control.
If you were to bind DurationProperty to the associated data item on your LightSwitch screen, you would need to bind it with the binding path Value. The problem is that you have to specify the data-binding path in the XAML, but custom Silverlight controls don’t expose dependency properties in the XAML (as shown in Figure 13-11). The trick to get around this problem is to wrap a parent control around your custom control. This parent control acts as a conduit and exposes the XAML you can use to bind your control to the underlying screen value.

Figure 13-11. You can’t bind value to the data context
To create this “wrapper,” follow these steps:
- Right-click your project in Solution Explorer and choose the right-click “Add New Item” option.
- When the Add New Item dialog appears, create a new Silverlight user control and name it DurationEditor.xaml.
- Drag the DurationEditorInternal control from your toolbox onto your DurationEditor control. If the control doesn’t show on your toolbox, try rebuilding your project. Listing 13-7 shows how your XAML should look.
Listing 13-7. Duration Editor Control

In the code that’s shown, Visual Studio adds the local namespace ![]() when you drag the DurationEditorInternal control onto your screen. If you recreate this example by typing the XAML from this book, make sure to enter the correct class name that corresponds to the name of your project.
when you drag the DurationEditorInternal control onto your screen. If you recreate this example by typing the XAML from this book, make sure to enter the correct class name that corresponds to the name of your project.
The definition of the DurationEditorInternal control ![]() within the XAML allows you to data bind the “normal” Duration property by specifying the binding path Value.
within the XAML allows you to data bind the “normal” Duration property by specifying the binding path Value.
You can now build your ApressControls project. Save the output file (ApressControls.DLL) into a location to which you can refer later on.
Adding the Duration Control to a Screen
You can now add the duration control to a screen. To demonstrate the control, let’s review how to add it onto a New Data Entry screen that binds to the timesheet table.
- Create a New Data Entry screen for the timesheet table. By default, LightSwitch will name this screen CreateNewTimesheet.
- Change the DurationMins data item from a textbox to a custom control.
- Open the properties sheet and click on the Change link. When the Add Custom Control dialog appears, click the Browse button and select the ApressControls.DLL file that you built in the previous section. Select the DurationEditor control from the Add Custom Control dialog.
You can now run your application; Figure 13-12 shows the result of this screen at design time and runtime.

Figure 13-12. Duration control
Calling Custom Control Methods via Dependency Properties
Another practical use for creating dependency properties is to trigger methods in your custom controls. As an example, let’s look at the web browser control from the System.Windows.Controls namespace. As the name suggests, this control is designed to display web pages or HTML content on a screen. It’s important to note that this control works only in LightSwitch desktop applications and won’t work in browser applications.
The web browser control includes a method called Navigate that allows you to supply a web address. When you call the Navigate method, the control displays the web page that you specify. If you add the web browser control to a LightSwitch screen, how exactly would you call Navigate method? There isn’t a simple way to call custom control methods from a LightSwitch screen. Therefore, a practical solution is to wrap the Navigate method in a dependency property. This would allow you to bind a web address to the web browser control and to automatically refresh the page that the web browser control shows whenever the underlying web address changes.
To create the custom web browser control, carry out these steps:
- Right-click your ApressControls project in Solution Explorer and choose the right-click ”Add New Item” option.
- When the Add New Item dialog appears, choose Silverlight User Control and name your control WebBrowser.xaml.
- Amend the XAML for your WebBrowser control as shown in Listing 13-8.
- Right-click your XAML file, click on the “View Code” option, and add the .NET code that’s shown in Listing 13-9.
Listing 13-8. WebBrowser control custom control


Much of the code here is similar to the other samples in this chapter. The .NET code includes the same dependency property logic that I described earlier. This code creates a dependency property called URIProperty ![]() , basing it on a normal .NET property called uri
, basing it on a normal .NET property called uri ![]() . The dependency property’s metadata specifies OnUriPropertyChanged as the value callback method. Whenever the underlying web-address data changes, the OnUriPropertyChanged method executes and calls the web browser control’s Navigate method
. The dependency property’s metadata specifies OnUriPropertyChanged as the value callback method. Whenever the underlying web-address data changes, the OnUriPropertyChanged method executes and calls the web browser control’s Navigate method ![]() to update the web page that the control shows.
to update the web page that the control shows.
You can now build and use this custom control. The custom web browser control provides a useful tool for desktop applications, and in Chapter 16 you will see how you would use this control to show HTML reports on LightSwitch screens.
Calling Screen Code from a Custom Control
As you might recall from Chapter 1, controls are simply views of the data and contain minimal business logic. In keeping with MVVM principles, it’s bad practice to build complex business logic into custom controls. A better approach is to define your business logic in screen methods and to call these methods from your custom controls.
To demonstrate this technique, let’s look at how to create a stylized Save button. When the user clicks this button, it calls business logic on your LightSwitch screen, rather than logic on the control itself. To create this control, follow these steps:
- Right-click your ApressControls project in Solution Explorer and choose the right-click “Add New Item” option.
- When the Add New Item dialog appears, choose Silverlight User Control and create a control called SaveControl.xaml.
- Amend the XAML for your SaveControl control as shown in Listing 13-10. This XAML applies a green style to your control, but you could use the designer to apply a far more sophisticated look.
- Right-click your project in Solution Explorer, choose the “Add Reference” option, and add references to the Microsoft.LightSwitch.Client.dll and Microsoft.LightSwitch.dll files. The default location of these files on a 64-bit machine is: C:Program Files (x86)Microsoft SDKsLightSwitchv5.0Client.
- Right-click the contents of your SaveControl.xaml file, click on the “View Code” option, and add the .NET code that’s shown in Listing 13-11.
Listing 13-10. CustomButton code


When a user clicks on the custom button, the application executes the CustomButton_Click method ![]() . The first part of this code disables the button to prevent users from clicking it multiple times
. The first part of this code disables the button to prevent users from clicking it multiple times ![]() .
.
All custom controls data bind to objects that implement the IContentItem interface. This object allows you to access the control’s parent screen via the Screen member ![]() .
.
The next block of code calls the method on your LightSwitch screen. This could be a long-running data operation, so you’ll need to execute this code on the screen’s logic thread. This prevents the process from locking up the UI and leaving your application unresponsive ![]() . The next line of code accesses a screen command called SaveData via the screens’s Details.Commands collection and runs the command by calling its Execute method
. The next line of code accesses a screen command called SaveData via the screens’s Details.Commands collection and runs the command by calling its Execute method ![]() . If the command succeeds or fails, the code in the finally block re-enables the custom button.
. If the command succeeds or fails, the code in the finally block re-enables the custom button.
The code that re-enables the button must run on the UI thread because it performs logic that modifies the UI. Because the current code block executes on the screen-logic thread, the SetEnabled method re-enables the button on the correct thread ![]() .
.
To show you how to use this control on a screen, let’s look at how to add it to the Timesheet screen that we created earlier. To do this, you’ll need to carry out the following steps:
- Open the Create New Timesheet screen that you created earlier in this chapter.
- Click on the Add Data Item button and create a new method called SaveData.
- Click on the Add Data Item button and create a local property of data type String and name it SaveDataButton. Uncheck the “Is Required” checkbox.
- Add the SaveDataButton property onto your screen and change the control type from a textbox to a custom control.
- From the properties sheet for the SaveDataButton property, click the Change link. When the Add Custom Control dialog appears, click the Browse button and select your ApressControls.DLL file. When the Add Custom Control dialog appears, choose the CustomButton control. Set the label style for the data item to collapsed.
- Right-click the SaveData method in the screen member list and click on the “Edit Execute Method” option. Enter the code that’s shown in Listing 13-12.

Listing 13-12. Screen code that is called by the Custom button

An important point is that you must create the screen method that you want to call by using the Add Data Item dialog box in the screen designer. If you try to call a method that you manually add to your code file, your custom control won’t find the method in the screen’s Details.Commands collection, and your code won’t work. The name of the method that’s shown in Listing 13-12 is called SaveData_Execute. But when you access commands via the screen’s Details.Commands collection, you would refer to the method without the _Execute suffix (as shown in Listing 13-11, ![]() )
)
You can now run your application; Figure 13-14 shows how your screen now looks.

Figure 13-14. Custom button control
The custom control that we’ve created here contains just a button; the purpose of this example is to show you how to call screen code from a custom control. More complex custom controls might feature multiple UI elements, and a button (or some other event) to call screen code would make up part of the custom control. In this example, you’ll notice how we bind this control to a local string property (the SaveDataButton property). In Chapter 19, I’ll show you how to adapt this code sample to enable you to bind directly to your screen command.
![]() Tip In this example, we’ve hard-coded the name of the command (SaveData) into our custom control. You can make this example more reusable by passing the command name into the custom control, rather than hard-coding it. You could do this by creating a dependency property. This would allow you to use the data-binding mechanisms that you’ve seen to bind your custom control to the command objects in LightSwitch.
Tip In this example, we’ve hard-coded the name of the command (SaveData) into our custom control. You can make this example more reusable by passing the command name into the custom control, rather than hard-coding it. You could do this by creating a dependency property. This would allow you to use the data-binding mechanisms that you’ve seen to bind your custom control to the command objects in LightSwitch.
Summary
LightSwitch allows you to visualize your data by using Silverlight controls. This frees you from using only the standard set of controls that LightSwitch provides. For example, you could write your own controls to show data with charts, slider controls, or other, more sophisticated input-entry controls.
One of the simplest ways to enrich your application is to use the controls in the System.Windows.Controls namespace. The controls from this assembly include the combo box, password, and web browser controls. To apply a custom control to a data item on your screen, use the data item’s drop-down box to set the control type to “Custom Control.” If you apply a control directly from the System.Windows.Controls namespace, you need to write code that binds it to your data context by calling the SetBinding method. This method requires you to supply a dependency property and a binding path. To bind a dependency property to the data-item value, you would use the binding path of Value. Other binding path expressions enable you bind your control to other entities, properties, or local screen properties.
If you want to bind screen data to a property on a custom control, that property must be a dependency property. Unlike normal properties, dependency properties don’t hold a concrete value. Their value can derive from many places, and the benefit of this is that it uses memory more efficiently. If you create your own custom control, you’ll need to create a dependency property if you want to consume LightSwitch data from within that custom control.
To create a dependency property, you would define a dependency property object and instantiate it by calling the Register method. You’ll need to define a normal .NET property that backs your dependency property. This property stores your dependency property value in a dictionary that the base class DependencyObject object provides.
If you want to use a custom control that you create yourself and don’t want to write SetBinding code for each instance of your control, you can wrap your control in a parent control and set the data binding in the XAML for your parent control.
Another reason to use dependency properties is to call methods within your custom control. To demonstrate this, I showed you how to wrap the web browser control’s navigate method inside a dependency property. This enables the control to update the content that it shows whenever the underlying data changes.
If you want to bind a data item to a dependency property when the data type of the data item and dependency property don’t match, you can write a value converter. I showed you how to write a value converter that converts integers to doubles, and vice versa.
Finally, you learned how to call a screen method from a custom control. The custom control code uses the screen’s Details.Commands collection to find the screen method. Once it obtains a reference to the screen method, it can execute the code in the method.