Once fully tested, you're ready to begin working with cases. This will involve creating case records, working within them toward resolution, and searching/reporting on them.
When you first open a new case, CiviCRM collects general details including the type of case you are creating, the status, the subject, and various details that will be stored in the open case activity. Once you've created the case, you will enter the Manage Case screen, where you will spend most of your case-management time.
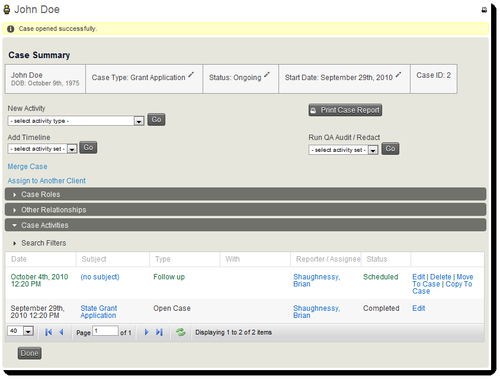
The screen is roughly divided into five sections:
- Case Summary and management tools
- Case Roles
- Other Relationships
- Case Tags (not present in the preceding screenshot)
- Case Activities
The summary includes the case client, type, status, start date, and reference ID. From this section, you can create a new activity, add a timeline to the case, merge the case with another case record, assign it to another client, print a summary report, or run a QA Audit/Redaction report.
Most of these tools are self-explanatory or have been described earlier. However, the QA Audit/Redaction report deserves further explanation. The dual-title indicates multiple purposes for the same tool. By "QA Audit", we refer to the ability to run a report in which we compare a defined target timeline against the recorded activities. This is useful if you have duration-defined workflows and want to see if the resolution process kept up with the target deadlines for various activities.
The redaction aspect of this report means the case redaction rules are processed when generating the report. Since the redaction rules can be used to remove or obfuscate sensitive information where there are privacy concerns, this ensures the ability to create a "sanitized" report that can be disseminated beyond the primary case managers.
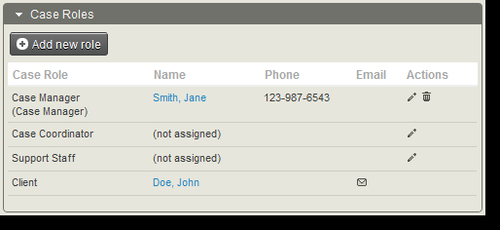
As one might expect, the Case Roles panel displays a list of the roles you have defined in your case and allows you to assign people to those roles or create new role-relationships. Note that although the list is pre-populated with the roles defined in your configuration file, you may add additional roles if needed. For example, you are not limited to having a single person assigned to the Case Coordinator role.
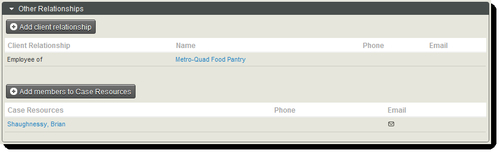
The Other Relationships panel contains two pieces of information: a list of any existing relationships attached to the record (such as employer, spouse, and so on), and the list of contacts found in the Case Resources group defined in your Settings.xml file. As mentioned earlier, these are included in the Case Management screen for the sake of convenience.
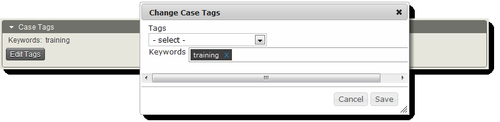
A Case Tags panel and button for adding them to the record will appear once you have created a tag at Contacts | New Tag with Used For set to Cases, or constructed a tagset for use with cases. A popup then lets you select from a drop-down list or tagset field to attach one or more tags to the case, as shown in the following screenshot:
The final panel, Case Activities, is where you are likely to spend most of your time. Since a case is primarily a collection of activities that may be ordered in a timeline, it makes sense that most of your work with cases will involve creating and editing activities.
Anything and everything you do as you work to resolve the case should be tracked as an activity. Whether you are making phone calls, receiving e-mails, changing the status, or even just reviewing the case history, you will benefit from taking the time to track each activity in the system. If someone else becomes involved in the case resolution, they will have a history of all communication that transpired with regard to the case. This will allow them to quickly jump in and begin working toward resolution.
Activities are ordered by date with the most recent first, but the sort order is dynamic and can be rearranged on any column. As with standard activities, scheduled activities will appear in green, and scheduled but overdue activities will be displayed in red. Activities may be edited and may also be moved or copied to another case (notice the rightmost column with various action links in the earlier Manage Case screenshot, in the activity listings section). This is useful if a contact has multiple cases open and you inadvertently recorded an activity against the wrong case and now must move it. Alternatively, if there are multiple cases open surrounding a common issue and you held a conference call with several involved constituents, you may record the activity against one case and copy to the others.
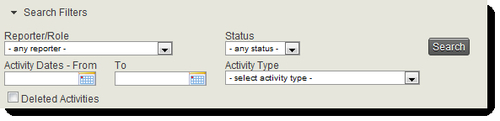
Be sure to note the Search Filters panel that opens up above the activities listing. Open this to expose some search/filter tools for your activity list. This will prove helpful if you have large cases that extend for a length of time and have accumulated many activities.
Before we move on, take note of the icons present throughout the Case Management screen, most notably the icon that looks like a pen. The "pen" is used to edit or take action on the record. In some cases, it will cause you to enter the edit view of the record or trigger a popup to add/edit information, such as assigning a case role. In other instances, it will trigger creation of an activity, such as clicking the icon next to the case status, which will generate a Change Case Status activity record.
In every instance, it provides a quick and easy way to take action on elements of the case record.
As with most components, you have a Case Dashboard and Find Cases utility available through the Cases menu (which, by default, is found under the Other menu). The Case Dashboard includes several useful tools, including a grid listing the number of cases by type and status (hyperlinked for easy retrieval), a list of cases with upcoming activities and a list with recently performed activities. Both of these lists can display all cases or just those connected with the currently logged-in user (My Cases).
These lists of cases can be expanded to display scheduled and completed activities. In addition, the All Cases and My Cases lists are available as special dashlet reports on the site Dashboard. If you are overseeing case management, it will be useful to have those dashlets configured for your dashboard so you can quickly gain a snapshot of case activities when you first enter the system.

The Find Cases tool is very straightforward. You can search by client name, e-mail, case type, status, whether the logged-in user is involved in the case (Search All Cases or Only My Cases), and tags.
Note the option to search for deleted cases. Similar to the trash function that stores deleted contact records, deleting a case does not permanently remove the record, but rather moves it to the trash. By opting to search for deleted cases, you may restore them should you determine they were mistakenly deleted.
In addition to the single-case detail report that can be generated from within the Manage Case screen, CiviCRM includes three reports related to cases that can be accessed at Reports | Create Reports from Templates. The reports are:
- Case Summary Report: Displays a summary of cases, listing the client, start/end date, status, duration, and other details.
- Case Time Spent Report: Geared toward tracking activities associated with cases and summarizing the total amount of time (duration) spent on them. This report can also be used to report on non-case activities.
- Contact Demographics Report: Displays demographics for constituents and includes access to custom contact fields.
Using the dashboard, search, and report tools, you can easily maintain oversight of cases as they are worked on and gradually resolved.