
Sheets and Templates
You can’t do anything in Numbers without working on a sheet—the blank canvas on which you place Numbers’ raison d’être, tables and their related charts, as well as fancier elements such as graphics and video. This chapter shows you how to create, name, and delete sheets.
You’ll also learn how to manipulate multiple sheets: reorder them, move from one to another, and even move directly to a specific element on a different sheet.
In addition, this chapter shows you how to access Numbers’ document templates when you open the Template Chooser, alter them to meet your needs, and save them as Custom Templates.
Sheet-handling Basics
Numbers’ fairly strict adherence to Mac interface rules makes handling sheets second nature if you’ve been using a Mac for more than a few months.
There are usually several ways to accomplish a sheet-handling task, but many of the most common are available from a tab’s menu. To open the menu, hover your pointer over any tab beneath the Numbers toolbar, and click the menu arrow that appears; or, just Control-click anywhere in a tab.
You can choose menu items from any tab, not just the currently active one; the item applies to the sheet whose menu you’ve used. So, for instance, you can copy or delete any sheet, not just the frontmost one.
The menu also conveniently lists all the tables and charts on a sheet, in order of creation (Figure 3).

Here’s what you can do from the tab bar and sheet menus:
- Name or rename a sheet: Choose Rename from the sheet menu or double-click anywhere in a tab to select the text for editing.
- Go to a table or chart in a sheet: Choose the item from that sheet’s menu. For the current sheet, use this part of the menu when an item has scrolled off the screen.
-
Add a sheet: Choose Insert > Sheet or click the big Add
 button at the left of the tabs. The width of the tabs doesn’t change when you add many sheets; instead, you’ll get a set of scroll arrows to the right of the tabs that lets you scroll them horizontally, as shown in the previous figure.
A new sheet always starts with an empty table; the style of the table matches the first one in the set of styles included in the document.
- Duplicate a sheet: Choose Duplicate from the sheet menu. (You can also choose Copy and Paste to duplicate a sheet in the current spreadsheet, but those commands are really meant for working between documents.)
- Go to another sheet: Click its tab. (Alternatively, you can choose a command from the Window menu for the next, previous, first, or last sheet.) Go directly to an element in another sheet by selecting it from that sheet’s menu.
- Scroll through the sheet tabs: Click the arrows at the right of the bar, or, if you’re using a trackpad, use a two-finger swipe when your pointer is anywhere over the bar.
- Reorder sheets: Drag a tab along the tab bar into a new position.
- Cut, copy, or paste a sheet: Use a sheet’s menu to cut or copy it. When you choose Paste, the pasted sheet is inserted to the right of the sheet whose menu you used. Use this option to copy or move a sheet from one document to another. Within a document, use the Duplicate command instead.
- Delete a sheet: Choose Delete from a sheet menu. There’s no confirmation dialog, but if you realize right away that you’ve chosen Delete accidentally, you can reverse the deletion with the standard Undo command (Command-Z).
Built-in and Custom Templates
What’s a template? In general, it’s a fill-in-the-blank document that saves you setup and formatting time. In Numbers, it’s a spreadsheet (that’s a document in Numbers parlance), usually with multiple sheets (tabs) in it. One sheet might have a table or two, and some charts, while another sheet could have the same elements for related information. The Net Worth template, for instance, has sheets for Assets and Liabilities with tables and charts, as well as an Overview sheet that shows information from the other two. (And, may I add: it’s pronounced templit, not template?)
Numbers comes with a plethora of superbly crafted templates—for everything from planning retirement savings to tracking students’ grades or a remodeling budget. They are all designed to make you either feel generally inadequate, or realize that only a fortunate combination of number skills and graphic-design talent will ever let you create a decent spreadsheet. (Wait… did I just say that out loud?)
I meant to say: Use Numbers templates when you want to explore what’s possible in a twenty-first century spreadsheet app, learn how certain functions and features can be used, and see what Numbers can do for you beyond the traditional business-centric purposes.
While it’s unlikely that any template will serve your needs exactly, you can tweak a built-in one or create your own. Numbers provides five categories of templates, as you can see in the figure just ahead, stocked with five to ten templates each.
Template Chooser
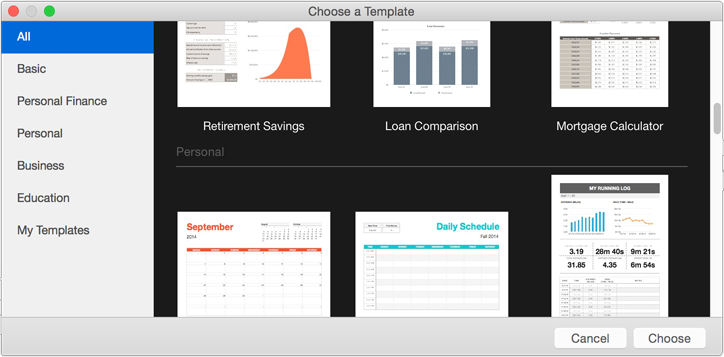
When you choose File > New, the Template Chooser opens to get you started (Figure 4). Scroll through the window to find a template; click a category at the left to narrow the displayed choices. When you find the template you want, click it and then click Choose or press Return; or, just double-click it. A template opens as a copy named Untitled, so you can’t inadvertently change the original’s name or contents.
Custom Templates
Once you’ve tweaked a Numbers template to serve your purposes, or designed one from scratch that you’ll want to re-use, you can make a template so you won’t have to tweak, or from-scratch, all over again.
Here’s how to handle your custom templates:
- Save in the Template Chooser: To save a finely crafted spreadsheet as a template for future use, choose File > Save as Template and click Add to Template Chooser. The Template Chooser opens, displaying your template in the My Templates category (which is created on the fly as necessary), with its name selected so you can edit it (Figure 5). The default name is the document’s current name, which is Untitled if you haven’t saved it yet.

- Save to your drive: Click the Save button in the Save as Template dialog to save the template anywhere on your drive. When you try to open it later, however, it won’t open it as a blank document—you’ll merely see a dialog offering to add it to the Template Chooser. So, why bother? Save a template to your drive when you want to share it with someone later.
- Rename: Control-click its name or thumbnail in the Template Chooser, and choose Rename.
- Edit: You can’t edit a template. Instead, you must open it and edit the document it creates, delete the template from the Template Chooser, and then save the edited document as a new template.
- Delete: Control-click it in the Template Chooser, and choose Delete.
- Organize: You can’t reorder your templates inside the Template Chooser; they remain in the order you added them, with the most recent one first. To shuffle them around, open all of them, delete the templates from the Template Chooser, and then save the open documents as templates in the order you want them to appear.