Configuring the Interface
Now that we have all the information we need, we can go ahead and configure the connection. We will do this two ways: dynamically and statically. Dynamically allows us to configure an interface while the machine is still running and is a task that is often carried out, but it will lose the settings at the next reboot. The static configuration requires a reboot before the changes will be activated, but ensures that the system retains the information across reboots.
Dynamic Configuration
Our systems have “hme” interfaces installed (these are 100 Mb per second Fast Ethernet network cards). It is the first, and only, instance on our system, and up to now hasn't been configured. We know this because ifconfig only reports the loopback interface:
hydrogen# ifconfig -a
lo0: flags=849<UP,LOOPBACK,RUNNING,MULTICAST> mtu 8232
        inet 127.0.0.1 netmask ff000000
hydrogen#
The next task is to create all the necessary connections for the “hme” device itself; this includes loading any streams drivers, opening the device itself, and informing the kernel that the network card is physically available:
hydrogen# ifconfig hme0 plumb
hydrogen# ifconfig -a
lo0: flags=849<UP,LOOPBACK,RUNNING,MULTICAST> mtu 8232
        inet 127.0.0.1 netmask ff000000
hme0: flags=842<BROADCAST,RUNNING,MULTICAST> mtu 1500
        inet 0.0.0.0 netmask 0
        ether 8:0:20:aa:bb:cc
hydrogen#
We now have an instance of “hme0” available, but by comparing its settings with that of the loopback interface, we can see that we are missing some values such as a valid IP address and netmask setting. The flags value also shows the interface is currently disabled (not “UP”).
Adding the missing values and activating it can all be performed in the same step if we wish, as shown here:
hydrogen# ifconfig hme0 inet 192.168.22.1 netmask 255.255.255.128 up
hydrogen# ifconfig -a
lo0: flags=849<UP,LOOPBACK,RUNNING,MULTICAST> mtu 8232
        inet 127.0.0.1 netmask ff000000
hme0: flags=863<UP,BROADCAST,RUNNING,MULTICAST> mtu 1500
        inet 192.168.22.1 netmask ffffff80 broadcast 192.168.22.127
        ether 8:0:20:aa:bb:cc
hydrogen#
Ifconfig shows we have correctly started our interface. Since this is still the only machine we have connected on the network (assuming it is plugged in correctly!), the only thing we can do is to check it in a similar way to the loopback interface:
hydrogen# ping hydrogen
hydrogen is alive
hydrogen#
Success! We can see our own network connection. Again, netstat will confirm that packets are being sent and received:
hydrogen#  netstat -in
Name  Mtu   Net/Dest      Address       Ipkts Ierrs Opkts Oerrs Collis Queue
lo0   8232  127.0.0.0     127.0.0.1     524   0     524   0     0      0
hme0  1500  192.168.22.0  192.168.22.1  4     0     4     0     0      0
hydrogen#
Permanent Changes
Now that the interface is up and running, we need to make sure it stays that way whenever the system reboots. This is actually quite a simple task, as all we need to do is to create or update two files: one that informs the system of which address to set, and a second to inform it of the netmask to apply. The first file is named after the interface type and the instance number, which in our case is /etc/hostname.hme0. It contains the following information:
hydrogen# cat /etc/hostname.hme0
hydrogen
hydrogen#
This example uses the hostname, but it can contain an IP address instead. If the hostname is used, there must be a valid address for it in whichever name service is being used—in our case the local hosts file—otherwise the system will not be able to determine the correct address to apply.
The second file is /etc/inet/netmasks. Ours now contains the following information:
hydrogen# cat /etc/inet/netmasks
192.168.22.0    255.255.255.128
hydrogen#
To check that the settings are correct, update the files, reboot the system, and when it comes back see that ifconfig shows the interface correctly and we can ping ourselves again.
The Rest of the Subnet
At this point, we'll connect another system and check that the two can communicate. This should actually be carried out on all systems that need to communicate with each other, at the time they are connected.
We will configure and check helium next, but this time we'll skip the dynamic settings and simply create or update the necessary files then reboot. After modification, the files contain the following information:
helium# grep helium  /etc/inet/hosts
192.168.22.2   helium   he
helium#

helium# cat /etc/hostname.hme0
helium
helium#

helium# cat /etc/inet/netmasks
192.168.22.0   255.255.255.128
helium#
Now reboot the system, and when it comes back up check that helium can be seen OK:
helium# ping helium
helium is alive
helium#
We can see we are alive, so let's try and see hydrogen across the network. We haven't got an entry for it in the hosts file yet, so we'll ping its IP address:
helium# ping 192.168.22.1
192.168.22.1 is alive
helium#
Great! We can see the whole of the network (or the two machines we have connected), so check that the hosts file contains all the systems we showed in “Host Names” on page 258. We now have details of every machine ready for when they are connected, and we won't have to update the file a number of times. Now we will add the remaining machines onto the 192.168.22.0 network, apart from the gateway machine, which we'll come to in a minute.
The list below shows the machines to add. The tasks to perform will be very similar to those required to connect hydrogen and helium:
lithium (192.168.22.3)
beryllium (192.168.22.4)
boron (192.168.22.5)
carbon (192.168.22.6)
nitrogen (192.168.22.7)
oxygen (192.168.22.8)
fluorine (192.168.22.9)
neon (192.168.22.10)
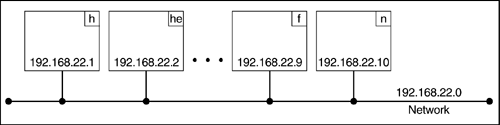
Taking a look at what we have achieved so far, we have physically connected all the systems that are part of the same subnet to the physical network, and each system can see each other (we hope!). This provides us with a series of connections as shown in Figure 11.2.
Figure 11.2. The 192.168.22.0 network.