
appendix b
Facebook Messenger, Twilio, and Alexa configuration
This appendix provides details on how to set up the following items required by chapters 8, 9, and 10:
- A Facebook Messenger page and application
- A Twilio account
- An Amazon Alexa account and skill
Facebook Messenger setup
Configuration of the Facebook Messenger chatbot for chapters 8 and 9 requires the following steps:
- Create a Facebook page.
- Create a Facebook app.
- Create a Facebook Messenger chatbot using Claudia Bot Builder.
- Enable built-in natural language processing (NLP).
Creating a Facebook page
To create a Facebook page, visit https://www.facebook.com/pages/create/. This page will show you a list of categories, which looks like figure B.1. You need to choose the type of page you want to create.

Figure B.1 Create your Facebook page.
You can choose any category; we picked “Cause or Community” because it requires minimal configuration. When you select the “Cause or Community” tile, Facebook asks you for the name of your page. Name your page “Aunt Maria’s pizzeria,” like we did in figure B.2, and click Get Started.

Figure B.2 Select the page category and name your page.
After you name your page, Facebook asks you to upload profile and header pictures and fill in some additional data. When you’ve completed or skipped all the steps, your new Facebook page should look like figure B.3.

Figure B.3 The Facebook page for Aunt Maria’s pizzeria
Creating a Facebook app
The next step is to create a Facebook application. To do so, go to https://developers.facebook.com, and from the My Apps menu, choose Add a New App, as shown in figure B.4.

Figure B.4 The Facebook developers portal
A pop-up titled “Create a New App ID” appears, as shown in figure B.5, asking you for your app’s name and your email address. Fill in the form (use “Aunt Maria’s pizzeria” for the application name) and click the Create App ID button to create a new Facebook application.

Figure B.5 Creating a new Facebook application
A screen listing some recommended products appears. When you hover over products with your mouse cursor, two buttons appear: Read Docs and Set Up. Find the Messenger product and hover over it with your mouse, as shown in figure B.6. Click Set Up.

Figure B.6 The list of recommended products
Clicking this button takes you to the Messenger Platform settings screen, which looks similar to figure B.7.
Do not close this browser page; you’ll need it again in a few moments.
Creating a Facebook Messenger chatbot using Claudia Bot Builder
Now that you have both a Facebook page and a Facebook application, it’s time to create a chatbot.
Open your terminal and navigate to your project folder. Then run the command from listing A.1 to create your AWS Lambda function and configure your chatbot.

Figure B.7 The Messenger Platform settings screen
claudia create
  --region eu-central-1    ①
  --api-module bot    ②
  --configure-fb-bot   ③

Figure B.8 Facebook Messenger bot setup with Claudia Bot Builder
Unlike a regular Claudia deployment, the command with the --configure-fb-bot option is interactive. After your code is deployed to an AWS Lambda function, the command will print the webhook URL and verify token you’ll need to configure your chatbot, as shown in figure B.8. You’ll need those values for the next step.
Keep the terminal open, because the process is not done yet.
Go back to the Messenger Platform settings screen in your browser (figure B.7), and click the Setup Webhook button in the Webhooks section. This button opens a pop-up similar to the one in figure B.9. In this pop-up, use the values that the terminal printed for you in the previous step to fill out the webhook URL and verify token. In the Subscription Fields section, select the “messages” and “messaging_postbacks” options. Then click the Verify and Save button.

Figure B.9 Set up the webhook and verification token
After a moment, the pop-up closes and you see your webhook configured, as in figure B.10.

Figure B.10 Webhook activation confirmation
The next step is to get your Facebook page access token. To do so, go to the Token Generation section of the settings screen, select the page you created from the drop-down menu, and copy the token, as shown in figure B.11.

Figure B.11 Generate the page token.
Go back to your terminal, paste the access token from the previous step, and press Enter, as shown in figure B.12.

Figure B.12 Configure the page token.
The interactive command then asks you for the Facebook app secret. The app secret is required because it is used to verify that a message is being received from your chatbot, not from some other source. Your secret will be stored in an API Gateway stage variable.
To get your Facebook app secret, go back to your browser, and select the Dashboard tab in the Facebook app’s menu on the left. Click the Show button next to the App Secret field, as shown in figure B.13. Copy this value, and go back to your terminal window.

Figure B.13 Copy the app secret.
Paste your App Secret and press Enter, as shown in figure B.14.

Figure B.14 Configure the app secret.
When the command finishes after a few moments, you should see a response similar to listing B.1.
Listing B.1 Bot creation response
{
  "lambda": {   ①
    "role": "pizza-fb-bot-executor",
    "name": "pizza-fb-bot",
    "region": "eu-central-1"
  },
  "api": {   ②
    "id": "wvztkdiz8c",
    "module": "bot",
    "url": "https://wvztkdiz8c.execute-api.eu-central-1.amazonaws.com/latest",
    "deploy": {   ③
      "facebook": "https://wvztkdiz8c.execute-api.eu-central-1.amazonaws.com/latest/facebook",
      "slackSlashCommand": "https://wvztkdiz8c.execute-api.eu-central-1.amazonaws.com/latest/slack/slash-command",
      "telegram": "https://wvztkdiz8c.execute-api.eu-central-1.amazonaws.com/latest/telegram",
      "skype": "https://wvztkdiz8c.execute-api.eu-central-1.amazonaws.com/latest/skype",
      "twilio": "https://wvztkdiz8c.execute-api.eu-central-1.amazonaws.com/latest/twilio",
      "kik": "https://wvztkdiz8c.execute-api.eu-central-1.amazonaws.com/latest/kik",
      "groupme": "https://wvztkdiz8c.execute-api.eu-central-1.amazonaws.com/latest/groupme",
      "line": "https://wvztkdiz8c.execute-api.eu-central-1.amazonaws.com/latest/line",
      "viber": "https://wvztkdiz8c.execute-api.eu-central-1.amazonaws.com/latest/viber",
      "alexa": "https://wvztkdiz8c.execute-api.eu-central-1.amazonaws.com/latest/alexa"
    }
  }
}
This response prints out all the webhooks, but you don’t need them because Claudia has already set everything up for you. Claudia also automatically subscribed your chatbot to your page, as shown in figure B.15.

Figure B.15 Your chatbot is subscribed to the page.
Now try to find your page in Facebook Messenger. You should see something similar to figure B.16.

Figure B.16 The Facebook Messenger bot start page
And if you message the bot, it should reply as shown in figure B.17.
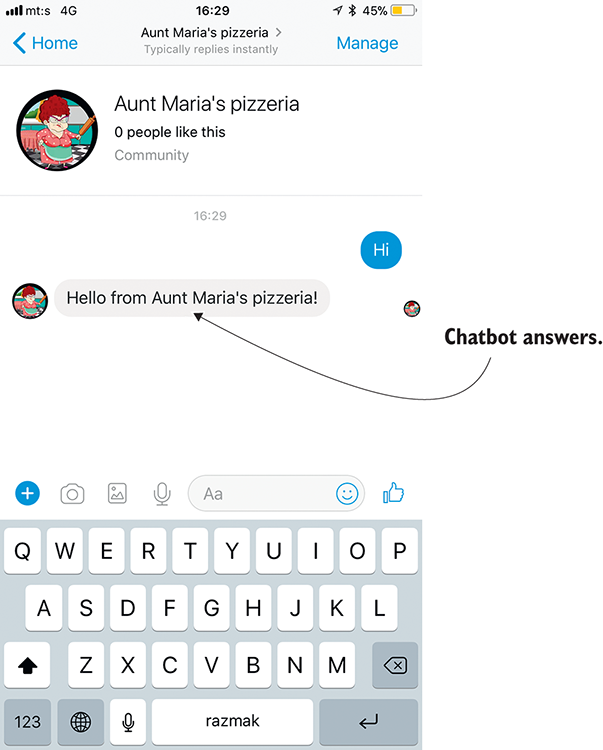
Figure B.17 The Facebook Messenger bot’s answer
Enabling built-in NLP
To enable built-in NLP, go back to the Messenger Platform settings screen in the Facebook developers portal, and scroll down to the Built-In NLP section. Then select your Facebook page in the Select a Page to Customize Built-In NLP drop-down, as shown in figure B.18.

Figure B.18 Select the page to enable built-in NLP.
Now you can enable built-in NLP, select the default language, and see advanced settings. For the pizzeria application, you’ll use English, so you need to enable built-in NLP as shown in figure B.19.

Figure B.19 Enable built-in NLP.
Twilio setup
Configuration of the Twilio SMS chatbot for chapter 10 requires the following steps:
- Sign up for a Twilio account.
- Get a Twilio number.
- Set up your Twilio Programmable SMS service.
- Create a Twilio SMS chatbot using Claudia Bot Builder.
Creating a Twilio account
If you already have a Twilio account, jump to the next section, “Getting a Twilio number.”
To sign up for a Twilio account, visit https://www.twilio.com/try-twilio. Type in the required account details. You’ll also see four drop-down fields, as in figure B.20.

Figure B.20 Sign up for a Twilio account.
In the drop-downs, make the following choices:
- For the product you’re going to use, choose SMS.
- For what you’re going to build, choose SMS Support.
- For the language you’re going to use, choose Node.js.
- For potential monthly interactions, choose Less Than 100,000 (or if you’re already planning for more, feel free to choose a higher value).
After you fill out all of the fields, Twilio asks you to verify that you’re a human by sending you a verification SMS. You need to type in your mobile phone number, and you’ll receive an SMS with the authentication code. Type in that code on the following screen.
Upon successful verification of your number, Twilio asks you to create a new project. You can see that page in figure B.21.

Figure B.21 Create a new Twilio project.
Fill in the project name and click Create Project, and your project is created. You’ll then see the Programmable SMS project page, shown in figure B.22.

Figure B.22 Your Programmable SMS project page
Getting a Twilio number
If you already have a Twilio number, jump to the next section, “Setting up your Twilio Programmable SMS service.”
Otherwise, on the Programmable SMS project page, click the Get a Number button. You’ll see a modal with a phone number suggested by Twilio. If you don’t like this number, or you just want a different one, you can click the Search for a Different Number link in the modal. When you’re okay with the phone number, click Choose This Number.
When Twilio finishes processing your new number request, you’ll see a “Congratulations” modal with your chosen phone number. Click Done, and Twilio opens up your Programmable SMS project page with the Learn & Build tab selected.
Setting up your Twilio Programmable SMS service
Your Twilio SMS chatbot should be able to both automatically send and receive messages. To enable this messaging, you need to configure it in your Programmable SMS project page as a Messaging Service. You can find the Messaging Services menu item in the navigation menu on the left side of the project page (see figure B.23).

Figure B.23 The Messaging Services option in the Programmable SMS project navigation menu
Open that tab, and click Create New Service. A pop-up window appears, asking you for the friendly name of your service and the use case. Set the name as “Aunt Maria’s Pizzeria chatbot” and the use case as “Mixed.”
The configuration page for your newly added Messaging Service opens, as shown in figure B.24.

Figure B.24 Configure your Messaging Service.
On this page, select the Process Inbound Messages options. Two text fields appear:
- Request URL
- Fallback URL
In the Request URL text field, paste or type in the URL of your serverless Twilio SMS chatbot you created with Claudia Bot Builder. Then click Save.
Next you need to add to this service the Twilio number you requested in the previous section. To do that, click the Numbers link in the left navigation menu of the Messaging Services tab.
In the Numbers page, click the Add an Existing Number button. A pop-up appears, as shown in figure B.25.

Figure B.25 Add your Twilio number to your Messaging Service.
In this pop-up, you can see your list of available Twilio numbers. If you don’t have one, please go back to the previous section, “Getting a Twilio number.”
To add one or more of these numbers, use the checkboxes to select them, and then click Add Selected. The numbers appear in the list on the Numbers page.
If you’ve also pasted the URL of the serverless Twilio SMS chatbot function you created into the Request URL field, that’s it—you’ve properly set up your Twilio account and Programmable SMS project. Congratulations! You can now try out your SMS chatbot by sending an SMS to your selected Twilio number.
Alexa skill setup
To set up an Alexa skill, go to https://developer.amazon.com/alexa and log in with your Amazon account. Then click the Add Capabilities to Alexa link, as shown in figure B.26.

Figure B.26 The Amazon Alexa dashboard
The Alexa Skills Kit screen appears, a place where you can find documentation and tutorials for designing, building, and launching Alexa skills. You can also create new skills here. To do so, click the Start a Skill button, as shown in figure B.27, which takes you to the Create a New Alexa Skill screen.

Figure B.27 The Alexa Skills Kit
The first part of the process is the Skill Information section. In this section you can select the skill type, set the name and invocation name of your skill, and configure global fields such as Audio Player, Video App, and Render Template.
The Custom Interaction Model type is selected by default; keep it selected because it allows you to build a new custom skill. Besides this type, you can build a Smart Home skill, a Flash Briefing skill, or a Video skill (for Amazon Echo Show or other visual Alexa devices).
Set both the name and invocation name to “Aunt Maria’s Pizzeria,” make sure that all the global fields are off, and click the Save button, as shown in figure B.28. Click the Next button to go to the next section.

Figure B.28 Setting up your skill
The next screen is the Interaction Model settings. For this screen, you need the intent schema, custom slot, and sample utterances you built in chapter 10.
First, paste the intent schema you built (listing 10.9) into the Intent Schema text field. Then fill out the Custom Slot Types form, adding a custom slot name (LIST_OF_PIZZAS) and using the values from chapter 10 (listing 10.10). Then click the Add button, as shown in figure B.29.

Figure B.29 Configuring the interaction model
After adding your custom slot type, fill out the custom utterances from chapter 10, then click the Next button, as shown in figure B.30.

Figure B.30 Adding the sample utterances
The next screen is the Configuration section, where you set up your skill’s webhook or AWS Lambda function. Before you complete this step, deploy your code to a Lambda function if you haven’t done that already. Keep your browser page open while you are doing this, because you’ll need to go back to the Configuration section of the Create a New Alexa Skill page in a few moments.
To deploy your Lambda function, open your terminal, navigate to your Alexa skill code folder, and run the following command:
claudia create --region eu-west-1 --handler skill.handler --version skill
This command deploys your code to AWS Lambda in the eu-west-1 region (only us-east-1 and eu-west-1 regions are supported by Alexa), and sets the version to skill.
After a few moments, you’ll see the standard claudia create response, similar to this one:
{
  "lambda": {
    "role": "pizza-alexa-skill-executor",
    "name": "pizza-alexa-skill",
    "region": "eu-west-1"
  }
}
Before you can use the Lambda function for your Alexa skill, you need to allow it to be triggered by Alexa. To do so, run the following command:
claudia allow-alexa-skill-trigger --version skill
This command allows the skill version of your Lambda function to be triggered by Alexa. After a few moments, you’ll see a response similar to this one:
{
  "Sid": "Alexa-1518380119842",
  "Effect": "Allow",
  "Principal": {
    "Service": "alexa-appkit.amazon.com"
  },
  "Action": "lambda:InvokeFunction",
  "Resource": "arn:aws:lambda:eu-west-1:721177882564:function:pizza-alexa-skill:skill"
}
Copy the Lambda ARN (Resource in the JSON response in your terminal), then go back to the skill configuration page in your browser. Select AWS Lambda ARN as the Service Endpoint Type and paste the ARN of your Lambda function into the input field below, as shown in figure B.31.

Figure B.31 Skill configuration
You are not building a skill that will have multiple geographical region endpoints (for example, different regions for the US and UK), so select No as the response to the “Provide geographical region endpoints?” question, and then click Next.
After your skill is configured, the Test screen appears. This screen is where you can test your skill, for example by entering an utterance in the Service Simulator and then listening to the response by clicking the Listen button, as shown in figure B.32. Your skill is also active on your Alexa device, so you can also say, “Alexa, start Aunt Maria’s Pizzeria.”

Figure B.32 Testing your skill
This skill is now available on your Alexa device, but if you want to make it available for everyone, you need to submit your skill for certification, as explained here: https://developer.amazon.com/docs/custom-skills/submit-an-alexa-skill-for-certification.html.