
Picture a scenario where the month end sales data in an organization is stored in a folder on the network from where it needs to be picked up for reporting purposes.
Control statements such as For Each next can be used in Qlik Sense as an approach towards script iteration. The following recipe deals with extracting files in Qlik Sense from a folder, processing them to create QVD files and then transferring the source files to another folder. In the process, we will also deal with the incremental update of the QVD.
This recipe requires the Legacy mode to be activated. The steps are as follows:
- To activate the Legacy mode, open the
Settings.inifile underC:Users<username>DocumentsQlikSense. - Change the value of the
StandardReloadparameter from1to0.
- For this recipe, we make use of four Excel files:
January.xlsx,February.xlsx,March.xlsx, andApril.xlsx. These files are provided with the chapter and can be downloaded from the Packt Publishing website. - Save the file
January.xlsxunderc:QlikSense. If you are not able to write to this location, then you may change the storage location for the file. Note that in this case you will have to make relevant changes in the file location paths for the load script discussed in the How to do it... section for this recipe. - Create another folder named
Processedinside theQlikSensefolder we created in step 1. The path for the folder would bec:QlikSenseProcessed. - Create a third folder named
QVDinside theQlikSensefolder created in step 1. The path for the folder would bec:QlikSenseQVD.
- Create a new Qlik Sense application.
- Open the data load editor.
- Load the following script:
For each File in filelist ('C:QlikSense*.xlsx') ProdSales: LOAD left(FileBaseName(),18) AS ProdSalesFileName, filename() as FileName, [Product], [Sales] FROM [$(File)] (ooxml, embedded labels, table is Sheet1) WHERE Sales >250000; Execute cmd.exe /C move "$(File)" "C:QlikSenseProcessed"; next File SET rowCount = 0; LET rowCount = NoOfRows('ProdSales'); IF rowCount > 0 AND Alt(FileSize('C: QlikSense QVDProdSales.QVD'),0) > 0 THEN Concatenate(ProdSales) LOAD * FROM C:\QlikSenseQVDProdSales.QVD (qvd); STORE ProdSales INTO C:QlikSenseQVDProdSales.QVD; ELSE STORE ProdSales INTO C:QlikSenseQVDProdSales.QVD; END IF DROP TABLE ProdSales; LOAD * FROM C:QlikSenseQVDProdSales.QVD (qvd); - Now, add the remaining three Excel files, that is,
February.xlsx,March.xlsx, andApril.xlsx, to the source location; in the case of this recipe, it isc:QlikSense. - Load the script again. You will notice that all the files have been processed and moved to the processed folder. At the same time, the new data is appended to the
ProdSales.QVDfile. - In order to test the data loaded into the QVD, go to App overview and create a new sheet.
- Drag a table object onto the sheet.
- Add ProdSalesFileName as the first dimension and label it
Month. - Add Product as second dimension.
- Add the following expression and label it as
Sales:Sum(Sales)
- The resultant table would look like the following, with each month showing records only with
Sales >250000: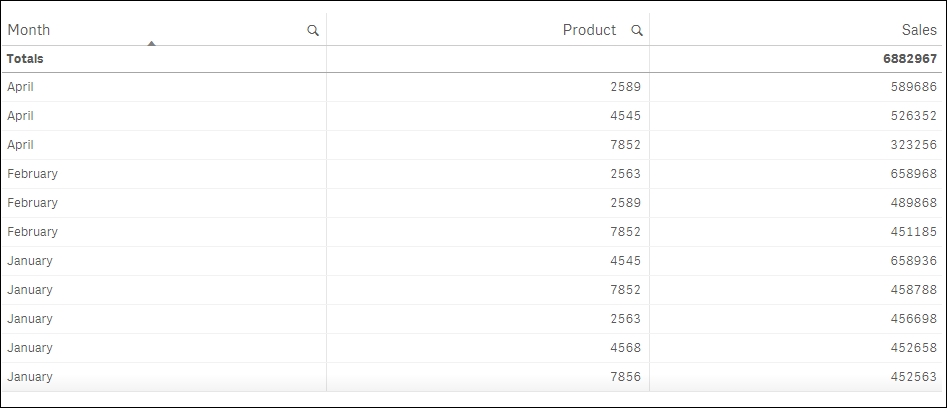
The for each next loop iterates through each file in the Source folder and processes it to pick up records with sales greater than 250,000. Once processed, the files are transferred to the processed folder using the command prompt.
The if condition checks for the row count of the processed file. If it is greater than zero then the file is concatenated to the existing ProdSales.QVD file. The LOAD statement inside the if condition has a WHERE not exists clause which makes sure to append only new files to the QVD.