Almost every aspect of your CMS project will be dealing with dynamic data in one form or another. Managing this data is broken down into two areas of responsibility:
Capturing the data: The data is captured, validated, and filtered by
Zend_Form.Storing the data: This depends on the data source, but in the case of this CMS, the data will be stored by
Zend_Db.
This separation contrasts some other patterns that handle data validation and filtering in the database abstraction layer. There is a good reason for this; a database is only one of many data sources that are at an application developer's disposal. It is common to use several sources in the same application. When the form object handles this, you can send the data to any source with confidence.
Zend_Form is easy to visualize if you consider how an actual XHTML form is constructed. An XHTML form is wrapped in the <form /> element, which can have a number of attributes, such as method, action, id, and so on. Once you have this form element defined, you add elements to it for each of the different controls. These controls can have a number of attributes as well, such as the type, name, value, and so on. Beyond these standard HTML control attributes, you can also add multiple validators and filters to each of the controls.
Note
In this section I am explaining how to work with Zend_Form_Elements. Zend Framework also provides several view helpers that generate HTML controls. The main difference between these two is the fact that Zend_Form_Elements are objects that are part of a Zend_Form, while the helpers simply generate the HTML controls.
A Zend_Form-based form works in the same way. The Zend_Form object serves as a container for Zend_Form_Element objects, and it has all of the standard form attributes. There are Zend_Form_Element objects for each of the standard web form controls, and each of these controls has the standard XHTML attributes. Zend_Form also supports several non-standard form controls, such as Dojo widgets.
The principal difference between Zend_Form and an XHTML form is the fact that Zend_Form is a PHP object that represents the XHTML form. To render the form, you use the Zend_Form instance's render() method, which returns the markup for the form.
The actual process of converting this object to the XHTML output is handled by decorators. These decorators are snippets of code that render the appropriate markup dynamically. You have complete control over which decorators are used to render each of the components.
Once the form has been completed and submitted, the form object switches gears and processes the data. First you confirm that the data is valid by passing an array of the data to the isValid() method to validate. If the data passes the validation test, you retrieve the validated and filtered data from the form using the getValues() method, as in the example in Listing 3-1.
Example 3.1. Processing a Zend_Form
<?php
$form = new Zend_Form();
// add some elements to the form
$data = $_POST; // this data can be any array
// validate the form
if($form->isValid($data)) {
    // if the form passes the validation test fetch the values
    // these values will be returned as an array of validated and filtered data
    $cleanData = $form->getValues();
}
Form elements are classes that represent HTML controls. These classes handle rendering the controls with the appropriate metadata and attributes and then validating and filtering the data.
Zend_Form includes a number of commonly used form elements in the base framework, described in the following sections.
The Button control creates an HTML button element. You can check to see whether the button was clicked by using the isChecked() method.
Captcha is used to confirm that a human is submitting a form. A number of Captcha adapters are included in the framework.
The checkbox element creates an HTML check box. If the check box is selected, then its value will be posted. Otherwise, nothing will be posted. You can also use the isChecked() method to test it explicitly.
The file element creates an HTML file upload control. This control uses Zend_File_Transfer to add the upload functionality to your form.
The hash element validates that the current user submitted a form by setting and checking the session.
The multiCheckbox element creates a group of check boxes. It extends the multi element, which enables you to specify multiple items and then validate this list.
The multiselect element extends the select element, adding the ability to select multiple items. It extends the multi element, so you have access to an array of methods to set and get the element options.
The password element creates an HTML password control. This is essentially the same as a text box, but the value is obscured while it is typed.
The radio element generates a radio group that displays multiple options, but it allows the user to select only one. It extends the multi element.
The select element creates an HTML select control. It extends the multi base element, which enables you to specify multiple options.
The submit element creates an HTML submit button. If you have several submit buttons on one form, you can determine whether a given submit button was clicked using the isChecked() method.
Bugs are an unfortunate but inevitable part of application development. This is especially true during the early iterations of a component that is developed with the Agile and RAD development methodologies. How you manage these issues plays a large role in the overall efficiency of your development process.
This makes a bug manager a very useful example to demonstrate how you manage data with Zend Framework. In this chapter, you will create and render a bug report form.
The first thing you need to do to get started adding any functionality to a ZF application is to create an action and the associated view. In this case, you are adding new functionality, rather than adding to an existing function, so you will need to create a new controller for the action.
Zend_Tool makes adding these controllers and actions a straightforward process. Note that although I use Zend_Tool, you can also create these files and classes manually in your favorite text editor. Open your command-line tool, and navigate to the root of your project. Then use the create controller command to create the new controller and its associated views. You pass this command a single argument, the name of the controller, as in Listing 3-2.
Now when you take a look at your project, you should see that this command created the BugController, a folder for its views, and the index action/view script.
Next you need to create the submit action, which will be used to submit new bugs. You do this with the create action command. You pass the create action command two arguments, namely, the name of the action and the name of the controller, as in Listing 3-3.
Next take a moment to make sure you set this action up properly. If you point your browser to http://localhost/bug/create, you should see your new page, which should render the default Zend view script. This script simply tells you the controller and action that have been dispatched.
You can build forms using Zend_Form in a number of ways. You can build them manually in your controllers as needed, create them from Zend_Config objects, or create classes for them. I prefer the third approach for several reasons:
To get started, create a new folder in application named forms (Listing 3-4).
Next create a new file in the application/forms folder named BugReportForm.php. Create a class in this file named Form_BugReportForm that extends Zend_Form. Note that I added the Form_ namespace to this class, which enables you to load the form resources with Zend_Loader_Autoloader rather than manually including each file (Listing 3-5).
You can add controls to your form in several ways as well. You can create a form and then add controls to this specific instance, but this method must be duplicated everywhere you use the form. I prefer adding the controls directly to the form class.
Zend_Form calls the init() method when the form class is constructed. This is done so it is easier for developers to add functionality to the constructor without having to manually call the parent::_construct() method. This is where you should add the elements to the form.
The bug report form will need several fields initially: author, e-mail, date, URL, description, priority, and status.
Author: The author field will be a text box that will enable people to enter their names when they submit a bug report. This field is required.
E-mail: The e-mail field will be a text box where the submitter can enter their e-mail address. It is required, and it must be a valid e-mail address.
Date: The date field will be a text box where the user will enter the date on which the issue occurred. It should default to the current day, it is required, and it must be a valid date.
URL: This field will be a text box and is the URL of the site where the issue occurred. It is required.
Description: This control will be a text area and is a description of the issue. It is required.
Priority: This will be a select control, so the user can choose from a list of priority levels. It will default to low.
Status: This will be the current status of the issue. It will be a select control and will default to new.
To get started, create a new method in the Form_BugReportForm form class named init(). In Listing 3-6, I added comments where you will add each of these form controls.
Example 3.6. The Form_BugReportForm Form init() Function in application/forms/BugReportForm.php
class Form_BugReportForm extends Zend_Form
{
    public function init()
{
// add element: author textbox
// add element: email textbox
// add element: date textbox
// add element: URL textbox
// add element: description text area
// add element: priority select box
// add element: status select box
// add element: submit button
}
}Now you are ready to start creating the controls. There are two ways to create the controls; you can instantiate a new instance of the form element class, or you can use the Zend_Form instance's createElement() method. In this example, you will use the createElement() method, which takes two arguments: the type and name of the control. It returns the instance of the element you just created.
The first control you need to add is the author text box. Create a new element that has the type set to text and author for the name. Then you set the label for the control, set its required flag to true, and set any other attributes you may need. In this case, you should set the size to 30 (Listing 3-7).
The next control you need to add is the e-mail field. This control will be a text box like the author but will require more validation and filtering. First you need to validate that the value is in fact a valid e-mail address. Then you will strip any whitespace from the value and convert the whole address to lowercase. You add these filters and validators using the following Zend_Form_Element methods:
addFilter(): This method adds a single filter.addFilters(): This method adds an array of filters.addValidator(): This method adds a single validator.addValidators(): This method adds an array of validators.
Each of these methods can accept the filter/validator as a string (the class name of the filter/validator) or as an instance of the filter/validator class. This is strictly a matter of preference; I use the latter because Zend Studio's code complete function will give me a list of the available options, as shown in Listing 3-8.
Example 3.8. Creating the E-mail Text Box in application/forms/BugReportForm.php
$email = $this->createElement('text', 'email'),
$email->setLabel('Your email address:'),
$email->setRequired(TRUE);
$email->addValidator(new Zend_Validate_EmailAddress());
$email->addFilters(array(
    new Zend_Filter_StringTrim(),
    new Zend_Filter_StringToLower()
    ));
$email->setAttrib('size', 40);
$this->addElement($email);
The date field will be a text box as well. It is required, and it must be a valid date. You can validate the date using the Zend_Validate_Date() validator, which you pass the date format to (see Listing 3-9).
Example 3.9. Creating the Date Text Box in application/forms/BugReportForm.php
$date = $this->createElement('text', 'date'),
$date->setLabel('Date the issue occurred (mm-dd-yyyy):'),
$date->setRequired(TRUE);
$date->addValidator(new Zend_Validate_Date('MM-DD-YYYY'));
$date->setAttrib('size',20);
$this->addElement($date);Next you need to add the field for the URL that the issue occurred on. At the time of writing, there is no URI validator included in Zend_Validate; you must write a custom validator to do this. For this example, just set the field to required, as shown in Listing 3-10.
The description field will be a text area control. Creating this control is very similar to creating a text field. The only differences are that you pass the createElement() method textarea rather than text and that it has a few different attributes (see Listing 3-11).
Example 3.11. Creating the Description Text Area in application/forms/BugReportForm.php
$description = $this->createElement('textarea', 'description'),
$description->setLabel('Issue description:'),
$description->setRequired(TRUE);
$description->setAttrib('cols',50);
$description->setAttrib('rows',4);
$this->addElement($description);
The priority field will be a select control. Select controls require one more step to create as opposed to text and text area controls; you must add the options that the user can select. There are two different ways to do this. You can add each option separately, using the addMultiOption() method. Alternatively, you can add an array of options using the addMultiOptions() method, where the key is the value of the option and the value is the label. Use the addMultiOptions() method for the priority field, as shown in Listing 3-12.
Example 3.12. Creating the Priority Select Control in application/forms/BugReportForm.php
$priority = $this->createElement('select', 'priority'),
$priority->setLabel('Issue priority:'),
$priority->setRequired(TRUE);
$priority->addMultiOptions(array(
    'low'    => 'Low',
    'med'    => 'Medium',
    'high'   => 'High'
));
$this->addElement($priority);
The status field is a select control as well. For the sake of the example, use the addMultiOption() method for this control, as shown in Listing 3-13.
Example 3.13. Creating the Status Select Control in application/forms/BugReportForm.php
$status = $this->createElement('select', 'status'),
$status->setLabel('Current status:'),
$status->setRequired(TRUE);
$status->addMultiOption('new', 'New'),
$status->addMultiOption('in_progress', 'In Progress'),
$status->addMultiOption('resolved', 'Resolved'),
$this->addElement($status);Finally, you need to add a submit button to the form. The submit button is one of the simplest controls, so I usually add it directly to the form instead of creating an instance, configuring it, and then adding it, as shown in Listing 3-14.
Now that you have created the bug report form, you are ready to add it to the bug submission page.
The first thing you need to do is update the Bootstrap class to configure the autoloader, adding the Form_ namespace so it can load the form classes for you. The default Zend_Loader will load all the library classes that follow the Zend library naming convention, but there are instances where the class name does not necessarily map to the directory. Zend_Loader_Autoloader_Resource enables you to specify additional namespaces (such as the Form_ namespace) and where they map.
To get started, add a new init method to the Bootstrap class named _initAutoload(). Zend_Loader_Autoloader implements the Singleton pattern, so you fetch the current instance rather than creating a new one. Pass the autoloader to the Bootstrap class, then create a new Zend_Loader_Autoloader_Resource for the Form_ namespace, as shown in Listing 3-15.
Example 3.15. Bootstrapping the Autoloader in application/Bootstrap.php
protected function _initAutoload()
{
    // Add autoloader empty namespace
    $autoLoader = Zend_Loader_Autoloader::getInstance();
    $resourceLoader = new Zend_Loader_Autoloader_Resource(array(
        'basePath'      => APPLICATION_PATH,
        'namespace'     => '',
        'resourceTypes' => array(
            'form' => array(
                'path'      => 'forms/',
                'namespace' => 'Form_',
            )
        ),
    ));
    // Return it so that it can be stored by the bootstrap
    return $autoLoader;
}
The next step is to create an instance of the form in the BugController submitAction() method. Then you need to configure it by setting the method and action. Once this is done, you pass the form to the view to render, as shown in Listing 3-16.
Example 3.16. Creating an Instance of the Bug Report Form in application/controllers/BugController.php
public function submitAction()
{
    $frmBugReport = new Form_BugReport();
    $frmBugReport->setAction('/bug/submit'),
    $frmBugReport->setMethod('post'),
    $this->view->form = $frmBugReport;
}
Next open the application/views/scripts/bug/submit.phtml view script. You passed the complete form object to the view instance in the submitAction() method of the BugController. Now update the view script to render the form, as shown in Listing 3-17.
Example 3.17. The Updated Submit Bug Page That Renders the Submission Form in application/views/scripts/bug/submit.phtml
<h2>Submit a bug report</h2>
<p>To submit a new bug report please fill out this form completely:</p>

<?php
echo $this->form->render();
// echo $this->form; does the same thing
?>
Now if you point your point your browser to http://localhost/bug/submit, you should see the completed form in its raw form (see Figure 3-1).

Now that your form is created and rendering, you are ready to process it. When you added the form to the controller, you set the form action to the submit action of the bug controller.
You now need to update this controller to evaluate whether the request is a postback and process the form if it is. Zend_Controller_Request_Http, which is the default request object, has a number of convenience methods for determining the request method. In this case, since the form method is POST, you will use the isPost() method to see whether the form is being posted back.
If the form is being posted back, you use the Zend_Form isValid() method, passing it the $_POST array. If it is valid, then you will get the validated and filtered values from the form and simply print them out for now. In the next chapter, you will set up the site's database and then update this controller action to save the bug report in a table, as shown in Listing 3-18.
Example 3.18. The Updated Aubmit Action in application/controllers/BugController.php
public function submitAction ()
{
    $bugReportForm = new Form_BugReportForm();
    $bugReportForm->setAction('/bug/submit'),
    $bugReportForm->setMethod('post'),
    if ($this->getRequest()->isPost()) {
        if ($bugReportForm->isValid($_POST)) {
            // just dump the data for now
            $data = $bugReportForm->getValues();
            // process the data
        }
    }
    $this->view->form = $bugReportForm;
}
Now when you submit the bug report form, one of two things will happen:
The default browser format for an unstyled Zend_Form is readable, but it leaves room for improvement. A few things that you will likely notice are the following:
There is no space between the form rows.
There is no indication that a form element is required.
If an element fails validation, the errors are rendered as an unordered list, but they do not stand out.
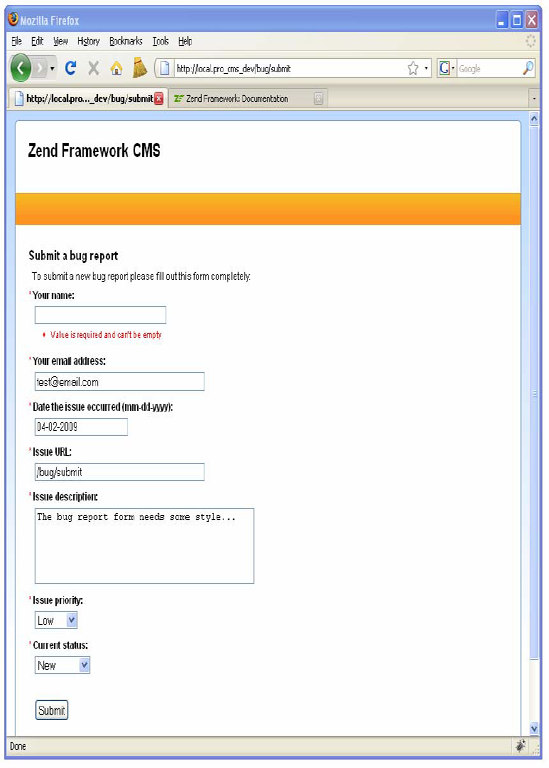
These issues are actually by design; the framework's philosophy is to render usable markup and pass the design control to the developer. To get started styling the form, intentionally leave the name field blank. Submit the form, and inspect the name field (see Figure 3-2).

Now inspect the markup that has been generated (see Listing 3-19).
Example 3.19. The Name Element's Markup
<dt>
    <label for="author" class="required">Your name:</label>
</dt>
<dd>
    <input name="author" id="author" value="" size="30" type="text" />
    <ul class="errors">
        <li>Value is required and can't be empty</li>
    </ul>
</dd>
You will note that several classes have been added to the markup that will make it easier to make your required fields and errors stand out on the page. The default decorator adds the class required to the label of required form controls. Then the errors are rendered in an unordered list, which has the class of errors.
To get started styling the form, create a new CSS file in public/skins/blues/css named form.css.
The first thing you need to work on is the general layout of the form. Add padding to the <dt> and <dd> elements to separate the form rows. Then make the label bold and the text 12 pixels.
Next you need to work on distinguishing the required fields. You can do this in many ways, but a red asterisk is a common mark. You can prepend this to all the required labels using the CSS pseudo-selector before. Then add padding to the errors <ul>, and make the items red so they stand out, as shown in Listing 3-20.
Example 3.20. The Form Styles in public/skins/blues/css/form.css
@CHARSET "ISO-8859-1";

dt {
    padding: 0 0 5px 0;
}

dd {
    padding: 0 0 10px 10px;
}

dt label {
    font-weight: bold;
    font-size: 12px;
}
dt label.required:before {
content: "* ";
color: #ff0000;
}
ul.errors {
padding: 5px 0 5px 25px;
color: #ff0000;
}Now that your form styles are set up, you need to include this CSS file in your skin. Open public/skins/blues/skin.xml, and add the form.css style sheet to the <stylesheet> section (see Listing 3-21).
Example 3.21. Adding the form.css Style Sheet to public/skins/blues/skin.xml
<stylesheet>form.css</stylesheet>
Your form should start to look better and be more usable now. The controls are more clearly separated, the required fields are marked with a red asterisk, and the errors are red to stand out more (see Figure 3-3).