
The Zend Framework development team anticipated that programmers would need to build modular applications, creating the conventional modular directory structure. This structure enables you to create modules, which are essentially separate MVC applications, that you can use with different front controllers. In this chapter, you'll learn about working with them by creating a contact module.
The contact module will enable your site managers to publish and manage contact forms. This will be a very simple module but one that will be useful in many projects.
Note
At the time of this writing, the Zend Tool Project has only basic support for modules. I use it to create the module's directory structure and then manually create the controllers and view scripts.
To get started, create the contact module using the Zend Tool Project's create module command, as shown in Listing 10-1. This will create the module directory and the required subdirectories.
Now you need to create the contact controllers and views manually. First create the index controller. Add a new file to the application/modules/contact/controllers directory named IndexController.php. Open this file, and add the controller class. Note that the class names of the module controllers are prepended with the module namespace, so in this case the controller class name should be Contact_IndexController. Add an empty indexAction() method to this controller, as shown in Listing 10-2.
Example 10.2. The Contact Module's IndexController in application/modules/contact/controllers/IndexController.php
<?php
class Contact_IndexController extends Zend_Controller_Action
{
    public function indexAction()
    {

    }
}
Next you need to add a directory to the module's view directory for the index controller's views named index. Then add a new file to this directory named index.phtml. Add a headline to the page for now, as shown in Listing 10-3. You will add the actual contact form to this page shortly.
Now that the contact module is created, you need to configure your application to load it. This requires two things; you need to update the main application configuration file and create a bootstrap file for the contact module.
To get started, open the configuration file (application/configs/application.ini). First set the front controller's module directory to modules. Once this is set, the front controller will automatically load each of the modules that are in this directory. Next set the module resource to an empty array. Then you need to override the setting you added earlier, where you set the default controller to page. Set this back to index. Listing 10-4 shows the three lines you need to add.
Example 10.4. The Updates You Need to Make to application/configs/application.ini
resources.frontController.moduleDirectory = APPLICATION_PATH "/modules"
resources.modules[] = ""
contact.resources.frontController.defaultControllerName = "index"
The last step of configuring your module is to bootstrap it. If your module has a file named Bootstrap.php in its root with a class named {Module}_Bootstrap, then Zend_Application will use this file to bootstrap your module. In the contact form's case, there is not a lot of custom configuration required; it needs only to reset the defaultControllerName. It will do this automatically since you set it in the configuration file.
Create a new file in the root of your contact module named Bootstrap.php. Add a class to this file named Contact_Bootstrap, which should extend Zend_Application_Module_Bootstrap, as shown in Listing 10-5.
Example 10.5. The Contact Module Bootstrap File in application/modules/contact/Bootstrap.php
<?php
class Contact_Bootstrap extends Zend_Application_Module_Bootstrap
{}
Once this file is in place, you should be able to point your browser to http://localhost/contact and see the index page of the contact module.
Now that the contact module is wired up, you are ready to construct the contact form. Create a new directory in the contact module named forms. Then create a new file in this directory named Contact.php. The module resources (forms and models) will be automatically loaded if you follow the module namespace convention like the controller class; the contact form class will be called Contact_Form_Contact. Add this class to the Contact.php file.
The contact form will need four fields: the person's name, their e-mail address, the subject, and the message. All of the fields are required. You will also need to validate that the e-mail address is valid. Listing 10-6 shows the completed form.
Example 10.6. The Contact Form in application/modules/contact/forms/Contact.php
<?php
class Contact_Form_Contact extends Zend_Form
{
    public function init()
    {
        // create new element
        $name = $this->createElement('text', 'name'),
        // element options
        $name->setLabel('Enter your name:'),
        $name->setRequired(TRUE);
        $name->setAttrib('size',40);
        // add the element to the form
        $this->addElement($name);

        // create new element
        $email = $this->createElement('text', 'email'),
        // element options
        $email->setLabel('Enter your email address:'),
        $email->setRequired(TRUE);
        $email->setAttrib('size',40);
        $email->addValidator('EmailAddress'),
        $email->addErrorMessage('Invalid email address!'),
        // add the element to the form
        $this->addElement($email);

        // create new element
        $subject = $this->createElement('text', 'subject'),
        // element options
        $subject->setLabel('Subject: '),
        $subject->setRequired(TRUE);
        $subject->setAttrib('size',60);
        // add the element to the form
$this->addElement($subject);
// create new element
$message = $this->createElement('textarea', 'message'),
// element options
$message->setLabel('Message:'),
$message->setRequired(TRUE);
$message->setAttrib('cols',50);
$message->setAttrib('rows',12);
// add the element to the form
$this->addElement($message);
$submit = $this->addElement('submit', 'submit',
array('label' => 'Send Message'));
}
}Now you need to load the form in the contact module's index controller. Open the file, and update the indexAction() method; first create an instance of the form, then set the action and method, and finally pass it to the view to render, as shown in Listing 10-7.
Example 10.7. The Updated indexAction() in application/modules/contact/controllers/IndexController.php
public function indexAction()
{
    $frmContact = new Contact_Form_Contact();
    $frmContact->setAction('/contact'),
    $frmContact->setMethod('post'),
    $this->view->form = $frmContact;
}
Then you simply need to update the view script to render the form, as shown in Listing 1087.
Example 10.8. Rendering the Contact Form in application/modules/contact/views/scripts/index/index.phtml
<h2>Contact Us</h2>
<p>To send us a message please complete the form below and click Send Message.</p>
<?php echo $this->form; ?>
Once you have updated the view script, point your browser to http://localhost/contact, and you should see the contact form in Figure 10-1.

Now that the form is completed, you need to update the indexAction() method of the contact index controller again to process the form submission. This process will be very similar to the other forms that you have worked with. First you need to check and see whether the request method is POST, which means that the form has been posted back. Next you need to load the form with the POST data and confirm that it is valid (as shown in Listing 10-9). If it is valid, then you can send the message.
Example 10.9. The Updated Index Action in application/modules/contact/controllers/IndexController.php
public function indexAction()
{
    $frmContact = new Contact_Form_Contact();
    if($this->_request->isPost() && $frmContact->isValid($_POST)) {
        //send the message
    }
    $frmContact->setAction('/contact'),
    $frmContact->setMethod('post'),
    $this->view->form = $frmContact;
}
Note that I just added a placeholder where you are going to send the message. I will go over that process next.
The Zend_Mail component gives you the capability to send e-mail messages from your project. You can send either plain-text messages or rich HTML messages. You have a number of options regarding the transport method you use. I generally use the default sendmail client, but you can use SMTP if you want to route your mail through a different server.
In this example, I'll show how to send an HTML message through the sendmail client, but feel free to modify this if necessary.
The first thing you need to do is format the message as HTML. The easiest way to do this is to create a template that you pass the data to. The template is just a standard Zend_View script, with placeholders for the sender's contact information and the message. Create a new directory in application/modules/contact/views/scripts named templates, and then add a file to this named default.phtml. Add the placeholders to this script, as shown in Listing 10-10.
Example 10.10. The E-mail Template in application/modules/contact/views/scripts/templates/default.phtml
<h1>Contact Form Submission</h1>
<p>You received a new contact form submission from:</p>
<ul>
    <li>Name: <?php echo $this->name; ?></li>
    <li>Email Address: <?php echo $this->email; ?></li>
</ul>
<h2>Message</h2>
<h3><?php echo $this->subject; ?></h3>
<p><?php echo $this->message; ?></p>Now that you have the pieces in place, you are ready to build and send the message.
Note
This will throw an error if you do not have mail configured on your testing server. You can alternatively use SMTP transport rather than defaulting to the local server to test this mail functionality. I will explain how to do this later in the chapter.
The first thing you need to do is load the data from the form. Although this is not technically necessary, I find that fetching these values and setting local variables makes the code easier to read.
The next step is loading the HTML template. You do this with the Zend_View Partial helper, which you pass the array of form data to.
Once the message is built, you are ready to send it. The PHP mail() function is very simple but can get complicated when you need to send multipart messages (such as this one), add attachments, and so on. The Zend_Mail component builds onto this basic functionality, providing rich e-mail functionality without manual configuration.
To get started with Zend_Mail, you need to create an instance of the class. Then you set the message subject and to and from fields.
Now you set the body of the message. When you send an HTML email, it is very important to also send a text-only version of the message; there are still some mail clients that don't support HTML email. Zend_Mail includes two methods for setting the body of the message: setBodyText(), which sets the text-only version, and setBodyHtml(), which sets the HTML version. Zend_Mail automatically sets the MIME content type to test/html and multipart/alternative if you use both methods on one message.
Once the message is finished, you send it using the send() method. Finally, you need to pass a flag to the view to let it know whether the message was sent or not, as shown in Listing 10-11.
Example 10.11. The Completed Contact Controller Index Action in the Updated Index Action in application/modules/contact/controllers/IndexController.php
public function indexAction()
{
    $frmContact = new Contact_Form_Contact();
    if($this->_request->isPost() && $frmContact->isValid($_POST)) {
        // get the posted data
        $sender = $frmContact->getValue('name'),
        $email = $frmContact->getValue('email'),
        $subject = $frmContact->getValue('subject'),
        $message = $frmContact->getValue('message'),

        // load the template
        $htmlMessage = $this->view->partial(
            'templates/default.phtml',
            $frmContact->getValues()
        );
$mail = new Zend_Mail();
// set the subject
$mail->setSubject($subject);
// set the message's from address to the person who submitted the form
$mail->setFrom($email, $sender);
// for the sake of this example you can hardcode the recipient
$mail->addTo('[email protected]', 'webmaster'),
// it is important to provide a text only version in
// addition to the html message
$mail->setBodyHtml($htmlMessage);
$mail->setBodyText($message);
//send the message
$result = $mail->send();
// inform the view with the status
$this->view->messageProcessed = true;
if($result) {
$this->view->sendError = false;
} else {
$this->view->sendError = true;
}
}
$frmContact->setAction('/contact'),
$frmContact->setMethod('post'),
$this->view->form = $frmContact;
}Now that you have processed the form, you need to let the user know whether the message was sent or whether issues were encountered. In Listing 10-11, you set flags in the view to notify the script of the status. Next you need to update the view script to display the confirmation or error message (Listing 10-12).
Example 10.12. The Updated Contact Form in application/modules/contact/views/scripts/index/index.phtml
<h2>Contact Us</h2>
<?php if($this->messageProcessed && $this->sendError) { ?>
    <p>Sorry there was an error sending your message. Please contact
 [email protected] for more help.</p>
<?php } elseif ($this->messageProcessed &! $this->sendError) {?>
    <p>Thank you for contacting us. We will be in touch soon.</p>
<?php } else { ?>
    <p>To send us a message please complete the form below
        and click Send Message.</p>
    <?php echo $this->form;
}
[email protected] for more help.</p>
<?php } elseif ($this->messageProcessed &! $this->sendError) {?>
<p>Thank you for contacting us. We will be in touch soon.</p>
<?php } else { ?>
<p>To send us a message please complete the form below
and click Send Message.</p>
<?php echo $this->form;
}You will almost be guaranteed to get some spam when you publish a contact form on your site. You can minimize this in a number of ways (such as asking a simple mathematical question), but CAPTCHA (Completely Automated Public Turing test to tell Computers and Humans Apart) is the most effective at the time of this writing. It authenticates that a real person is submitting the form rather than an automated process. It does this by requiring the user to perform some challenge task, such as typing the letters of a graphical piece of text, which is difficult (but not impossible) for an automated process to do.
Zend_Captcha includes a number of back-end adapters that can generate CAPTCHA for your program:
Zend_Captcha_Word: This is the main base adapter.Zend_Captcha_Dumb: This is a simple adapter that produces a string that you need to type backward.Zend_Captcha_Figlet: This adapter produces aFigletthat the user must type exactly.Zend_Captcha_Image: This adapter converts a string to an image with a skewed font.Zend_Captcha_Recaptcha: This adapter uses the Recaptcha service to generate theCAPTCHA.
I have used several of the adapters, but I really like the Recaptcha service. It is a web project that is attempting to digitize literature that was written prior to the digital revolution. It does this by photographically scanning the works and then transforming it into text using "optical character recognition" software. The issue is that this software is not perfect, so the Recaptcha service sends the text that it cannot translate to humans to decipher. You get a simple and effective CAPTCHA service while helping this project.
To get started using the Recaptcha service, you need to sign up on its site (http://recaptcha.net) for an API key. Once you have this key, integrating the service with your form is a trivial task. Zend_Form has a CAPTCHA form element that handles the rendering and validation for you. Add this element to your form, configuring it as is demonstrated in Listing 10-13.
Example 10.13. The CAPTCHA Form Control in application/modules/contact/forms/Contact.php
// configure the captcha service
$privateKey = 'your private key';
$publicKey = 'your public key';
$recaptcha = new Zend_Service_ReCaptcha($publicKey, $privateKey);

// create the captcha control
$captcha = new Zend_Form_Element_Captcha('captcha',
    array('captcha'        => 'ReCaptcha',
        'captchaOptions' => array('captcha' => 'ReCaptcha', 'service' => $recaptcha)));

// add captcha to the form
$this->addElement($captcha);
Now if you point your browser to the contact form (http://localhost/contact), you should see the Recaptcha control, as in Figure 10-2.

There are many situations where you may not want to use the default mail server. A few examples include when you are working on a development server that does not have a mail server configured and when your site has a large volume of messages that you do not want bogging down your web server. SMTP mail transport enables you to send mail through a remote server.
To configure Zend_Mail to use SMTP transport, you first have to create a new instance of Zend_Mail_Transport_Smtp, which you configure with the address to the mail server and your user credentials. Listing 10-14 demonstrates how to update the mail method in the indexAction() to use SMTP transport.
Example 10.14. Updating the Mail Method to Use SMTP Transport in the indexAction() of application/modules/contact/controllers/IndexController.php
$mail = new Zend_Mail();
// configure and create the SMTP connection
$config = array('auth' => 'login',
    'username' => 'myusername',
    'password' => 'password'),

$transport = new Zend_Mail_Transport_Smtp('mail.server.com', $config);

// set the subject
$mail->setSubject($subject);
// set the message's from address to the person who submitted the form
$mail->setFrom($email, $sender);
// for the sake of this example you can hardcode the recipient
$mail->addTo('[email protected]', 'webmaster'),
// it is important to provide a text only version in addition to the html message
$mail->setBodyHtml($htmlMessage);
$mail->setBodyText($message);
//send the message, now using SMTP transport
$result = $mail->send($transport);You may want to enable file attachments on your contact form in certain circumstances. For example, your users might need to upload a screenshot if the form is being used for technical support.
Attaching files to your contact form messages is a two-step process; first you need to upload the file from the user's desktop to the server, and then you need to attach the file to the message. A number of other things need to be done behind the scenes, such as setting the MIME type, but Zend_Mail handles that for you.
The first thing you need to do is update the contact form and indexAction() to enable the users to upload files.
Warning
The file element requires a little more configuration than many of the other elements; allowing a site visitor to upload a file onto your server is not something to take lightly!
Start by creating a new directory for the file uploads named uploads. This directory should be in the root of your project because these files should never be publicly accessible.
Then add a new file element to the contact form beneath the subject element, setting the upload destination to the upload directory you just created.
The next step is validating the upload. Note that for this example I limited uploads to image files, but you can add any file types you need to allow. Add the following validators to your file element:
Count: Ensures that only one file is uploaded
Size: Sets a reasonable limit to the file size, in this case 100KB
Extension: Ensures that only allowed file types can be uploaded
The final step is setting the enctype attribute of the form to multipart/form-data so it accepts file uploads. Listing 10-14 shows the complete element.
Example 10.15. Creating the File Upload Control in application/modules/contact/forms/Contact.php
// create new element
$attachment = $this->createElement('file', 'attachment'),
// element options
$attachment->setLabel('Attach a file'),
$attachment->setRequired(FALSE);
// specify the path to the upload folder. this should not be publicly accessible!
$attachment->setDestination(APPLICATION_PATH . '/../uploads'),
// ensure that only 1 file is uploaded
$attachment->addValidator('Count', false, 1);
// limit to 100K
$attachment->addValidator('Size', false, 102400);
// only allow images to be uploaded
$attachment->addValidator('Extension', false, 'jpg,png,gif'),
// add the element to the form
$this->addElement($attachment);
// set the enctype attribute for the form so it can upload files
$this->setAttrib('enctype', 'multipart/form-data'),
Now if you point your browser to the contact form (http://localhost/contact), you should see the file control, as in Figure 10-3.
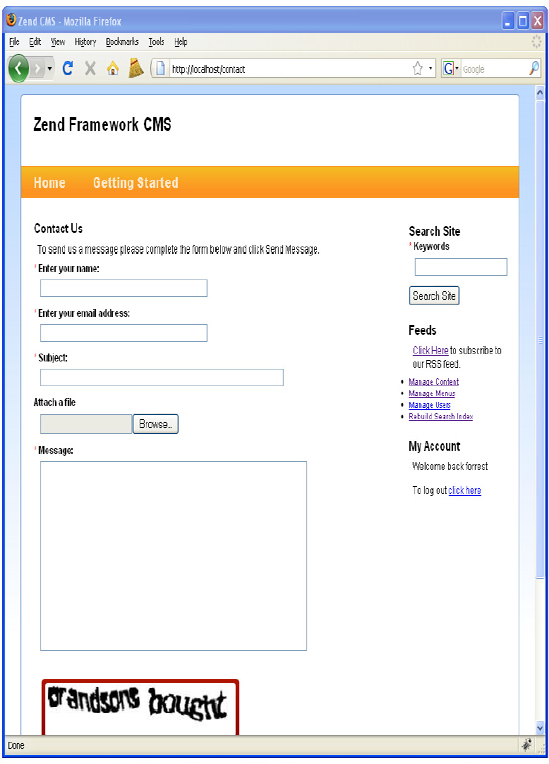
Now you need to process the uploaded file and attach it to the message. Zend_Form_Element_File handles the file upload process, so the first thing you need to do is get the attachment element. Then confirm that a file was uploaded since this is an optional field. The next step is fetching the filename from the attachment element and loading the file into a binary stream. Once you have this data, you can create a new attachment using the Zend_Mail createAttachment() method. Zend_Mail handles the rest of the process.
Note
In a production environment, you should create a method to clean the uploaded files, as they can take up a lot of hard drive space if left unchecked.
Example 10.16. Updating the Mail Method to Enable File Attachments in the indexAction() of application/modules/contact/controllers/IndexController.php
$mail = new Zend_Mail();
// configure and create the SMTP connection
$config = array('auth' => 'login',
    'username' => 'myusername',
    'password' => 'password'),

$transport = new Zend_Mail_Transport_Smtp('mail.server.com', $config);

// set the subject
$mail->setSubject($subject);
// set the message's from address to the person who submitted the form
$mail->setFrom($email, $sender);
// for the sake of this example you can hardcode the recipient
$mail->addTo('[email protected]', 'webmaster'),
// add the file attachment
$fileControl = $frmContact->getElement('attachment'),
if($fileControl->isUploaded()) {
    $attachmentName = $fileControl->getFileName();
    $fileStream = file_get_contents($attachmentName);
    // create the attachment
    $attachment = $mail->createAttachment($fileStream);
    $attachment->filename = basename($attachmentName);
}
// it is important to provide a text only version in addition to the html message
$mail->setBodyHtml($htmlMessage);
$mail->setBodyText($message);
//send the message, now using SMTP transport
$result = $mail->send($transport);In this chapter, you learned how to extend a Zend Framework project by adding modules to the project. After this brief overview, you created a new contact module, which served as a good example of a very common addition to dynamic web sites. While you built this module, you also learned how to create and send e-mail messages with Zend_Mail, including some of the more advanced features such as using SMTP transport and handling file attachments.