
DAY 1
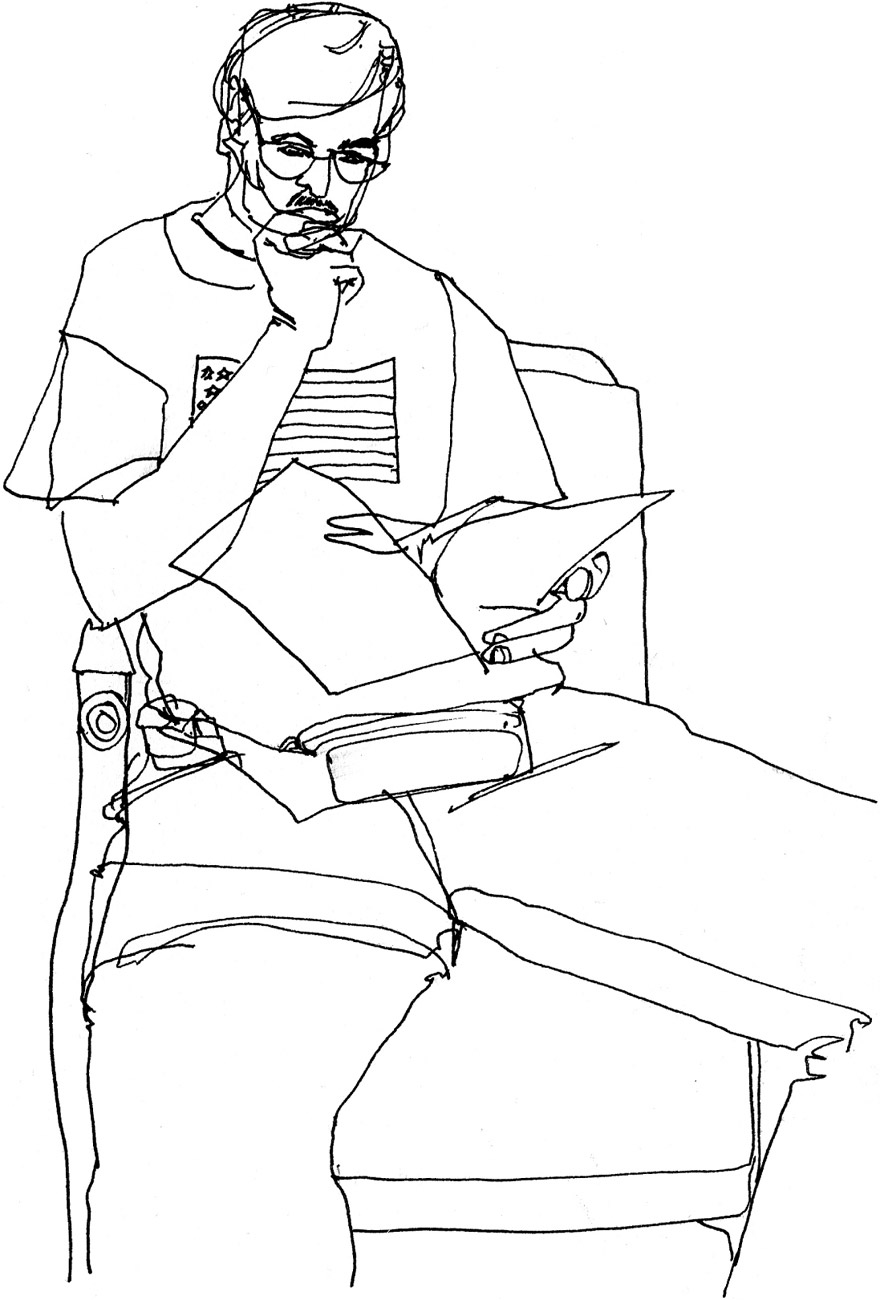
Pen line drawing of Dad reading in the afternoon
Sometimes that first step is the hardest. Studio 1482 illustrator Michele often likes to do a still-life drawing to warm up for the day. Something simple and readily available such as a composition of things in your home can be a perfect way to get out of that “what to do” confusion. Michele loves to keep freshly cut flowers in her studio, and books are her passion second only to family and friends, whom she entertains often. So why wouldn’t she like to draw them?
EXERCISE 1
Select a few items in your home and create a still life with them. Choose things that mean something to you or your family. Alternatively, you could simply sit down in front of your kitchen table, a shelf, your dresser top, or any place in your home where collectibles or things you use every day are displayed. Pick up a razor-point pen or marker and put it to paper. Draw continuously, picking the pen up from the page only occasionally. Give yourself permission to make mistakes in the drawing: Judging a drawing midstream stops creativity, and we are only at the beginning of our One Drawing a Day journey!
VARIATION
Once you have done your still life, you might like to try drawing someone in your home. Pick someone who is relatively still, as in this drawing Michele did of her father reading. Hold your pen farther back and keep your hand off the page. Don’t worry about likeness or correct proportions; simply observe the person and experience the drawing.
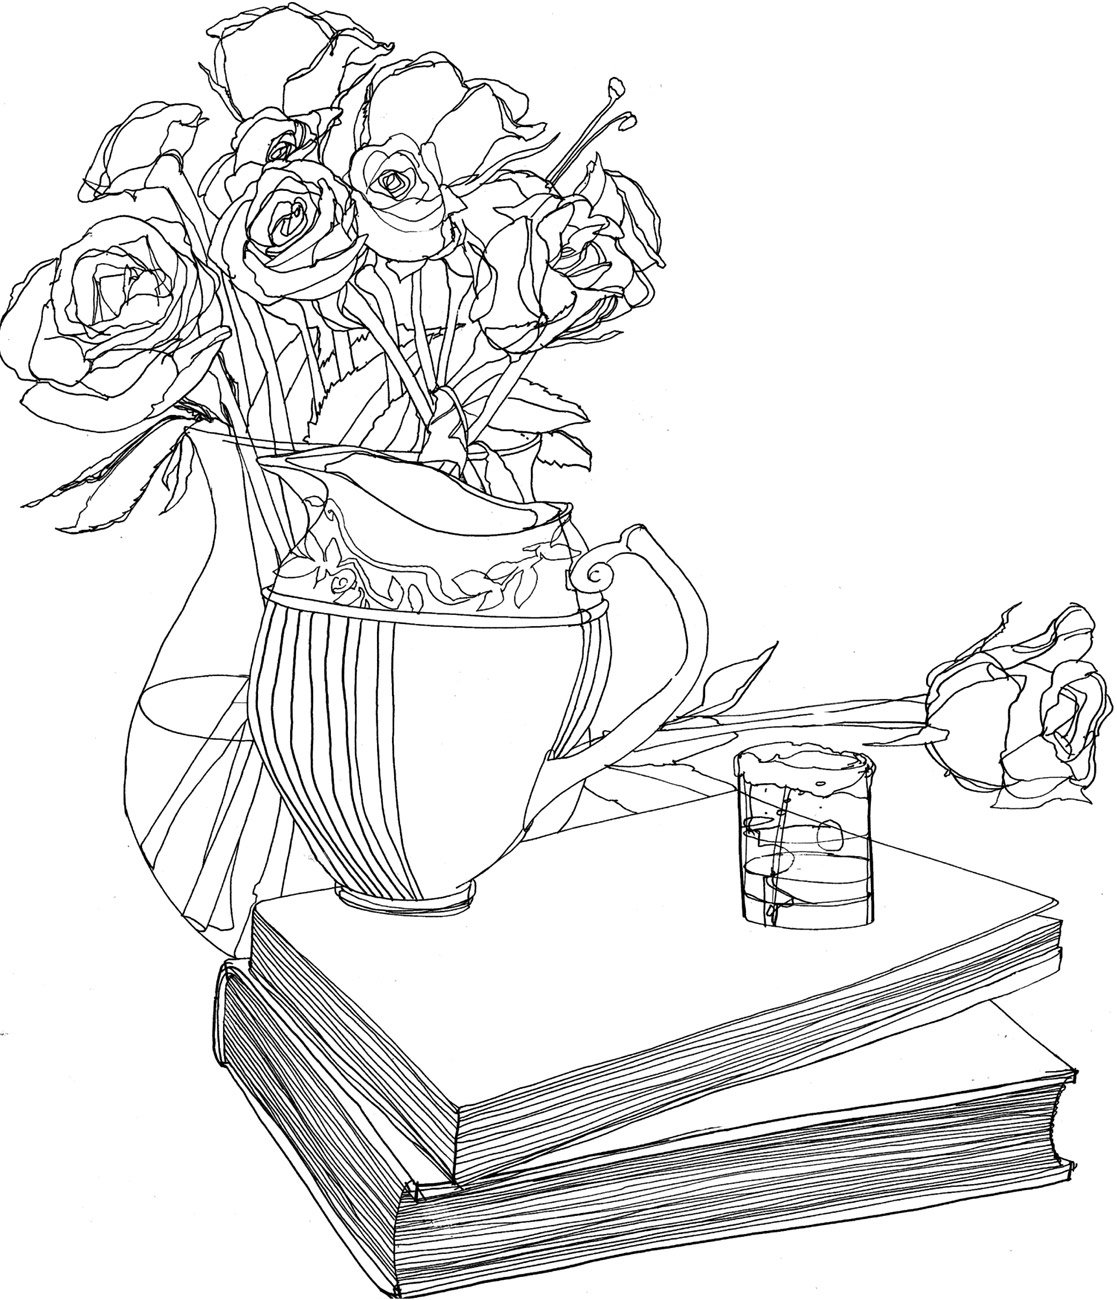
Still life of books and roses, pen
TIP
- Focus on the objects you are drawing and not on the drawing itself. Observe the shapes and the textures or patterns that appear. Let your hand move freely: Try holding the pen farther back from the tip and keeping your hand from touching the page. Although it may be tricky to keep control of the drawing this way, it will encourage spontaneity and freedom of line.
DAY 2
Butterflies, Roses, Caterpillars, and a Lady
“This drawing was inspired by, and drawn in, the English rose garden at Epcot. It was fun just to draw roses and butterflies and caterpillars and then imagine a beautiful lady sitting in the middle of the garden.”—Margaret
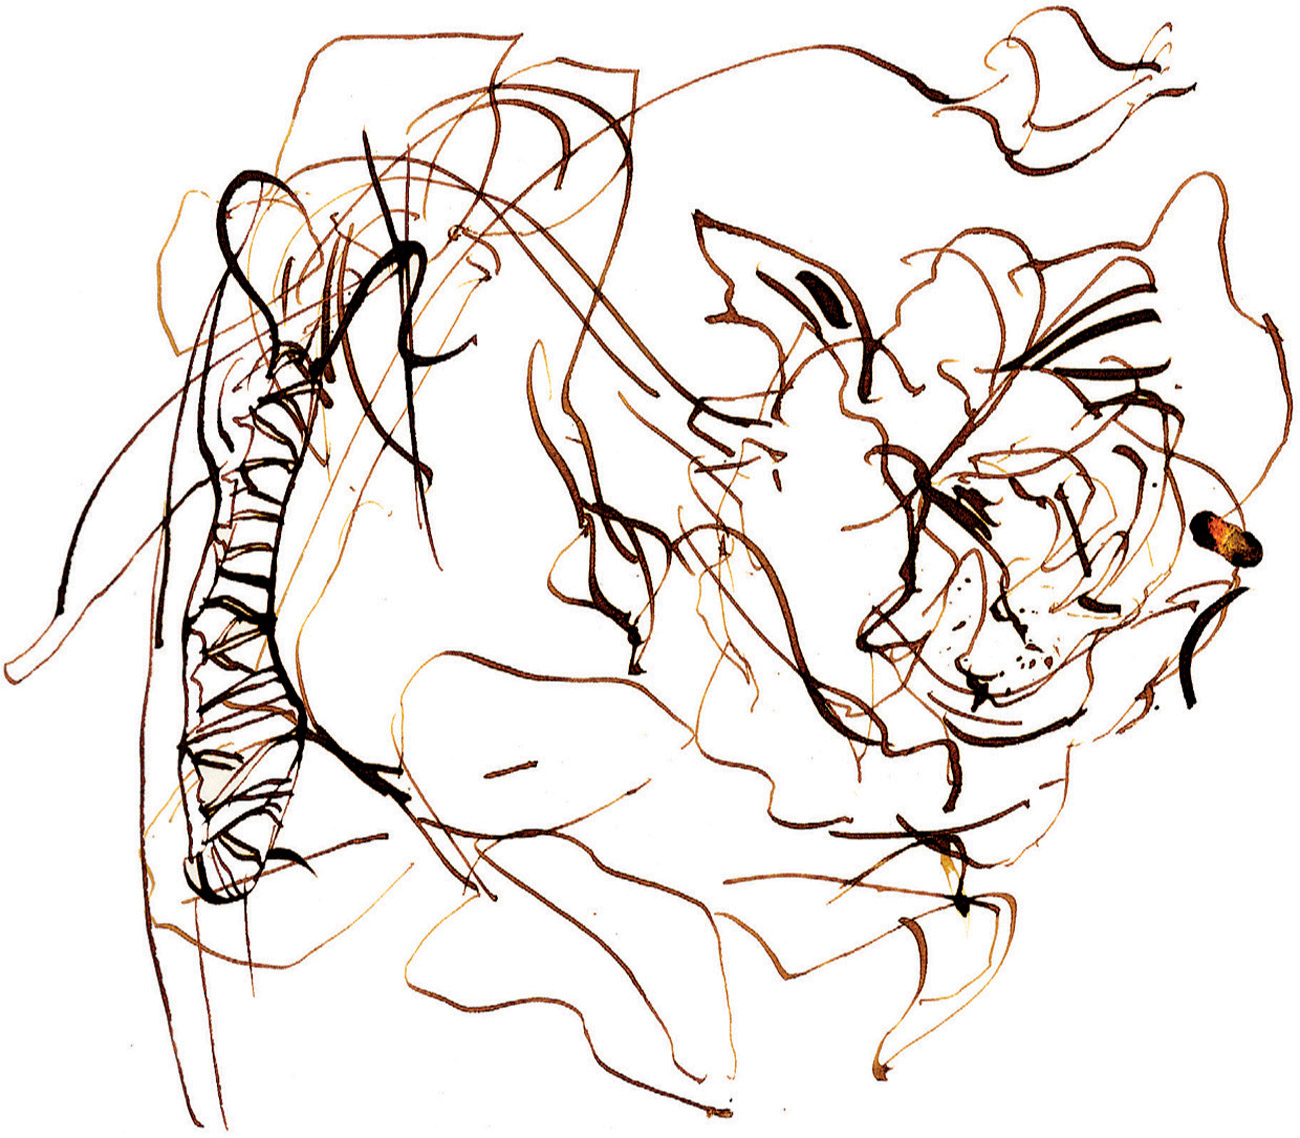
Rose, pen and ink
EXERCISE 2
Today’s exercise involves the variation of line thickness and calligraphy that you can achieve with an old-fashioned dip pen and some black or brown ink. Get a nib holder and an assortment of nibs in different sizes. Speedball makes a good range: Try the fine-line ones as well as the broader nibs meant for calligraphy. You might want to get a few holders so you can have the different nibs available to use in one drawing.
Go to a garden or set up a gardenlike still life in your home. Roses are always romantic, and if you are outside, keep your eyes open for a butterfly. Make the drawing directly with the ink on paper; don’t pencil anything in first. See what kinds of lines you can produce. Don’t worry about realism; allow the expressionistic approach of the dip pen to take over. Try different nibs until you find the ones you prefer.
TIP
- Don’t worry about your ink smearing: Mistakes help create the romantic, expressionistic feel of the drawing. Try adding a little water to your ink for a smoother line.
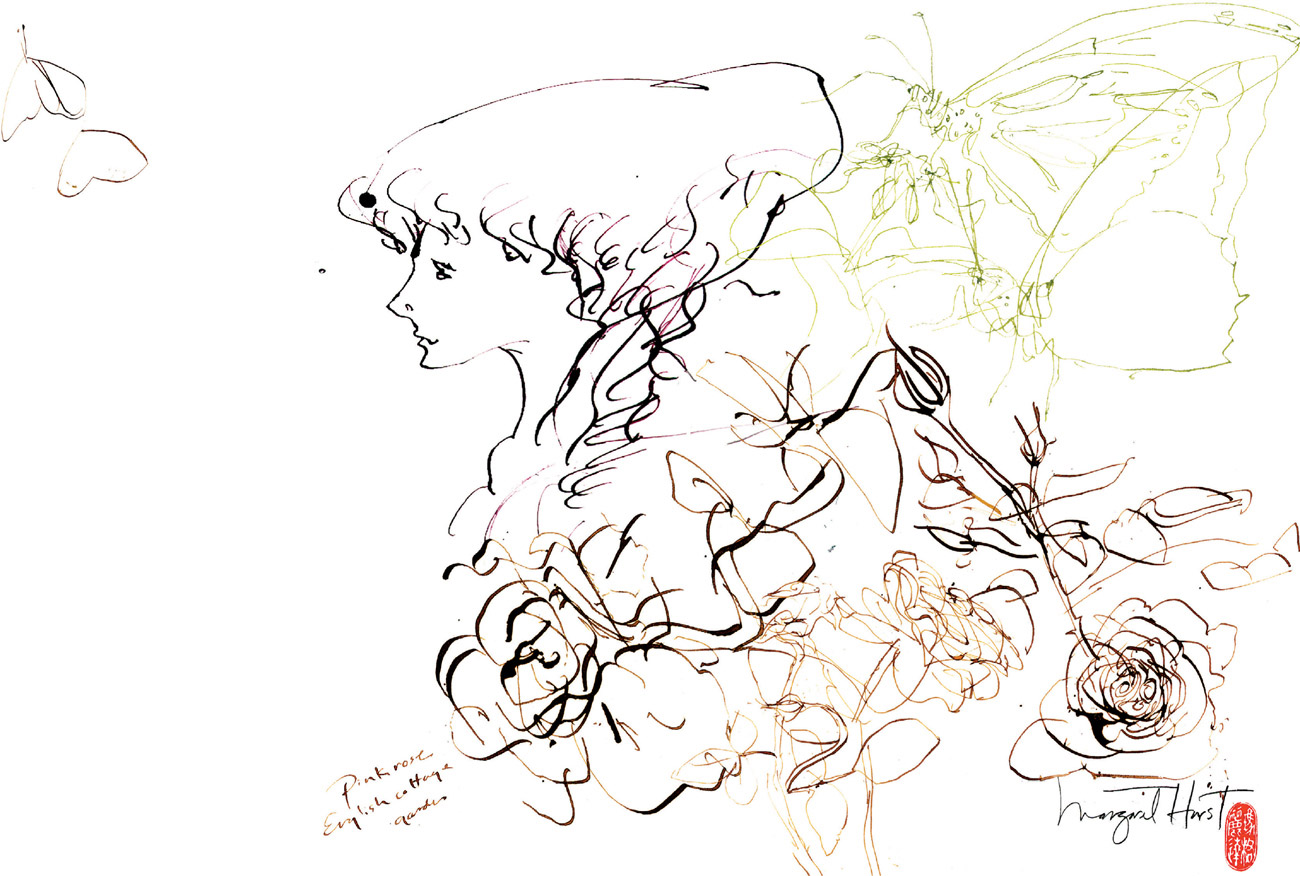
Romantic rose garden, pen and ink
DAY 3

Cellist, bamboo pen and ink
“Here is a drawing of one of the New York Repertory Orchestra cellists. The bamboo pen I used is by far the worst I’ve ever tried! It barely takes any ink and does not improve when sharpened, but I admit, it is kind of fun to take on the challenge and just kind of wrestle drawings out of it anyway. By the way, I really love this man’s face.”—Kati
EXERCISE 3
Today we are going to play with a bamboo pen—a pen made from a hard shaft of bamboo, sharpened to a point. The pen has a very distinctive graphic feel that is a good note to add to your drawing language. Using the bamboo pen and loose ink, make a drawing of someone in your immediate vicinity. Rather than draw the whole person, as we did in the first exercise variation, focus on a face, or a torso, or, as in Eddie’s example at top right, a pair of hands. “Wrestle” the pen, as Kati says, and allow all the skips and blotches to become part of the overall look. Look for someone who lends himself to this kind of graphic, like the somewhat scraggly face of the cellist at left or the extreme expressions of the other two musicians Kati has drawn here.
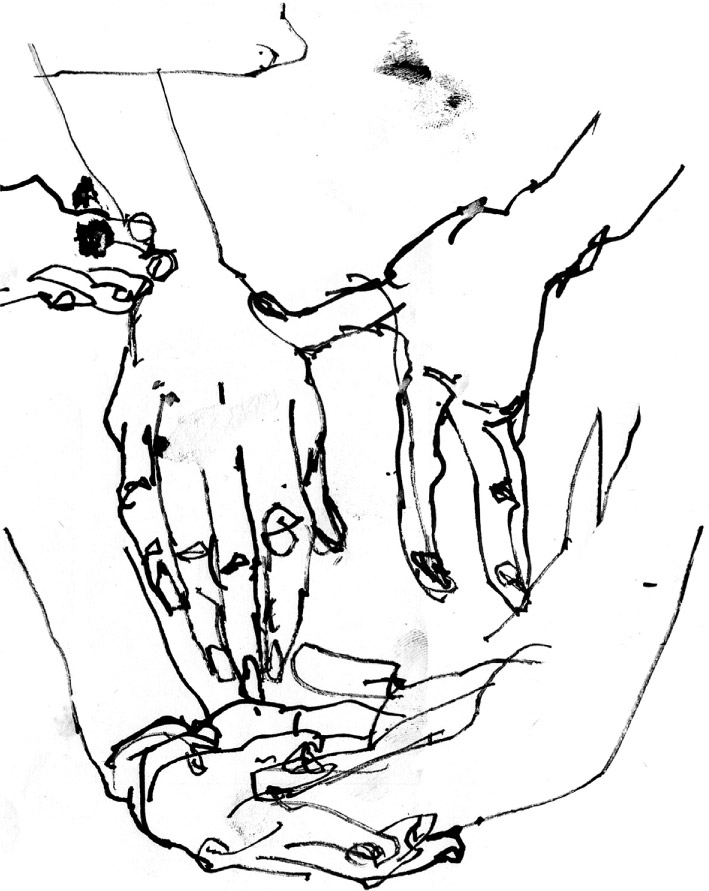
Study of hands, bamboo pen and ink
TIPS
- Soaking the bamboo pen in water for a few hours will open up the pores and allow it to hold more ink, longer.
- Sharpen the pen with a small razor blade or craft knife if you prefer a finer tip.
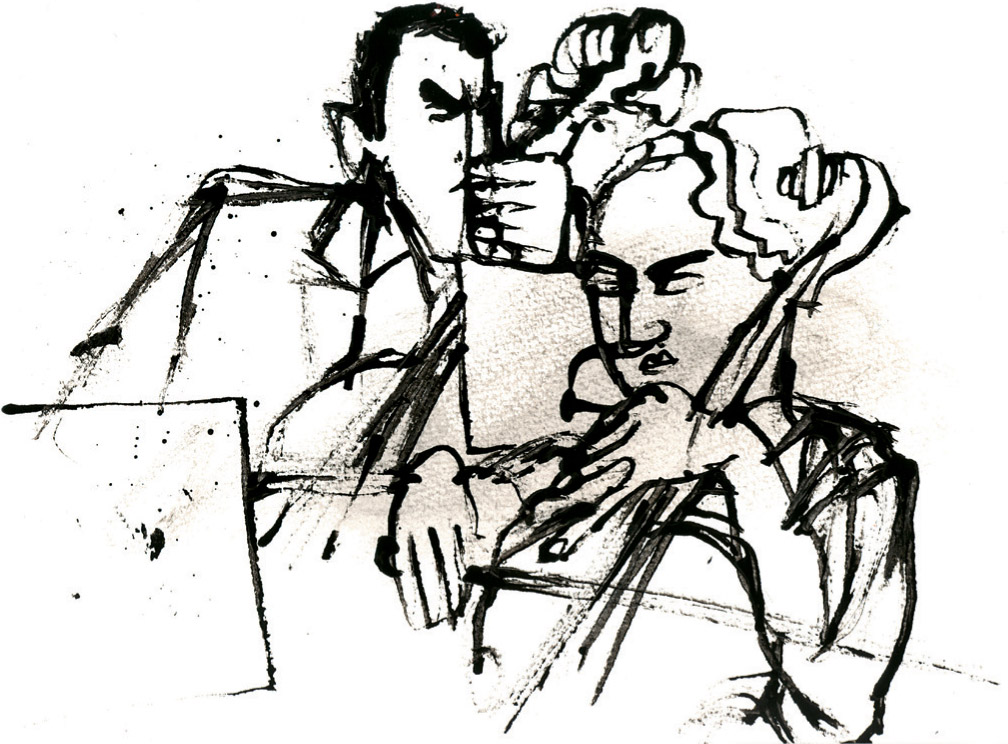
Musicians playing, bamboo pen and ink
DAY 4
“This has been some week. I recently ordered a new camera [see below] and as I awaited its arrival, my computer died. As I was waiting for deliveries of all kinds, I couldn’t really get out much, so I had to draw things around the house. I spent some time watching tennis yesterday and did a few drawings from the screen. It’s a great way to practice when you don’t have a model. This drawing at right is one that I was particularly happy with.
“Funny coincidence, both the new camera and the new computer were here on Monday evening accompanied by a new moon in the sky. I think it’s time for new beginnings.”—Greg
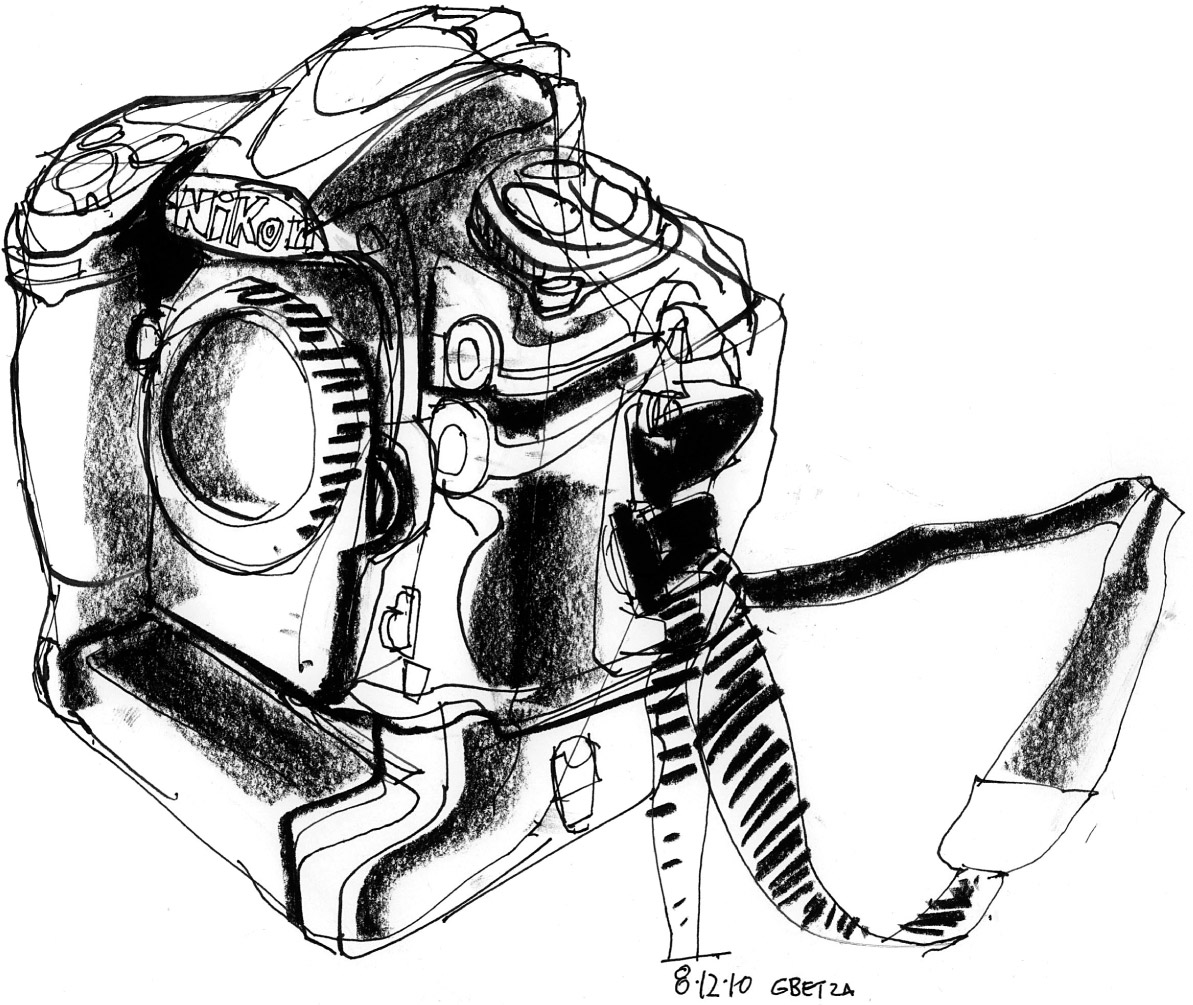
Nikon camera, pen line and charcoal
EXERCISE 4
This is an exercise for a day when the weather, or other circumstances, keeps you indoors. Using a piece of charcoal and some paper with a light texture, draw a portrait of a person from the television. If you have a DVR, you can freeze the shot to draw from, or maybe tape it to pause and draw later. If you’re feeling adventurous, try drawing the portrait in real time! You could also draw some objects around the house, similar to what we did with the still life in the first exercise. This time, use charcoal to render lights and darks and a pen line for outline and fine details.
TIP
- When drawing a portrait, look for the major shapes in the face, such as the cheekbones and jawline. This will help you get a likeness even more than focusing on the features, which can be secondary. Notice how Greg mixes soft areas of charcoal with hard line to emphasize shape and volume.

Television portrait, charcoal
DAY 5
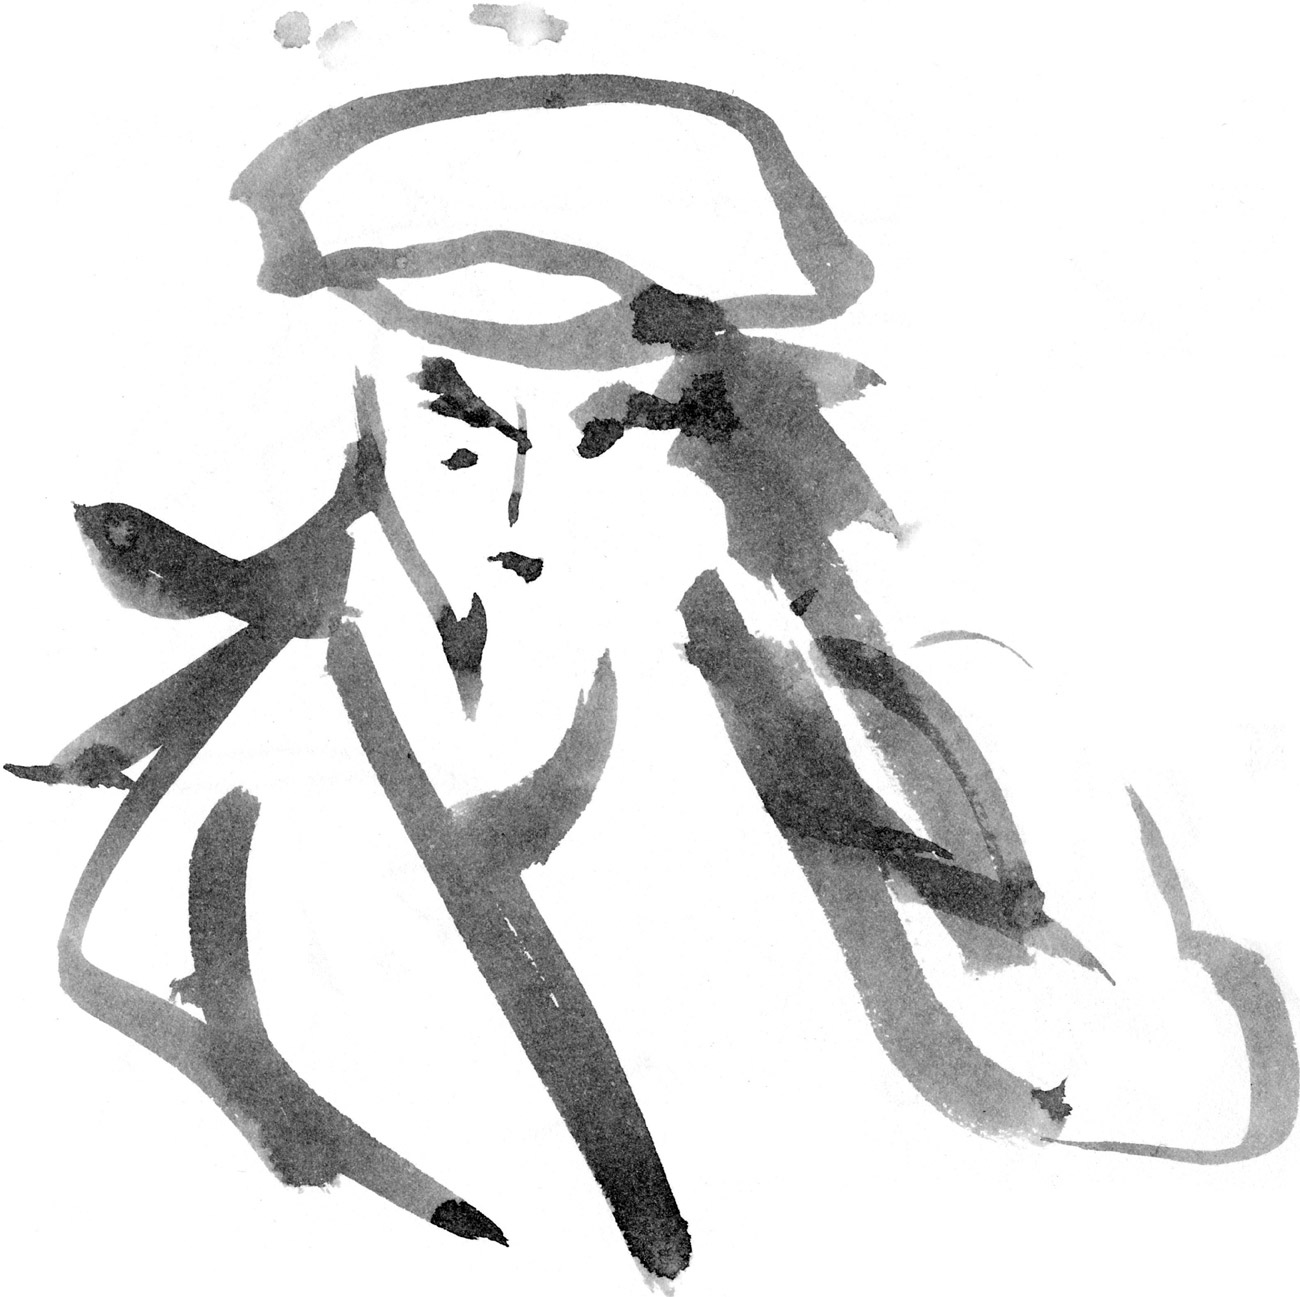
Portrait of a woman, brush with ink wash
“Saw this woman on the train and decided to draw her with a brush pen. I don’t know her; she just randomly appealed to my artistic sensibilities, so I drew her! And she definitely had a kind of romantic flair, so I felt that a brush was the best medium to capture her with. I wonder who she is and what she is doing right now?”—Dominick
EXERCISE 5
Ask someone you know to pose for you, or take a trip out on location and find a random person who appeals to you to draw. You can use a watercolor brush and a small jar of diluted ink to draw with or buy a disposable brush pen. Test the ink color to be sure it has the amount of gray you want before making the drawing. More ink equals a darker wash, and vice versa. Allow the brush lines to dry and then overlap each other to build layers, as Dominick has done. You might look at some Chinese or Japanese calligraphy to inspire you.
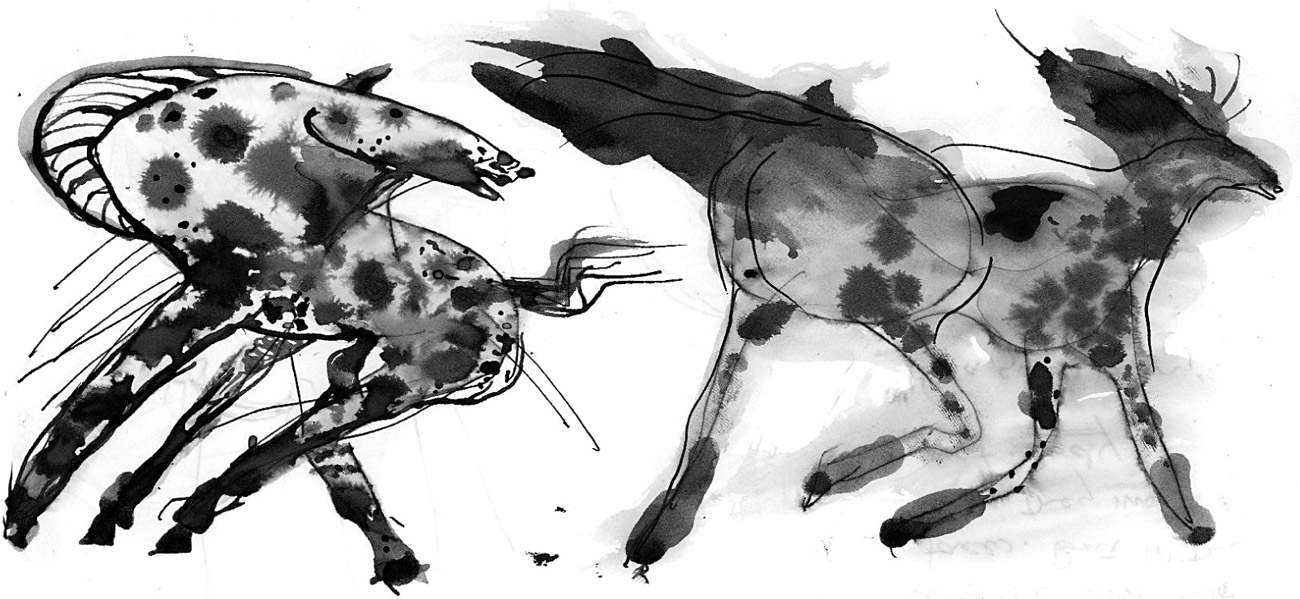
Horses, ink line and wash
VARIATION
You could also try mixing the brush with a pen line, as Despina has done in this drawing of horses above. Notice the use of wash to create different values and the layering of dark marks over the lighter ones to add the spotted texture. Try putting a shape down in wash first, and then adding the line and brushwork, to avoid a “colored-in” feeling. If there are no horses handy, a pet cat or dog will do just as well!
DAY 6
“‘You ain’t seen nothing yet!’ These are the words I heard upon entering the conservatory at Longwood Gardens in Pennsylvania. The kind old man on his scooter noticed me in my state of shock and awe after seeing the beyond-words-beautiful entrance, and he felt the need to warn me about the rest of the place. He was not kidding! This place is just soooo stunningly gorgeous.
“At right is the drawing I made from the entrance. Let me explain parts of it: The cagelike structure shaped like a Victorian perfume bottle is sort of like a humongous tea infuser. But instead of tea, it holds an array of aromatic flowers, and as you walk through it, your olfactory system is truly overwhelmed. It is to scent what the Greek amphitheatre is to sound. The columns you see in the drawing are a few of the many that are covered with creeping figs and make the space feel like a fancy jungle. Everywhere you look you are confronted with the prettiest flora ever. I dare anyone to walk in this place and not feel like they’ve ‘died and gone to heaven.’ ”—Despina
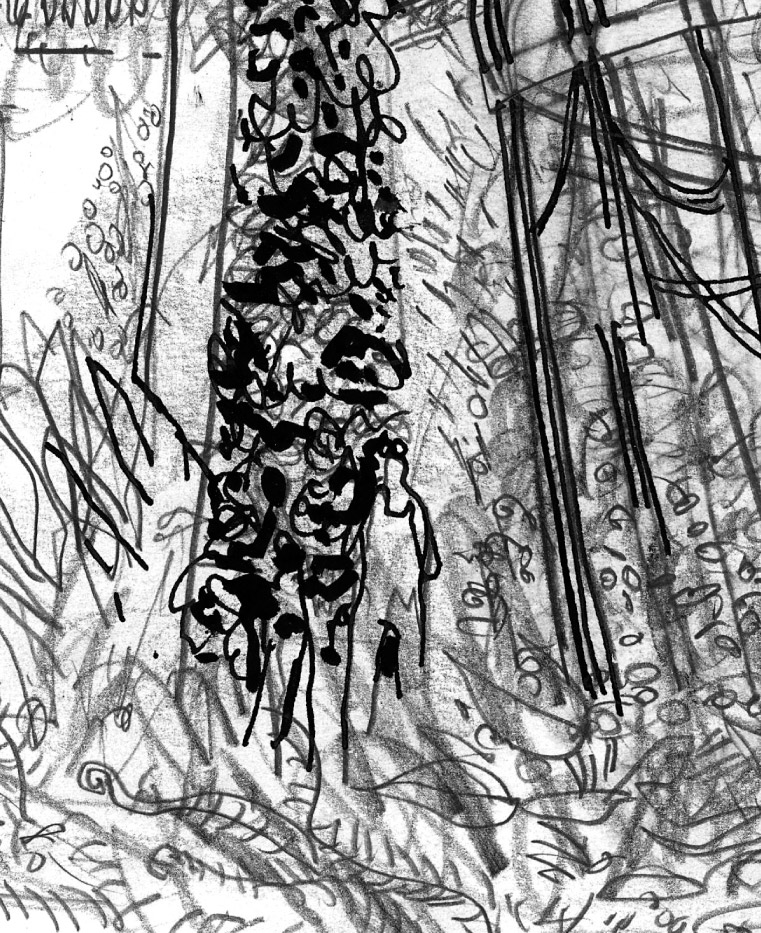
Detail, Longwood Gardens drawing
EXERCISE 6
Take a range of soft graphite pencils, from 2B to 6B, and go to a forest, field, or botanical garden near you. Draw the leaves, the flowers, the fruits, and the vegetables—draw everything! See how many different kinds of textures you can create in the drawing. Try to make different marks with your pencils—dots, scratches, scribbles—anything goes. Try the side of the pencil as well as the point for even more variation. Smudging the graphite with a stump or your finger can be fun also. Be as wild as nature is and don’t worry about realism. No lines, just markings—go for expression. Once you have the feeling that you want on the page, add some darker lines for emphasis. You really want depth in this. And most important, no erasing! Allow the so-called mistakes to become part of the work.
- Any kind of paper will do for this exercise, but a nice heavier cotton paper with a bit of tooth will give you more heft and yield richer marks. Using a smudge stick instead of your finger will give you greater control of the area you want to smear. It has a nice pointed tip, unlike your index finger! Of course, you may want to mix the two for different effects.
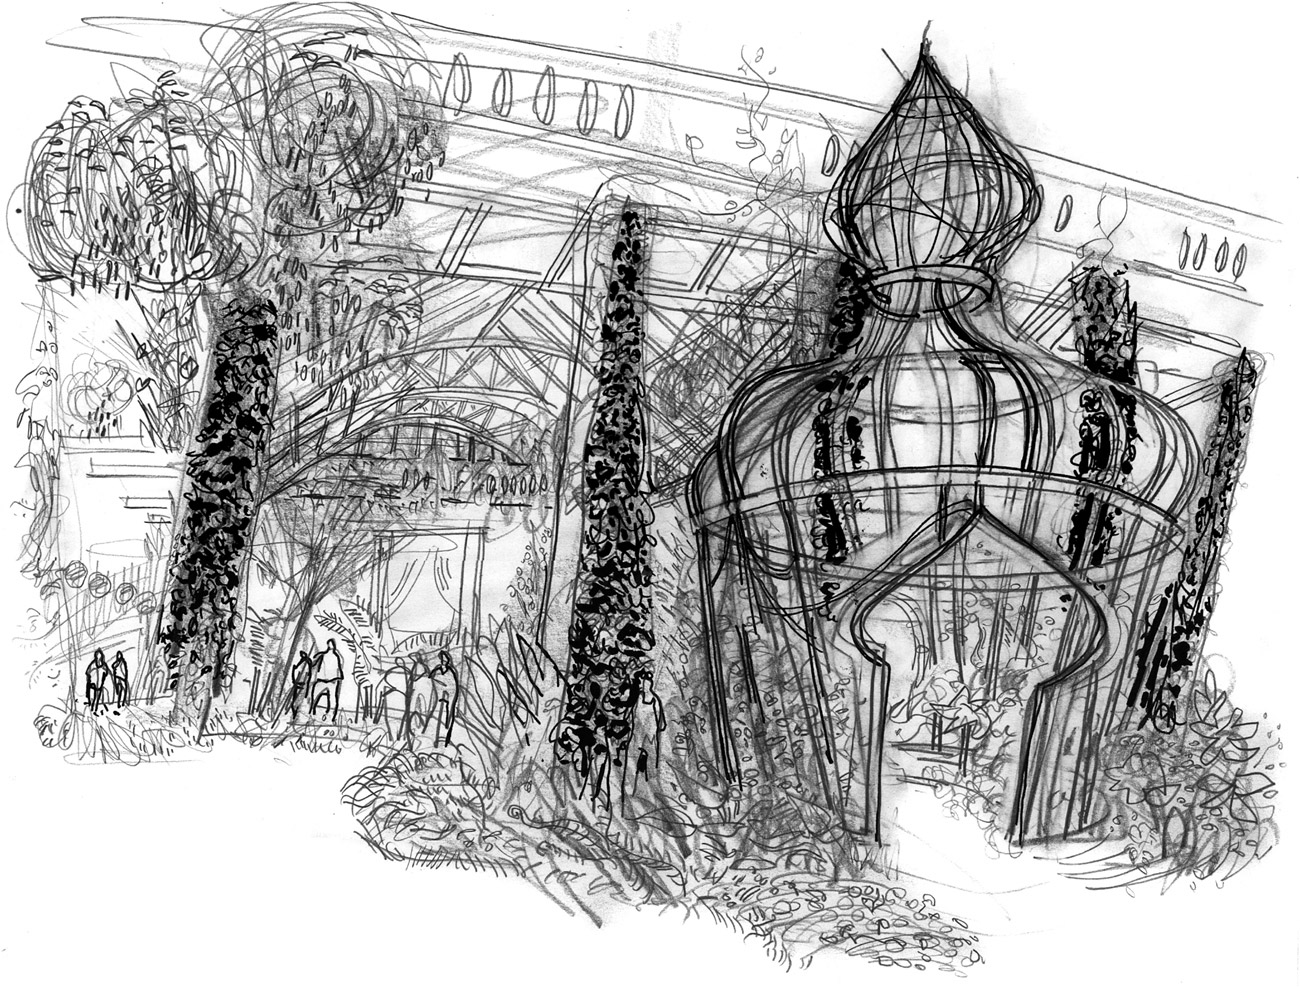
Longwood Gardens, graphite with ink on paper
DAY 7
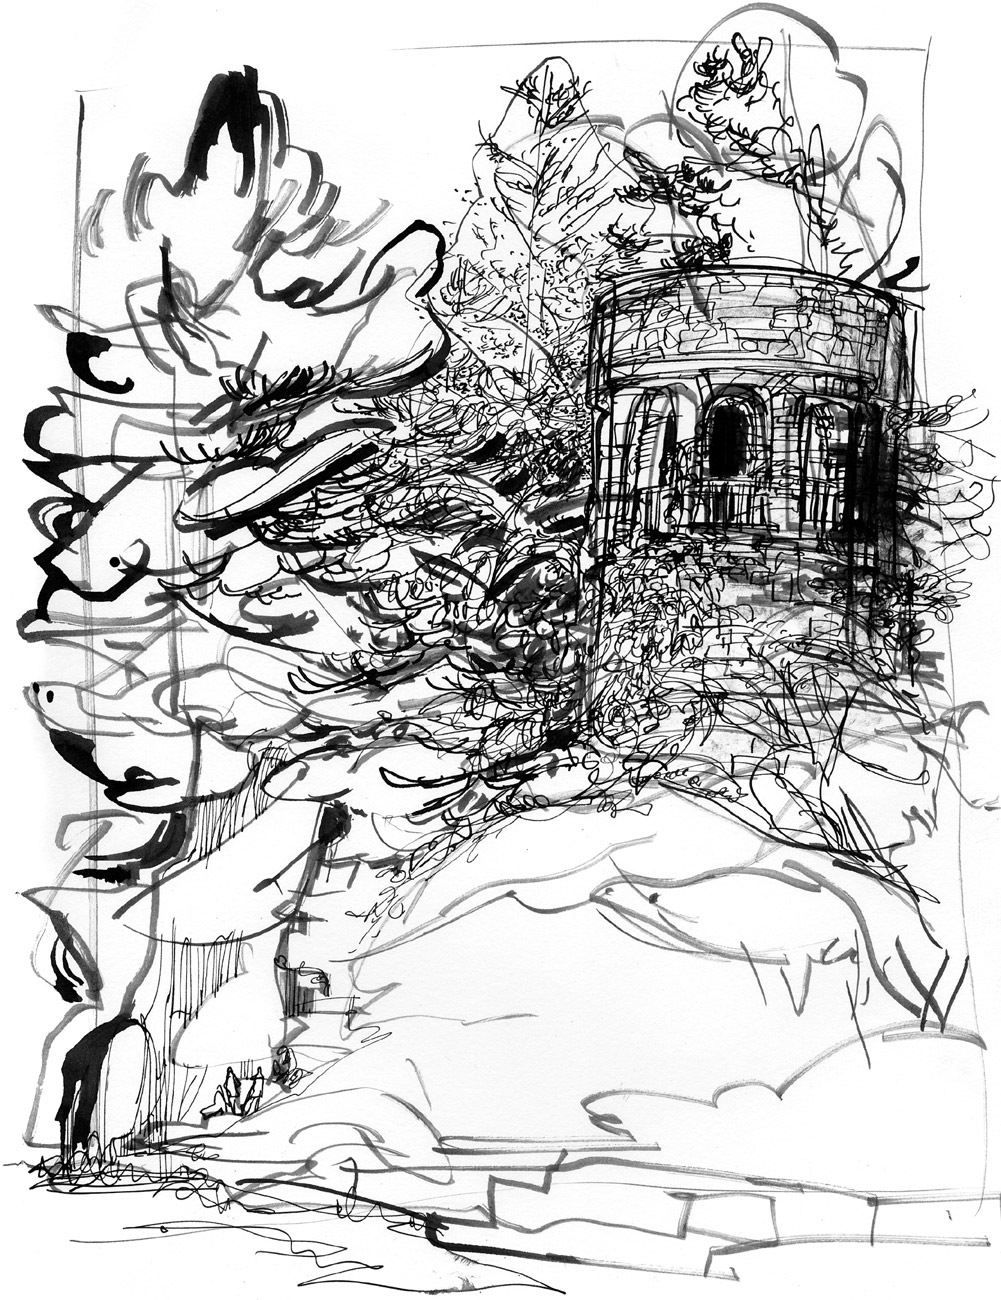
Longwood Gardens Tower, pen and ink and brush drawing, black ink, left
“I think Robin Hood really did live here. Or was it Maid Marian? Could this be where Howard Pyle did his famous illustrations? I saw this tower when visiting Longwood Gardens in Pennsylvania one weekend, and I couldn’t help but want to draw it! Relaxing in an Adirondack chair, enjoying the nice weather, and having my husband, Neil, drawing next to me didn’t hurt either.”—Veronica
EXERCISE 7
This is an exercise in line and marks that combines them all, using ink. Get a few pens of differing widths, a brush or two, some black water-soluble ink, and a small jar of water. Find an outdoor scene with plenty of texture: A forest setting would be perfect. Using the pen and brush, put down some overall shapes, and then start adding marks and texture. Dip your tools in the water to gray down some of the marks as well. Allow the textures to “thread” your drawing: This means to work them so they weave in and out of the picture. You might choose a specific mark to represent the leaves on each of the different trees. Pay attention to the way that the trees overlap each other, and let the leaf marks go behind and in front of each other to create the same dappled effect in your drawing. Don’t be afraid to put some nice black shapes in there and leave some areas in relief as well. This is a question of proportion—how much do you need to create the picture? That being said, don’t hesitate to overdraw on this one: It’s the best way to discover what works for you!
VARIATION
Once you’ve tried this with black-and-white line and marks, you might want to try the same scene in color. The drawing at below, left was done with watercolor and different-size brushes to allow for variety in marks and line width. Notice how marks in a black-and-white drawing can translate to color, and keep the threading idea going in the painting as well. Weave your colors and textures through the picture and create some solid-color shapes as well for relief. This variation is a good introduction to chapter three.
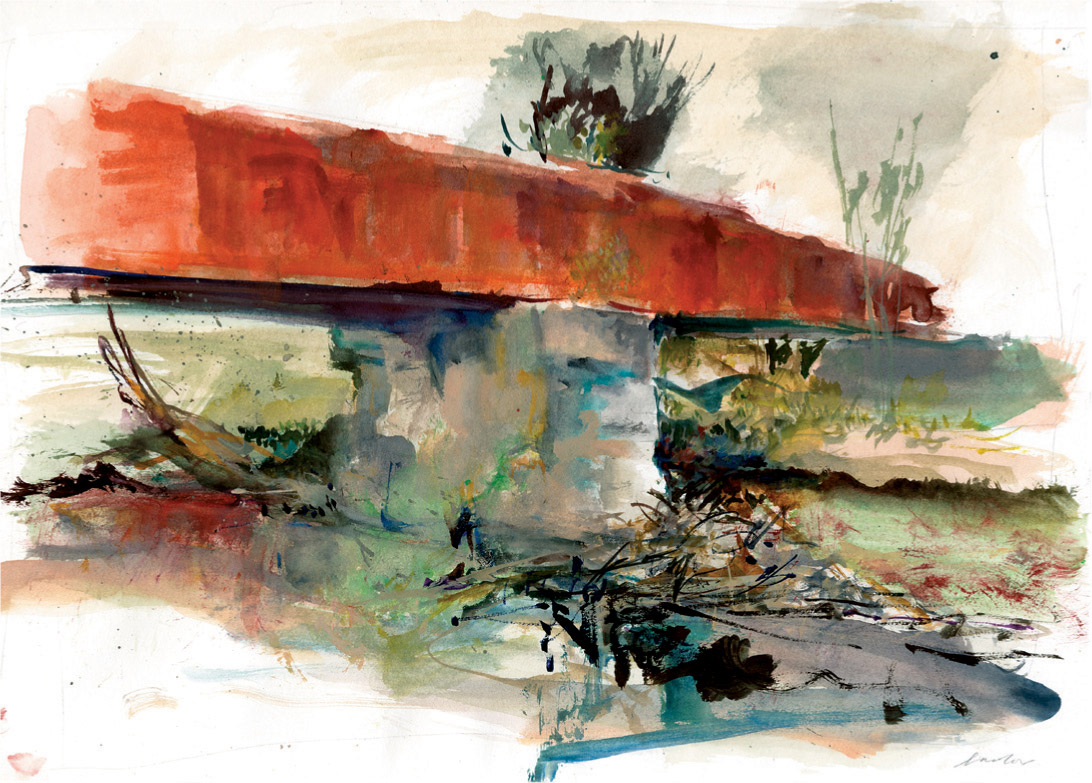
Bridge, watercolor painting
DAY 8
“Modesto Peña, that’s my grandpa: He has the thousand-yard stare. I wouldn’t be the man I am today without him. My abuelo [grandfather] is as close to my beginning as I will ever know. We don’t have a long-lineage story of how we came to be where we are in my family.
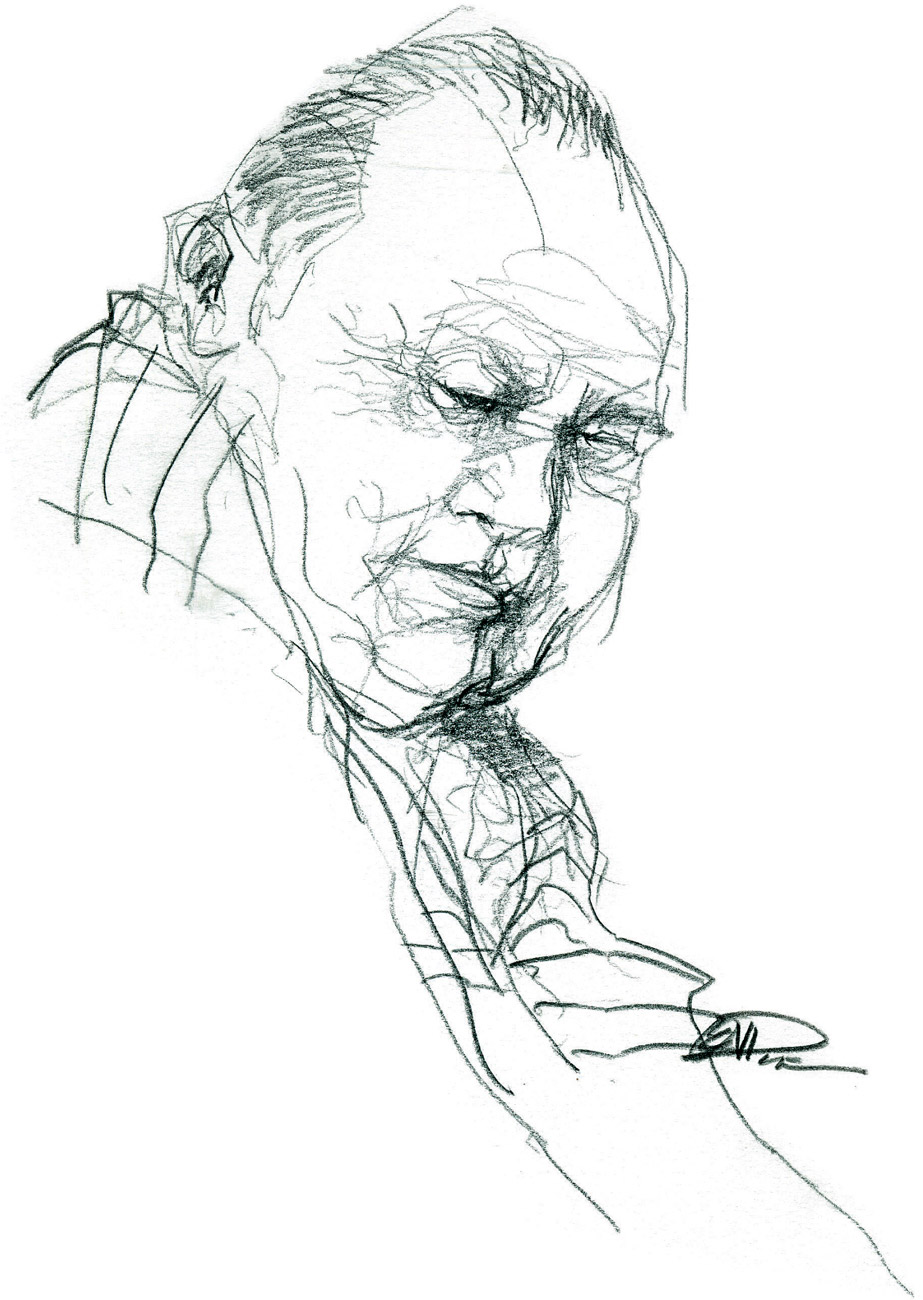
Drawings of Modesto Peña, pencil, charcoal, and ink
“Modesto grew up in Dominican Republic, met my grandma, had eleven kids, and came to America. The past is not something he has ever been interested in talking about. Who he is and what he has done is sufficient.”—Eddie
EXERCISE 8
Create three portraits of a family member or friend using charcoal, pencil, and ink. Choose one material for each portrait and explore the graphic differences between them. What kind of emotional effect can you get from the different mediums? Don’t be afraid to smudge the charcoal, scribble with the pencil, splatter the ink: Really explore what different nuances the materials have to offer.
It’s best if you can get someone to sit and pose for you rather than use a photograph. Don’t take more than thirty minutes to do each portrait. A light misting with spray fixative when you are done will keep your finished work from smearing.

TIPS
- A smudge stick can help you get the most from your charcoal drawing, although your finger can work too. Use a kneaded eraser as well, not for correcting anything but instead to smear the charcoal or lift some of it from the paper. A stronger paper with texture will allow for more work with the charcoal. Don’t be afraid to use a little pencil, too, as Eddie has done.
- Use loose ink and a dip pen for more expressiveness in the ink portrait. Don’t be afraid of blotches or dribbles of ink going in places you don’t want them to go: This is part of the overall feeling of ink. Explore it!
- Try different-grade pencil weights. A softer pencil such as a 6B grade will yield a soft, blurred line; a harder pencil such as a 3H will give you more sharpness. Experiment with different grades across the spectrum to see which feel works best for you and best describes the personality of your portrait subject!
