3. Developing Your LinkedIn Network

In this chapter, you explore how to develop a solid LinkedIn connection strategy, connect with other members, and manage your contacts.
![]() Developing a connection strategy
Developing a connection strategy
![]() Finding and connecting with alumni
Finding and connecting with alumni
![]() Sending and responding to invitations
Sending and responding to invitations
After creating a strong profile, the next step in making the most of your LinkedIn experience is developing a solid network of professional connections. Before you add connections to LinkedIn, however, you should develop a connection strategy that matches your goals and networking philosophy.
Developing a Connection Strategy
There is no one “right” way to develop your LinkedIn network. All LinkedIn members are unique and need to follow a personalized strategy that focuses on their own goals, industry, position, and comfort level with networking.
The three most common approaches are as follows:
• Connect only with people you know—LinkedIn members who follow this approach connect only with colleagues, classmates, and associates they personally know or who their known connections recommend to them.
• Connect with people you know plus strategic contacts you would like to know—With this approach, you connect with people you know and seek out strategic connections who match your networking goals.
• Connect with anyone and everyone—Some LinkedIn members, particularly those who want to use the site for business development purposes, are open networkers and like to connect with as many people as possible and make special efforts to connect with thousands of people.
What’s an Open Networker?
As you begin to use LinkedIn, you might see the terms open networker or LION on member profiles. An open networker is a LinkedIn member who is open to connecting with people they don’t know. Several LinkedIn groups exist for open networkers, such as LION (LinkedIn Open Networker) and TopLinked. Although it’s a good idea to network with new people and develop a mutually beneficial business relationship, be careful not to abuse open networking by connecting indiscriminately just to amass a large network. Don’t treat your LinkedIn network as a numbers game.
Which approach is best? There is no one right answer for everyone. All LinkedIn members have their own goals for what they hope to accomplish on the site as well as their own networking strategies and comfort levels.
To get started, consider connecting with current and former colleagues, current and former classmates, friends, and fellow members of professional associations. Then expand your network from there based on your personal goals and preferences.
• Import your webmail or desktop email contacts and search for them on LinkedIn. The Import Contacts and Invite page enables you to import contacts from Gmail, Outlook, Yahoo! Mail, Hotmail, AOL, and other email providers. See the section “Import Your Gmail Contacts,” for one example of the contact-import process. When you’re new to LinkedIn, your home page also prompts you to import your contacts.

• View the People You May Know box on your home page for potential connections.

• Search for and connect with alumni on the Alumni page. See the section “Find and Connect with Alumni,” later in this chapter.
• Search for and connect with people you know using LinkedIn’s advanced search functionality. See Chapter 7, “Searching on LinkedIn,” for more information.
• Send an invitation request to someone who doesn’t use LinkedIn yet. See the section “Connect with People Not on LinkedIn,” later in this chapter.
Keep in mind that you don’t need to use all these methods to develop your pool of LinkedIn connections. For example, you might not want to connect with all your webmail or address book contacts. Or your webmail account might contain personal email addresses, not the email addresses your contacts used to sign up for LinkedIn.
Import Email Contacts
The Import Contacts and Invite page enables you to import your contacts from popular email providers such as Gmail, Outlook, Yahoo! Mail, Hotmail/Outlook.com, and AOL. To access this page, select Add Connections from the Network menu.


The exact steps for importing vary based on your email provider, but the process involves connecting with your provider and displaying a list of email contacts who are LinkedIn members. From here, you can select the people you want to invite to connect on LinkedIn.
If your email provider doesn’t appear on the Import Contacts and Invite page, click the Any Email button. You can import from other providers including Comcast, Cox, AT&T, Verizon, EarthLink, MSN, and more.

Import Your Gmail Contacts
In this example, you import Gmail contacts. Even if you use one of the many other email providers LinkedIn supports, this should give you a good idea of the process involved.
1. Select Add Connections from the Network menu.
2. Select the Gmail button.
3. Enter your Gmail email address.
4. Click the Continue button.

5. LinkedIn connects with your Gmail account and displays a list of contacts who are LinkedIn members.
6. By default, LinkedIn selects the check box next to each person on the list. Deselect the check box next to the names of the people you don’t want to connect with.
7. Click the Add Connection(s) button.

8. LinkedIn sends invitations to the selected people.

What Happens Next?
Each selected person receives an individual invitation from LinkedIn and must manually accept it to become one of your connections. (See the section “Respond to an Invitation,” later in this chapter for more information.)
If you have another email account whose contacts you want to import, you can repeat this process. For example, you might have a work email address and a personal email address, each with different contacts.
Find and Connect with Alumni
LinkedIn enables you to quickly identify former classmates you might want to connect with.
1. Select Find Alumni from the Network menu.

2. LinkedIn displays a list of alumni from the most recent school listed on your profile.
3. Click the Connect button below a person’s name to send an invitation to this person.

Narrowing Your Results
If you attended a large school, you could discover a lengthy list of potential classmates. Optionally, you can narrow your results by attendance date, location, employer, or occupation. You can also search the Alumni page by name or keyword.
Send an Invitation to Connect
The exact process of connecting on LinkedIn varies based on where you initiate the invitation, but, in general, you click either the Connect button or the Connect link to send an invitation. In this example, you send an invitation to someone who displays in the People You May Know box on the LinkedIn home page.
Sending Invitations to People You Don’t Know
If you don’t know someone and don’t have any connection with this person (such as a common profession, association membership, or alumni affiliation), be sure to make your reason for wanting to connect clear so that the recipient doesn’t mark your request as spam. Optionally, consider sending an InMail or requesting an introduction instead. See Chapter 6, “Communicating with Other LinkedIn Members,” for more information on InMail and introductions.
1. Click the Connect link below the person to whom you want to send an invitation.

2. Specify how you know this person.
3. Include a personal note in the text box explaining why you want to connect on LinkedIn. This is particularly important if you don’t know the person you want to connect with.
4. Click the Send Invitation button.

What Happens Next?
LinkedIn sends this person your invitation, who must accept it manually to become one of your connections. (See the section “Respond to an Invitation,” later in this chapter for more information about this process).
Connect with People Not on LinkedIn
If you discover that some of your real-world contacts aren’t using LinkedIn yet, it’s easy to invite them.
1. Select Add Connections from the Network menu.
2. Click the Any Email button.
3. Click the Invite by Individual Email link.

4. Enter the email address of the person or persons you want to invite. Separate multiple addresses with a comma.
5. Click the Send Invitations button.

Respond to an Invitation
In addition to sending invitations to connect, you might receive invitations. LinkedIn makes it easy to accept—or ignore—invitations right from the navigation bar.
1. Pause over the Inbox button on the navigation bar.
2. LinkedIn displays a list of your most recent invitations and messages.
3. Pause over an invitation and click the Accept button to make this person a connection.
4. Pause over an invitation and click the Ignore button to ignore this request.
5. Click the sender’s name if you would like to view the profile of a person who wants to connect.

When you ignore an invitation, LinkedIn moves it to your Archived folder where you can view and respond later. After ignoring an invitation, LinkedIn provides two additional options: the I Don’t Know [First Name] link and the Report as Spam link. Clicking the I Don’t Know link blocks this person from inviting you again and alerts LinkedIn that this was an unwanted invitation request. Clicking the Report as Spam link reports the sender to LinkedIn.
Previewing a LinkedIn member’s profile can help you remember more about someone you don’t know well or decide whether to connect with someone you don’t know at all. If you do decide to connect, you can click the Accept Invitation button on the profile. This button displays only on profiles of people who have a pending invitation request.

What Happens Next?
When you accept an invitation, LinkedIn makes this person a 1st degree connection in your network, whose updates display on your home page. You can also exchange messages with this connection.
>>>Go Further: Other Ways to Review Invitations
• Review, accept, and ignore invitations in your inbox. See Chapter 6 for more information about working with your inbox.
• Receive invitations to connect by email, if you specified that you want to receive email invitations on the Account & Settings page. (See Chapter 4, “Customizing Your LinkedIn Settings,” for details.) Click the link in the email to open the invitation.

Managing Your Connections
After you develop your LinkedIn network, you need an easy way to find and manage your connections. The Contacts page offers several ways to do this. Select Contacts from the Network menu to open this page, which displays previews of your connections and saved profiles.

The Contacts page offers a variety of options for managing your LinkedIn network, including the following:
• View connections with recent milestones such as a new job or birthday.
• Sort by recent conversations (the default), newly added, alphabetical, company, location, or those with whom you’ve lost touch.
• Search for people by keyword.
• Filter by specific criteria such as company, title, or location. This is particularly useful if you have a large network.
• View profiles you saved by clicking the Saved link.
The Saved tab displays the profiles of LinkedIn members you saved, even if they’re not your connections. Saving profiles is an excellent way to track prospects, such as potential employers or clients. See Chapter 7 for more information on saving profiles.
• Hover over a preview to tag, message, hide, or remove this person.

• Click a name to open this person’s profile.
• Synchronize your LinkedIn contact with external sources.
Synchronizing Your Contact
Optionally, click the Settings link to synchronize your LinkedIn contacts with your contacts on sources including Microsoft Outlook, Google Gmail, Google Calendar, Google Contacts, Google Voice, Evernote, LinkedIn CardMunch, and many others. You can also manually import your contacts from an Outlook Contacts file, a Mac Address Book vCard file, or a Yahoo! Contacts file.
Add a Tag
Tags enable you to categorize your LinkedIn network using custom labels. By default, LinkedIn offers a “Favorites” tag, but you can create and use any tags you like. For example, you might want to tag people who belong to a common professional organization, prospective clients, and so forth. You can tag the profiles of your 1st degree connections as well as profiles you’ve saved.
1. Select Contacts from the Network menu.

2. Hover over the profile of the person you want to tag and click the Tag link.

3. Select the check box next to the tag or tags you want to apply.
4. Optionally, click the Add New Tags link to add a new tag.

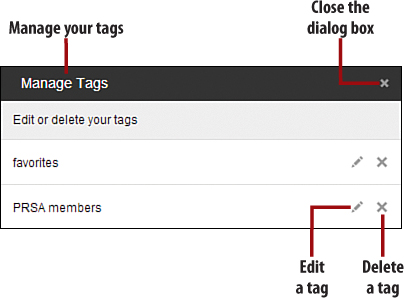
Managing Your Tags
Click the Manage Tags link to open the Manage Tags dialog box. Here, you can edit or delete the tags you created.
5. Enter a new tag in the text box and click the Save button.

6. Repeat steps 4 and 5 to add more tags.
7. LinkedIn displays the tags you applied below the photo of the tagged person.

Remove a Connection
If you decide that you no longer want to connect with someone on LinkedIn, you can remove that person as a connection. People you remove are no longer able to view any data restricted to actual connections, and they can’t send you direct messages. LinkedIn, however, doesn’t notify them that they’ve been removed.
1. On the Contacts page, hover over the profile of the connection you want to remove.
2. Select Remove Connection from the More drop-down list.

3. Click the Remove button to confirm removal.

Editing Contact Info on a Profile
When you connect with another LinkedIn member or save someone’s profile, LinkedIn activates the Relationship and Contact Info tabs on this person’s profile.
The Relationship tab enables you to add and view notes, reminders, tags, and details about how you met this person. Some of this information displays automatically based on your interaction on LinkedIn; other data you must enter manually.

The Contact Info tab displays contact data such as an email address, LinkedIn profile URL, and website URLs. The information that displays here varies based on what these members enter in the Contact Info section on their profiles and whom they allow to view this data (connections only or everyone on LinkedIn).

Optionally, you can add your own contact info for someone by clicking the Edit Contact Info link, entering your data, and clicking the Done Editing button.

Only you can view contact info you enter for another person.