14 Publishing Data on the Web
Introduction
Microsoft Excel provides you with the tools you need to create and save your workbook as a Web page and to publish it on the Web. The Save As command allows you to format your workbook in Hypertext Markup Language (HTML), a simple coding system used to format documents for an intranet or the Internet. Saving your workbook in HTML format means you can use most Web browsers to view your workbook. Any workbook can easily be saved as a Web document and viewed in a Web browser. By saving your Excel workbooks as Web pages, you can share your data with others via the Internet.
Incorporating hyperlinks within your Microsoft Excel worksheet adds an element of connectivity to your work. You can create a worksheet and then have a hyperlink with supporting research to add to the content of your data. Or, you can copy data from a Web page and incorporate it into your Excel workbook. Either way, using the Web to publish Excel data or incorporate research into your workbook, is a great resource.
Opening a Workbook as a Web Page
After saving a workbook as a Web page, you can open the Web page, an HTML file, in Excel. This allows you to quickly and easily switch from HTML to the standard Excel format and back again without losing any formatting or functionality. For example, if you create a formatted chart in an Excel workbook, save the workbook file as a Web page, and then reopen the Web page in Excel, the chart will look the same as the original chart in Excel. Excel preserves the original formatting and functionality of the workbook.
Open a Workbook as a Web Page in Excel
![]() Click the File tab, and then click Open.
Click the File tab, and then click Open.
![]() Click the Files of type list arrow, and then click All Web Pages.
Click the Files of type list arrow, and then click All Web Pages.
![]() Click the Look in list arrow, and then select the folder where the file is located.
Click the Look in list arrow, and then select the folder where the file is located.
![]() Click the Web workbook file.
Click the Web workbook file.
![]() Click Open.
Click Open.
![]() To open the Web page in your browser, click the Open button arrow, and then click Open in Browser.
To open the Web page in your browser, click the Open button arrow, and then click Open in Browser.

Previewing a Web Page
You can view any Excel worksheet as if it were already on the Web by previewing the Web page. By previewing a file you want to post to the Web, you can see if there are any errors that need to be corrected, formatting that needs to be added, or additions that need to be made. Just as you should always preview a document before you print it, you should preview a Web page before you post it. Previewing the Web page in your browser shows you what the page will look like once it’s posted on the Internet. You do not have to be connected to the Internet to preview a document as a Web page.
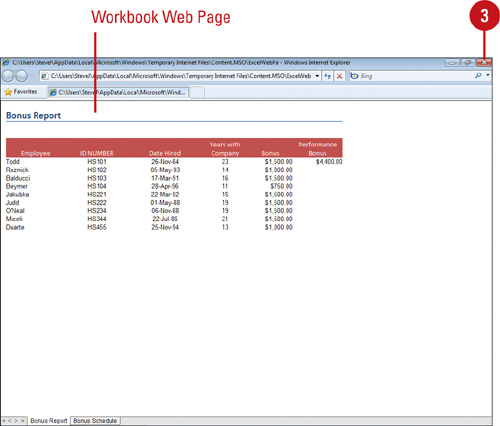
View a Web Page
![]() Open the Web file you want to view as a Web page.
Open the Web file you want to view as a Web page.
![]() Click the Web Page Preview button on the Quick Access Toolbar.
Click the Web Page Preview button on the Quick Access Toolbar.
![]() To add the button to the toolbar, click the Customize Quick Access Toolbar list arrow on the Quick Access Toolbar, click More Commands, add the Web Page Preview button, and then click OK.
To add the button to the toolbar, click the Customize Quick Access Toolbar list arrow on the Quick Access Toolbar, click More Commands, add the Web Page Preview button, and then click OK.
Your default Web browser starts and displays the Web page.
![]() Click the Close button to quit your Web browser.
Click the Close button to quit your Web browser.

Creating a Hyperlink
With instant access to the Internet, your worksheet can contain links to specific sites so you and anyone else using your worksheet can access Web information. An Internet link that is embedded on a worksheet is called a hyperlink—because when it is clicked, you are instantly connected to the link’s defined address on the Web. If your worksheet contains a hyperlink, the link appears in a worksheet cell as blue text. When you point to hyperlinked text or an object, the cursor changes to a pointing hand to indicate it’s a hyperlink. To connect to the linked location, such as a Web site, just click the hyperlink.
Create or Edit a Hyperlink
![]() Select a cell or object, such as a picture, where you want to create or edit a hyperlink.
Select a cell or object, such as a picture, where you want to create or edit a hyperlink.
![]() Click the Insert tab.
Click the Insert tab.
![]() Click the Hyperlink button.
Click the Hyperlink button.
TIMESAVER Press Ctrl+K.
![]() Click one of the icons on the Link To bar for quick access to frequently used files, Web pages, and links.
Click one of the icons on the Link To bar for quick access to frequently used files, Web pages, and links.
![]() Existing File or Web Page. Click to link to a workbook or other file.
Existing File or Web Page. Click to link to a workbook or other file.
![]() Place in This Document. Click to link to another location in the current workbook. Select or type a cell reference, or select a defined name.
Place in This Document. Click to link to another location in the current workbook. Select or type a cell reference, or select a defined name.
![]() Create New Document. Click to link to a new document.
Create New Document. Click to link to a new document.
![]() E-mail Address. Click to create a link to an e-mail address. When you click the e-mail address, your e-mail program automatically opens with the address.
E-mail Address. Click to create a link to an e-mail address. When you click the e-mail address, your e-mail program automatically opens with the address.
![]() Type or select the name and location of the file or Web page you want to link to.
Type or select the name and location of the file or Web page you want to link to.
![]() Click OK.
Click OK.


Jump to a Hyperlink
![]() Click the hyperlink on your worksheet.
Click the hyperlink on your worksheet.
Excel opens the linked location. For Web addresses, Excel opens your Web browser, displaying the Web page associated with the hyperlink.

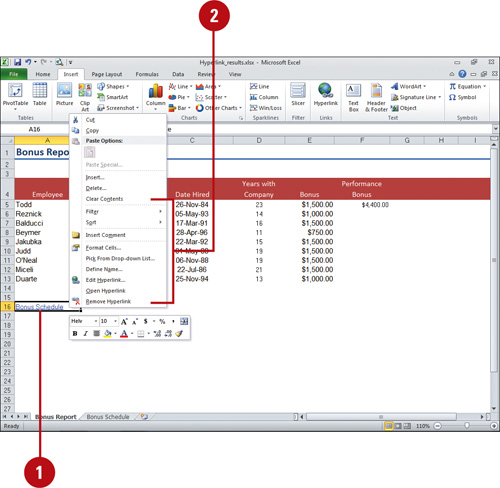
Remove a Hyperlink
![]() Right-click the cell containing the hyperlink you want to remove.
Right-click the cell containing the hyperlink you want to remove.
![]() Do one of the following:
Do one of the following:
![]() Clear Contents to delete a hyperlink and the text.
Clear Contents to delete a hyperlink and the text.
![]() Remove Hyperlink to remove the hyperlink and keep the text.
Remove Hyperlink to remove the hyperlink and keep the text.
Formatting a Hyperlink
Excel comes with a set of predefined cell styles for various data types, including hyperlinks, in a worksheet. When you create a hyperlink, the default cell style is used to format the text. If you want to change the appearance of hyperlinks in your workbook, you need to change the cell style for hyperlinks.
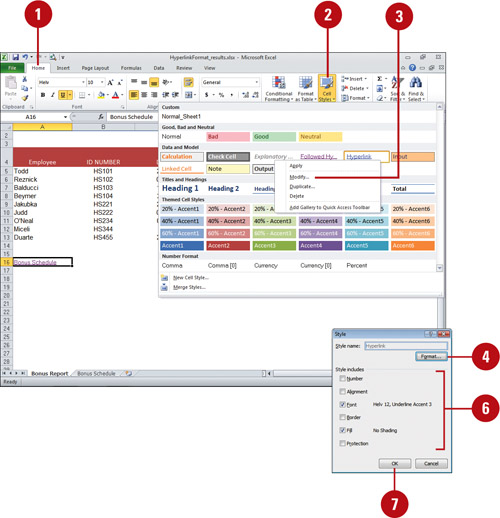
Change the Hyperlink Cell Style
![]() Click the Home tab.
Click the Home tab.
![]() Click the Cell Styles button.
Click the Cell Styles button.
![]() Right-click the Hyperlink or Followed Hyperlink, and then click Modify.
Right-click the Hyperlink or Followed Hyperlink, and then click Modify.
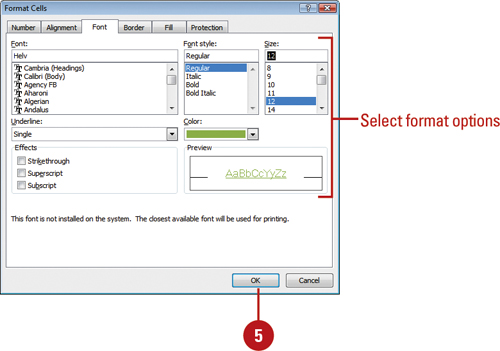
![]() Click Format.
Click Format.
![]() Select the formatting options you want on the Font and Fill tabs, and then click OK.
Select the formatting options you want on the Font and Fill tabs, and then click OK.
![]() Select the check boxes with the formatting you want to include in the modified cell style.
Select the check boxes with the formatting you want to include in the modified cell style.
![]() Click OK.
Click OK.
Changing Web Page Options
When you save or publish a workbook as a Web page, you can change the appearance of the Web page by changing Excel’s Web options. You can set Web options to save any additional hidden data necessary to maintain formulas, allow PNG as a graphic format, rely on CSS for font formatting, reply on VML for displaying graphics in browser, and save new Web pages as Single File Web Pages. Web pages are saved using the appropriate international text encoding so users on any language system are able to view the correct characters.
Change Web Page Options
![]() Click the File tab, and then click Options.
Click the File tab, and then click Options.
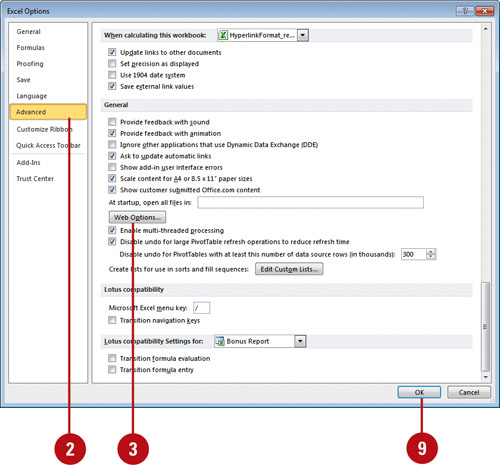
![]() In the left pane, click Advanced.
In the left pane, click Advanced.
![]() Click Web Options.
Click Web Options.
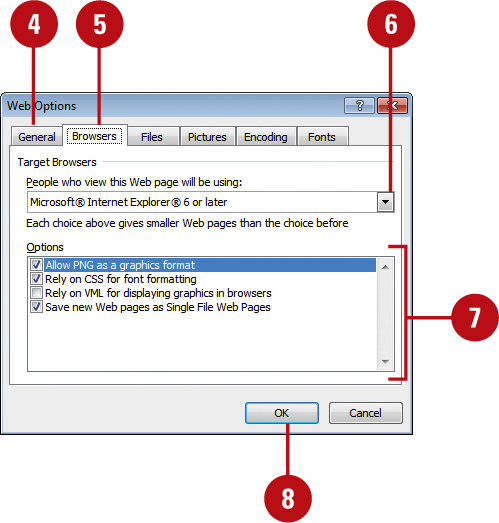
![]() Click the General tab, and then select or clear the Web pages options:
Click the General tab, and then select or clear the Web pages options:
![]() Save any additional hidden data necessary to maintain formulas.
Save any additional hidden data necessary to maintain formulas.
![]() Load pictures from Web pages not created in Excel.
Load pictures from Web pages not created in Excel.
![]() Click the Browsers tab.
Click the Browsers tab.
![]() Click the Target Browsers list arrow, and then select the version you want to support.
Click the Target Browsers list arrow, and then select the version you want to support.
![]() Select or clear the Web page options:
Select or clear the Web page options:
![]() Allow PNG as a graphic format.
Allow PNG as a graphic format.
![]() Rely on CSS for font formatting. Cascading Style Sheets for Web page formatting.
Rely on CSS for font formatting. Cascading Style Sheets for Web page formatting.
![]() Reply on VML for displaying graphics in browsers. VML is Vector Markup Language, XML based graphics.
Reply on VML for displaying graphics in browsers. VML is Vector Markup Language, XML based graphics.
![]() Save new Web pages as Single File Web Pages.
Save new Web pages as Single File Web Pages.
![]() Click OK.
Click OK.
![]() Click OK.
Click OK.
Saving a Worksheet as a Web Page
You can place an existing Excel worksheet on the Internet for others to use. In order for any document to be placed on the Web, it must be in HTML (Hypertext Markup Language) format—a simple coding system that specifies the formats a Web browser uses to display the document. This format enables you to post, or submit Excel data on a Web site for others. You don’t need any HTML knowledge to save an Excel worksheet as a Web page. When you save a worksheet as a Web page, you can save it using the Web Page or Single File Web Page format. The Web Page format saves the worksheet as an HTML file and a folder that stores supporting files, such as a file for each graphic, worksheet, and so on. Excel selects the appropriate graphic format for you based on the image’s content. A single file Web page saves all the elements of a Web site, including text and graphics, into a single file in the MHTML format, which is supported by Internet Explorer 4.0.1 or later.
Save a Workbook or Worksheet as a Web Page
![]() Click the File tab, and then click Save As.
Click the File tab, and then click Save As.
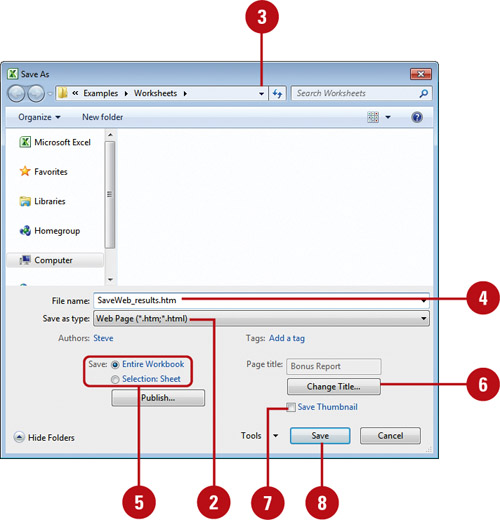
![]() Click the Save as type list arrow, and then click Web Page.
Click the Save as type list arrow, and then click Web Page.
![]() Click the Save in list arrow, and then select a location for your Web page.
Click the Save in list arrow, and then select a location for your Web page.
![]() Type the name for the Web page.
Type the name for the Web page.
![]() Click the Entire Workbook or Selection: Sheet option.
Click the Entire Workbook or Selection: Sheet option.
![]() To change the title of your Web page, click Change Title, type the new title in the Set Page Title box, and then click OK.
To change the title of your Web page, click Change Title, type the new title in the Set Page Title box, and then click OK.
![]() To save a thumbnail preview of the Web page, select the Save Thumbnail check box.
To save a thumbnail preview of the Web page, select the Save Thumbnail check box.
![]() Click Save.
Click Save.
![]() If necessary, click Yes to keep workbook formatting.
If necessary, click Yes to keep workbook formatting.
Save a Workbook or Worksheet as a Single File Web Page
![]() Click the File tab, and then click Save As.
Click the File tab, and then click Save As.
![]() Click the Save as type list arrow, and then click Single File Web Page.
Click the Save as type list arrow, and then click Single File Web Page.
![]() Click the Save in list arrow, and then select a location for your Web page.
Click the Save in list arrow, and then select a location for your Web page.
![]() Type the name for the Web page.
Type the name for the Web page.
![]() Click the Entire Workbook or Selection: Sheet option.
Click the Entire Workbook or Selection: Sheet option.
![]() To change the title of your Web page, click Change Title, type the new title in the Set Page Title box, and then click OK.
To change the title of your Web page, click Change Title, type the new title in the Set Page Title box, and then click OK.
![]() To save a thumbnail preview of the Web page, select the Save Thumbnail check box.
To save a thumbnail preview of the Web page, select the Save Thumbnail check box.
![]() Click Save.
Click Save.
![]() If necessary, click Yes to keep workbook formatting.
If necessary, click Yes to keep workbook formatting.
The Web page is saved as a single file.

Publishing a Web Page
At times, you’ll want to publish a copy of your current workbook in HTML format directly to a Web server (a computer on the Internet or intranet that stores Web pages) so others can view and manipulate your data. Publishing to a Web server is as simple as saving a file. You can publish a complete workbook, a single worksheet, or a range of worksheets. A worksheet saved as a Web page retains all its spreadsheet, charting, or PivotTable functionality and formatting properties. This interactivity means that while your worksheet is on the Web, others can manipulate your data. You can elect to let anyone using Internet Explorer 4.01 or later interact with your data from Excel.
Save and Publish a Worksheet as an Interactive Web Page
![]() To publish part of a worksheet, select the range you want saved as a Web page.
To publish part of a worksheet, select the range you want saved as a Web page.
![]() Click the File tab, and then click Save As.
Click the File tab, and then click Save As.
![]() Click the Save as type list arrow, and then click Web Page.
Click the Save as type list arrow, and then click Web Page.
![]() Click the Save in list arrow, and then select a location for your Web page.
Click the Save in list arrow, and then select a location for your Web page.
![]() Click the Selection: Sheet or Entire Worksheet option.
Click the Selection: Sheet or Entire Worksheet option.
![]() Type the name for the Web page or Web address.
Type the name for the Web page or Web address.
![]() To change the title of your Web page, click Change Title, type the new title in the Set Page Title box, and then click OK.
To change the title of your Web page, click Change Title, type the new title in the Set Page Title box, and then click OK.
![]() Click Publish.
Click Publish.
![]() Click the Choose list arrow, and then select the items you want to publish in the Web page.
Click the Choose list arrow, and then select the items you want to publish in the Web page.
![]() Select or clear the AutoPublish everytime this workbook is saved check box.
Select or clear the AutoPublish everytime this workbook is saved check box.
![]() Select or clear the Open published web page in browser check box.
Select or clear the Open published web page in browser check box.
![]() Click Publish.
Click Publish.


Copying a Web Table to a Worksheet
You can copy tabular information on a Web page and paste or drag the information into an Excel worksheet. It’s an easy way to transfer and manipulate Web-based table data using Excel. Excel simplifies access to table data by making it available to anyone with a browser. If you need to make changes to the table, you can use normal editing techniques in Excel.
Copy a Web Table to a Worksheet
![]() Open your Web browser.
Open your Web browser.
![]() In the Address bar, type the location of the Web page with the table data you want to copy, and then press Enter.
In the Address bar, type the location of the Web page with the table data you want to copy, and then press Enter.
![]() Select the table data in the Web page you want to copy.
Select the table data in the Web page you want to copy.
![]() Open the Excel worksheet where you want to paste the table data.
Open the Excel worksheet where you want to paste the table data.
![]() Right-click the taskbar, and then click Show Windows Side by Side (7 or Vista) or Tile Windows Vertically (XP).
Right-click the taskbar, and then click Show Windows Side by Side (7 or Vista) or Tile Windows Vertically (XP).
![]() Drag the table data from the Web browser window to the location on the worksheet where you want the table data, and then release the mouse button.
Drag the table data from the Web browser window to the location on the worksheet where you want the table data, and then release the mouse button.

Creating Refreshable Web Queries
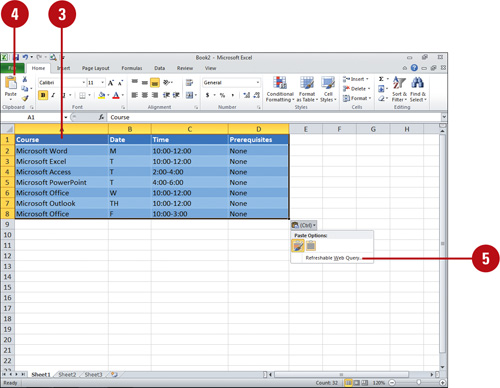
If you need to analyze Web data in a worksheet, you can use the copy and paste commands to bring the data from a Web page into the worksheet. The Paste Options button allows you to specify whether you want the information to keep the data as it is right now or make it refreshable to the current data on the Web. As the data changes on the Web, you can use the Refresh button to quickly update the data in your worksheet. You don’t need to copy the information again.
Copy and Paste Refreshable Data from the Web
![]() Open the Web page with the information you want to copy into a worksheet, and then select the data.
Open the Web page with the information you want to copy into a worksheet, and then select the data.
![]() Copy the data.
Copy the data.
![]() Switch to Excel, and then click the active cell where you want the data.
Switch to Excel, and then click the active cell where you want the data.
![]() Click the Paste button on the Home tab.
Click the Paste button on the Home tab.
![]() Click the Paste Options button, and then click Create Refreshable Web Query.
Click the Paste Options button, and then click Create Refreshable Web Query.
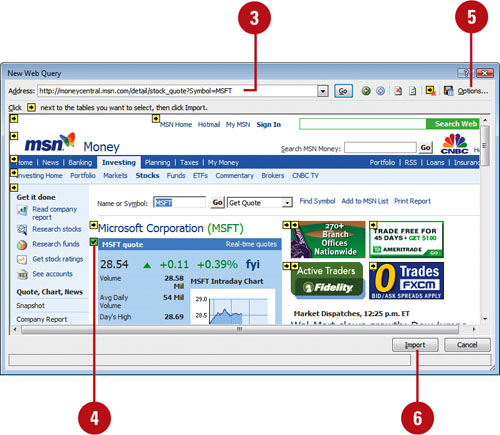
![]() Click the arrow buttons to select the information you want.
Click the arrow buttons to select the information you want.
![]() Click Import.
Click Import.

Getting Data from Web Queries
You can import data into Excel through database and Web queries and analyze data with formulas and formatting. You can insert columns within query tables and apply formulas and formatting. When data is refreshed, the formatting and analysis are retained. Excel helps you through the process of bringing data from a Web page to your worksheet. You can create a new Web query as you choose the URL and parameters for how you want to import the Web data. Once you save the query, you can run it again at any time.
Get Data from a New Web Query
![]() Click the Data tab.
Click the Data tab.
![]() Click the From Web button.
Click the From Web button.
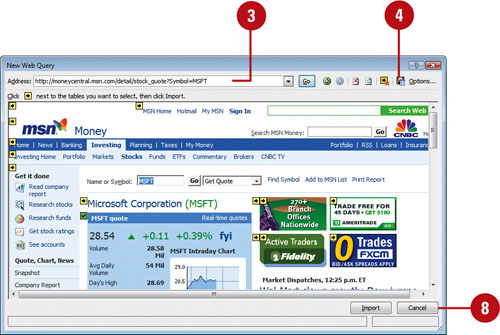
![]() Type the address for the Web page that contains the data you want.
Type the address for the Web page that contains the data you want.
![]() Click the arrow buttons to select the information you want.
Click the arrow buttons to select the information you want.
![]() Click Options to select the formatting you want your data to keep.
Click Options to select the formatting you want your data to keep.
![]() Click Import.
Click Import.
![]() Click the Existing worksheet option and specify a starting cell, or click the New worksheet option.
Click the Existing worksheet option and specify a starting cell, or click the New worksheet option.
![]() Click OK.
Click OK.

Saving Web Queries
When you create a Web query, it is automatically saved for use in the current workbook. If you need the same query in another workbook, you can save the Web query in a separate file. When you save a query, the file uses the .iqy extension, which you can import into another workbook. After you save a Web query, you can use the Existing Connections button to import the query data into a worksheet.
Save a Web Query
![]() Click the Data tab.
Click the Data tab.
![]() Click the From Web button.
Click the From Web button.
![]() Display the Web page that contains the data you want.
Display the Web page that contains the data you want.
![]() Click the Save Query button.
Click the Save Query button.
![]() Select the drive and folder in which you want to save the query.
Select the drive and folder in which you want to save the query.
![]() Type a name for the query.
Type a name for the query.
![]() Click Save.
Click Save.
![]() Click Cancel.
Click Cancel.
Import a Query
![]() Click the Data tab.
Click the Data tab.
![]() Click the Existing Connections button.
Click the Existing Connections button.
![]() Click the Web query you want to import.
Click the Web query you want to import.
![]() Click Open.
Click Open.
![]() Click the Existing worksheet option and specify a cell location, or click the New worksheet option, and then click OK to insert the query data.
Click the Existing worksheet option and specify a cell location, or click the New worksheet option, and then click OK to insert the query data.
![]() To refresh the query data, click the Refresh All button arrow, and then click Refresh.
To refresh the query data, click the Refresh All button arrow, and then click Refresh.

Accessing Office Information on the Web
New information about programs comes out with great frequency. You have access to an abundance of information about Excel and other programs in the Office Suite from Microsoft. This information is constantly being updated. Answers to frequently asked questions, user forums, and update offers are some of the types of information you can find about Microsoft Office. You can also find out about conferences, books, and other products that help you learn just how much you can do with your Microsoft Office software.
Find Online Office Information
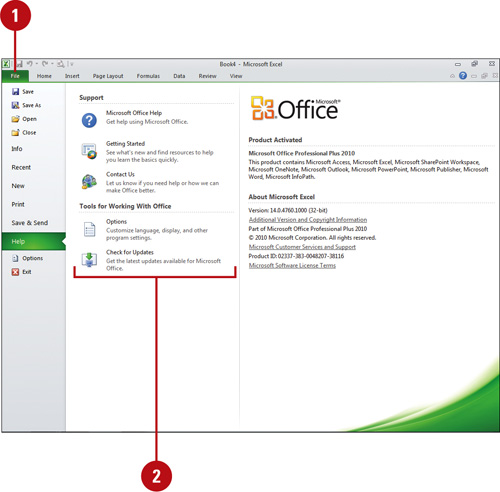
![]() Click the File tab, and then click Help.
Click the File tab, and then click Help.
![]() Click any of the following options to display online information:
Click any of the following options to display online information:
![]() Getting Started. Accesses information to help you get started with the product.
Getting Started. Accesses information to help you get started with the product.
![]() Contact Us. Accesses the Microsoft Support web site, where you can get assistance.
Contact Us. Accesses the Microsoft Support web site, where you can get assistance.
![]() Check for Updates. Accesses Windows Update to check for the latest Office updates.
Check for Updates. Accesses Windows Update to check for the latest Office updates.
Your Web browser opens, displaying a Microsoft Office Online Web page.
![]() Click a hyperlink of interest.
Click a hyperlink of interest.
![]() Click the Close button to quit the browser and return to Excel.
Click the Close button to quit the browser and return to Excel.
Getting Documents from the Web
File Transfer Protocol (FTP) is an inexpensive and efficient way to transfer files between your computer and others on the Internet. You can download or receive, from another computer, any kind of file, including text, graphics, sound, and video files. To download a file, you need an ID and password to identify who you are. Anonymous FTP sites are open to anyone; they usually use anonymous as an ID and your e-mail address as a password. You can also save the FTP site address to revisit the site later.
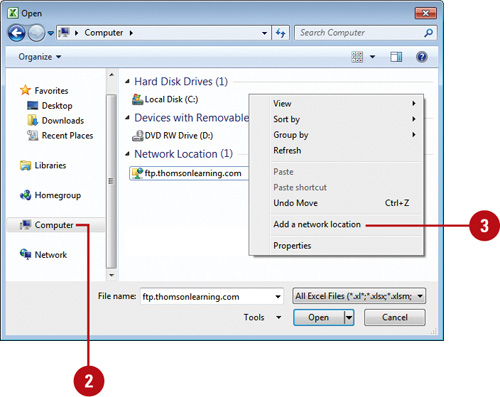
Add FTP Locations
![]() Click the File tab, and then click Open.
Click the File tab, and then click Open.
![]() Click Computer in the left pane.
Click Computer in the left pane.
![]() Right-click a blank area, and then click Add a network location.
Right-click a blank area, and then click Add a network location.
![]() Follow the Add Network Location wizard to create a link to an FTP site or other network, and then click Finish to complete it.
Follow the Add Network Location wizard to create a link to an FTP site or other network, and then click Finish to complete it.
![]() To complete the process, you need the complete address for an FTP site, and a username and password.
To complete the process, you need the complete address for an FTP site, and a username and password.
Access an FTP Site
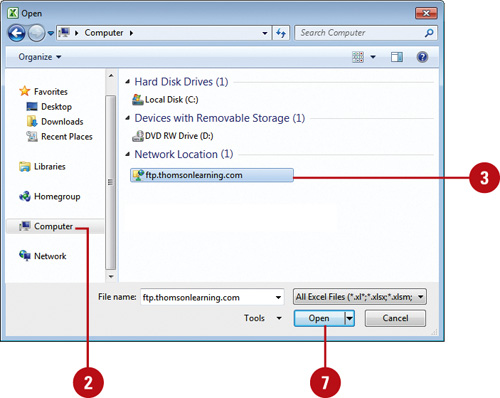
![]() Click the File tab, and then click Open.
Click the File tab, and then click Open.
![]() Click Computer in the left pane.
Click Computer in the left pane.
![]() Double-click the FTP site to which you want to log in.
Double-click the FTP site to which you want to log in.
![]() Enter a password (your E-mail address or personal password), and then select a log on option.
Enter a password (your E-mail address or personal password), and then select a log on option.
![]() Click Log On.
Click Log On.
![]() Select a folder location, and then select a file.
Select a folder location, and then select a file.
![]() Click Open.
Click Open.