
Now that we have our web API in place, we can create our Docker container image. We can generate this from Visual Studio directly. To do so, follow these steps:
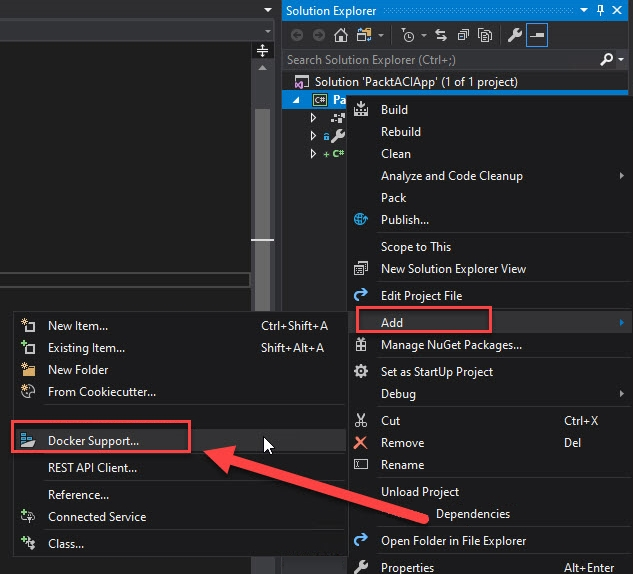
- Right-click the project file in the Visual Studio Solution Explorer.
- Then, select Add | Docker Support:
Creating a Dockerfile
- A wizard will open where you can generate a Dockerfile. Here, select Linux.
- Visual Studio creates a Dockerfile for you. This defines how to create the container image for your Web API project.
- Your Dockerfile will now look as follows:
FROM mcr.microsoft.com/dotnet/core/aspnet:2.2-stretch-slim AS base
WORKDIR /app
EXPOSE 80
EXPOSE 443

FROM mcr.microsoft.com/dotnet/core/sdk:2.2-stretch AS build
WORKDIR /src
COPY ["PacktACIApp/PacktACIApp.csproj", "PacktACIApp/"]
RUN dotnet restore "PacktACIApp/PacktACIApp.csproj"
COPY . .
WORKDIR "/src/PacktACIApp"
RUN dotnet build "PacktACIApp.csproj" -c Release -o /app

FROM build AS publish
RUN dotnet publish "PacktACIApp.csproj" -c Release -o /app

FROM base AS final
WORKDIR /app
COPY --from=publish /app .
ENTRYPOINT ["dotnet", "PacktACIApp.dll"]
- Now, when you run your project from Visual Studio, it will run inside a Docker container. Make sure that Docker is running and click the Docker button on the toolbar:

Running the Dockerfile from Visual Studio
- The browser will open once more, just like in the previous step, except now, your app will run in a container.
If you get a Docker Volume sharing is not enabled error when you first run your project, then open PowerShell as an administrator and run the following line of code: docker run --rm -v c:/Users:/data alpine ls /data. Restart Visual Studio and run the project again.
Now that we have created our Dockerfile, the next step is to deploy the image to the Azure Container Registry.