
It can be challenging for developers to understand the different methods of a web API when it is consumed. This problem can be solved by using Swagger, which is an open source software framework tool that offers developers support for automated documentation, code generation, and test-case generation. This tool generates useful documentation and help pages for web APIs. It also provides benefits such as client SDK generation, API discoverability, and interactive documentation.
Swagger is a language-agnostic specification for describing REST APIs. It offers the ability for both users and computers to understand the capabilities of a service without any direct access to the implementation (source code, network access, documentation, and so on). This reduces the amount of time that's needed to accurately document service, and it minimizes the amount of work that is needed to connect disassociated services to it.
Swagger uses a core specification document, which is called swagger.json. It is generated by the Swagger toolchain (or third-party implementations of it) based on the service at hand. It describes how to access the API with HTTP(s) and what its capabilities are.
In this demonstration, we are going to create documentation for the API using Swagger. This can be created directly in Visual Studio using a NuGet package. Go through the following steps:
- Clone or download the API sample application from the GitHub page that was referenced at the beginning of this chapter in the Technical requirements section.
- Open the solution in Visual Studio.
- In Visual Studio, in the top menu, go to Tools | NuGet Package Manager.
- Open the Browse tab and search for Swashbuckle.AspNetCore. Select the package and install it for your application.
- Wait for the package to be installed. Then, open Startup.cs and import the following namespace:
using Microsoft.OpenApi.Models;
- Add the following line of code to the ConfigureServices method in Startup.cs:
   services.AddSwaggerGen(c =>
   {
       c.SwaggerDoc("v1", new OpenApiInfo { Title = "To Do API", Version = "v1" });
    });
- Add the following lines of code to the configure method in Startup.cs:
 // Enable middleware to serve generated Swagger as a JSON endpoint.
 app.UseSwagger();

 // Enable middleware to serve swagger-ui (HTML, JS, CSS, etc.),
 // specifying the Swagger JSON endpoint.
 app.UseSwaggerUI(c =>
 {
       c.SwaggerEndpoint("/swagger/v1/swagger.json", "My To Do API v1");
 });
- Now, run your application. When the API is displayed in the browser, replace the URL with the following:
https://localhost:44377/swagger/index.html
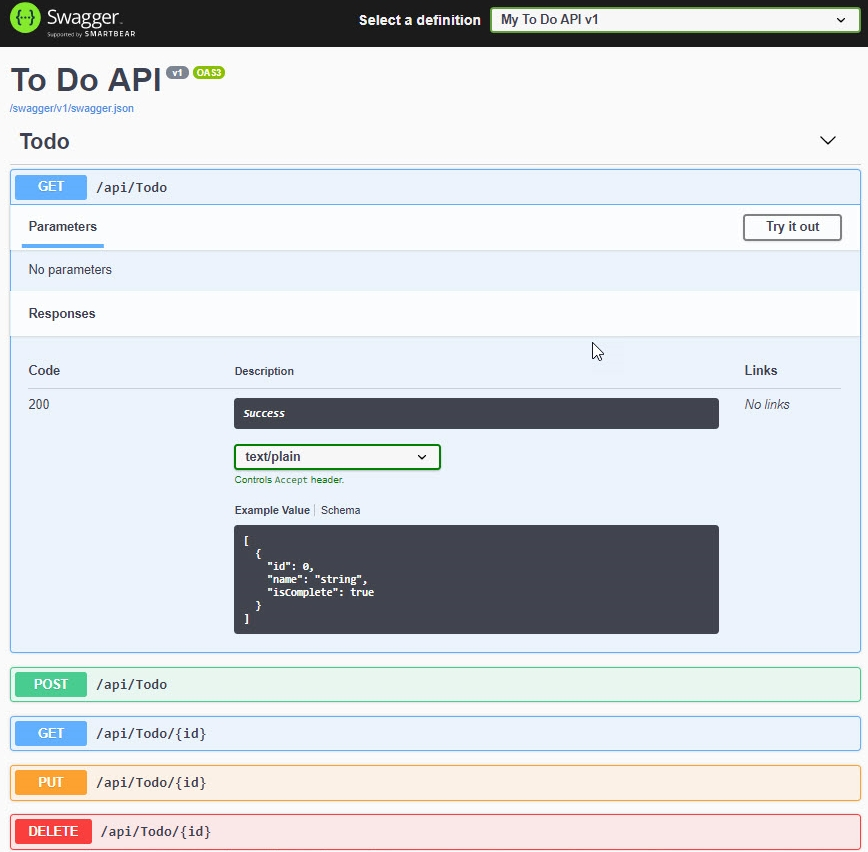
- The Swagger page will be displayed. This will look as follows:

- You can drill down into the different methods by clicking on them, as shown in the following screenshot:
- Now, you can publish this API directly from Visual Studio to the Web App that we created in the previous demonstration. Therefore, in the Solution Explorer of Visual Studio, right-click on the project name and select Publish...:

- On the first screen of the wizard, select App Service, then Select Existing, and click Publish:

- On the next screen, select the subscription where the API will be deployed, select PAcktPubToDoAPI, and click OK:

The API will be published and the browser opened to display the root URL of the Web App.
- To display the API, append the following to the URL:
https://<our-azure-webapp-url/api/ToDo
- To display the Swagger page, append the following to the root URL of the web API:
https://<your-azure-webapp-url/swagger/index.html
Now, we can navigate to the Azure portal by opening https://portal.azure.com/.
Go to the App Service overview page. Then, under API, select API definition. Here, we can add the definition to the App Service. Add the Swagger URL to the textbox and click Save:

This will update the API definition.
This concludes this demonstration. In the next section, we are going to cover Web Apps for containers.