Chapter at a Glance
In this chapter, you will learn how to
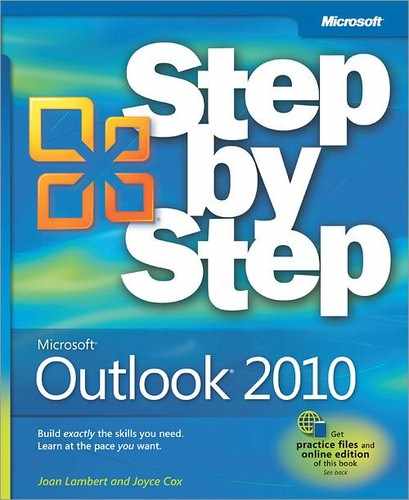
Messages composed in and sent from Microsoft Outlook 2010 don't have to consist only of plain text. They can contain diagrams and graphics and can be visually enhanced by a judicious use of colors, fonts, and backgrounds. For more formal messages, you can attach a signature that includes your contact information as well as graphics such as a photograph or logo.
In this chapter, you'll first review formatting techniques, set default fonts for new messages and message responses, and create an e-mail signature that's automatically included in all new messages. Then you'll insert and modify pictures, Clip Art, and shapes, and use the new Screenshot and Screen Clipping tools to capture images of content displayed on your screen. You'll create and format graphical representations of business information and data. Finally, you'll learn about the message settings and delivery options you can set for outgoing messages.
Note
Practice Files Before you can complete the exercises in this chapter, you need to copy the book's practice files to your computer. The practice files you'll use to complete the exercises in this chapter are in the Chapter10 practice file folder. A complete list of practice files is provided in Using the Practice Files at the beginning of this book.
By default, the text content of an Outlook message is shown in black, 11-point Calibri (a font chosen for its readability), arranged in left-aligned paragraphs on a white background. You can change the appearance of the text in a message by applying either local formatting (character or paragraph attributes and styles that you apply directly to text) or global formatting (a theme or style set that you apply to the entire document) in the same way that you would when working in a Microsoft Word document or Microsoft PowerPoint presentation. However, if you have a preferred font or theme for the messages you compose, you can save your preferences so that Outlook automatically applies it to new messages and to message responses.
You set your default font and theme preferences from the Signatures And Stationery dialog box, which you open by clicking Stationery And Fonts on the Mail page of the Outlook Options dialog box. You have the option of specifying one default font for new messages and another for message responses. You might do this if you need to visually differentiate between original messages and responses. For example, you might compose original messages in a dark blue font, and compose message responses in a medium blue font.

You can also specify a theme—a preselected set of fonts, colors, and graphic elements—to have Outlook create new messages using that theme. For example, if your organization uses a specific theme for corporate communications, you can specify that theme as the default for outgoing messages as well as for Word documents.
Tip
If you create different types of Office documents (such as Word documents, PowerPoint presentations, and corporate e-mail messages) for your organization, you can ensure the uniform appearance of all the documents by applying the same theme to all the documents. For example, you might choose a theme that incorporates your company's corporate fonts and logo colors.
You can manually format text in the content pane to differentiate it from your default font. The local formatting options available in Outlook 2010 are the same as those available in Word and other Microsoft Office 2010 programs, and you might already be familiar with them from working with those programs. Here's a quick review of the types of formatting changes you can make.
Font, size, and color More than 220 fonts in a range of sizes and in a virtually unlimited selection of colors.
Underline style and color Plain, multiple, dotted, dashed, wavy, and many combinations thereof, in all colors.
Effects Strikethrough, superscript, subscript, shadow, outline, emboss, engrave, small caps, all caps, or hidden.
Character and paragraph styles Titles, headings, and purpose-specific font formatting (for example, for quotes and book titles).
In a message composition window, the local formatting commands are available both from the Message tab and from the Format Text tab. The formatting commands are available only when the cursor is in the content pane. When the cursor is in a message header box (such as To or Subject), the formatting commands are grayed out.
You can apply character and paragraph styles from the Quick Styles gallery in the Styles group on the Format Text tab, or from the Styles pane that opens when you click the Styles dialog box launcher on the Format Text tab.

Tip
You can preview the effect of a style on the currently selected text by pointing to the style in the Quick Styles gallery.
The global formatting options—themes and style sets—are sets of local formatting that you can apply with a couple of clicks.
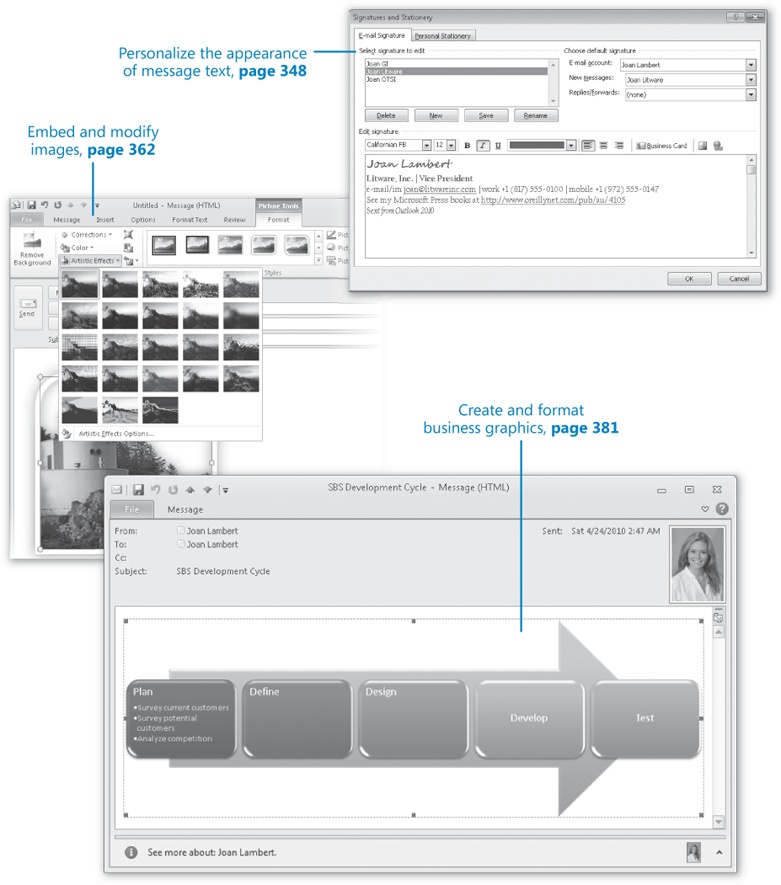
A theme applies a preselected combination of colors, fonts, and effects to all the message content. You can apply all the elements of a theme to the message content by selecting any of the 40 available themes in the Themes gallery, which you open from the Themes group of the Options tab.
The default theme for all e-mail messages, Word documents, PowerPoint presentations, Microsoft Excel workbooks, and other Office 2010 documents is the Office theme. If you don't apply another theme to your message, the colors, fonts, and effects in your message are controlled by the Office theme.
You can modify the currently applied theme by selecting a color set from the Colors gallery, a font set from the Fonts gallery, or an effect from the Effects gallery.

A style set changes the colors, fonts, and paragraph formatting of individual styles. You can change the appearance of all the styles in a message by selecting any of the 14 available style sets (or by creating your own). Selecting a style set changes the appearance of all the text in the current document, as well as the appearance of the icons in the Quick Styles gallery. You can preview or select a style set by clicking the Change Styles button in the Styles group on the Format Text tab, clicking Style Set, and then pointing to or clicking a specific style set.

Note
Troubleshooting The appearance of buttons and groups on the ribbon changes depending on the width of the program window or item window. For information about changing the appearance of the ribbon to match our screen images, see Modifying the Display of the Ribbon at the beginning of this book.
When you send an e-mail message to someone, you will most likely "sign" the message by typing your name at the end of the message text. You can automatically insert your signature text in outgoing messages by creating an e-mail signature and assigning it to your e-mail account. Your e-mail signature can include additional information that you want to consistently provide to message recipients.

Your e-mail signature can include any text or graphics you want; you would commonly include your name and contact information, but depending on your situation, you might also include information such as your company name, job title, a legal disclaimer, a corporate or personal slogan, a photo, and so on. You can even include your electronic business card as part or all of your e-mail signature.
Note
See Also For more information about electronic business cards, see Personalizing Electronic Business Cards in Chapter 9.
You can create different signatures for use in different types of messages or for use when you're sending messages from different e-mail accounts. For example, you might create a formal business signature for client correspondence, a casual business signature for interoffice correspondence, and a personal signature for messages sent from a secondary account. Or you might create a signature containing more information to send with original e-mail messages, and a signature containing less information to send with message replies. You can format the text of your e-mail signature in the same ways that you can format message text. If you want to apply formatting that's not available from the selections of buttons across the top of the signature content pane, you can create and format your signature either in an e-mail message composition window or in a Word document, copy the signature from its original location, and then paste it into the signature content pane. Using this technique, you can include artistic content such as WordArt and Clip Art in your e-mail signature.
Note
All Office programs share the Microsoft Office Clipboard, so you can easily copy and move content between programs. You don't need to work from the Clipboard to paste the most recently cut or copied text into another location; it's stored in the shared Clipboard, so all Office programs have access to it.
You can assign specific e-mail signatures to specific accounts so that they appear automatically in new messages. You can also manually insert any e-mail signature in any message. To manually insert an existing e-mail signature in a message:
Tip
If you have not previously set up a signature, clicking the Signature button opens the Signatures And Stationery dialog box in which you can create a signature.
To remove an e-mail signature from a message, select and delete the signature content as you would any other text.
In this exercise, you'll first set the default fonts for new messages and for responses. Then you'll create an e-mail signature and instruct Outlook to insert the signature in all new messages you create.
Note
SET UP You don't need any practice files to complete this exercise. Display your Inbox, and then follow the steps.
Display the Backstage view and then, in the left pane, click Options.
The Outlook Options dialog box opens, displaying the General page.
In the left pane of the Outlook Options dialog box, click Mail.
From the Mail page of the Outlook Options dialog box, you can access other dialog boxes that control the settings for specific features.
In the Compose messages section, click the Stationery and Fonts button.
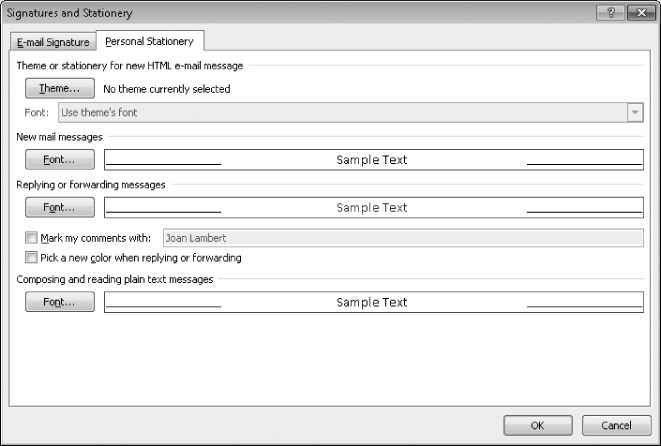
The Signatures And Stationery dialog box opens, displaying the Personal Stationery page.
By default, new messages use the 11-point version of the body font and font color specified by the theme (for the default Office theme, this is 11-point black Calibri), and responses use the same font, but in blue.
Under New mail messages, click the Font button.
Scroll down the Font list, noting the many fonts you can choose from, and click Garamond.
The sample text in the Preview pane changes to reflect your selection.
Note
This Font dialog box doesn't display font previews in the Font list; you have to actually select the font to see what it looks like in the Preview box. You can preview fonts in the font lists that are available in a message composition window, either from the Basic Text group on the Message tab or from the Font group on the Format Text tab.
Scroll down the Font list and click Lucida Sans.
The sample text changes, as do the options available in the Font Style list. The available styles are specific to the fonts installed on your computer.
In the Font style box, click Demibold Roman, and in the Size box, click 9.
Click the Font color arrow and then in the palette, click the second darkest square in the purple column. (When you point to the square, the ScreenTip identifies it as Purple, Accent 4, 25%.)
In the Font dialog box, click OK.
The New Mail Messages font preview changes to reflect your selections.
In the Replying or forwarding messages area, click the Font button. Repeat steps 6 through 9 to set the default font for message responses to Purple, 9-point, Demibold Roman, Lucida Sans.
In this instance, you aren't differentiating between the color of the font in your new messages and message responses; instead you will differentiate by including an e-mail signature only in new messages.
In the Signatures and Stationery dialog box, click the E-mail Signature tab.
Below the Select signatures to edit box, click New.
Outlook prompts you to first supply a name for the new signature.
In the Type a name for this signature box, enter Casual. Then click OK.
Outlook creates the Casual signature, which is currently blank.
In the Edit signature box, type Thanks! (including the exclamation point), press the Enter key, and then type your name.
 Select your name. Click the Font arrow and then, in the list, click
Lucida Handwriting (or any other
font you like).
Select your name. Click the Font arrow and then, in the list, click
Lucida Handwriting (or any other
font you like). Click the Font Size
arrow and then, in the Font Size
list, click 14.
Click the Font Size
arrow and then, in the Font Size
list, click 14. Click the Font
Color arrow and then, under Standard Colors, click the Purple box. Then click away from your
name to see the results of your changes.
Click the Font
Color arrow and then, under Standard Colors, click the Purple box. Then click away from your
name to see the results of your changes.With the formatting you applied, the name now resembles a signature.
Apply any other types of formatting you want; for example, you might want to format the Thanks! to match your default message font.
Tip
If you want to include your electronic business card as part of your signature, click the Business Card button. Then in the Insert Business Card dialog box, locate and click your name, and click OK.
You can manually insert any signature you create in an e-mail message, but it's a more usual practice to instruct Outlook to insert the signature automatically.
In the Choose default signature area, ensure that your default e-mail account is shown in the E-mail account box. Then click the New messages arrow and, in the list, click Casual.
Outlook will now insert your signature into all new e-mail messages you send from this account but not into replies or forwarded messages.
Tip
If you have more than one e-mail account set up in Outlook, you can instruct Outlook to insert a different signature in messages sent from each account. To do so, click the account in the E-mail Account list, click the signature you want to use with that account in the New Messages and Replies/Forwards lists, and then click OK.
Make any other changes you want, and then click OK in the Signatures and Stationery dialog box and in the Outlook Options dialog box.
 On the Home tab, in the New group, click the New E-mail button.
A message composition window opens. Your e-mail signature is already present in the content pane.
Click to position the cursor in the blank line at the top of the content pane. Then type I love this book!
The message text is automatically formatted in the default font you set earlier in this exercise.


E-mail is a means of communicating information to other people, and, as the old saying goes, a picture is worth a thousand words. Using Outlook 2010, you can communicate visual information in the following ways:
Share photographs with other people by attaching them to or embedding them in messages.
Share information from Web sites, documents, and other visual presentations by capturing pictures of things on your screen using a handy tool that is new in Office 2010, and then inserting those screen clippings in your message.
Explain complicated processes and other business information by creating SmartArt graphics within messages or by embedding SmartArt graphics that you create in other Office 2010 programs.
Communicate statistical information by creating a chart within a message.
Decorate message content by inserting Clip Art images.
You can insert all these types of images from the Illustrations group on the Insert tab into the content pane of an e-mail message, calendar item, or task; or into the Notes pane of a contact record. (You can't insert an image into a note.)
Note
See Also For information about SmartArt graphics and charts, see Creating and Formatting Business Graphics later in this chapter.
The process of embedding a picture in a message or other Outlook item is straightforward. Simply follow these steps:
Position the cursor in the content pane or notes pane where you want the picture to appear.
On the Insert tab, in the Illustrations group, click the Picture button.
The Insert Picture dialog box opens, displaying the contents of your Pictures library.
In the Insert Picture dialog box, browse to the folder containing the picture you want to insert.
Click the picture to select it, and then click Insert.
Tip
To insert multiple pictures at one time, select the first picture you want to insert. Then either press Shift and click the last picture in a consecutive series, or press Ctrl and click each individual picture.
After inserting a picture, you can modify the picture and control the flow of text around it by using the commands on the Format contextual tab that appears when the picture is selected.

Note
See Also For information about applying effects to pictures, see Modifying Images later in this topic.
Clip Art is free media—illustrations, photographs, videos, and audio files—that you can insert into any Office document. A collection of Clip Art is installed on your computer and available whether you are working online or offline. Additional Clip Art is available from the Microsoft Office Web site at office.microsoft.com.

To locate and insert a Clip Art image, follow these steps:
Position the cursor in the content pane or Notes pane where you want the image to appear.
On the Insert tab, in the Illustrations group, click the Clip Art button.
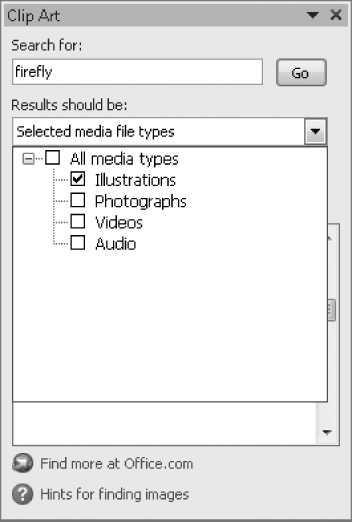
The Clip Art task pane opens on the right side of the Outlook item window.
In the Search box, enter one or more keywords describing the image you want to locate.
In the Results Should Be list, clear the check boxes of any media file types you don't want to search for.
Click Go.
Scroll through the search results until you locate the image you want to insert.
Point to any image to display a ScreenTip with information about the file; click the vertical bar that appears on the right side of the image to display a menu of commands.
From the menu, you have several options for working with the selected image.
On the menu, click Insert.

In addition to Clip Art, you can insert many types of shapes into the content pane of an Outlook item. To insert a shape, follow these steps:
Available shapes include lines and simple arrows, geometric shapes, common symbols, block arrows, mathematical operators, flowchart symbols, stars and banners, and more.
After inserting a shape, you can change its outline and fill colors and modify its appearance in many ways by using the commands available on the Drawing Tools - Format contextual tab.
The Screenshot and Screen Clipping tools are new features of Outlook 2010 that you can use to easily capture images of either an entire window that's open on your screen or a specific area of the screen that you select.
To capture and insert a screen image, follow these steps:
Ensure that the window you want to capture is not minimized or, if you plan to capture only a portion of a window, that it's visible on the screen.
In the Outlook item window, position the cursor in the content pane or Notes pane where you want the image to appear.
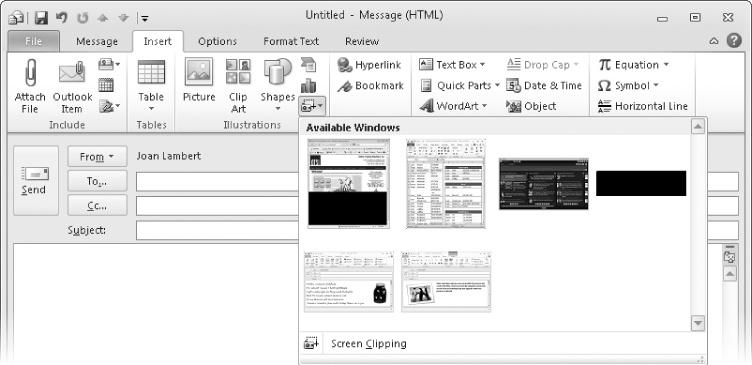
On the Insert tab, in the Illustrations group, click the Screenshot button.
The Available Windows gallery displays the currently open (non-minimized) windows.
To insert an image of an entire open window into the Outlook item, click its icon in the Available Windows gallery.
To capture an image of a portion of the content that's visible on your screen, click Screen Clipping.
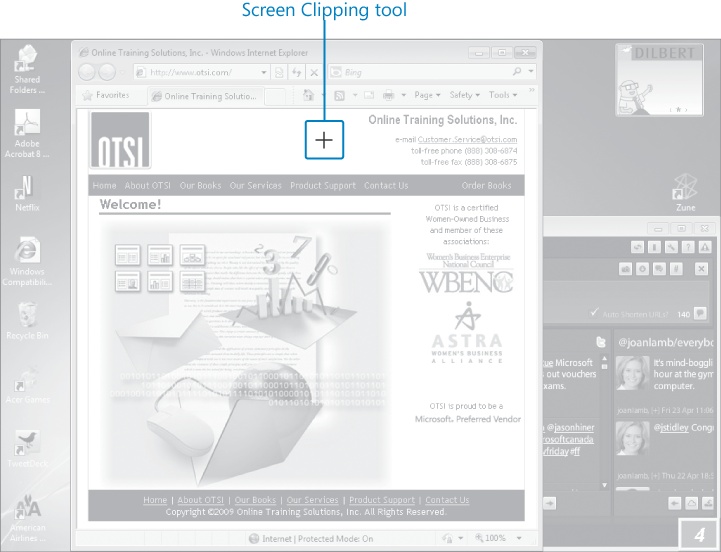
If you click Screen Clipping, the active Outlook item is minimized to the Windows Taskbar so that the content behind it is visible. White shading covers the desktop, and the Screen Clipping tool (which at this point looks like a large plus sign) appears.
Position the Screen Clipping tool in the upper-left corner of the area you want to capture. Press and hold the mouse button, and then drag to encompass the capture area.
The Screen Clipping tool makes a window in the shaded area to indicate the intended capture area. You can change the capture area until you release the mouse button.
When the entire area you want to capture is encompassed in the Screen Clipping box, release the mouse button.
The Outlook item is restored from the taskbar and the captured image appears in the content pane.


Using functionality that is new in Office 2010, you can modify and enhance images directly in the item window. From the new Picture Tools contextual tabs that appear when you select an image, you can do things like:
Crop or remove background elements from an image.
Sharpen or soften the image content.
Colorize the image and control color saturation and tone.
Apply artistic effects to make an image look as though it's rendered in pencil, chalk, marker, or paint, or has a pattern applied to it.
Add shadows, reflections, and glowing or soft edges.
Apply three-dimensional effects.
Certain effects can be applied to only specific types of files. For example, you can apply artistic effects to a photograph that's saved in .jpg format (a common format for digital photos) but not to an illustration that's saved in .wmf format (a common format for Clip Art illustrations).
In this exercise, you'll insert a photograph in an e-mail message and then use some of the new Picture Tools commands to modify the photo before sending it.
Note
SET UP You need the Lighthouse photograph located in the Chapter10 practice file folder to complete this exercise. Open a new message composition window, and then follow the steps.
Maximize the message window.
On the ribbon, click the Insert tab.
While the cursor is in the To field, only the commands in the Include group are available.
Click to position the cursor in the content pane.
The commands in the Tables, Illustrations, Links, Text, and Symbols groups become available.
Note
See Also For information about inserting and formatting tables, see Creating and Sending Messages in Chapter 3.
 On the Insert tab, in the Illustrations group, click the Picture button.
The Insert Picture dialog box opens, displaying the Pictures library or the previous location you browsed to in the current computing session.
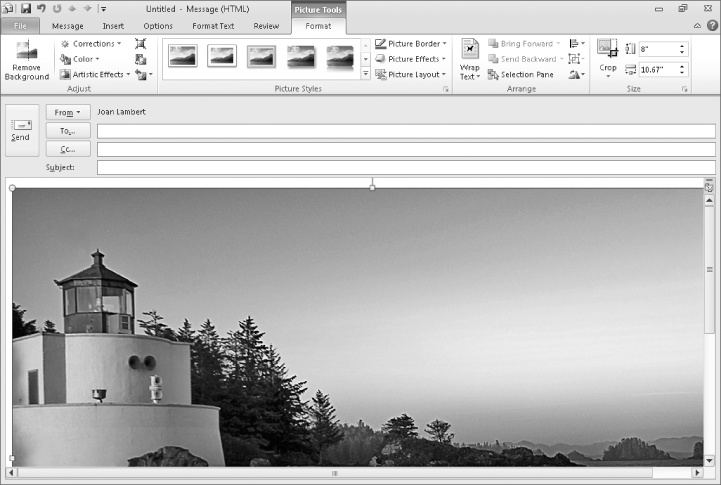
Navigate to the Chapter10 practice file folder, click the Lighthouse photo, and then click Insert.
The photo appears in the e-mail message content pane, and the Picture Tools - Format contextual tab becomes active. Because the image is so large, only the upper-left corner of the photo is visible in the content pane.
Note
Troubleshooting If your screen resolution is set higher than 1024 x 768, you will see more of the photo in the message window. Either change the size of your message window to match ours or simply follow along with the steps as written and be aware that your message window will appear different from those shown here.
 On the Format tab, in the Size group, click and hold the down arrow
in the Shape Height box until the shape height is 4".
On the Format tab, in the Size group, click and hold the down arrow
in the Shape Height box until the shape height is 4".The shape's width decreases proportionally with the shape's height so that the photo maintains its aspect ratio.
 In the Adjust
group, click the Remove
Background button.
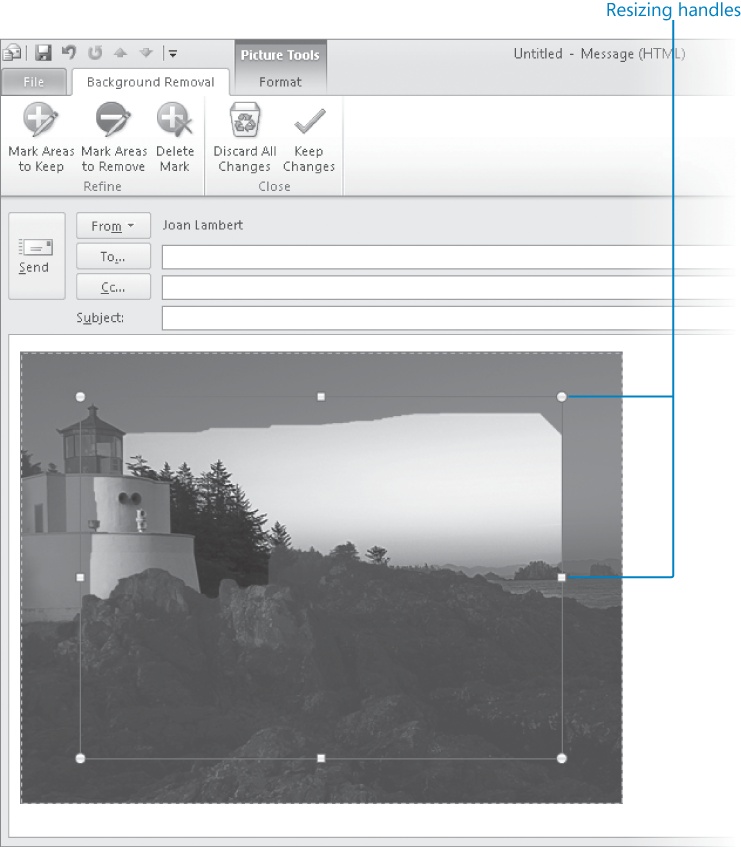
In the Adjust
group, click the Remove
Background button.Purple shading obscures all but selected areas of the photo. Resizing handles surround an area selector in the center of the photo. The Picture Tools - Background Removal contextual tab appears on the ribbon.
Drag the upper-left resizing handle to the left edge of the photo, keeping it just above the top of the lighthouse. Then drag the lower-right resizing handle to the lower-right corner of the photo.
The purple shading now covers only part of the sky.
 On the Background
Removal tab, in the Refine
group, click the Mark Areas to
Remove button. Then move the cursor back to the
photo.
On the Background
Removal tab, in the Refine
group, click the Mark Areas to
Remove button. Then move the cursor back to the
photo.The cursor shape changes from an arrow to a pencil.
Click the area of sky that remains visible just below the purple screen.
After a moment, a marker appears in the location you clicked, and the purple screen extends to cover the area defined by your clicks.
 Click two more times (or as necessary) to
shade the entire sky. If a click results in an unintended
effect, click the Undo button on
the Quick Access Toolbar to remove the effect, and then try
again.
Click two more times (or as necessary) to
shade the entire sky. If a click results in an unintended
effect, click the Undo button on
the Quick Access Toolbar to remove the effect, and then try
again.Note
Keyboard Shortcuts Press Ctrl+Z to undo the most recent action. Press Ctrl+Y to repeat the most recent action.
Note
See Also For more information about keyboard shortcuts, see Appendix A at the end of this book.
Each click affects the area that resembles the marker location.
 On the Background
Removal tab, in the Close group, click the Keep Changes button.
On the Background
Removal tab, in the Close group, click the Keep Changes button.The purple-shaded area is removed from the photo, leaving only a white background. The Background Removal contextual tab disappears from the ribbon and the Format contextual tab becomes active again.
Click in the content pane, away from the photo, to see the full effect of removing the background from the photo.
The lighthouse and landscape details are clearly outlined as though the photo had been carefully trimmed with scissors.
 Click the photo to select it and activate the
Format contextual tab. On the
Format tab, in the Size group, click the Crop arrow (not the button), and then
click Aspect Ratio.
Click the photo to select it and activate the
Format contextual tab. On the
Format tab, in the Size group, click the Crop arrow (not the button), and then
click Aspect Ratio.A menu of width-to-height ratios opens.
On the Aspect Ratio menu, click 1:1.
A selection area appears on the photo.
Drag the photo to the right within the square selection area so that the left edge of the photo is aligned with the left edge of the square.
Press and hold the Shift key, and then drag the lower-right crop handle up and to the left until the square selection area encompasses the lighthouse, trees, and only a bit of rock. Release the mouse button first, and then the Shift key.
The resulting selection is approximately three inches square. The area of the photo outside of the selection is depicted in grayscale rather than in color.
 In the Size group, click the Crop button.
The photo is cropped to the square shape.
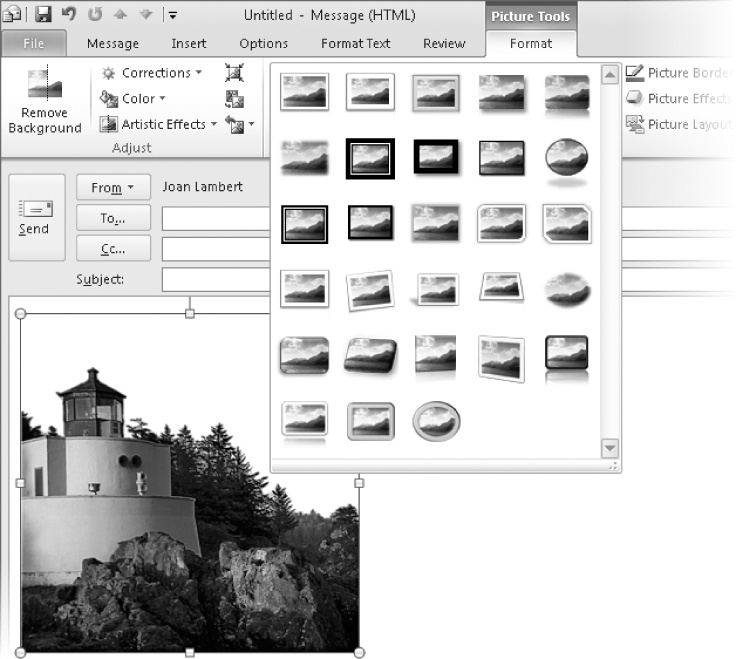
In the Picture Styles gallery, point to several of the icons to see their names and the effect of applying that style to the selected photo. Then click the Rounded Diagonal Corner, White style (in the fourth column of the third row).
A combination of shapes and shadows is applied to the photo.
 With the photo still selected, click the
Artistic Effects button in the Adjust group.
With the photo still selected, click the
Artistic Effects button in the Adjust group.In the Artistic Effects gallery, point to several of the icons to see their names and the effect of applying that style to the selected photo. Then click the Mosaic Bubbles effect (in the fourth column of the third row).
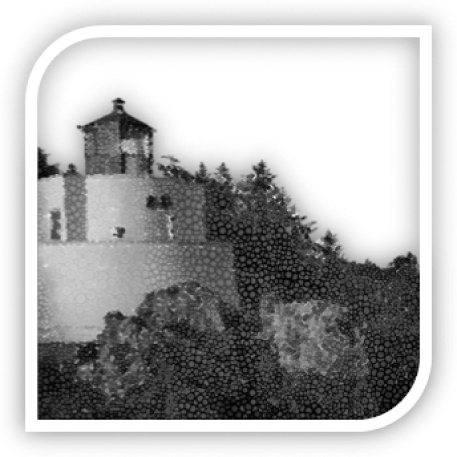
Click in the content pane away from the photo to see the full effect.
The artistic effect causes the photo to more closely resemble a painting than a photograph.
In the message header, enter your e-mail address in the To box and enter SBS Picture Tools in the Subject box. Then send the message.
When the message arrives in your Inbox, note that you can select and copy the embedded picture in the Reading Pane or in the open message window for use in other documents.


Note
CLEAN UP Close any open message windows. Move the SBS Picture Tools message to the SBS Messages folder and retain it for use in later exercises.
Tip
When you respond to a message that contains an embedded image, clicking the image activates the Picture Tools Format tab that contains a restricted range of formatting options. (Fewer formatting options are available when you work with the modified image than were available in the original message window.)
Images can be especially valuable in business communications, when you need to clearly explain facts or concepts, particularly to a global audience. In Outlook 2010 (and other Office 2010 programs), you can depict relationships, processes, cycles, hierarchies, and so on, by creating SmartArt graphics, and you can depict graphical representations of data by creating charts.
You can create a SmartArt graphic directly in an e-mail message or you can convert an existing list into a SmartArt graphic. When sending a message, Outlook converts any SmartArt graphics within the message to static graphics.
You can create a chart directly in an e-mail message. Charts you create in an Outlook message look exactly like those you would create in an Excel workbook—because they are based on an Excel data source that is created from within Outlook.
To create a chart in a message or other Outlook item, follow these steps:
Position the cursor in the pane where you want the picture to appear.
On the Insert tab, in the Illustrations group, click the Insert Chart button.
In the Insert Chart dialog box, locate the type of chart you want to create. Click the chart icon, and then click OK.
A basic chart appears in the Outlook item, and several Chart Tools contextual tabs become active on the ribbon. An Excel program window opens, containing the mock data from which the basic chart is built.
Update the mock data with your own. When you finish, close the Excel window.
It's not necessary to save or name the worksheet that contains the data depicted by the chart.


When you want to send a chart depicting important data, it's safer to store the data in an Excel worksheet, create a chart in the Excel workbook from the data, and then embed that chart in an e-mail message.
In this exercise, you'll create a SmartArt flowchart in an e-mail message.
Note
SET UP You don't need any practice files to complete this exercise. Open a new message composition window, and then follow the steps.
Maximize the message window, and then click in the content pane.
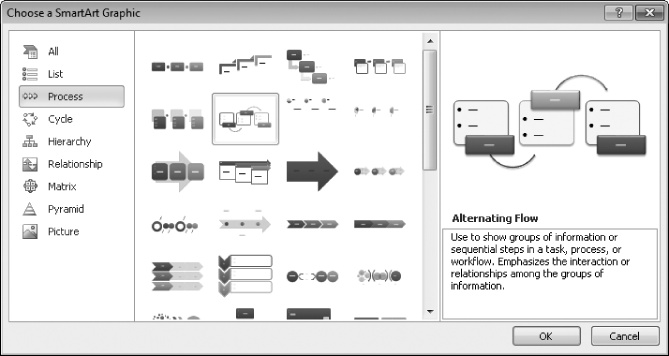
 On the Insert tab, in the Illustrations group, click the SmartArt button.
Scroll through the center pane of the dialog box for an overview of the available SmartArt graphics.
In the left pane, click Process. Scroll to the top of the center pane and click the second icon in the second row (Alternating Flow).
This is a process diagram showing the details of a three-step process.
In the Choose a Smart Art Graphic dialog box, click OK.
Outlook inserts a basic version of the selected process diagram in the content pane. It looks similar to the preview graphic, but without the colors and three-dimensional aspects. (You select formatting options later.) The Text pane opens and the two SmartArt Tools contextual tabs, Design and Format, appear on the ribbon.
Tip
You can display or hide the Text pane for any SmartArt graphic by clicking the diagram and then clicking the Text Pane button in the Create Graphic group on the Design contextual tab. Or you can click the Text Pane tab on the left side of the diagram drawing area.

 You can enter text in the Text pane or
directly in the graphic—selecting a graphic element or positioning
the insertion point within the bulleted list also selects the
corresponding element in the graphic or Text pane. The graphic
name is shown at the bottom of the Text pane; pointing to it
displays a ScreenTip describing the purpose of the current type of
graphic.
You can enter text in the Text pane or
directly in the graphic—selecting a graphic element or positioning
the insertion point within the bulleted list also selects the
corresponding element in the graphic or Text pane. The graphic
name is shown at the bottom of the Text pane; pointing to it
displays a ScreenTip describing the purpose of the current type of
graphic.In the Text pane, click the [Text] placeholder to the right of the first bullet, and then type Plan.
As you type in the pane, the text appears in the diagram.
Click the [Text] placeholder to the right of the first second-level (indented) bullet, and type Survey current customers. Press the Down Arrow key to move to the next second-level bullet, and then type Survey potential customers.
The font size in the graphic adjusts to fit the text into the available space.
Press Enter to create another second-level bullet in the Text pane and in the graphic, and then type Analyze competition.
In the diagram, click the second solid blue box to select the placeholder, and then type Define.
As you type, the text also appears in the second first-level bullet in the Text pane.
In the third solid blue box, type Design.
 On the Design contextual tab, in the Create Graphic group, click the Add Shape arrow (not the button) and then, in the list, click
Add Shape After.
On the Design contextual tab, in the Create Graphic group, click the Add Shape arrow (not the button) and then, in the list, click
Add Shape After.An additional item appears at the right end of the diagram and in the Text pane.
You can add shapes above, below, before, or after the selected shape, depending on the diagram layout.
In the new solid blue box, type Develop.
In the Text pane, click at the end of the word Develop, and then press Enter.
A first-level bullet and additional shape appear.
 Type Test
and then, in the Text pane, click
the Close button.
Type Test
and then, in the Text pane, click
the Close button.At its current size, the text within the diagram is very difficult to read.
Point to the move handle (the vertical line of four dots) on the right side of the diagram. When the pointer becomes a double-headed arrow, drag the move handle to the right so that the diagram fills the width of the message window.
In the Layouts gallery, point to a few of the icons to preview the effect of the SmartArt graphic layout on your content. Then click the second layout in the second row (Continuous Block Process).
The process diagram layout changes, as do the styles available on the Design tab.
In the SmartArt Styles gallery, point to a few of the icons to preview the effect of the style on your graphic. Then in the 3-D section, click the first icon (Polished).
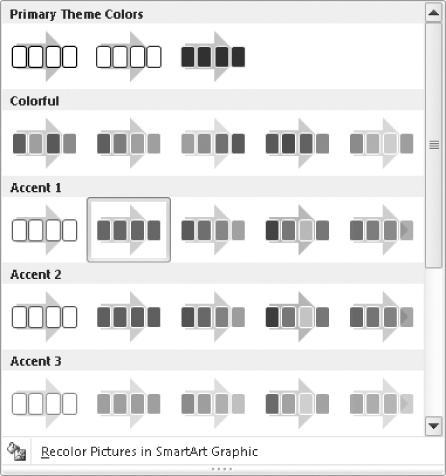
 In the SmartArt
Styles group, click the Change
Colors button.
In the SmartArt
Styles group, click the Change
Colors button.The Change Colors gallery expands.
The color schemes displayed in the Change Colors gallery are variations of the current theme colors, and they are organized in groups that reflect the six thematic accent colors. Changing the theme also changes the color schemes in the gallery.
In the Change Colors gallery, point to a few of the icons to preview the effect of the color scheme on your graphic. Then under Colorful, click the second icon (Colorful Range – Accent Colors 2 to 3).
The color scheme of the graphic changes to match your selection.
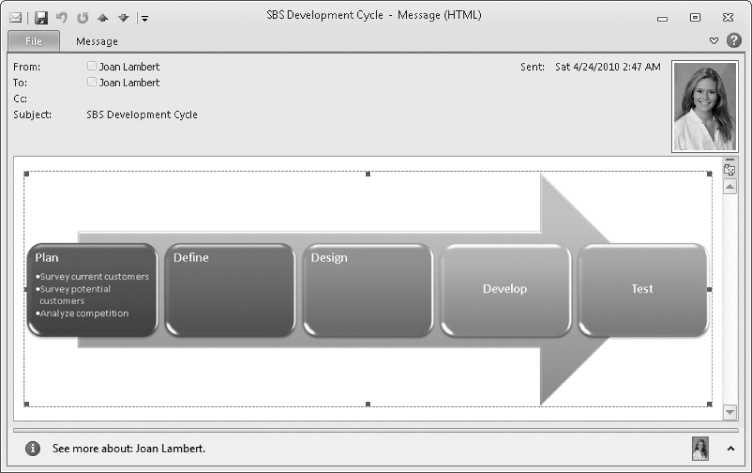
In the message header, enter your e-mail address in the To box, and enter SBS Development Cycle in the Subject box. Then send the message.
When you receive the message, the SmartArt graphic is visible in the Reading Pane. Regardless of the size at which you created the graphic, the entire graphic is visible in the Reading Pane.
Open the message, and click the SmartArt graphic.
The SmartArt graphic has been converted to a static image. If you open the message from your Sent Items folder, you'll find that the same is true of the graphic in that message.


When you send a message, you can include visual indicators of the importance, sensitivity, or subject category of a message or other Outlook item, flag a message for follow-up, restrict other people from changing or forwarding message content, provide a simple feedback mechanism in the form of voting buttons, and specify message delivery options to fit your needs.
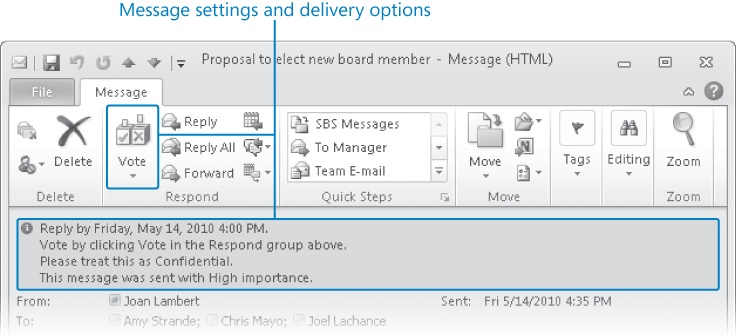
Common message settings and delivery options include:
Flags and reminders You can place an outgoing message on your task list, add an informational reminder to it, or set a reminder to appear at a certain time and date, for yourself and for message recipients.
Importance You can indicate the urgency of a message by setting its importance to High or Low. A corresponding banner appears in the message header and, if the Importance field is included in the view, an importance icon appears in the Inbox or other message folder.
Sensitivity You can indicate that a message should be kept private by setting its sensitivity to Confidential, Personal, or Private. No indicator appears in the message folder, but a banner appears in the message header to indicate a sensitivity level other than Normal. You can choose to include the sensitivity as one of the message attributes shown in the Inbox pane, but if you do, it replaces the message subject, which isn't very helpful.
Security If you have a digital ID, you can digitally sign the message; or you can encrypt the contents of the message.
Voting options If you and your message recipients have Microsoft Exchange Server accounts, you can add voting buttons to your messages to enable recipients to quickly select from multiple-choice response options.
Tracking options You can track messages by requesting delivery receipts and read receipts. These receipts are messages automatically generated by the recipient's e-mail server when it delivers the message to the recipient and when the recipient opens the message.
Delivery options You can have reply messages delivered to an e-mail address other than yours, specify a date and time for the message to be delivered and to expire, and set advanced attachment format and encoding options.
Categories You can assign a message to a color category that will be visible to the recipient if he or she views the message in Outlook.
Tip
You can easily sort and group messages by message settings by choosing the message setting in the Arrange By list.
The most commonly used options are available in the Tags group on the Message tab of the message window. You can access other options from the Properties dialog box, which you open by clicking the Tags dialog box launcher.

You can limit the actions other people can take with messages they receive from you by restricting the message permissions. For example, you can prevent recipients from forwarding or printing the message, copying the message content, or changing the content when they forward or reply to the message. (Restrictions apply also to message attachments.) Within a message window, permission options are available both on the File tab and in the Permission group on the Options tab.
Note
See Also For information about digital signatures and for more information about restricting recipients from forwarding, copying, or printing messages you send, see Securing Your E-Mail in Chapter 11.
You can format the text and background of your messages, either by choosing individual formatting options and styles or by applying a theme.
You can automatically insert contact information in e-mail messages by using an electronic signature. You can create different signatures for different purposes and instruct Outlook to insert a specific signature for each e-mail account and message type.
You can insert many types of images including photos, screen clippings, and Clip Art into an Outlook item and modify the appearance of the inserted image by using commands available from the Picture Tools contextual tab.
You can create graphical representations of processes, hierarchies, and other organizational structures by using the SmartArt feature.
You can create a chart directly in an Outlook item as a graphical representation of data stored in an associated Excel worksheet.
You can make outgoing messages more useful by setting their properties to communicate information to the message recipient and by setting delivery options so you are informed when the message is received and read.