Revit MEP provides users with the ability to design and model complex engineering systems. More often than not, this is a team effort. It is important to fully understand how a Revit MEP file can be set up in a way that allows for multiple designers and engineers to work on these systems at the same time. Unlike traditional CAD solutions that require many files to represent the design intent, the entire mechanical, electrical, plumbing, and fire protection systems can be modeled in one Revit MEP file. Doing so will require careful setup of the project file in the early stages of the design.
Harnessing the power of Revit MEP to create a single model containing all the MEP systems will provide for quick and easy collaboration and coordination. The same is true for any Revit MEP file that requires more than one person working on the same model at the same time. Creating a central file in which all users' changes are accounted for will ensure that these changes can be coordinated as they occur. This empowers the team to make design decisions early on in the design process. It will also give you control of how entire systems are displayed in views and ultimately on construction documents.
To take advantage of the functionality created by enabling worksharing, it is necessary to know how the features work and how to manage them to best suit your company workflow and standards.
In this chapter, you will learn how to
Create a central file by dividing the model into worksets
Allow multiple users to work in the same file
Work with and manage worksets
Control the visibility of worksets
It can be difficult to grasp the idea that several users can work in the same file at the same time. When worksharing has been enabled in a Revit MEP file, the file is "transformed" into a central file. This file is the repository for the model and all of its associated components. In truth, each user will not be opening and working in this specific file but rather in a copy of this file that communicates the actions and model changes of each user back to the central file. A copy of a central file is called a local file. These files can be created by copying and pasting the central file to a folder that is connected to the location of the central file via some networking means. When the copied file is opened for the first time, Revit will warn the user that saving the file will make it into a local file copy of the central file.
A typical practice for working with a central file is to store it in a job folder on a network with the local copies residing on the hard drives of the users' workstations. This prevents the users from having to work across the network while designing and modifying the model. This workflow reduces network traffic to occurring only when the local file is synchronized with the central file.
This workflow can be achieved regardless of the number of users. Each user works in their respective local file, saving changes to the design and periodically synchronizing those changes with the central file. So, the big question is, "How do several users all work in one file at the same time?" One analogy to explain the workflow is to consider a jigsaw puzzle. You could dump out the pieces onto a table and gather your friends or family around and begin work on the puzzle. Each person could scoop up a handful of the pieces (local file) and work to put the puzzle (central file) together. The next sections explain the workflow in more detail.
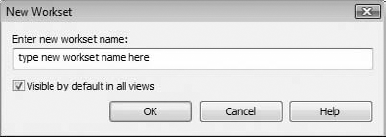
Like most data files on a computer, Revit project files can be accessed by only one user at a time. To allow for multiple users, the project file must be made into a central file. This process starts when worksharing is enabled for a project. Any user can enable worksharing, and it needs to be done only once, by whoever is setting up the project. To enable worksharing, click the Worksets button on the Collaborate tab.

This can be done at any point in a project, but it is best to do so as early as possible because it will keep you from having to go through the model and assign elements to specific worksets after they have already been placed.
Worksets are the divisions of a model into four categories:
User Created
Families
Project Standards
Views
Each category contains a number of worksets depending on the makeup of the Revit project. Each view of the model, component, and project standard (things such as settings and types) has its own unique workset. Every family that is loaded into the project is also assigned its own unique workset. This partitioning is done by Revit automatically when worksharing is enabled to keep users from modifying the same model elements at the same time. The User Created category allows you to create your own set(s) of model components in order to control their visibility as a group or to control access to those components.
For example, if you are working on a project that will contain the elements from multiple disciplines, you may decide to create worksets that correspond to those disciplines. In other words, there would be a workset for all the electrical components, mechanical components, plumbing, and so on. However, the real world often dictates that multiple designers and drafters will be working on a project, so it may be necessary to divide the model into more specific categories based on the roles of the people assigned to the project. Perhaps there will be one person working on the HVAC systems while another works on the mechanical piping. Likewise, there may be a designer doing the lighting as another develops the power systems. In this type of scenario, it is wise to use worksets to divide the model into these categories to allow for control of these specific systems.
Figure 3.1 shows the dialog box that appears the first time you click the Worksets button in a project. This dialog box informs you that you are about to enable worksharing and contains some important information.

The first thing to notice is the note that warns you that if you continue with the process of enabling worksharing, it cannot be undone. In other words, once you have enabled worksharing for a project, it will always be enabled. So, the file will always behave as a central file. The importance of this warning is that if you really do not need multiple users working on the file at the same time, then enabling worksharing is not really necessary. At this point, there are several methods/points of view. One viewpoint is that all project files, regardless of how many people are working on the project, are workset enabled. This method means that all projects can be accessed in the same way, and users always work on a local file. The benefits of this are as follows:
There is less network traffic.
There is more than one location for backup files.
Users, especially new to the software, have less to think about.
There is less reliance on users renaming files.
The second piece of information that this dialog box provides is an explanation of the worksets that the components in the model (if any exist at the time you click the Worksets button) will be assigned to. So if you have already begun to build the model and later decide to enable worksharing, Revit will place all the model components into two default worksets. Revit will put any levels and column grids onto a workset called Shared Levels And Grids. This is done because these types of elements are typically used by all disciplines and are typically visible in all model views. Everything else that exists in the model will be placed into a workset called Workset1. You have the option to rename these default worksets to something more appropriate to meet your project needs. It is recommended that you rename Workset1 because this name gives no indication of what types of components belong to the workset. If you enable worksharing in a file that contains no model, the default worksets will still be created; they will just be "empty".
When you click OK on this dialog box, Revit will go through the process of creating worksets for each view, project standard, and family that is in the project file, and if a model exists, Revit will assign each component to the default workset. Once worksharing has been enabled, you have access to the Worksets dialog box, shown in Figure 3.2 by clicking the Worksets button on the Collaborate tab.

The first thing to notice is the drop-down in the upper-left corner of the dialog box. This indicates which workset is active. When a workset is active, any components that are placed into the model are part of that workset. This is similar to AutoCAD; when lines are drawn, they are on the layer that is set current. The Name column of the dialog box lists all the worksets in the project depending on which category is being shown. The radio buttons below the columns allow you to switch between categories of worksets you are viewing. This keeps you from having to view the entire list of worksets at one time.
The Editable column in the dialog box has two options: Yes or No. When a workset is set to Editable (Yes), then the user has what is known as ownership of that workset. Having ownership of a workset means you are the only person who can modify the model elements that belong to that workset. Ownership can be taken only by the user; it cannot be assigned by someone else. If a workset is set to Non-Editable (No), it does not mean that workset cannot be edited. It simply means that nobody "owns" that workset, so anybody working in the model can modify elements that belong to that workset. You will notice that by default the user who first enables worksharing and creates a central file is the owner of the default worksets. That user must save the file before they can relinquish their ownership of those worksets. This is a critical step when a central file is created because the goal is to allow multiple users to access the model.
The next column in the Worksets dialog box is the Borrowers column. This will display the username of anyone who has worked on elements in the model that belong to that particular workset. As you can see in Figure 3.3, the username is listed in the Borrowers column for the Lighting workset because that user made a modification to a model element (in this case the lighting fixture shown to the left) that is in that workset.

This is the core functionality of worksharing. Revit is keeping track at all times of who is manipulating the model and what parts of the model they are working on. The central file is keeping track of the work done in the local files. Two users cannot borrow the same model element at the same time. This is how multiple users can work on the same model at the same time. If you select a model element such as a light fixture and some other user has already selected and modified that light fixture, Revit will warn you with a dialog box that you cannot modify that model element until the other user relinquishes their control of it. Going back to the jigsaw puzzle analogy, if you were to pick up a puzzle piece to place it somewhere, no other person at the table could do anything with that piece until you let go of it. Revit will list all the usernames of anyone borrowing elements on a workset.
The next column of the dialog box indicates whether a workset is open. If a workset is not open, then the items that are in that workset are not displayed in the model and are not able to be modified. When you open a Revit project that has worksharing enabled, you have the option in the Open dialog box to set which worksets will be open with the file. This can save file opening time and improve file performance. For example, you could choose to not open the Lighting workset if you are working only on the plumbing systems and have no need to coordinate with the lighting portion of the model at that time. This may help with model regeneration time and improve your productivity.
The last column of the dialog box is new to Revit MEP 2011. The Visible In All Views column allows you to control the behavior of the visibility of the worksets. You will see that when you create a workset, you can determine whether it is visible in all views. In previous versions of the software, once you made that decision, it could not be reversed. This new column allows you to reverse that decision if necessary.
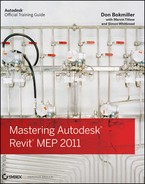
To create a new workset, click the New button in the upper-right corner of the dialog box. This will display the New Workset dialog box that allows you to name your new workset.
This dialog box has a check box allowing you to set the default visibility of the workset in your model views. This is an important setting that we will discuss further in the next chapter because it has an effect on what can be seen when your model is linked into another file. With the new functionality of Revit MEP 2011 that allows you to change this setting after the workset has been created, it is not as important as it used to be to make the decision at the time of workset creation. When you give the new workset a name and click OK, it is added to the list of User Created worksets. Whoever creates a workset is the owner of that workset by default. Once you have created the worksets necessary for your project and you click OK in the Worksets dialog box, you must save the file to complete the creation of a central file. Revit will warn you with a dialog box if you attempt to relinquish your control of the worksets prior to saving the file as a central file.
After enabling worksharing and establishing your worksets, click the Save button to create the central file. This will open the Save As dialog box. If you click the Options button in the Save As dialog box, you will see that because worksharing has been enabled, Revit will save your file as a central file, as shown in Figure 3.4.
When your file has been made into a central file, a backup folder is automatically created. This folder contains data files that will allow you to restore a backup version of your project if you should ever need to roll back the project to an earlier date or time. Having several users on a project who are saving frequently can limit how far back in time you can go to restore your project. For this reason, it is recommended that you archive your project file at intervals logical to the submittal of the project.
The first thing you should do after the file is saved is click the Relinquish All Mine button on the Collaborate tab. This will release ownership of all worksets and borrowed elements. The file should then be saved again so as to have the central file in a state where no user has ownership of any worksets. However, if you have a central file open, you will notice that the Save button is inactive. To save a central file when you have it open, you must click the Synchronize With Central button on the Collaborate tab. This will save the file and create a backup folder of the project. Once the central file has been saved, it should be closed before any more work on the project file continues. From this point on, all work should be done in the local files of the project.

To summarize, these are the steps to create a central file for a project.
Select New

Click the Worksets button on the Collaborate tab.
Verify that the Shared Levels And Grids and Workset1 worksets will be created, and then click OK on the Worksharing dialog box.
Create any additional worksets needed for your project in the Worksets dialog box.
Click OK. You will be asked whether you want to make one of your User Created worksets the current workset. You can choose to do so, but it has no effect on the file creation.
Save your file to the desired location. Your file will be saved as a central file. You are the owner of all of the worksets until you relinquish them.
After you have saved your file, click the Relinquish All Mine button on the Collaborate tab. The Save button is no longer active, so you must use the Synchronize With Central button to save your changes.
Now that the central file has been created, each person who will work on the project must create a local file copy of the project. This local file can reside on the users' local workstations or on the network, although local C: drives are generally the best location. The important thing is that the local file copies must be connected to the central file via the network in order to maintain the ability to synchronize them and for Revit to manage borrowing of elements.
The Create New Local option in the Open dialog box shown in Figure 3.5 is selected by default when you attempt to open a central file.

Selecting the Create New Local option can prevent someone from accidentally opening the central file by automatically creating a local file when they click Open. This is the easiest way to create a local file. Using this method will create a local file copy of the central file in the folder specified in your Revit settings. The filename will be the same as the central file with _username added to the end. Figure 3.6(a) shows the File Locations tab of the Options dialog box indicating the destination folder for project files, and Figure 3.6(b) shows the local file saved to the destination folder.
There are utilities available that automate the process of creating a local file, and many companies are developing their own routines that conform to their specific standards such as file naming and project folder structure. If you do not have such a utility, another way to create a local copy of a central file is to simply browse to the location of the central file and copy/paste it to the desired location using Windows Explorer (see Figure 3.6). Once you have placed the local copy, it is important to rename the file, removing the word Central from the filename to avoid confusion. It is suggested that you use the word Local along with your username in the filename to keep track of who owns the local files. If you use this method when you open the copied file, you will receive a warning dialog box stating that the central file has moved or been copied and that saving the file will make it into a local file (which is the intent). Click OK on this warning, and you will have a local file once you save.

The central file is in constant communication with all of its local file copies in order to maintain coordination of the model elements. As you are working in the model, it is aware of what elements you have control of. You have two options for saving your work. The first option is to save your local file by simply clicking the Save button or selecting Save from the Application menu. When these changes are saved, they are saved to your local file only. This gives you the freedom to save at frequent intervals without accessing the central file. This also allows for a more efficient workflow because minor changes and reworking of the design can be finalized before pushing them out to the entire design team.
The second option for saving changes is to synchronize with the central file. Synchronization occurs when a user wants to save their work to the project and clicks the Synchronize With Central button on the Collaborate tab.
Clicking this button saves any changes made in the local file to the central file. It also updates the local file with any changes that have been synchronized to the central file by other users. So when you click this button, you are updating your local file to the most current status of the project. Another very important thing happens when you synchronize with the central file. Any items that you are borrowing in the model or any worksets that you have taken ownership of are relinquished when you synchronize. If you need to relinquish your control over items in the project but are not ready to save your changes yet, you can do so by saving your local copy and then clicking the Relinquish All Mine button on the Collaborate tab.
Synchronizing and relinquishing will become a regular part of your daily workflow once the project gets rolling. There are some occurrences in this workflow that are important to be aware of. If two or more users try to synchronize with the central file at the same time, Revit will synchronize them in the order that they happen. So whoever hit the button first, their changes will be saved first. While the central file is being updated, the others who have attempted to synchronize will see a dialog box with a message that the central file is currently busy. They can cancel their attempt to synchronize or wait until the central file is available. Clicking the Cancel button means that no synchronization will occur. If you wait, the synchronization will happen as soon as the central file becomes available.

Local files can be deleted and new ones created at any time. It is recommended that you create a new local file every day as you begin work. This will help keep the number of warning and error messages that are saved to the central file down and will ensure that you start your Revit session with an updated copy of the central file. If you do not choose to make a new local file each day, it is important to update your local file with any changes that other users may have made while you were gone. You can do this by selecting Reload Latest from the Collaborate tab. When another user synchronizes with the central file, keep in mind that your file will not update with those changes automatically. You must either synchronize your file or reload the latest version of the central file.
When you start working on a project and want to create a new local file, you can browse to the location of the central file and open it with the Create New Local option selected. If you already have a local file for the project, a dialog box will appear with options for creating the new local file, as shown in Figure 3.7.
Depending on the changes made since you left, it is possible for your local file to become unreconcilable with the central file. It is for this reason that it is a good practice to create a new local file each day.

When the time comes to end your session of Revit MEP, it is best to synchronize your local file with the central file. If you forget or you choose not to by closing the program, you will see a dialog box with options for closing your session of Revit MEP. Figure 3.8 shows the dialog box with options for closing a local file that has not been saved or synchronized with the central file.

Clicking the Cancel button in this dialog box will return you to your session of Revit MEP. Clicking the Synchronize With Central option will open a dialog box with settings for your synchronization, as shown in Figure 3.9.
Notice in Figure 3.9 that you have the option to save your local file before and after it is synchronized with the central File. There is also a setting to control whether you will relinquish any worksets or borrowed elements.
If you click the Save Locally option in the dialog box shown in Figure 3.8, you will be given another dialog box with your options for relinquishing any borrowed elements or owned worksets. You can choose to relinquish any items even though your changes are saved only to your local file and not the central file, or you can choose to keep ownership of the items. Keeping ownership will prevent others from editing those items even after you close your Revit session.

Selecting the third option in the dialog box in Figure 3.8 will open the same dialog box mentioned earlier, providing options for relinquishing control of worksets and borrowed elements. So even if you open the file to make changes that you don't intend to keep, be aware that you may affect others' use of the model by borrowing elements. It is important to relinquish worksets and borrowed elements when you are closing your Revit MEP session to allow others to work without running into the obstacle of not being able to edit an element because you have ownership.
Any work done in a local file will transfer to the central file when synchronized. This is true for worksets also. When the central file is created, you may not know what worksets will be necessary, so they may be created in the local file and will appear in the central file after synchronization.
To make a model element part of a workset, that workset has to be set as the current workset. You do not need to be the owner of a workset in order to place a model element in that workset.
You do not have to access the Worksets dialog box in order to set a workset as current. The Workset panel of the Collaborate tab contains a drop-down with a list of all the worksets in the project. The workset visible in the drop-down window is the one that is set current. Remember that the words (Not Editable) next to the workset do not mean that changes cannot be made to the workset; they simply indicate that the workset is not owned by anyone.

With the ribbon-based user interface, it can be cumbersome to switch to the Collaborate ribbon each time you want to set a workset as current or check to confirm the correct workset is current before placing an element in the model. For this reason, the current workset drop-down list is available on the status bar, so it is visible at all times. You can also add the Workset drop-down to the Quick Access toolbar if you choose.
There are two primary reasons for taking ownership of a workset. Both result in that no other user can edit any model elements that are in that workset. If you are concerned that someone else might inadvertently move or edit an element that is part of your workset, you can take ownership of the workset. This scenario can be detrimental to the efficiency of the team if other users need to make changes. There are other alternatives to protecting elements in a model such as pinning them in place.
Another reason for workset ownership is to protect a group of elements such as a system or area of the model from changes while design decisions are being made. This most commonly occurs when you have to work on the project offline, such as when meeting with a client.
To take ownership of a workset, all you have to do is open the Worksets dialog box and change the value to Yes in the Editable column. It is best to synchronize your local file with the central file after taking ownership of a workset.
Rusty is an electrical designer working for an engineering firm that is consulting with an architect in another state. He is nearing his project deadline, and the owner is ready to decide on some of the different lighting options that have been proposed. While Rusty is away meeting with the architect and client, he wants to make sure that no unnecessary work is done to the lighting model since he will most likely bring back a new design that would make those changes obsolete. So, he takes ownership of the Lighting workset and then takes a copy of the project with him on his laptop.
During the next two days Rusty makes several modifications to the lighting design while the owner and architect provide input. When Rusty returns to his office, he connects his laptop to his network, opens his local file, and synchronizes his changes with the central file. Since he had ownership, no other work was able to be done to the lighting design, and his remotely made changes are now part of the central file.
When a workset is set to be the active workset, any component placed into the model will be part of that workset. Annotative elements such as text, tags, or dimensions do not become part of a User Created workset but rather the workset of the model view that they are drawn in. Each project view, including sheet views, has its own workset. When you are working in a view adding annotation or detailing, you are borrowing that view workset. This prevents others from annotating the same view or changing the properties of that view until your changes are synchronized.
The User Created worksets are the most managed worksets since the Views, Families, and Project Standards worksets are created automatically and there is rarely a need to delete or edit them. Deleting a family or view will also remove its workset from the project.
To delete a workset, you must first take ownership of it. You can do so only if there no other users borrowing elements on that workset. You have to close the Worksets dialog box after taking ownership before you can delete the workset. You can then reopen the Worksets dialog box, select the workset from the list, and click the Delete button on the right side of the dialog box. If there are any elements in the model that are in the workset you are deleting, you will get a dialog box that gives you options for what to do with those elements. Figure 3.10 shows the options of either deleting the elements from the model or moving them to another workset.

If another user owns the workset you are trying to move your elements to, you will need to have them relinquish their ownership of that workset before you can move your items to it.
When you place your cursor over an object in the model, you will see a cursor tooltip that lists some information about that object, as shown in Figure 3.11. When worksharing has been enabled in a project, the first item in the list of information on the tooltip is the name of the workset to which the object belongs.
This is the easiest way to determine which workset the object belongs to. This information can also be found in the properties of a model object or project component. The Workset parameter of an object is an instance parameter listed under the Identity Data group. If you need to change the workset of an object, you can edit the setting for the parameter in the Properties palette. The parameter and its value will be grayed out and inactive if you are not borrowing the selected item.

Once you have borrowed an item in the model, the Workset parameter will become active, and you can change its value by selecting from the drop-down list of workset names, as shown in Figure 3.12.
You can change the workset of multiple items by selecting them all and then accessing the Workset parameter in the Properties palette, but you must be borrowing all of the selected elements. Since going through the model and selecting elements to modify them just so they will be borrowed is impractical, another method to activate their Workset parameters is to take ownership of the workset to which the items belong. This will enable you to access the Workset parameter by simply selecting an item and using the Properties palette. Keep in mind that nobody else will be able to edit items on that workset until you relinquish your ownership, even if they are not items that you are working on.
As mentioned earlier, each model component has its own workset. So if you select an item in the model that is a family and you select the Edit Family option from the Modify tab, once you load the family back into the project, you will see a dialog box that notifies you that the family is not editable and asks whether you would like to make it editable. This will give you ownership of the workset for that family. Because this does not occur until you load the family back in, it is possible that two or more users could edit a family, but only the first one to load it back into the project would gain access to the workset; therefore, only their changes would occur in the project.

If you are the owner of a workset and want to release your ownership, you can do so by accessing the Worksets dialog box and changing the editable value from Yes to No. If it is a User Created workset that you are releasing, you will remain the borrower of any items that you have modified on that workset until you synchronize with the central file. If you attempt to use the Workset dialog box to release your ownership of a family workset, you will be notified that the local file must be synchronized with the central file in order to release that workset.
Using the power of visualizing the model is one of the key advantages to using a building information modeling (BIM) solution for project design. We also use visibility settings to define how our views will appear on the construction documents. With the model divided into worksets that denote the engineering systems, we can harness this power to help us design more efficiently using "working" views. A working view is one that may show more or less model information than would be represented on a construction document.
The first feature of visibility control is simply turning items on or off. This applies not only to model categories but to worksets as well. When worksharing has been enabled in a project, an additional tab appears in the Visibility/Graphics Overrides dialog box, as shown in Figure 3.13.

This tab of the dialog box provides a list of the User Created worksets in the project and allows for setting the visibility behavior of the worksets in the current view. There are three options for workset visibility in a view.

When you hide a workset, none of the items in that workset are visible in the view, even if the categories of the individual items are set to visible. The visibility settings for the workset take precedence over the settings for model categories.
The Use Global Setting option means that the visibility of the workset is determined by the Visible In All Views setting established when the workset was created or the status of that setting in the Worksets dialog box. The status is shown in parentheses.
When setting up your project worksets, it is important to consider this functionality. Thinking about what types of systems or groups of model components might need to be turned on or off will help you make decisions on what worksets will be created. Doing so early on will save time from having to do it later when the model contains many components that would have to be modified and will make controlling visibility easier from the start.
Another way to control a workset's visibility is to determine whether the workset will be opened when the project is opened. In the Open dialog box, you can click the arrow button next to the Open button to access options for which worksets to open with the file, as shown in Figure 3.14.

Selecting the All option will open all the User Created worksets when the file opens. This does not mean that all the worksets will be visible in every view; it just means that the worksets are open, or "loaded", into the project. Selecting the Editable option will open (load) all worksets that are editable (owned) by you. If another user has ownership of a workset, it will not be opened with this option. The Last Viewed option is the default option.
The final option for opening (loading) worksets in a file is the Specify option. This allows you to choose which worksets will be open when the file is opened. Selecting this option opens a dialog box similar to the Opening Worksets dialog box, as shown in Figure 3.15, where you can choose the worksets to open.

This is a powerful option because it can greatly improve file opening time and overall performance of your model. If you need to work on a system in the model and do not need to see other systems, you can choose to not open their respective worksets, decreasing the amount of time for view regeneration and limiting the amount of behind-the-scenes calculations that are occurring when you work on your design. If you decide later that you want to see the items on a workset that you did not open when you opened the file, you can open the workset via the Worksets dialog box. When selecting the Visibility/Graphics Overrides dialog box for a view and there are worksets that are unopened, the unopened worksets will appear in the list with an asterisk next to them. So if you are not seeing a workset that is set to be visible, you can quickly see that it is not visible because it is not open.
One way to utilize this functionality for improved performance is to create a workset for each Revit file that you will link into your project. This gives you the option of not opening the workset of a linked file without having to unload the linked file.
- Create a central file by dividing the model into worksets
Setting up your Revit project file correctly will help users visualize and coordinate their systems easily.
- Master It
You are working on a project with a mechanical engineer, a plumbing designer, and an electrical engineer. Describe the types of worksets that the model can be divided into to accommodate the different systems for each discipline.
- Allow multiple users to work in the same file
Revit MEP provides functionality to set up your project in a manner that allows users to edit and manage their systems without conflicting with other systems in the model.
- Master It
Describe how to create a local file copy of a central file and how to coordinate changes in the local file with other users who are accessing the central file.
- Work with and manage worksets
Working in a project with multiple users means it is likely that you will need to coordinate the availability of worksets.
- Master It
Describe how you would isolate a system in the model so that no other user could make changes to that system. What is the best way to release a system so that others can work on it?
- Control the visibility of worksets
Visualization is one of the most powerful features of a BIM project. Worksets give you the power to control the visibility of entire systems or groups of model components.
- Master It
You are facing a deadline and need to add some general notes to one of your plumbing sheets. Because of the intricate design of the HVAC system, your project file is very large and takes a long time to open. What can you do to open the file quickly to make your changes?